Table of Contents
Advertisement
Quick Links
Advertisement
Table of Contents

Related Manuals for Partner PAT-110


Summary of Contents for Partner PAT-110
- Page 1 POS Terminal PAT-110 Service Manual...
-
Page 2: Regulatory Notices
Regulatory Notices WARNING This is Class A Product. In domestic environment this product may cause radio interference in which case the user may be required to take adequate measures. 警告使用者 這是甲類的資訊產品,在居住的環境中使用時,可能會造成射頻干擾,在這種情況下,使用者會被要 求採取某些適當的對策。 FCC Statement This device has been tested and found to comply with the limits for a Class A digital device, pursuant to part 15 of the FCC Rules, these limits are designed to provide reasonable protection against harmful interference when the device is operated in a commercial environment. -
Page 3: Legislation And Weee Symbol
Legislation and WEEE Symbol 2002/96/EC Waste Electrical and Electronic Equipment Directive on the treatment, collection, recycling and disposal of electric and electronic devices and their components. The crossed-out wheeled bin symbol on the device means that it should not be disposed of with other waste at the end of its working life. -
Page 4: Safety Information
Safety Information Computer components and electronic circuit boards can be damaged by discharges of static electricity. Working on computers that are still connected to a power supply can be extremely dangerous. Follow these guidelines to avoid damage to the computer or injury to yourself. •... -
Page 5: Contact Information
Contact Information Partner Tech Corporation 10F., No.233-2, Baoqiao Rd., Xindian Dist., New Taipei City 231, Taiwan (R.O.C.) http://www.partner.com.tw/... -
Page 6: Copyright And Trademark
Copyright and Trademark Copyright This publication, including all photographs, illustrations and software, is protected under international copyright laws, with all rights reserved. Neither this manual, nor any of the material contained herein, may be reproduced without written consent of the author. Disclaimer The information in this document is subject to change without notice. - Page 7 Contents Regulatory Notices ......................2 Safety Information ......................4 Contact Information ......................5 Copyright and Trademark ....................6 About this manual ......................6 Chapter 1 Getting Started ....................9 Identifying Components ....................9 Connector Pin Define ....................... 11 Installing the Tablet in the Cradle ..................13 Installing the Thermal Paper Roll ..................
-
Page 9: Chapter 1 Getting Started
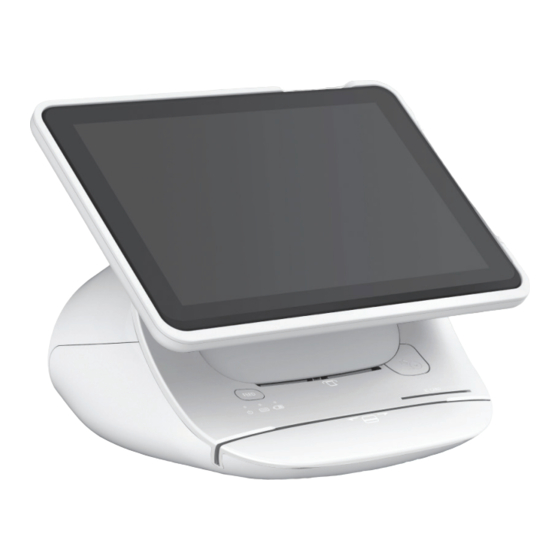
Getting Started Identifying Components This section describes the parts and connectors on the machine. Tablet Vol- Vol+ Power* Front Camera Micro-SD slot DC-in Jack Micro USB Mini HDMI Earphone Reset ” 10 . 1 Touch Panel Rear Camera Speakers... - Page 10 Cradle Printer Door Printer Door Release Button Feed Button IC Card Reader (optional) Charge LED MSR (optional) Error LED Power LED NFC (optional) DC-in Jack Power Switch* Cash Drawer NOTE *Tablet can only be powered off when Cradle Power Switch has been turned off.
-
Page 11: Connector Pin Define
Connector Pin Define This section describes the connectors pin define. COM Connector Pin Define Signal Signal SOUT *Can be selected for 5V or 9V via jumpers. USB 2.0 Connector Pin Define Signal USB Vcc USB - USB + USB GND RJ-11 Cash Drawer Connector Pin Define Signal CASEOPEN2... - Page 12 DC-In Jack Pin Define Signal LAN Connector Pin Define Signal Signal TXA+ TXC- TXA- TXB- TXB+ TXD+ TXC+ TXD-...
-
Page 13: Installing The Tablet In The Cradle
Installing the Tablet in the Cradle Place the bottom of the tablet over the Pogo pins in the cradle. Rotate the tablet into the cradle and press firmly until it latches in place. -
Page 14: Installing The Thermal Paper Roll
Installing the Thermal Paper Roll Lift the cradle upwards. Press Printer Door Release Button to open the printer door. Insert the thermal paper roll as shown on the picture. Close the printer door and press it down until you feel a click. -
Page 15: Fixing A Paper Jam
Fixing a Paper Jam Power off from the cradle. Power off Keep pressing Printer Door Release Button several times to return the paper cutter. If the paper still stack in the printer door after step2, put a knife into the door seam to clear the paper. -
Page 16: Installing The Micro Sd Card
Installing the Micro SD Card Insert the microSD card into the memory card slot as shown in the illustration. Charging the Battery The device battery can be charged from the DC-IN jack or the Micro-USB connector. DC-IN Jack Power Adapter Micro-USB Power Adapter When the battery is charging, the charging icon is displayed on the top-right corner of the screen. -
Page 17: Powering The Device On/Off
Powering the Device On/Off To turn on the device: Press and hold the Power button for 3 seconds to turn on the device. To turn off the device: Press and hold the Power button for at least 3 seconds. Touch Power off. A confirmation message appears on the screen. -
Page 18: Unlocking The Screen
Unlocking the Screen By default, the screen is locked after turning the device on or after a period of inactivity. The screen lock time can be set in Settings menu. To unlock the screen, slide the Unlock button outside the unlocking ring. -
Page 19: Chapter 2 Using The Tablet
Using the Tablet Using the Touch Screen The following describes some tips on how to use the touch screen. Touching • Touch an icon displayed on the screen to select • A pop-out menu may appear (depending on the function in use) by touching and holding on the screen. -
Page 20: Home Screen
Pinching • Zoom in: move the two fingers apart from each other at the specific area on the screen to zoom • Zoom out: move the two fingers closer together at the specific area on the screen to zoom out. Home screen Notifications App menu... -
Page 21: Access The Settings Menu
Access the Settings Menu To access the settings menu, perform the following: On Home screen, tap the Setting icon. Choose the item you want to configure from the list on the left side. -
Page 22: Force Power Off
Force Power Off Press the power button for 8 seconds to force the system power off. Press the power button for 8 seconds. - Page 23 Specification PAT- 110 Specification Item Tablet Processor Quad Core Cortex A 9 1 . 4 GHz Android 4 . 4 Memory 2 GB Storage 16 GB 10 . 1 ", 1280 X 800 Display Touch 5 points capacitive touch V 4 . 0 Bluetooth WiFi 802 .
- Page 24 Cradle Specification Item Cradle 1 x DC jack 1 x Ethernet 1 x RJ- 11 for cash drawer 3 x USB type A 1 x RS- 232 Male 9 pins 1 x Power Switch 1 x Paper roll cover release button 1 x Paper feed button 1 x Green LED for power indication 1 x Red/green LED for charging indication...
Need help?
Do you have a question about the PAT-110 and is the answer not in the manual?
Questions and answers