Table of Contents
Advertisement
Quick Links
Trademark Acknowledgements
X-Star™ and Venture™ are trademarks of Autel Robotics Co.,Ltd., registered in
China, the United States and other countries. The Autel
Autel Corp. registered in the United States and other countries. All other marks
are trademarks or registered trademarks of their respective holders.
Copyright Warning
No part of this manual may be reproduced, stored in a retrieval system or
transmitted, in any form or by any means, such as electronic, mechanical,
photocopying, recording, or otherwise without the written permission of Autel
Robotics.
Disclaimer
All information, speciications and illustrations in this manual are based on
the latest information available at the time of printing. Autel Robotics reserves
the right to make changes at any time without notice. While information of this
manual has been carefully checked for accuracy, no guarantee is given to the
completeness and correctness of the contents, including but not limited to the
product speciications, functions, and illustrations.
When using the X-Star/X-Star Premium, always refer to and follow the safety
instructions in this manual. Autel Robotics accepts no responsibility or warranty
for direct or indirect product damage or injury if the user fails to follow the safety
instructions. Autel Robotics will not be liable for any direct damages or for any
legal, special, incidental, indirect damages or for any inancial consequences
(including the loss of proits).
The safety instructions herein covers situations which Autel Robotics is aware
of. Autel Robotics cannot know, evaluate or advise you as to all of the possible
hazards. You must be certain that any condition or service procedure encountered
do not jeopardize your personal safety.
Safety Information
IMPO RT A NT
Before operating or maintaining this unit, please read this manual carefully,
paying extra attention to the safety warnings and precautions.
For your own safety and the safety of others, and to prevent damaging the product
and its features, it is important for you to read and understand the instructions and
all safety information presented throughout the product manual.
®
logo is trademark of
Advertisement
Table of Contents

Subscribe to Our Youtube Channel
Related Manuals for Autel Robotics X-Star


Summary of Contents for Autel Robotics X-Star
- Page 1 (including the loss of proits). The safety instructions herein covers situations which Autel Robotics is aware of. Autel Robotics cannot know, evaluate or advise you as to all of the possible hazards. You must be certain that any condition or service procedure encountered do not jeopardize your personal safety.
- Page 2 • Do not take-off or land on slopes or uneven surfaces. • Only use the battery and battery charger provided by Autel Robotics. Use • Fly in an open and safe area; keep away from buildings, trees, people and...
- Page 3 • Check the weather before lying, including air temperature and wind speed. • Make a thorough prelight check before each light ( • Use only authorized accessories approved or provided by Autel Robotics. • Do not attempt to disassemble, modify or reconstruct any part of the devices.
- Page 4 Using This Manual REMOTE CONTROLLER PREPARING THE FLIGHT Thank you for purchasing the X-Star series product. Please read the manual carefully before you use the smart drone and retain the manual for future reference. PREPARING THE BATTERY Should your smart drone fail to operate correctly, refer to Troubleshooting Tips PREPARING THE AIRCRAFT 59).
- Page 5 Built-in Smart Flight System generated WiFi network, while the X-Star Premium utilizes HD video streaming to establish a live video link with the X-Star mobile app Starlink as you ly. The X-Star/X-Star Premium features a built-in Smart Flight System which This manual provides detailed descriptions of the functions and operations about provides stable and user-friendly light control.
- Page 6 Measures atmospheric pressure to determine the pressure altitude of NO T E Barometer the aircraft. It is highly recommended to operate outdoor lights in GPS mode for maximum safety. ATTI mode is disabled by default, and GPS mode is Ultrasonic Measures the distance between the aircraft and the ground.
- Page 7 The aircraft battery is a rechargeable Li-Po battery with the capacity of 4900mAh level and turn on/off the specially designed for the X-Star/X-Star Premium aircraft. It can only be charged battery with the charger supplied in the X-Star/X-Star Premium package, and can provide up to 23 minutes of continuous light if fully charged.
- Page 8 Lock direction ( a clicking sound when the gimbal is properly installed. The XI-5S camera gimbal for X-Star/X-Star Premium supports 2 working modes: Fixed Mode – synchronizes the camera gimbal movements with the aircraft to provide a real time video piloting experience from a irst-person view.
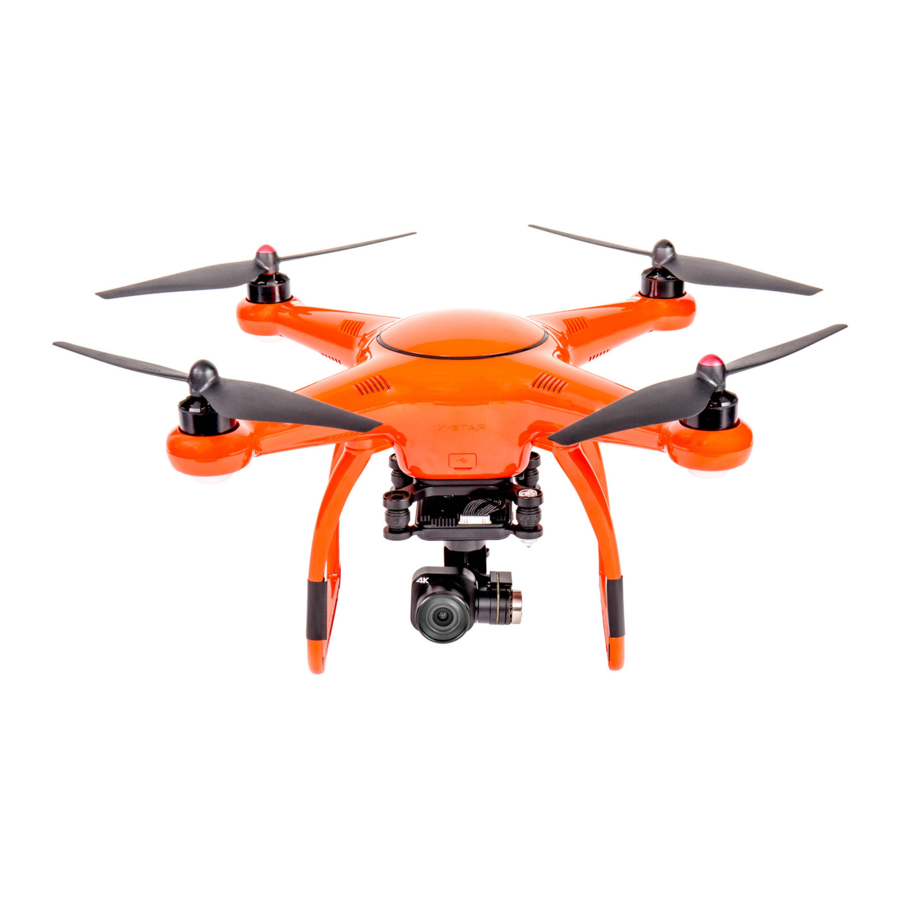
- Page 9 • The left antenna transmits 5.8GHz RF signal to the aircraft for sending commands and receiving light information. The X-Star and X-Star Premium are both equipped with a 4k UHD camera. The camera supports various shooting modes including single shot, burst shooting, ①...
- Page 10 Turn the dial to control the tilt angle of the gimbal. Gimbal Pitch Dial ⑭ The LCD Flight Information Panel found on the X-Star/X-Star Premium remote Switch between IOC, GPS and ATTI modes. Flight Mode Switch controller is designed to provide you with intuitive information during the light, including the light status, warning messages, real-time instructions, etc.
- Page 11 NO T E GPS Signal satellites. The remote controller should be power off before you start Indicates the WiFi video signal (X-Star) or HD the RC calibration. You do NOT need to repeat this operation ② Video Link Signal video signal (X-Star Premium) strength.
- Page 12 5 quick beeps every second (last for 3s), RC Critical Low Battery Warning (5%) followed by 2 RC vibrations A. Suficient battery when RC is in use 2 quick beeps every second (last for 5s), Aircraft & RC Communication Lost G-●: B.
- Page 13 The X-Star/X-Star Premium features a user-friendly design that requires very simple assembly to get the aircraft ready to ly. However, it is essential to read and follow all the instructions and warnings in this manual prior to assembly, setup or Charging use, in order to operate safely.
- Page 14 Connect the charger to a power outlet. Reinstall the gimbal holder after using the aircraft to protect the gimbal from unwanted movements when not in use. ● The battery level indicator lights on the aircraft battery will illuminate and indicate the current battery level during charging, and will turn off Installing Propellers when the battery is fully charged.
- Page 15 IMPO RT A NT NO T E • Check and ensure every propeller is stably mounted and in good The remote controller is made to comply with both CE and FCC standards. condition before each light. Do not use aged or damaged propellers. The system automatically chooses to comply with CE or FCC depending on the GPS locations.
- Page 16 By connecting your mobile device to the aircraft, the X-Star mobile app Starlink ¾ conigures your mobile device to perform as a First Person View (FPV) monitor and To connect the mobile device to the aircraft a ground station for remote piloting, light coniguration and waypoint navigation.
-
Page 17: Calibrating The Compass
Revolve aircraft Launch the mobile app on your mobile device. When the connection is horizontally for 360°. The successful, the Home Page of the app displays Connected in the upper 4 LEDs on the aircraft will left corner, and the Flight Information Panel on the remote controller change into lashing green displays App Connected in the Flight Status Bar. - Page 18 ¾ Start the motors in one of the following ways: the aircraft. • The camera view on the X-Star mobile app is synchronized with the mounted camera. • The irmware has been updated to the latest version. • Familiarize yourself with the light controls.
- Page 19 ¾ When the motors are turned on, use one of the following methods Rotate Left/Rotate Right – commands the heading of the aircraft to to take off the aircraft: rotate left or right by pushing the stick left or right. Takeoff/Landing Button: Left Command Stick Hold for 3s...
-
Page 20: Before Starting
z Go Home Smart Flight Features The Go Home function only works in GPS mode. To manually activate Go ) on the remote Home function, you can press the Go Home button ( z Intelligent Orientation Control (IOC) controller. To activate the IOC function during When the Go Home command has been successfully received, the aircraft light, slide the Flight Mode Switch automatically maneuvers itself to return directly and land at the preset home... -
Page 21: Aircraft
The Starpoint Positioning System installed on the X-Star/X-Star Premium functions through a monocular camera ① and two ultrasonic sensors The Failsafe function is designed to help your X-Star/X-Star Premium ② on the bottom of the aircraft. automatically return home or land onsite when necessary. -
Page 22: Remote Controller
Release the command sticks when the aircraft reaches the target IMPO RT A NT position to let it hover. The performance of the Starpoint Positioning System is affected by Push the left command stick down steadily and gently to land the the brightness and texture of the surface over which the aircraft is ly- aircraft. -
Page 23: Using The Starlink App
Using the Starlink App Register or log into your Autel account. The X-Star/X-Star Premium mobile application, Starlink, is a newly-designed program with full features including aircraft control, light data review, remote camera shooting, preset-waypoint navigation, general settings and so on. Your... - Page 24 BACK page after the connection is completed. Please follow the on-screen Return to the Home Page of Starlink. instructions to activate your X-Star/X-Star Premium: Create an account and set a password for your account. FLIGHT MODE Name your X-Star/X-Star Premium.
- Page 25 BATTERY LEVEL ADVANCED CAMERA SETTINGS ) or manual settings ( ) of ISO, The current battery level of the aircraft. Choose automatic ( Shutter Speed and EV. STARPOINT INDOOR POSITIONING CAMERA SETTINGS The distance between the surface and the Starpoint Positioning Perform Photo Settings ( ), Video Settings ( ) and...
- Page 26 VIDEO LINK SIGNAL Choose a map view from Normal, Hybrid and Satellite Map View Displays the signal strength of the WiFi Video Link (X-Star) or view. HD Video Streaming (X-Star Premium) between the aircraft and the remote controller. Tapping this icon will open the Video Link Auto-Pilot Settings.
- Page 27 IMPO RT A NT During auto-pilot mode, please always keep a clear path for the aircraft as it cannot avoid obstacles that come into the light path autonomously. z Orbit Mode When Orbit mode is activated, the aircraft lies in a circle with the camera ixed on a point of interest (POI).
- Page 28 IMPO RT A NT For X-Star Premium, you can use this function directly and the map will be downloaded automatically. For X-Star, if you use the app on an Change the direction of the aircraft’s Android mobile device, you need to download the map before using nose.
- Page 29 have conirmed all the waypoints, tap Finish. NO T E To edit a selected waypoint before Finish, tap on the waypoint you wish to edit and Waypoint Settings will pop up. You can then set the waypoint altitude, hover duration, and decide whether to delete the waypoint.
- Page 30 Slide this button to enable or disable Beginner Mode. This mode has a ixed maximum light altitude (30m), distance (30m) and speed (horizontal: 6m/s, ascent: 3m/s, descent: 1m/s) designed to keep beginners’ lights safe. Flight Speed Set a limit to the aircraft’s ascent, descent and horizontal speed when Beginner Mode is disabled.
- Page 31 • Flight Data Recorder Tap Format to clear all of your light data. z Remote Controller Settings ) on the General Information You can also enter this section by tapping ( Bar. The Remote Controller Settings function grants access to Gimbal Pitch Dial Sensitivity, RC Binding, RC Calibration, Command Stick Mode and RC Language Setting.
- Page 32 Video Link Settings NO T E For the X-Star, you can rename the WiFi SSID and reset the password in this For your own safety, the Low Battery Warning cannot be set below section. 25%, i.e., the minimum battery level for Go Home; and the Critical Low Battery Warning cannot be set below 12.5%, i.e., the minimum...
-
Page 33: Firmware Upgrade
Firmware Upgrade • Background Caching To optimize the performance of your X-Star/X-Star Premium, the irmware updates will be provided when necessary. You can download the latest irmware Slide this button to enable or disable map caching in the background. (Flight Control, Gimbal, Camera, Remote Controller, etc.) in one package from •... -
Page 34: Troubleshooting Tips
• Avoid dropping your devices, especially on a hard surface. Check it in detail • Keep the Micro-SD card inside the camera. Restart the camera and wait until after any crash or impact, and contact a local Autel Robotics agent in time if the video iles are recovered (partial data may be lost) -
Page 35: Customer Service
Technical Support If you have any questions or concerns regarding our products, please contact us Autel Robotics Co., Ltd. (the Company) warrants to the original retail purchaser of this product, that should this product or any part thereof during normal consumer usage and conditions be proven defective in material or workmanship that results •... -
Page 36: Appendix
Autel Robotics announces that the X-Star and X-Star Premium are in compliance with the essential requirements and other relevant provisions of Directive 1995/5/ IC RSS Warning This device complies with Industry Canada license-exempt RSS standard(s). - Page 37 take-off and light are prohibited. Aircraft Battery Speciications • Warning Zone Battery Type Rechargeable Li-Po battery Once the aircraft enters the region within 2km from the center of the site, the Capacity 4900mAh app will prompt a warning message. Battery Voltage 14.8V 10°C~45°C (50°F~113°F) Charging Environment Temperature...
- Page 38 FAT32/exFAT File Formats Photo: JPG/DNG/JPG+DNG Video: MOV/MP4 Remote Controller Speciications Operating Frequency 5.727GHz~5.799GHz Video Link Frequency 902MHz~928MHz (America) X-Star Premium 915MHz~928MHz (Australia) Operating Temperature 0°C~50°C Less than 3 months: -20°C~45°C Storage Temperature More than 3 months: 22°C~28°C X-Star CE: 400m; FCC: 1000m...
Need help?
Do you have a question about the X-Star and is the answer not in the manual?
Questions and answers