Advertisement
Sun Netra 6000 AC Modular System
Getting Started Guide
This guide describes the minimum steps required to install and power on Oracle's Sun Netra 6000 AC modular
system for the first time.
For more detailed installation information, refer to the Sun Netra 6000 Modular System Installation Guide. Also
read the latest Sun Netra 6000 Modular System Product Notes to find out if any late breaking issues impact
installation requirements:
http://www.oracle.com/pls/topic/lookup?ctx=E19945-01&id=homepage
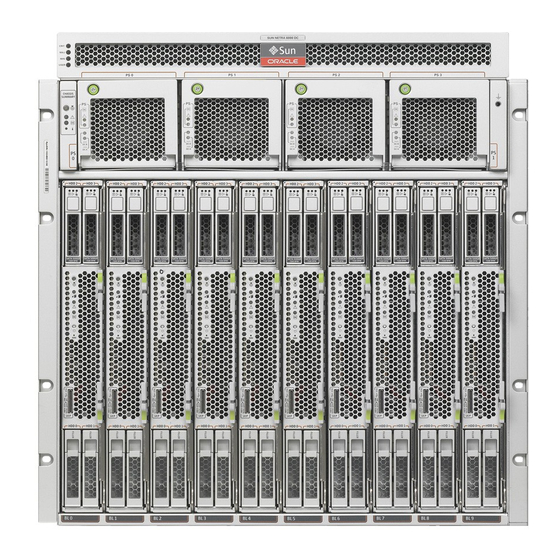
Modular System Overview
Front indicator
Power supplies
module (FIM)
Server and storage modules, or filler panels
Network
express
modules
(NEMs)
Chassis
monitoring
module
(CMM)
Power
connectors
PCIe ExpressModules (PCIe EMs)
Rear fans
1
Advertisement
Table of Contents

Related Manuals for Sun Oracle Netra 6000


Summary of Contents for Sun Oracle Netra 6000
-
Page 1: Getting Started Guide
For more detailed installation information, refer to the Sun Netra 6000 Modular System Installation Guide. Also read the latest Sun Netra 6000 Modular System Product Notes to find out if any late breaking issues impact installation requirements: http://www.oracle.com/pls/topic/lookup?ctx=E19945-01&id=homepage... - Page 2 ▼ Unpack the Modular System ♦ Unpack your modular system and any additional modules purchased for your modular system. The following items are included with the modular system: Sun Netra 6000 AC modular system (chassis) ■ Four power cords ■...
-
Page 3: Install Optional Components
3. Install the chassis into your rack. Follow the rackmounting instructions on the template that is included in the rackmount kit. 4. If you depopulated the chassis, replace the components now. Return each component to its original location in the chassis. Refer to the online installation or service manual for installation details. - Page 4 2. (Optional) Connect an Ethernet cable between the CMM NET MGT port and the network to which future connections to the CMM will be made. After the initial configuration of the system using the SER MGT port, you can connect to ILOM on the CMM through your network.
- Page 5 This guide instructs you to assign a static IP address to the CMM port. Alternatively, you can use DHCP services to assign an IP address to the CMM NET MGT port. For details, refer to the Sun Netra 6000 Modular System Installation Guide.
-
Page 6: Product Documentation
-> set /CMM/users/root password=your_password Completing Your Configuration You have completed the basic setup of Oracle’s Sun Netra 6000 AC modular system. However, you probably have additional modular components and operating systems that require configuration. To complete those activities, refer to the getting started guides and installation guides for those components.
Need help?
Do you have a question about the Netra 6000 and is the answer not in the manual?
Questions and answers