Miele B 3312 Operating Instructions Manual
Steam ironing system
Hide thumbs
Also See for B 3312:
- Operating instructions manual (80 pages) ,
- Operating instructions manual (80 pages)

Related Manuals for Miele B 3312


Summary of Contents for Miele B 3312
-
Page 1: Operating Instructions
Operating instructions Steam ironing system To avoid the risk of accidents or damage to the appliance, it is essential to read these instructions before it is installed and used for the first time. en-AU,NZ M.-Nr. 10 675 001... -
Page 2: Caring For The Environment
Caring for the environment Disposal of the packing Disposing of your old material appliance The transport and protective packaging Electrical and electronic appliances has been selected from materials which often contain valuable materials. They are environmentally friendly for also contain specific materials, disposal, and can normally be recycled. - Page 3 Contents Caring for the environment .................. 2 Warning and Safety instructions ................. 6 Guide to the appliance .................. 14 Transporting the appliance................. 17 Assembling ...................... 18 Adjusting the height ....................19 Connecting...................... 21 Connecting the mains connection cable............... 21 Removing the iron and the steam hose holder ............. 22 Connecting the steam hose ..................
- Page 4 Contents Active ironing board ....................37 Suction function .................... 37 Inflation function.................... 37 Automatic switch on/off ................... 37 Memory function .................... 38 Heated ironing surface .................. 38 Steamer ........................ 39 Connecting the steamer ..................39 Using the steamer ....................41 Brush attachment....................
- Page 5 Contents Cleaning the water filter..................60 Disconnect the power supply................ 60 Removing the water container ................. 60 Removing the water filter cover................ 61 Removing the sealing ring................ 61 Pulling out the water filter................. 62 Cleaning the water filter.................. 62 Inserting the water filter.................. 63 Inserting the water container................
-
Page 6: Warning And Safety Instructions
The steam ironing system is intended to be used only as described in these operating instructions. Any other use is not permitted. Miele cannot be held liable for damage resulting from incorrect or improper use or operation. This steam ironing system is not intended for use by persons... - Page 7 Make sure that young children cannot access the steam hose or the power cable, either during use or while the steam ironing system is cooling down. Miele recommends that only children over the age of 14 are allowed to operate the steam ironing system unsupervised. ...
- Page 8 If the mains connection cable is damaged, it must be replaced with a special cable of the same type (available from Miele). For safety reasons, this must only be fitted by a Miele service technician. Do not use the steam ironing system if the ironing board cover is damaged.
- Page 9 Faulty components must only be replaced by genuine Miele original spare parts. Only when these parts are fitted can Miele guarantee the safety standards of the appliance.
- Page 10 Warning and Safety instructions The steam ironing system must be isolated from the electricity supply during installation, maintenance and repair work. The steam ironing system is only considered disconnected from the power supply if: – the power plug of the steam ironing system is switched off at the wall socket and unplugged, or –...
- Page 11 Warning and Safety instructions Correct use Emitted steam, the iron soleplate together with the areas surrounding it on the iron, and the steamer jets are very hot. Danger of burning! Avoid direct contact. The steam ironing system is not designed for commercial purposes.
- Page 12 Warning and Safety instructions Always place the iron with its soleplate horizontally on the resting surface of the steam ironing system. Ensure the steam function is switched off and the soleplate does not protrude over the edges. Do not place the iron anywhere else as this presents a fire hazard. ...
- Page 13 Using accessories Only use genuine Miele spare parts and accessories with this appliance. If spare parts or accessories from other manufacturers are used, this will invalidate the warranty, and Miele cannot accept liability.
-
Page 14: Guide To The Appliance
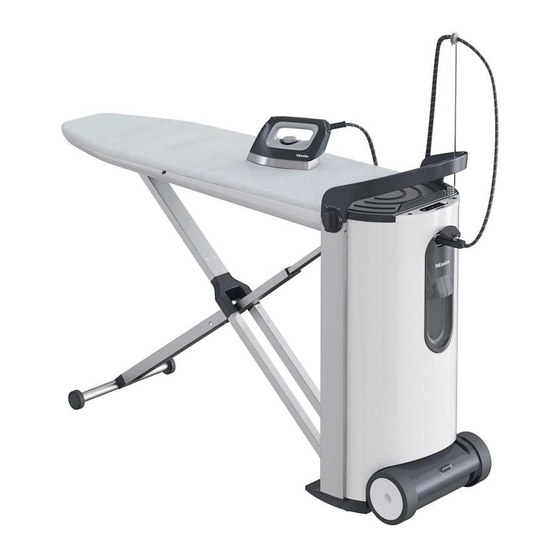
Guide to the appliance a Ironing board i Ironing board X-frame b Iron with steam hose j Iron resting area c Steam hose holder k Mains connection cable d Handle l Lower storage compartment For the mains connection cable, the e Water container steamer *, the non-stick soleplate, f Tower... - Page 15 Guide to the appliance Tower Tower (top view) with open storage compartment (top) a Rotary dial for height adjustment d Sockets for the steam hose holder and folding the appliance away e Control panel b Iron resting area f Steam hose holder c Steam connection g Iron with steam hose...
- Page 16 Guide to the appliance Some of the messages in the display are more than one line long. Touch the or button to read them in full. Control panel on tower h On/Off button Switches the steam ironing system on or off.
-
Page 17: Transporting The Appliance
Transporting the appliance The steam ironing system is fitted with two castors. This allows the steam ironing system to be pulled across an even surface when folded up. Two people are required for carrying the steam ironing system up or down stairs. -
Page 18: Assembling
Assembling Move the steam ironing system to its set-up location. Use both hands to pull the ironing board upwards into a horizontal position until it audibly clicks into Use one hand to pull the release place on both sides of the tower. mechanism upwards. -
Page 19: Adjusting The Height
Assembling Adjusting the height The steam ironing system can be adjusted to your preferred working height. The maximum working height is 102 cm. When adjusting the height, ensure the mains connection cable does not become trapped in the mechanism. The steam ironing system is now assembled. - Page 20 Assembling At the same time, pull the handle on the tower upwards with the other hand or press the handle down. Do not push down on the ironing board while adjusting the height! Always use the handle on the tower to do this.
-
Page 21: Connecting
Connecting Insert the plug into a suitable earthed Connecting the mains socket (see "Electrical connection"). connection cable The steam ironing system is designed for connection to a properly installed earthed socket for AC 220-240 V, 50-60 Hz. Guide the mains connection cable through the slot in the lid. -
Page 22: Removing The Iron And The Steam Hose Holder
Connecting Removing the iron and the The steam ironing system is suitable steam hose holder for right-handed or left-handed people. Operation is optimised for both sides. Connecting the steam hose Open the steam connection socket by pulling it upwards. ... - Page 23 Connecting Do not place the iron in an upright position! It can easily tip over or fall to the floor. Always place the iron onto the iron resting area with its soleplate down. If the iron remains on the resting area for any length of time, the surface will become hot.
-
Page 24: Before Using For The First Time
Before using for the first time Before using the steam ironing Using the test strips system for the first time, remove all packaging (e.g. the protective film from the tower). Determining water hardness In order for the steam ironing system to function properly and to display a message prompting you to descale it at the correct time, it is important to set... -
Page 25: Before Using For The First Time
Before using for the first time Language settings Before using for the first time The following steps must be carried out before using the appliance for the first time: english (GB) Switching on the steam ironing system Use the or arrow buttons to select your preferred language. -
Page 26: Setting The Water Hardness
Before using for the first time Setting the water hardness Level 7 Set water hardness ... Use the or arrow button on the control panel to set the water Before the water hardness can be set, hardness level for your household. the display message ... -
Page 27: Set-Up Is Now Complete
Before using for the first time Set-up is now complete This completes the settings for using the appliance for the first time. The message Initial set-up complete will appear in the display. Confirm this message by pressing the OK button. The steam ironing system will normally run a rinse cycle automatically after it has been set up for use. -
Page 28: Switching On
Switching on Switching on the steam ironing Depending on the operating duration, system immediately after switching the steam ironing system on, the automatic rinse function can be started (see "Automatic rinsing") or you may be prompted to start the descaling process (see "Descaling"). The steam ironing system is not available for ironing while the rinse or descaling process is running. -
Page 29: Filling The Water Container
Switching on Filling the water container Filling the water container If the water container is empty or not fitted in the tower, the message Fill water cont. will appear in the display. Removing the water container Open the screw cap at the rear of the water container by turning the cap anti-clockwise. -
Page 30: Steam Operation
Switching on Steam operation Water quality Use only fresh tap water. Water prepared using commercially available water filters may also be Ready for use used. For water hardness of more than 14 °dH / 2.5 mmol/l, you can use tap After inserting the water container, wait water mixed at a 1:1 ratio with distilled until the steam ironing system is ready... -
Page 31: Selecting The Ironing Temperature
Switching on Selecting the ironing With temperature level the temperature soleplate temperature is too low for ironing with steam. If you use this temperature level, do not use the steam button. If you do, water will escape from the steam jets. - Page 32 Switching on Care label Ironing with steam for best Ironing without steam (on the garment) results (Material / Temperature setting) (Material / Temperature setting) With non-stick soleplate Minimum iron, synthetics Low temperature (see "Ironing with the non-stick soleplate") Minimum iron, synthetics, appliqués, prints, flocking, etc.
-
Page 33: Cooldown Function
Switching on CoolDown function Do not leave the steam ironing system unattended with the iron or steamer connected! Always switch off at the wall socket Iron switched off and withdraw the plug before leaving the steam ironing system unattended. -
Page 34: Ironing
Power level button d Inflation/Suction function button a Steam button b Sliding switch for continuous steam Irons supplied with previous Miele c Suction function button steam ironing systems (B 1xxx/B 2xxx) cannot be used with this appliance. d Inflation function button ... -
Page 35: Ironing With Steam
Ironing Ironing with steam The continuous emission of steam must have stopped before the iron is The steam system is ready for use put back on the resting surface. when Ready for use appears in the If the steam button was not unlocked display. -
Page 36: Ironing Without Steam
Ironing Attaching the non-stick soleplate Ironing without steam Place the tip of the iron inside the Remove the water container from the non-stick soleplate. steam ironing system if you want to iron without steam. The steam generator will not heat up, thus saving you electricity. -
Page 37: Removing The Non-Stick Soleplate
Ironing Removing the non-stick soleplate Active ironing board Hold the iron by the handle. The steam ironing system uses a fan that sucks away the steam or uses the The non-stick soleplate is still inflation function to inflate the ironing very hot after ironing. -
Page 38: Memory Function
Ironing Memory function Fan control for the B 3826 / B 3847: The memory function saves the fan direction and the power setting used last with your steam ironing system. When you use the appliance the next time, you do not need to set it again. Heated ironing surface When the iron is connected and the steam ironing system is switched on,... -
Page 39: Steamer
Steamer Connecting the steamer The B 3847 steam ironing system is equipped with a steamer in addition to You can also plug the steamer into the the iron. The steamer is available as steam connection socket of the an optional accessory for the B 3312 ironing system as an alternative to the and B 3826 steam ironing systems. - Page 40 Steamer Now you can connect the steamer to You can plug the iron into the steam the steam connection socket. connection socket as an alternative to the steamer at any time. Attaching the steamer to the steam You do not need to switch off the connection socket steam ironing system to do this.
-
Page 41: Using The Steamer
Steamer Using short bursts of steam Using the steamer Briefly press the button. Danger of burning due to hot Then release the button. steam! Never direct the steam or the steam Using continuous steam jets at people, animals or electrical ... -
Page 42: Brush Attachment
Steamer Brush attachment The steamer is equipped with a brush attachment which can be clipped on. The brush attachment helps to raise garment fibres. You can hold the steamer directly onto the fabric while the brush attachment is in place. Always try it first on an inconspicuous part of the fabric. -
Page 43: Switching Off
Switching off To switch off the steam ironing system, press the button on the control panel. The light in the button goes out. The steam ironing system is now switched off. The last selected fan Lower storage compartment settings are saved and are available for the next time you switch on the appliance. -
Page 44: Dismantling
Dismantling Setting the ironing board to its lowest working height To dismantle the steam ironing system, the ironing board must first be set to its lowest working height. Make sure you do not trap the mains connection cable in the system. Ensure the residual water drawer is completely emptied, pushed in and clicked into place. -
Page 45: Folding The Ironing Board
Dismantling Folding the ironing board Push the ironing board up by the tapered end until it is upright and Turn one of the two rotary dials as far locks into position on the tower. as it will go towards the position. The ironing board is now unlocked. -
Page 46: Disconnecting The Steam Hose
Dismantling Disconnecting the steam hose Storing the iron Do not pull on the steam hose. The iron soleplate is still very hot Hold the plug at the end of the steam after use! hose. The plug may still be warm Avoid direct contact. -
Page 47: Emptying The Water Container
Dismantling Emptying the water container Storing the steam ironing system Empty the water container if the steam ironing system is not going to be used for a long period of time. Take the steam ironing system to its storage place. Do not store the steam ironing ... -
Page 48: Cleaning And Care
Cleaning and care Emptying the residual water drawer Automatic rinsing After the rinsing process has finished, The automatic rinse function clears the residual water drawer must be the steam generator of mineral emptied. The message Empty deposits from the evaporated water. drawer will appear in the display on the After approx. -
Page 49: Descaling
Miele appliances to optimise the Slide the residual water drawer back descaling process. Your appliance is into the tower until it clicks into place. supplied with one pack of Miele descaling tablets. Steam cannot be produced until the Other descaling agents, which... -
Page 50: Descaling Warning
Cleaning and care Descaling warning further 60 minutes. For the rest of the descaling process, you can leave the Descale soon will appear in the steam ironing system unattended. display the next time you switch the steam ironing system on if there are Useful tip: To optimise the descaling only about 2 hours of ironing available process, start the procedure while the... -
Page 51: Starting The Descaling Process Early
Cleaning and care Starting the descaling process early Descaling process The following display messages will guide you through the entire descaling process. Only proceed with the Ready for use required action if you are prompted to do so by the appropriate message in the display. - Page 52 Cleaning and care Fill water container to mark Add descaler Turn the screw cap at the back of the water container anti-clockwise and remove the cap. Hold the water container by its handle. Pull the handle downwards. Level mark on the water container The water container will release from ...
- Page 53 Cleaning and care Fit water container Fit the water container back in the tower. Add descaler After about 10 minutes (the time it takes for the descaling tablet to dissolve), the descaling process begins automatically. Press the OK button to display the Messages in the display will tell you next step.
- Page 54 Cleaning and care Empty drawer Pre-rinse This message may be displayed after If the steam ironing system is still hot inserting the water container with the from the previous use, the cooling descaling tablet. If you do not see this down phase will start first.
- Page 55 Cleaning and care Rinse water container and fill to Empty drawer the mark Remove the residual water drawer Remove the water container from the from the tower. tower. The message Fit drawer will appear As long as the water container is not in the display.
- Page 56 Cleaning and care Empty drawer Descale Remove the residual water drawer After an activation time of approx. 1 hour, the descaling solution is drained and empty it. from the steam generator into the The message Fit drawer is now residual water drawer.
- Page 57 Cleaning and care Rinsing the soleplate system is ready and steam is available, the message Ready for use will be The iron must not be warm from shown in the display. previous use. Hold the iron over a washbasin or a Let the iron cool down for at least heat-resistant container.
-
Page 58: Cleaning The Housing
Cleaning and care Now set the temperature selector on Cleaning the housing the iron to the highest temperature Before cleaning the housing, setting . switch off at the socket and withdraw the plug. Depending on the level of soiling, use a dry or moist soft cloth to wipe the housing. -
Page 59: Cleaning Or Replacing The Ironing Board Cover
Cleaning and care To avoid damaging the surface, do Cleaning or replacing the not use the following for cleaning: ironing board cover – abrasive cleaning agents, (e.g. If the ironing board cover is soiled, you powder cleaners, cream cleaners, can wash and dry it. -
Page 60: Cleaning The Water Filter
Cleaning and care Wash and dry the ironing board cover Cleaning the water filter according to the care label or replace The water filter prevents foreign the cover if it is damaged. objects in the water from entering the Never use the steam ironing system steam ironing system and causing without the ironing board cover in... -
Page 61: Removing The Water Filter Cover
Cleaning and care Removing the water filter cover Removing the sealing ring Use a Phillips head screwdriver to Use the hook on the water filter cover remove the screw of the water filter to pull the sealing ring up and out of cover. -
Page 62: Pulling Out The Water Filter
Cleaning and care Pulling out the water filter Cleaning the water filter Detach the water filter from the round Push the round tool on the water filter tool. cover onto the water filter from above. Clean the water filter thoroughly under running water. -
Page 63: Inserting The Water Filter
Cleaning and care Inserting the water filter Position the water filter with the small seal facing downwards. Press the water filter fully into the right-hand socket. Then refit the seal in the right-hand socket. The side with the ridge must face downwards. -
Page 64: Inserting The Water Container
The steam ironing system is now ready for operation again. If the water filter is not inserted, the steam ironing system will not work. The water filter must be replaced if it is worn or damaged. Replacement filters are available from Miele. -
Page 65: Optional Accessories
Optional accessories Miele appliances are designed to Care products achieve the best possible results and to The Miele care product range has been provide uncompromising satisfaction developed specially to clean your for as long as possible. To achieve this, appliance thoroughly and gently. -
Page 66: Problem Solving Guide
With the help of the following notes minor faults in the performance of the appliance, some of which may result from incorrect operation, can be corrected without contacting Miele. This will save time and money as a call-out charge will apply to customer service visits where the problem could have been rectified as described in these operating instructions. -
Page 67: Problem Solving Guide
Problem solving guide Problem solving guide Problem Possible cause and remedy The steam ironing The steam ironing system does not have any power. system cannot be Check that switched on. – the plug is inserted into the wall socket and that the socket is switched on. - Page 68 Now the ironing board can either be folded away or brought into its working position. If the ironing board still will not lock into place, contact Miele. The iron does not heat The steam ironing system is switched off.
- Page 69 Rectify the indicated malfunction and proceed as described on the following pages (see "Display messages"). The steam ironing system is damaged. Call Miele. The ironing board is not Steam has not been used for a while. heated. Press the steam button . This will activate the ironing board's heating system.
- Page 70 Put the dry ironing board cover back on (see "Cleaning or replacing the ironing board cover"). If the ironing board gets damp again, contact Miele. Water is leaking from The frequent removal and replacement of the water the steam ironing...
- Page 71 Rectify the indicated malfunction and proceed as described on the following pages (see "Display messages"). If there is still no steam, contact Miele. When using the steam The selected temperature level on the iron is too low. button on the iron, ...
-
Page 72: Display Messages
Press the button to switch the steam ironing system back on again. The steam ironing system will try and rectify the fault itself. If the fault message continues to be displayed, switch off at the wall socket and withdraw the plug. Contact Miele. - Page 73 Push the residual water drawer back in the tower until it clicks into place. There is a fault with the steam ironing system. If the fault message continues to be displayed, contact Miele. There is a fault with the steam system. ...
- Page 74 The steam ironing system is now ready for operation and will continue to operate from the point reached before the fault was registered. There is a fault with the steam ironing system. If the fault message continues to be displayed, contact Miele.
- Page 75 Press the button to switch the steam ironing system off and then back on again. F45: LNG The steam ironing system will try and rectify the fault itself. If the fault message continues to be displayed, contact Miele.
-
Page 76: After Sales Service
The manufacturer's warranty for this correct yourself, please contact Miele. appliance is 2 years. For further information, please refer to The contact details for Miele are given your warranty booklet. at the back of these instructions. When contacting Miele please quote the model and serial number of your appliance. -
Page 77: Electrical Connection
Electrical connection Before you connect the steam Do not use a multi-socket adapter or ironing system to the electricity an extension lead to connect the supply, you must check the steam ironing system to the power connection data (voltage and supply. -
Page 78: Technical Data
Technical data Dimensions, folded (H x W x D) 1280 x 470 x 370 mm Assembled dimensions (H x W x D) 970 x 470 x 1480 mm Weight 29 kg Voltage See data plate Total rated load See data plate Fuse rating ≥ 10 A Steam pressure for B 3312 3.5 bar Steam pressure for B 3826 and B 3847 4.0 bar... - Page 79 Miele Experience Centre South Melbourne: Freemans Bay, Auckland 1011 206-210 Coventry Street South Melbourne, VIC 3205 Miele Experience Centre Auckland: Miele Experience Centre and Office Sydney: 8 College Hill 3 Skyline Place Freemans Bay, Auckland 1011 Frenchs Forest, NSW 2086 Telephone:...
- Page 80 FashionMaster en-AU,NZ M.-Nr. 10 675 001 / 00...
Need help?
Do you have a question about the B 3312 and is the answer not in the manual?
Questions and answers