Table of Contents
Advertisement
Quick Links
Advertisement
Chapters
Table of Contents

Related Manuals for Epson EPL-5500


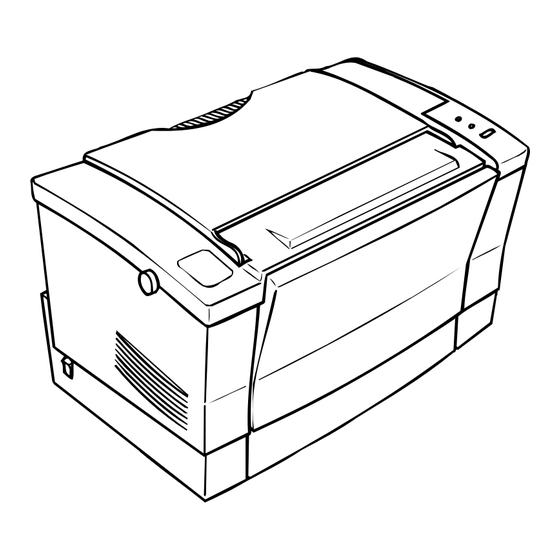
Summary of Contents for Epson EPL-5500
-
Page 1: Service Manual
EPSON TERMINAL PRINTER EPL-5500 SERVICE MANUAL EPSON 4005431... - Page 2 - ii -...
- Page 3 All efforts have been made to ensure the accuracy of the contents of this manual. However, should any errors be detected, SEIKO EPSON would greatly appreciate being informed of them. The above notwithstanding SEIKO EPSON can assume no responsibility for any errors in this manual or the consequence thereof.
- Page 4 SUPPLY CABLE MUST BE CONNECTED, USE EXTREME CAUTION IN WORKING ON POWER SUPPLY AND OTHER ELECTRONIC COMPONENTS. WARNING REPAIRS ON EPSON PRODUCT SHOULD BE PERFORMED ONLY BY AN EPSON CERTI- FIED REPAIR TECHNICIAN. MAKE CERTAIN THAT THE SOURCE VOLTAGE IS THE SAME AS THE RATED VOLTAGE, LISTED ON THE SERIAL NUMBER/RATING PLATE.
-
Page 5: Safety Information
SAFETY INFORMATION This printer is a page printer which operates by means of a laser. There is no possibility of danger from the laser, provided the printer is operated according to the instructions in this manual provided. Since radiation emitted by the laser is completely confined within protective housings, the laser beam cannot escape from the machine during any phase of user operation. - Page 6 For Finland, Sweden Users; VAROITUS Laitteen käyttäminen muulla kuin tässä käyttöohjeessa mainitulla tavalla saat- taa altistaa käyttäjän turvallisuusluokan 1 ylittävälle näkymättömälle laser- säteiylle. VARNING Om apparaten används på annat sätt än i denna bruksanvisning specificerats, kan användaren utsättas för osynlig laserstrålning, som överskrider gränsen för laser klass 1.
- Page 7 For Europe [Label inside printer] The following laser safety label will be attached inside the printer as shown below. For Denmark, Finland, Sweden, and Norway - v -...
- Page 8 Includes a step-by-step guide for product disassembly and assembly. CHAPTER 4. ADJUSTMENTS Includes a step-by-step guide for adjustment. CHAPTER 5. TROUBLESHOOTING Provides Epson-approved techniques for adjustment. CHAPTER 6. MAINTENANCE Describes preventive maintenance techniques and lists lubricants and adhesives required to service the equipment. APPENDIX Describes connector pin assignments, circuit diagrams, circuit board component layout and exploded diagram.
- Page 9 REVISION SHEET Revision Issue Date Revision Page Rev. A October 06, 1995 1st issue Revise the whole pages of the following chapters: Chapter 1 Chapter 2 Rev. B March 15, 1996 Chapter 3 Chapter 4 Chapter 5 Chapter 6 - vii -...
-
Page 10: Table Of Contents
Chapter 1 General Description Table of Contents 1.1 FEATURES 1.2 SPECIFICATIONS 1.2.1 Basic Specification ......... . . 1-3 1.2.2 Electrical Specifications . - Page 11 Table 1-1. Options for the EPL-5500........1-2...
- Page 12 Rev. A 1-iii...
-
Page 13: Features
1.1 FEATURES The EPSON EPL-5500 is non-impact page printer that combines a semi-conductor laser with electrophotographic technology. This printer is small and light, and features high-speed, high-resolution printing. Maintenance is very easy as a result of various built-in diagnostic functions. -
Page 14: Table 1-1. Options For The Epl-5500
General Description EPL-5500 Service Manual Table 1-1 lists the optional units available for the EPL-5500. Table 1-1. Options for the EPL-5500 Cat. No. Description Note C83218 Windows Printing System ROM SIMM Supports Windows Printing System EPSONScript Level 2 ROM SIMM... -
Page 15: Specifications
EPL-5500 Service Manual General Description 1.2 SPECIFICATIONS This section provides statistical data for the EPL-5500. 1.2.1 Basic Specifications Printing method: Laser beam scanning and dry electrophotography Resolution: 600/300 dpi Printing speed: 6 ppm (letter/A4) First printing time (A4/LT): Less than 20 seconds (face-up output) -
Page 16: Figure 1-2. Printable Area
General Description EPL-5500 Service Manual Standard paper Xerox 4024 DP paper 20 lb (75 g/m Normal paper Regular photocopier paper Bond paper Recycled paper 16 to 24 lb (60 to 90 g/m Special papers Card stock (90 to 157 g/m... -
Page 17: Table 1-4. Usability Of Special Papers
EPL-5500 Service Manual General Description Usability of special papers: See Table 1-4. Table 1-4. Usability of Special Papers Input Envelopes Labels Card Stock Letterhead Standard built-in paper tray Manual feed slot Lower paper cassette R: Reliable feeding and good image quality. -
Page 18: Electrical Specifications
General Description EPL-5500 Service Manual 1.2.2 Electrical Specifications Table 1-5. Electrical Requirements and Ranges Description 100 V Version 200 V Version 100 ∼ 120 VAC 220 ∼ 240 VAC Rated voltage 90 ∼ 132 VAC 198 ∼ 264 VAC Input voltage range 50 ∼... -
Page 19: Applicable Standards
EPL-5500 Service Manual General Description 1.2.6 Applicable Standards Safety Standards 120 VAC model: UL 1950, CSA 22.2 No. 950 Deviation 3 220/240 VAC model: EN 60950 (IEC950), NEMKO (IEC950), SETI (IEC950), SEMKO (IEC950), DEMKO (IEC950) Safety Regulations (Laser Radiation) 120 VAC model:... -
Page 20: Software Specifications
EPSON GL/2 mode (GL-like mode) Note: EPSON GL/2 mode is similar to the GL/2 mode included in the HP LaserJet 4 emulation. Table 1-6 shows the differences between EPSON GL/2 mode and the LJ4 GL/2 mode. While in EPSON GL/2 mode, the operator can enter GL/2 mode without sending the ESC %#B (Enter GL/2 mode) command. - Page 21 General Description EPL-5500 Service Manual Table 1-7. Built-in Fonts (Continued) Applicable Mode HP LJ4 Resident Fonts GL/2 Scalable fonts Swiss 742Bold Italic SWC Swiss 721Roman SWM Swiss 721Bold SWM Swiss 721Oblique SWM Swiss 721Bold Oblique SWM Dutch 801Roman SWM Dutch 801Bold SWM...
-
Page 22: Interface Specifications
Optional LocalTalk/serial interface Optional Type B interface with Type-B EX box 1.3.1 Parallel Interface The parallel interface has the following two modes: Compatibility mode (same as parallel interface for EPSON’s current page printer) Reverse mode 1.3.1.1 Parallel Interface Compatibility Mode System:... -
Page 23: Table 1-8. Parallel Interface Pin Assignment
General Description EPL-5500 Service Manual Table 1-8. Parallel Interface Pin Assignments Pin No. Signal Name Description STROBE STROBE is a strobe pulse used to read data from the host computer. The pulse width must be more than 0.5 µsec. Normally it is HIGH, and data is latched at the trailing edge of this signal. -
Page 24: Table 1-9. Parallel Interface Pin Assignment
EPL-5500 Service Manual General Description 1.3.1.2 Reverse Mode Reverse mode for the EPL-5500 supports the IEEE-P1284 nibble mode. This printer can run in reverse mode, in which the printer can inform the computer of its status with EJL and PJL commands. -
Page 25: Figure 1-4. Parallel Interface State Switch Diagram
General Description EPL-5500 Service Manual Compatibility M ode S TROB E Forward Forward D ata Terminate Idle ACK and BUSY Transfer Failed SLCT IN=HIGH Negotiation SLCT I N=LOW ERR=HI GH E RR=L O W Negotiation No data sent Sending data... -
Page 26: Figure 1-5. Negotiation Timing Chart
EPL-5500 Service Manual General Description Figure 1-5 shows the negotiation timing chart. DATA 00h or 04h SEL-IN STROBE AUTO-FEED ACKNLG BUSY Peripheral Busy Status Current Peripheral Status Note1 SLCT Note 2 ERROR Current Peripheral Status Note1 Compatibility Negotiation HB DA or... -
Page 27: Figure 1-7. Termination Timing Chart
General Description EPL-5500 Service Manual Figure 1-7 shows the timing chart for termination. DATA SEL-IN STROBE AUTO-FEED Note 3 ACKNLG BUSY Peripheral Busy Status Peripheral Busy Status Note 1 Current Peripheral Status SLCT Note 2 ERROR Note 1 Current Peripheral Status... -
Page 28: Serial Interface
EPL-5500 Service Manual General Description 1.3.2 Serial Interface This printer can use the optional LocalTalk/serial interface module. Type: RS-232C/current loop Transfer system: Full duplex Synchronization: Asynchronous start-stop system Start-bit: 1 bit Stop-bit: 1 or 2 bits Data length: 7 bits or 8 bits... - Page 29 General Description EPL-5500 Service Manual Handshaking When the vacant area for data in the input buffer drops to 256 bytes, the printer outputs an X-OFF code or sets the DTR signal level to LOW, indicating that the printer cannot receive more data.
-
Page 30: Optional Localtalk Interface
EPL-5500 Service Manual General Description 1.3.3 Optional LocalTalk Interface This printer can use the optional LocalTalk/ serial interface module. Type: LocalTalk Signal level: Same as RS-422 signal level Protocol: X-ON/X-OFF (cannot be combined with DTR control) DTR control (cannot be combined with X-ON/X-OFF) Transfer speed: 230.4K bps... -
Page 31: Operating Instructions
General Description EPL-5500 Service Manual 1.4 OPERATING INSTRUCTIONS This section describes functions performed through the control panel, such as printing a status sheet, hexadecimal dump, and printer settings functions. 1.4.1 Control Panel The printer control panel gives you easy control over most common printer operations. The panel consists of indicator lights and a button. - Page 32 EPL-5500 Service Manual General Description Functions of Pressing the Button While the Red light flashes slowly: Function of button Clears an error. Operation Hold down the button until the yellow and Red lights both go on after release. The printer prints a status sheet indicating the error type.
-
Page 33: Printer Settings Functions
General Description EPL-5500 Service Manual 1.4.2 Printer Settings Functions The printer settings function from the Remote Control Panel (software) lets the user control most of the printer’s functions, such as printing test pages, selecting a paper size, and changing the printer’s configuration. - Page 34 EPL-5500 Service Manual General Description ESCP2 * (Continued) Auto CR ON, OFF Auto LF OFF, ON Bit Image Dark, Light, BarCode φ Zero Char Font Courier, Prestige, Roman, Sans serif, Script Pitch 10 CPI, 12 CPI, 15 CPI, Prop Condensed...
- Page 35 General Description EPL-5500 Service Manual Table 1-12. Printer Settings (Continued) Menu Item Available Options PAGE PROTECT AUTO, ON RESOLUTION 600, 300 IMAGE OPTIMUM AUTO, OFF, ON TIMEOUT 5 to 300 EMULATION PARALLEL LJ4, ESCP2*, FX*, I239X*, PS*, GL2, AUTO* SERIAL*...
-
Page 36: Service Mode
EPL-5500 Service Manual General Description 1.4.3 Service Mode This printer has the following four service modes: Hexadecimal dump mode EEPROM format mode Factory reset mode Default setting mode Each service mode can be activatted selectively, by turning the printer on while hold down the button and release it at the corresponding timing shown in table below. -
Page 37: Table 1-14. Default Settings Codes
General Description EPL-5500 Service Manual 1.4.3.4 Default Settings The default settings function is used to enter printer settings. The procedure for entering default settings is: To enter the default settings mode, turn on the printer while holding down the button until yellow and red lights turn off and on and off. - Page 38 EPL-5500 Service Manual General Description EMULATION PARALLEL ESCP2* I239X* AUTO* SERIAL* AUX* SERIAL* ESC/P2* AUX* SERIAL* AUX* SERIAL* I239X* AUX* SERIAL* AUX* SERIAL* GL/2 AUX* SERIAL* AUTO* AUX* * With option Rev. B 1-25...
- Page 39 General Description EPL-5500 Service Manual Table 1-14. Default Settings Code (Continued) Deafult Settings Codes Menu Item Available Options Code Code Code ESC/P2* / FX* CG Table PcUSA Italic PcMultilin PcPortugue PcCanFrenc PcNordic PcTurkish PcE.Europe BpBRASCII BpAbicomp STATUS SHEET LANGUAGE ENGLISH...
-
Page 40: Display Of Messages
EPL-5500 Service Manual General Description 1.4.4 Display of Messages This printer indicates three types of messages with the LED lights or status sheet: status messages, error messages, and the service call error message. 1.4.4.1 Status Messages The LED lights normally indicate the printer’s status. (Refer to Section 1.4.1.) 1.4.4.2 Error Messages... -
Page 41: Printer Sharing
General Description EPL-5500 Service Manual 1.4.5 Printer Sharing This section describes printer sharing. This printer has two methods of printer sharing, port fixed mode and auto sense mode. These modes are selected by “INTERFACE” in the printer settings menu. 1.4.5.1 Port Fixed Mode When the printer is in port fixed mode, only one interface port is active. -
Page 42: Emulation Mode Switch Function
The two types of emulation switch function described below are available on this printer. Together they are referred to as SPL (Shared Printer Language). EJL: EPSON Job Language This is EPSON’s original language system. It is used to skip among various destinations, as shown in Figure 1-12. PJL: Printer Job Language This is HP’s original language, which is available with LaserJet 4 printer. -
Page 43: Figure 1-15. Ritech Adjustment
General Description EPL-5500 Service Manual The main improvement of this technique is in eliminating “jaggies” in diagonal lines. It is most effective when the dot map data fits the development characteristics of the printer mechanism well. It is therefore necessary to set appropriate values in printer settings. -
Page 44: Toner Save Mode
By installing additional SIMMs, you can increase the printer’s memory to a total of 32MB, including the resident memory. EPSON supplies several types of memory option (SIMMs). Other SIMMs can be purchased from other vendors. Be sure the SIMM meets the requirements listed below. -
Page 45: Main Components
General Description EPL-5500 Service Manual 1.5 MAIN COMPONENTS To simplify maintenance and repair, the main components of the EPL-5500 have been designed for easy removal and replacement. The main components are: C169 MAIN-B Board Main board PWB-E Board Power supply circuit board... -
Page 46: C169 Main-B Board
EPL-5500 Service Manual General Description 1.5.1 C169 MAIN-B Board The C169 MAIN-B board is a video controller and engine controller board. The primary functions of this board are receiving print data from the host, generating the print image (video), and sending the print image to the engine controller via the video interface. -
Page 47: Pwb-E Board
General Description EPL-5500 Service Manual 1.5.2 PWB-E Board The PWB-E is the power supply board, which consists of a switching regulator circuit. It converts the AC line voltage into +24 V and +5 VDC voltages. There are two types of power supply board, the 100/120 V type and 220/240 V type. -
Page 48: Optical Unit
EPL-5500 Service Manual General Description 1.5.4 Optical Unit The optical unit consists of the laser diode (semi-conductor laser), the mirror motor (scanner motor) which drives the polygon mirror for laser scanning, and several mirrors and lenses. The laser beam generated by the laser diode is conducted to the OPC drum surface by way of the polygon mirror, as well as several mirrors and lenses, to create a latent electro-photographic image on the drum. -
Page 49: Photoconductor Unit
General Description EPL-5500 Service Manual 1.5.6 Photoconductor Unit Core mechanisms of the printing process, such as charging and imaging, are integrated into this unit. Figure 1-23. Photoconductor Unit 1.5.7 Developing Cartridge Core mechanisms of the printing process, such as developing, are integrated into this cartridge. - Page 50 Chapter 2 Operating Principles Table of Contents 2.1 ENGINE OPERATION 2.1.1 Print Process ..........2-2 2.1.1.1 Paper Feeding .
- Page 51 Figure 2-20. High-Voltage Supply Block Diagram ..... . 2-13 Figure 2-21. Print Process ........2-14 Figure 2-22.
-
Page 52: Engine Operation
EPL-5500 Service Manual Operating Principles 2.1 ENGINE OPERATION This section describes the functions and operating principles of the EPL-5500 engine. Figure 2-1 shows the locations and names of the main engine components. Optional Second Paper Feeding Unit Figure 2-1. Main Components 1. -
Page 53: Print Process
Operating Principles EPL-5500 Service Manual 2.1.1 Print Process This section describes the print process from paper feeding to paper exit. Figure 2-2 shows a diagram of the print process. Optical Unit Print Exit Fusing Exposure Drum Cartridge Drum Charge Toner... -
Page 54: Paper Feeding
EPL-5500 Service Manual Operating Principles 2.1.1.1 Paper Feeding Paper can be fed into the printer from the paper feed tray (150 sheets) or from the manual feed slot (1 sheet at a time). Installing an optional second paper feed unit (lower cassette, 250 sheets) adds another feeding method. -
Page 55: Drum Charge
Operating Principles EPL-5500 Service Manual Second Paper Feed Unit (Optional Lower Cassette) This unit contains no drive motor, so the main motor (M1) drive is transmitted to the paper take-up and transport sections in the unit via the drive transmission gear. Although the feeding method is the same as for the paper feed tray in the printer, this unit uses a corner separation system as its paper separating function. -
Page 56: Laser Exposure
EPL-5500 Service Manual Operating Principles 2.1.1.3 Laser Exposure The laser beam, emitted from the optical unit, makes an invisible static image. The SOS (start of scan) sensor, installed on the laser diode control board (PWB-D), unifies the laser emission timing for each scan line. -
Page 57: Image Transfer
Operating Principles EPL-5500 Service Manual 2.1.1.5 Image Transfer The electrode comb is an image transfer system that transfers the toner image on the PC drum onto the paper. Image Transfer Unit Housing Housing Electrode Comb Pre-Image Transfer Roller C169 MAIN-B... -
Page 58: Engine Control
EPL-5500 Service Manual Operating Principles 2.1.2 Engine Control This section describes engine control, the power supply board, and the high-voltage supply board. The engine is controlled by the main board (C169 MAIN-B Board). Figure 2-10 shows the engine controller connecting diagram. -
Page 59: Main Motor Functions And Control
Operating Principles EPL-5500 Service Manual 2.1.2.1 Main Motor Functions and Control The M1 main motor transmits the drive to the printer rollers and the optional second paper feed unit (lower cassette) via each gear as shown below. Toner Cartridge Sleeve Roller... -
Page 60: Paper Take-Up Sensor And Paper Exit Sensor
EPL-5500 Service Manual Operating Principles Figure 2-12 shows the main motor drive circuit. The M1 main motor is a four-phase stepping motor controlled by the CPU (IC201) on the main board (C169 MAIN-B). This board has a stepping motor driver IC that drives the M1 main motor with a constant current. -
Page 61: Fuser Control
Operating Principles EPL-5500 Service Manual 2.1.2.3 Fuser Control The heater lamp, powered by AC voltage, heats the fuser. When the power supply board receives a FUSER signal from the main board (C169 MAIN-B), the power supply board (PWB-E) supplies the AC voltage to the heater lamp. This AC voltage is cut by an interlock switch when the case is open. - Page 62 EPL-5500 Service Manual Operating Principles Rev. B 2-11...
-
Page 63: Scanner Mirror Motor Control
Operating Principles EPL-5500 Service Manual If any of the following conditions are detected, the printer indicates a fuser error: 1. If the thermistor detects the temperature has not risen by 20º C for 50 msec. within 12 to 30 sec. -
Page 64: Laser Diode Drive
EPL-5500 Service Manual Operating Principles 2.1.2.5 Laser Diode Drive Figure 2-17 shows the laser diode drive circuit. Laser diode emission is controlled by three signals (LDATA, LDAPC1, and LDAPC2) from the main board (C169 MAIN-B). Laser Diode SSCAN LD_CTL SOS Mirror... -
Page 65: Bias Voltages And Laser Drive Timing
Operating Principles EPL-5500 Service Manual 2.1.2.6 Bias Voltages and Laser Drive Timing Figure 2-20 is a diagram of the drum charge bias voltage, image transfer bias voltage, and the developing bias voltage control circuit. These bias voltages are generated from the +24 VDC from the high-voltage supply board (PWB-F). -
Page 66: Operating Principles
EPL-5500 Service Manual Operating Principles Figure 2-21 shows the print process. Brush Roller Charging Laser Exposure PC Drum Development Image Transfer Figure 2-21. Print Process Figure 2-22 shows the start print sequence. The printer’s engine starts printing when it receives the PRINT signal from the video controller circuit. -
Page 67: Fan Motor Control
Operating Principles EPL-5500 Service Manual 2.1.2.7 Fan Motor Control The fan motor (M3) rotates at engine initialization, and stops after 2 sec. The fan motor also rotates during printing. When printing ends, the fan motor stops after 3 min. If the following condition is detected, the printer indicates a Fan motor error. -
Page 68: Video Controller Operation
EPL-5500 Service Manual Operating Principles 2.2 VIDEO CONTROLLER OPERATION The video controller section generates the video signals for received data. The video controller section is the C169 MAIN-B Board. C169 MAIN-B Board Video Controller Section Engine Controller Section Figure 2-25. Video Controller Section 2.2.1 C169 MAIN-B Board Operation... - Page 69 Operating Principles EPL-5500 Service Manual Table 2-1 lists the functions of the main elements of the video controller section in C169 MAIN-B Board. Table 2-1. Functions of C169 MAIN-B Board Main Elements Element Location Function MB86933H RISC The CPU, which operates at 22.5 MHz, manages the video controller operation.
- Page 70 EPL-5500 Service Manual Operating Principles Print data and commands transmitted from the host computer via the parallel or optional interfaces are read using the CPU interrupt process and stored in the DRAM input buffer. Data and commands in the input buffer are processed by the CPU, which then stores the printing bitmap data (image data) in the V (video) -RAM (image buffer) area of the DRAM.
-
Page 71: Reset Circuit
Operating Principles EPL-5500 Service Manual 2.2.1.1 Reset Circuit The entire system (CPU and external devices) can be initialized if the RESET signal (CPU pin 113) are active simultaneously. This circuit uses an M51938 IC to monitor the supply voltage if a voltage level less than 4.25 V is detected. -
Page 72: Interrupt Control
EPL-5500 Service Manual Operating Principles 2.2.1.3 Interrupt Control The ASIC E05A93 determines the priority level of the interrupt and outputs it to terminals IRL0 - IRL3. Then an interrupt is sent to the CPU. When the IRL0-3 value is 1111b, the CPU process is a non-maskable interrupt process. -
Page 73: Parallel Interface Circuit
Operating Principles EPL-5500 Service Manual 2.2.1.5 Parallel Interface Circuit Figure 2-31 shows a circuit block diagram of the parallel interface. Data sent from the host computer is latched within the E05A93 by the STROBE signal. The E05A93 outputs a BUSY signal automatically to stop the host computer from sending additional data. -
Page 74: Video Interface
EPL-5500 Service Manual Operating Principles 2.2.1.6 Video Interface The ASIC E05A92 maps the SRAM into a memory space different from the system memory. The CPU transmits data from the V-RAM (in the system RAM) to the SRAM using the ASIC E05A92. - Page 75 Chapter 3 Disassembly and Assembly Table of Contents 3.1 GENERAL INFORMATION 3.1.1 Precautions for Disassembly/Assembly ......3-1 3.1.2 Tools.
- Page 76 Figure 3-24. Removing the Paper Separator ......3-17 Figure 3-25. Paper Exit Sensor ........3-17 Figure 3-26.
-
Page 77: General Information
EPL-5500 Service Manual Disassembly and Assembly 3.1 GENERAL INFORMATION This chapter describes disassembly/assembly procedures to be used for replacing the main assemblies of the EPL-5500. 3.1.1 Precautions for Disassembly/Assembly Follow the precautions below when disassembling/assembling the printer. WARNING Disconnect the power cord before disassembling/assembling the printer. -
Page 78: Small Parts
Disassembly and Assembly EPL-5500 Service Manual 3.1.3 Small Parts In the following sections, abbreviations are used for small parts, such as screws and washers. Tables 3-2 and 3-3 list these abbreviations. Table 3-2. Screw Types and Abbreviations Standard Type Appearance... -
Page 79: Service Checks After Repair
EPL-5500 Service Manual Disassembly and Assembly 3.1.4 Service Checks after Repair Check the repaired unit using the following list on completion of servicing. Table 3-3. Checks after Repair Item Location Checkpoint Check Operation Control panel Do all LEDs and button function normally? -
Page 80: Disassembly And Assembly
3.2 DISASSEMBLY AND ASSEMBLY This section describes and illustrates the procedures for removing and disassembling the components of the EPL-5500. Cleaning is described in Chapter 6. The assembly procedures are not described, except for special notes where necessary, because assembly can be accomplished by performing disassembly in reverse. -
Page 81: Removal Of The Controller Section
EPL-5500 Service Manual Disassembly and Assembly 3.2.2 Removal of the Controller Section The control section is comprised of the controller board (the C169 MAIN-B Board). 3.2.1.1 Main Board (C169 MAIN-B Board) Removal CAUTION Before you remove the video controller board, make sure that you remove any optional LocalTalk/ serial board or Type-B EX box. -
Page 82: Disassembling The Engine
Disassembly and Assembly EPL-5500 Service Manual 3.2.3 Disassembling the Engine This section describes disassembling the engine, including the high voltage unit (PWB-F) and power supply board (PWB-E). 3.2.3.1 Optical Unit Removal CAUTION Do not touch the optical unit except at the time of replacement. -
Page 83: Image Transfer Unit Removal
EPL-5500 Service Manual Disassembly and Assembly 3.2.3.2 Image Transfer Unit Removal Open the top cover. Remove the harness cover A. (Refer to Section 3.2.3.3.) Remove the 2 screws (#5) and holders at both ends of the image transfer unit. Figure 3-5. Removing the Image Transfer Unit - 1 Disconnect the 2 connectors and remove the unit. - Page 84 Disassembly and Assembly EPL-5500 Service Manual ASSEMBLY POINTS After reinstalling the image transfer unit, check that the unit smoothly moves up and down. Figure 3-7. Moving the Image Transfer Unit Remove the remove the electrode comb. ASSEMBLY POINTS When reinstalling the electrode comb, be careful of the direction of installation. Install the electrode comb so that the terminal of the comb faces the image transfer roller drive gear.
-
Page 85: Upper Unit Removal
EPL-5500 Service Manual Disassembly and Assembly 3.2.3.3 Upper Unit Removal Open the upper unit. Remove the right cover and left cover. (Refer to Section 3.2.1.1.) Disconnect connectors CN202, CN208, and CN211 from the C169 MAIN-B. Remove harness covers A and B, and pull out the CN1 of the PWB-E board. -
Page 86: High-Voltage Supply Board (Pwb-F) Removal
Disassembly and Assembly EPL-5500 Service Manual 3.2.3.4 High-Voltage Supply Board (PWB-F) Removal Open the top cover. Remove 1 screw (#5) from the PWB-F cover. Remove the PWB-F cover. Figure 3-11. Removing the PWB-F Cover Remove the 4 screws (#5) from the PWB-F board. -
Page 87: Power Supply Unit (Pwb-E) Removal
EPL-5500 Service Manual Disassembly and Assembly 3.2.3.5 Power Supply Unit (PWB-E) Removal Remove the upper unit. (Refer to Section 3.2.3.3.) Remove 6 screws (#4:2, #7:2), and remove the PWB-E cover. Figure 3-13. Remove the PWB-E Cover Disconnect connector CN207 from the C169 MAIN-B Board. -
Page 88: Fusing Unit Removal
Disassembly and Assembly EPL-5500 Service Manual 3.2.3.6 Fusing Unit Removal Open the top cover. (Refer to Section 3.2.3.3.) Remove the image transfer unit. (Refer to Section 3.2.3.2.) Remove 1 screw (#5), and remove the drive tension section of the fusing unit. - Page 89 EPL-5500 Service Manual Disassembly and Assembly Remove the harness cover. Figure 3-17. Removing the Harness Cover Remove the fusing entrance guide. Figure 3-18. Removing the Fusing Entrance Guide Rev. B 3-13...
- Page 90 Disassembly and Assembly EPL-5500 Service Manual 10. Remove 4 screws (#5), and remove the fusing unit. Figure 3-19. Removing the Fusing Unit ASSEMBLY POINTS After reinstalling the fusing unit, check the direction of the bushings on the paper exit roller and the connection condition between the roller and the ground plate.
-
Page 91: Fusing Unit Disassembly
EPL-5500 Service Manual Disassembly and Assembly 3.2.3.7 Fusing Unit Disassembly This section describes how to remove the paper exit sensor, heater lamp, lower fusing roller, and upper fusing roller. Heater Lamp CAUTION Do not touch the glass surface of the lamp with your bare hands. - Page 92 Disassembly and Assembly EPL-5500 Service Manual Thermistor Remove the fusing unit. (Refer to Section 3.2.3.6.) Remove the 1 screw (#4), and remove the thermistor. Figure 3-22. Removing the Thermistor ASSEMBL POINTS When reinstalling the thermistor, wire the harness as shown below.
- Page 93 EPL-5500 Service Manual Disassembly and Assembly Paper Separator Remove the fusing unit. (Refer to Section 3.2.3.6.) Release the lock of the holder and remove the 3 paper separator. Figure 3-24. Removing the Paper Separator ASSEMBLY POINTS When reinstalling the paper separators, be careful of these positions as the middle one differs from others.
- Page 94 Disassembly and Assembly EPL-5500 Service Manual Fusing Roller Remove the fusing unit. (Refer to Section 3.2.3.6.) Remove the 2 G-rings from the fusing unit. Figure 3-26. Removing the G-Rings CAUTION When reinstalling the G-rings: Be careful of the direction. Securely position them into the grooves of the fusing roller.
- Page 95 EPL-5500 Service Manual Disassembly and Assembly Take out the lower fusing roller. Figure 3-28. Removing the Lower Fusing Roller Thermal Fuse Remove the fusing unit. (Refer to Section 3.2.3.6.) Remove 2 screws (#5), and remove the thermal fuse. Figure 3-29. Removing the Thermal Fuse Rev.
-
Page 96: Main Motor Removal
Disassembly and Assembly EPL-5500 Service Manual 3.2.3.8 Main Motor Removal Remove the housing components. (Refer to Section 3.2.1.1.) Remove 1 screw (#4) which fixing the motor bracket and the 2 screws (#2) which fixing the main motor, and remove the main motor together with the bracket. -
Page 97: Paper Take-Up Sensor And Paper Take-Up Solenoid Removal
EPL-5500 Service Manual Disassembly and Assembly 3.2.3.9 Paper Take-Up Sensor and Paper Take-Up Solenoid Removal Remove the housing components. (Refer to Section 3.2.1.1.) Turn over the printer on its back. Remove the 4 screws (#6), and remove the ground plate. -
Page 98: Paper Take-Up Roller Removal
Disassembly and Assembly EPL-5500 Service Manual 3.2.3.10 Paper Take-Up Roller Removal Remove the main motor. (Refer to Section 3.2.3.8.) Remove the paper guide assembly. (Refer to Section 3.2.3.9.) Remove the 6 screws (#4:2, #5:4), and remove the left frame. Remove the 2 gears (GEAR 29/65T, GEAR 22/57T), specified in the figure below. -
Page 99: List Of Figures
Chapter 4 Adjustment Table of Contents 4.1 ADJUSTMENT 4.1.1 Print Position Adjustment ........4-1 List of Figures Figure 4-1. - Page 100 EPL-5500 Service Manual Adjustments 4.1 ADJUSTMENTS This section describes the adjustment procedures for the EPL-5500. You must perform these adjustments after servicing the printer, especially when any component or part is replaced. 4.1.1 Print Position Adjustment You can adjust the vertical print position on a sheet of paper by turning the image synchronizing volume control on the main board (C169 MAIN-B).
- Page 101 Chapter 5 Troubleshooting Table of Contents 5.1 OVERVIEW 5.2 SELF-DIAGNOSTIC FUNCTION 5.2.1 SOFT ERROR ..........5-1 5.2.2 Service Call Error .
- Page 102 Troubleshooting 5.1 OVERVIEW The EPL-5500 has a sophisticated, built-in, self-diagnostic function that reduces the troubleshooting time by identifying failed parts or components. This self-diagnostic test identifies the troubleshooting problems for page printers, in which even a trivial failure can result in a serious print quality problem.
- Page 103 Troubleshooting EPL-5500 Service Manual 5.2.2 Service Call Error If the printer detects a fatal error that unrecoverable by the user, the printer indicates it with the LED lights as "Service Call Error". There are two types of "Service Call Error" as explained below, and each error is indicated by the LED lights of the control panel in different manner.
- Page 104 EPL-5500 Service Manual Troubleshooting Note that if any digit of corresponding error number is "0", both yellow and red LED lights go on and off once at the same time. Rev. B...
- Page 105 Troubleshooting EPL-5500 Service Manual Example: "Standard ROM error" (error number = 1130) Order Interval State (Yellow) (Red) Short Service Call Error B indication Short Short Short Short Short Long Error code = "1130" Short 4th digit = "1" Long Short 3rd digit = "1"...
- Page 106 EPL-5500 Service Manual Troubleshooting Error No. Error Code Error Condition C1000 RAM Validation error C1001 System RAM check error C1002 Standard RAM error C1003 Optional RAM (SIMM) error C1130 Standard ROM error C1170 Optional NLSP fonts ROM error C1180 Optional ROM SIMM error...
-
Page 107: Troubleshooting
Troubleshooting EPL-5500 Service Manual 5.3 TROUBLESHOOTING This section describes troubleshooting abnormal operations and print quality problems. 5.3.1 Troubleshooting of Abnormal Operation This section describes how to detect malfunctions, and determine the cause, and it suggests what actions to take for various types of malfunctions. Each paragraph refers you to a detailed troubleshooting table. - Page 108 EPL-5500 Service Manual Troubleshooting Table 5-5. The Printer Does Not Operate at All Cause Step Checkpoint Finding Solution Connector CN207 Is connector CN207 on the Connect CN207 on C169 MAIN-B Board may be C169 MAIN-B Board the board. disconnected. disconnected?
- Page 109 Troubleshooting EPL-5500 Service Manual Cause Step Checkpoint Finding Solution The interlock switch lever is Does the switch turn on when Replace the interlock bad. the case is closed? lever. The interlock switch may be Does switch toggle? Replace the interlock dead.
- Page 110 EPL-5500 Service Manual Troubleshooting Table 5-8. The LED Does Not Come On (2) Cause Step Checkpoint Finding Solution The paper take-up solenoid Disconnect connector CN203 Replace the paper coil may be open or shorted. on the C169 MAIN-B Board take-up solenoid.
- Page 111 Troubleshooting EPL-5500 Service Manual Table 5-8. The LED Does Not Come On (2) (Continued) Cause Step Checkpoint Finding Solution The main motor coil may be Disconnect connector CN206 Replace main open or shorted. on the C169 MAIN-B Board, motor. and check the coil resistance between: pin 1 and pin 2;...
- Page 112 EPL-5500 Service Manual Troubleshooting Table 5-9. The LED Does Not Come On (3) Cause Step Checkpoint Finding Solution standard tray Is the standard tray OK? Refer to Table 5-8. problems. The paper take-up solenoid coil Disconnect junction Replace the paper...
- Page 113 Troubleshooting EPL-5500 Service Manual Table 5-10. The LED Does Not Come On (4) Cause Step Checkpoint Finding Solution The consumables may not be Are the consumables installed? Install installed. consumables. The paper take-up roller may Does paper always jam in paper Replace the paper be bad.
- Page 114 EPL-5500 Service Manual Troubleshooting Cause Step Checkpoint Finding Solution The optical unit may be bad. — Replace the optical — unit. The C169 MAIN-B Board may — Replace the C169 — be bad. MAIN-B Board. Rev. B 5-13...
- Page 115 Troubleshooting EPL-5500 Service Manual Table 5-15. Laser Light Error Cause Step Checkpoint Finding Solution The optical unit may be — Replace the optical — dead. unit. The C169 MAIN-B Board — Replace the C169 — may be dead. MAIN-B Board.
- Page 116 EPL-5500 Service Manual Troubleshooting Table 5-21. C1003 Error Cause Step Checkpoint Finding Solution The optional SIMM may be Is the operation OK after Replace the SIMM. bad. you remove the optional SIMM? The C169 MAIN-B Board — Replace C169 —...
- Page 117 Troubleshooting EPL-5500 Service Manual Table 5-26. C1320 Error Cause Step Checkpoint Finding Solution The optional interface card — Replace optional — may be bad. interface card. The C169 MAIN-B Board may — Replace C169 — be bad. MAIN-B Board. Table 5-27. C1990 Error...
- Page 118 EPL-5500 Service Manual Troubleshooting 5.4.2 Print Quality Anomalies This section describes how to isolate possible causes of a print quality problem . Table 5-28. Print Quality Anomalies Symptom Possible Cause Part Name Check Item Remedy Low image density Poor development PWB-F board —...
- Page 119 Troubleshooting EPL-5500 Service Manual Table 5-28. Print Quality Anomalies (Continued) Symptom Possible Cause Part Name Check Item Remedy Blank print Poor development Imaging Check whether Reinstall toner cartridge toner cartridge cartridge. installed properly. PWB-F board — Replace PWB-F board. Improper charging PWB-F board —...
- Page 120 EPL-5500 Service Manual Troubleshooting Table 5-28. Print Quality Anomalies (Continued) Symptom Possible Cause Part Name Check Item Remedy Toner smudges on Improper charging PWB-F — Replace PWB-F the back side of the board. sheet. Poor development PWB-F — Replace PWB-F board.
- Page 121 Chapter 6 Maintenance Table of Contents 6.1 MAINTENANCE 6.1.1 User Maintenance ......... . . 6-1 6.1.1.1 Cleaning.
- Page 122 6-ii Rev. A...
- Page 123 Maintenance 6.1 MAINTENANCE The EPL-5500 is a page printer that uses an electrophotographic printing method. Unlike most impact or ink-jet printers, the key components in the electrophotographic process are integrated into two expendable units (the photoconductor unit and toner cartridge).
- Page 124 Maintenance EPL-5500 Service Manual 6.1.1.2 Replacement of Consumables This printer uses a consumable photoconductor unit and toner cartridge. The life of photoconductor unit is 20,000 pages and the toner cartridge life is 3,000 pages, when printing on A4- or letter-size pages with a 5% print ratio.
- Page 125 EPL-5500 Service Manual Maintenance Rev. B...
- Page 126 Appendix A Reference Materials Table of Contents A.1 CONNECTOR PIN ASSIGNMENTS A.1.1 Main Board (C169 MAIN-B Board) ......A-4 A.2 CIRCUIT DIAGRAM A-11 A.3 CIRCUIT BOARD COMPONENT LAYOUT...
- Page 127 EPL-5500 Service Manual Appendix A.1 CONNECTOR PIN ASSIGNMENTS Figures A-1 and A-2 illustrate the interconnection of the primary components. Table A-1 gives the size and a description of each connector. C169 MAIN-B Boad Video Controller Section Parallel I/F RAM SIMM...
- Page 128 Appendix EPL-5500 Service Manual Main motor C N 2 0 6 ϕA ϕA ϕB C169 MAIN-B ϕB Board Po lyg on mot or C N 2 1 0 C N 1 M POLYGON CTL D C 5 V G N D D C 2 4 V N .
- Page 129 EPL-5500 Service Manual Appendix Table A-1. Board Connector Summary Connector Description Pins Reference Main Board (C169 MAIN-B Board) Centronics parallel interface 36 pins Table 1-8 Connector for RAM SIMM 72 pins Table A-2 (Not used) 20 pins — Connector for LocalTalk/Serial I/F Module or Type-B EX...
- Page 130 Appendix EPL-5500 Service Manual A.1.1 Main Board (C169 MAIN-B Board) Table A-2. CN2 Pin Assignments Pin No. Signal Name Description Ground — Data bus bit 0 DQ16 Data bus bit 16 Data bus bit 1 DQ17 Data bus bit 17...
- Page 131 EPL-5500 Service Manual Appendix Table A-2. CN2 Pin Assignments (Continued) Pin No. Signal Name Description DQ24 Data bus bit 24 Data bus bit 9 DQ25 Data bus bit 25 DQ10 Data bus bit 10 DQ26 Data bus bit 26 DQ11...
- Page 132 Appendix EPL-5500 Service Manual Table A-3. CN4 Pin Assignments (Continued) Pin No. Signal Name Description Read strobe signal Write strobe signal IREQ Interrupt to option Non-maskable interrupt DREQ Data request DTCT LT option used/unused +5 VDC — +5 VDC —...
- Page 133 EPL-5500 Service Manual Appendix Table A-4. CN5 Pin Assignments Pin No. Signal Name Description Ground — Data bus bit 0 Data bus bit 16 Data bus bit 1 Data bus bit 17 Data bus bit 2 Data bus bit 18...
- Page 134 Appendix EPL-5500 Service Manual Table A-4. CN5 Pin Assignments (Continued) Pin No. Signal Name Description Data bus bit 24 Data bus bit 9 Data bus bit 25 Data bus bit 10 Data bus bit 26 Data bus bit 11 Data bus bit 27...
- Page 135 EPL-5500 Service Manual Appendix Table A-7. CN204 Pin Assignments Pin No. Signal Name Description HV-C — HV-T HV-S — HV-S2 — HV-B BIAS-M GND2 Ground — +24 VDC — Table A-8. CN205 Pin Assignments Pin No. Signal Name Description SSCAN...
- Page 136 Appendix EPL-5500 Service Manual Table A-12. CN209 Pin Assignments Pin No. Signal Name Description +24 V +24 VDC — FEED2 Lower cassette solenoid on No connected — +5 VDC — GND1 Ground — Lower cassette paper empty PSIZ0 PSIZ1 PSIZE2...
- Page 138 EPL-5500 Service Manual Appendix Figure A-4. C169 MAIN-B Circuit Diagram (2/2) Rev. A A-13...
- Page 139 Appendix EPL-5500 Service Manual Figure A-5. PWB-E (120 V) Circuit Diagram A-14 Rev. A...
- Page 140 EPL-5500 Service Manual Appendix Figure A-6. PWB-E (220/240 V) Circuit Diagram Rev. A A-15...
- Page 141 Appendix EPL-5500 Service Manual A.3 CIRCUIT BOARD COMPONENT LAYOUT Figure A-7. C169 MAIN-B Component Layout (Front) A-16 Rev. A...
- Page 142 EPL-5500 Service Manual Appendix Figure A-8. C169 MAIN-B Component Layout (Rear) Rev. A A-17...
- Page 143 EPSON OVERSEAS MARKETING LOCATIONS EPSON AMERICA, INC EPSON DEUTCHLAND GmBH 20770 Madrona Avenue, Zülipicher Straße 6, 40549 Düsseldorf P.O. Box 2842 Germany Torrance, CA 90509-2842 Phone: 0211-56030 Phone: (800) 922-8911 Fax: 0211-504-7787 Fax: (310) 782-5220 EPSON UK LTD. EPSON FRANCE S.A.
- Page 145 EPSON...
Need help?
Do you have a question about the EPL-5500 and is the answer not in the manual?
Questions and answers