Advertisement
Quick Links
Goodwe 5048ES with BYD B-BOX (2.5-10) Installation Guide
Attention:
Goodwe 5048D-ES in this manual is the new one with serial number starting with 9 ie 95048ESU16XXXXX.
For the Goodwe 5048D-ES with starting SN 3, please refer to other document.
Index
1. Physical wiring
2. APP configuration
3. System function review
4. WiFi set up
5. Could Account Registration
6. Check List
Advertisement

Summary of Contents for Goodwe 5048ES
-
Page 1: Check List
Goodwe 5048ES with BYD B-BOX (2.5-10) Installation Guide Attention: Goodwe 5048D-ES in this manual is the new one with serial number starting with 9 ie 95048ESU16XXXXX. For the Goodwe 5048D-ES with starting SN 3, please refer to other document. Index 1. - Page 2 Part 1: Inverter and battery physical connection 1.1 DC POWER connection (Battery and PV connection) Referring to Goodwe ES manual 4.1 & 4.2 as well as BYD battery manual for physical connection 1.2 AC POWER connection Goodwe 5048D-ES inverter has the grid connected and back up connection at the bottom of inverter.
- Page 3 To improve the system reliability, Goodwe recommends installer to install a changeover switch between back up load and grid tied load. Then for rare case, if the inverter is faulty, customer could manual switch all essential house loads back to the grid side.
- Page 4 Attention point: a. Part 1 on top of meter connects to power cable; part 4 on top of meter connects to neutral cable for powering up the meter. b. CT position is between the main switch and the customer power meter. c.
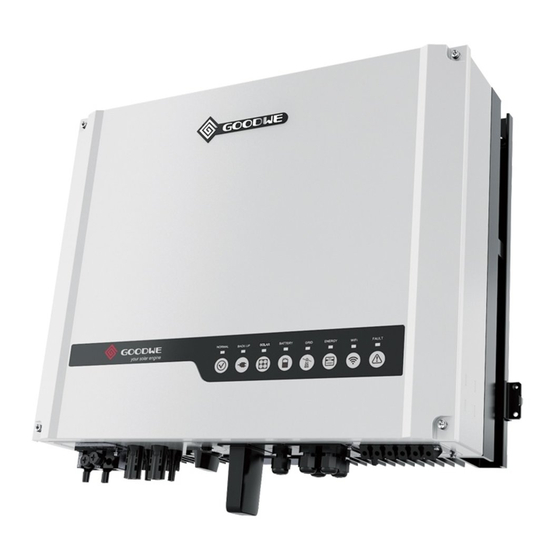
- Page 5 Turn the system ON: Procedure of turning system ON: Turn the PV firstly, following by battery, then ac grid after physical wiring completed. The inverter LED indicator lights will start to be ON. The indication of each LED is below: The same label is on left side of inverter.
- Page 6 Part 2: APP configuration Goodwe offers the free Ezmanage APP for set up the system, please download the APP from Apple store and Android shop. 2.1 Fristly, connect mobile&tablet to ‘solar-wifi’ on the device, password is 12345678 2.2 Then open the ‘ezmanage’...
- Page 7 2.8 Push ‘Next’ to select the battery type So far, Goodwe offered B-BOX2.5 – 10, four options, depends on the real battery bank. 2.9 Once selected the battery type, push the start button. Ezmanage will pump out the window to enquire whether restart the inverter for saving these settings.
- Page 8 Part 3: System Review To ensure Goodwe 5048D-ES is communicating with BYD Box and Goodwe ezmeter, there are two parts need to be checked. a. Meter Status Since finish part 1 & part 2, still connect the mobile to the solar wifi. Push the ‘Param’ on home page, push the ‘Grid’, the meter status should be ‘OK’.
- Page 9 Customer could use mobile to connect the solar-wifi, and open the ezmanage for instantaneous data monitoring on ezmanage home page. b. Cloud monitoring Customer can connect the inverter to local wifi, then register on Goodwe cloud for remote monitoring. The procedure is below: 4.1 Connect the mobile&tablet to Solar-WiFi still...
- Page 10 4.5 Select local wifi name 4.6 Type in the password (case sensitive) 4.7 Push ‘OK’ to save the setting Attention: Once the WiFi set up procedure has finished, the WiFi LED light on inverter will be steady ON.
- Page 11 Part 5: Cloud Account Registration As installer, please follow the step below to register account. 5.1.1 www.goodwe-power.com 5.1.2 Edit the station with basic info 5.1.3 Put the inverter info Just need S/N and Check Code (which is together on the label), keep Type and Description blank,...
- Page 12 5.1.4 Link this station to End User’s Visitor account by typing the End User’s Email. Then as installer, the account has been registered. As End User, once installer registered his account and follow the procedure to create this solar station, end user can register on portal as visitor. Then installer and end user can see the same station by using their own log in detail.
- Page 13 Part 6: Check List Task Check Ticket Physical Power connection □ PV polarity on DC part □ Battery physical connected □ AC cable connect on inverter □ (optional) if using back up, the back up neutral has been jumped together with grid neutral Data Cable connection □...


Need help?
Do you have a question about the 5048ES and is the answer not in the manual?
Questions and answers