Avaya 4620 User Manual
Avaya user guide telephone 5620/4620
Hide thumbs
Also See for 4620:
- User manual (92 pages) ,
- Frequently asked questions manual (32 pages) ,
- Quick reference manual (2 pages)
Table of Contents
Advertisement
Quick Links
Advertisement
Table of Contents
Troubleshooting

Related Manuals for Avaya 4620


Summary of Contents for Avaya 4620
- Page 1 IP Office 5620/4620 Phone User Guide Issue 2d (15 September 2005)
-
Page 2: Table Of Contents
Call Appearance Width ... 24 Visual Alerting ... 24 Function Keys ... 25 Overview of the Function Keys ... 25 Function Key Programming ... 26 Shorthand Programming Mode ... 27 4620/5620 Phone User Guide IP Office Page ii Issue 2d (15th September 2005) - Page 3 Accessing External WAP Websites ... 33 Web Navigation Controls... 34 Entering Data... 35 Management and Troubleshooting... 36 Overview... 36 Testing the Telephone's Lights and Display ... 36 Troubleshooting... 37 Index... 39 4620/5620 Phone User Guide Page iii IP Office Issue 2d (15th September 2005)
-
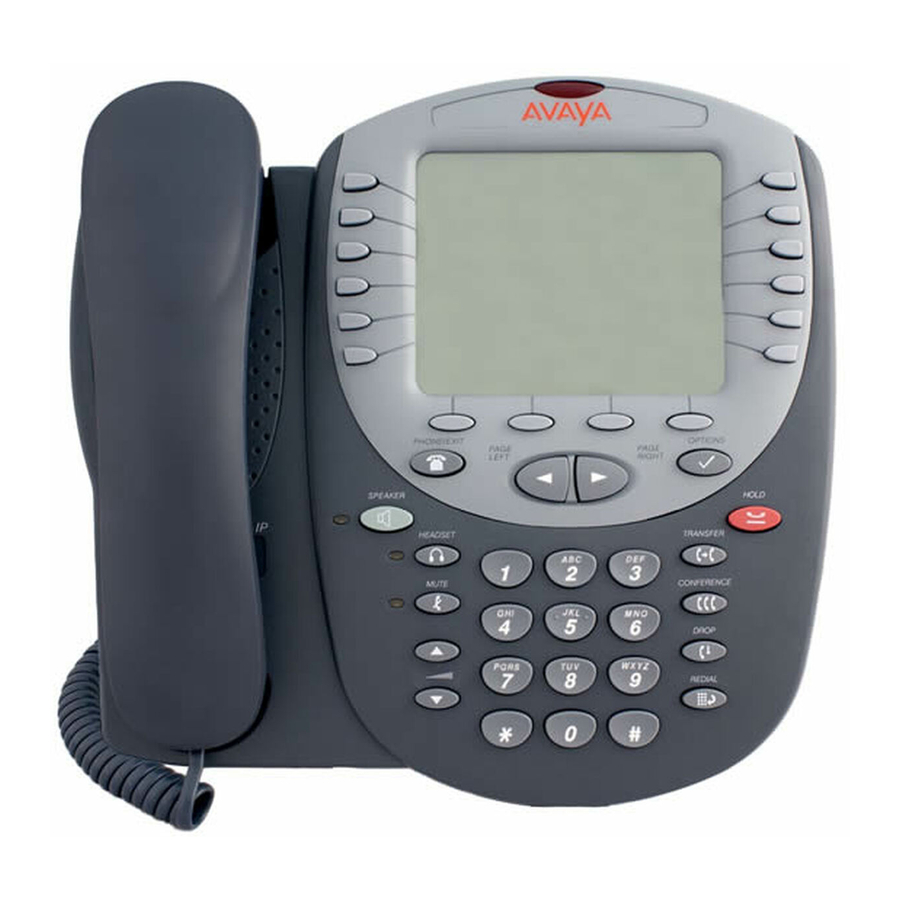
Page 4: The Telephone
The Telephone Overview This guide covers the use of the Avaya 5620 and 4620 telephone on Avaya IP Office telephone system. These two phones are physically similar, the key difference being that the 5620 is only supported on the IP Office where as the 4620 is supported on a range of Avaya phone systems. - Page 5 With a headset connected, changes audio control from the handset or speaker to the headset. The associated LED lights steadily when the headset is active. The headset jack socket is located on the base of the telephone underneath the front edge. Speaker and LED Indicator: Accesses the Speaker feature.
-
Page 6: Call Appearance Keys
• A Bridged Appearance A bridged appearance key matches the status and operation of the Call Appearance Key on a pre-defined colleague’s telephone. Hence, you can pick-up, make and receive calls on behalf of your colleague. • A Line Appearance An IP Office exchange line (but not IP lines) can be allocated to you such that the status of that line is displayed and you can use the line appearance key to make and receive calls. -
Page 7: Call Appearance Keys Icons
Connected: A symbol next to a call appearance key indicates that it is the currently connected call. The caller's telephone number (if available) is also shown. Pressing the adjacent call on hold. An H is also shown on the display. -
Page 8: Basic Call Handling
1. Replace the handset 2. Press Drop. You will hear dial tone, unless you are in ‘call center mode’ of working when you will then hear silence. 4620/5620 Phone User Guide IP Office button to use the speakerphone. Issue 2d (15th September 2005) -
Page 9: Headset Working
Access the Speed Dial List in your personal directory and initiate a call to a specific entry. See Dialing a Speed Dial Number. • When the call is answered, speak to the called party. 4620/5620 Phone User Guide IP Office Headset. The lamp beside the button is next to the flashing bell icon ( ):... -
Page 10: Speakerphone
2. The other party cannot hear you. The indicator next to the Mute button lights when Mute is active. 3. To reinstate two-way conversation, press 4620/5620 Phone User Guide IP Office buttons. The display bar at the top of the display Mute again. -
Page 11: Hold
To redial previously dialed number: 1. Press Redial. Use number, press the associated key. 4620/5620 Phone User Guide IP Office Line/Feature button on which the call is being held, or press the SpDial softkey. The Speed Dial screen is displayed. -
Page 12: Transfer
Transfer The Transfer feature lets you transfer a call from your telephone to another extension or outside number. Transferring a call to another telephone 1. With the call active (or with only one held call and no active calls), press the 2. -
Page 13: Speed Dials
3. When the speed dial required is shown on the screen, press the speed dial name. 4. Continue as per a normal call. 4620/5620 Phone User Guide IP Office key adjacent to an name, dials the speed dial number stored with that Page Right keys. -
Page 14: Adding A Speed Dial From The Call Log
4. Press the key next to the speed dial to delete. 5. Press Delete to confirm the deletion. Press 4620/5620 Phone User Guide IP Office Phone Exit to exit the current screen Page Right keys. Delete option is provided to remove the speed Phone Exit to exit the current screen Page Right keys. -
Page 15: Adding A New Speed Dial
3. The cursor, a | symbol, in initially in the empty name field. You can move between Name and Number entry by pressing the adjacent 4. Begin entering text using the telephone keypad. Each key is marked with the letters it provides. You may have to press the key more than once depending on the character you require. -
Page 16: Using The Call Log
Apart from using the call logs for information, you can turn a call log entry into a speed dial for future calls. You can also delete individual log entries or the all entries in a particular log. Note: Call log entries are lost whenever the telephone system or the individual telephone are reset. 4620/5620 Phone User Guide IP Office Log on the display. -
Page 17: To Access The Call Logs
3. The log entry details are shown. 4. Using Return key to return to the call log. 4620/5620 Phone User Guide IP Office Phone Exit to exit the current screen key under Missed, InAns or Outgo. -
Page 18: Making Calls From The Call Log
4. Press Call make the call. If the number shown is external but doesn't include the external dialing prefix used by your telephone system, go off-hook, dial the prefix and then press To Turn a Log Entry into a Speed Dial 1. -
Page 19: Changing Options
• Changing the width of displayed call appearances. • Allowing the Voice message light to flash when the telephone rings. • Disabling and re-enabling the Call Log. This chapter also covers how to verify the status of certain phone/server interactions. This information can be useful in troubleshooting problems or when discussing phone operation with your System Administrator. -
Page 20: View Ip Settings
View IP Settings Views of telephone and system information are available from this screen. A user normally does not need to view this information, however your System Administrator may ask you to report certain values from any of the status screens in the event of problems. -
Page 21: Logging Off
Hash (#). 3. The phone is now ready for use. Feature Button Labeling This action is currently not supported with the 4620 and 5620 phones on IP Office. 4620/5620 Phone User Guide IP Office Log Off. -
Page 22: Display Language Selection
Language options are: • English, Français, Italiano, Japanese (Katakana characters), Español, Deutsche, Nederlands, Português. Note: This does not alter your user language setting on the telephone system. 1. Press Option), 2. Press the key next to the language required. You are asked in the original language “Are you sure?”... -
Page 23: Application Options
2. Select Save. To restore the previous setting without changing it, press 3. After saving or canceling, the first Options Main screen displays. 4620/5620 Phone User Guide IP Office Applications Options and then select the Phone Screen on Calling Cancel. -
Page 24: Message Display Rate
1. Press the corresponding Call Appearance/Feature button. To toggle between No and Yes options. 2. Select Save. (To restore the previous setting without changing it, press 3. Upon saving or canceling, the first Options Main screen displays. 4620/5620 Phone User Guide IP Office Cancel. Cancel. Cancel.) -
Page 25: Function Keys
If the phone has been setup with either or both the Admin and Admin1 features assigned to display keys, you can select and program your own feature choices against other keys. See Function Key Programming. 4620/5620 Phone User Guide IP Office Soft Keys can be used to access a range of system features. The keys. -
Page 26: Function Key Programming
Function Key Programming If any one of the keys on the telephone is programmed with an Admin or Admin 1 feature, it allows you to program further features against other function keys. Both Admin and Admin1 are allocated to your... -
Page 27: Shorthand Programming Mode
The display then shows BUTTON PROGRAMMED! as above. • Press Keep • Press Delete 4620/5620 Phone User Guide IP Office Admin 1. See Display Key Programming. keys to move through the list of feature. key adjacent to its name. keys until Repla, Keep and Delet are shown along the right-hand to replace that existing function with the one just programmed. -
Page 28: Longhand Programming Mode
Caution: Do not select the slot used for the Admin function. Replacing this function will lock the phone for further programming until reset through the telephone system. 8. If the display slot is not already used, the display shows BUTTON PROGRAMMED!. -
Page 29: System Features
As well as your phones specific features, you can access a number of system features by dialing short codes. These instructions are for the system's default configuration. They assume that you are using the default feature codes. It also assumes that you have full access to all features and the public telephone network. Making Calls Internal Calls:... -
Page 30: Ip Office Issue 2D (15Th September
*13*N# to re-direct the calls back to your own extension, before you return to it. At your own extension: • *14*N# from your own extension. • *14*# to cancel either feature from your own extension. 4620/5620 Phone User Guide IP Office Page 30 Issue 2d (15th September 2005) -
Page 31: Do Not Disturb
1 to retrieve your mail. The System Administrator also specifies the reception number, to which the call is diverted if the caller dials 0, and your email address if your voicemail and email are integrated. 4620/5620 Phone User Guide IP Office Page 31... -
Page 32: Default Feature Codes
Voicemail Off *20*N# Set Hunt Group Night Service *21*N# Clear Hunt Group Night Service Toggle Calls Call Pick Up Any Call Pick Up Group 4620/5620 Phone User Guide IP Office *32*N# Call Pick Up Extension *33*N# Call Queue Hold Music *35*N#... -
Page 33: Web Browsing
WML (Wireless Markup Language). The phone supports WML1.2. If your telephone system has been setup with a default WAP website, the phone will display Pressing this key will display your systems default WAP website. The links and services on this site will control the WAP website and services you can access. -
Page 34: Web Navigation Controls
• Phone Icon: If the icon appears next to a link in the web page, it indicates that the link is a telephone number. Pressing the adjacent 4620/5620 Phone User Guide IP Office key to move up the page by one screen (six lines). -
Page 35: Entering Data
3. Begin entering text using the telephone keypad. Each key is marked with the letters it provides. You may have to press the key more than once depending on the character you require. -
Page 36: Management And Troubleshooting
Management and Troubleshooting Overview This chapter provides helpful information for: • Testing your telephone to be sure it is operating correctly. • Basic Troubleshooting; this chart provides the most common problems an end user might encounter and suggested resolutions. •... -
Page 37: Troubleshooting
• Phone does not activate when connected for the first time: Unless your System Administrator has already initialized your telephone, you may experience a delay of several minutes before it becomes operational. Upon plug-in, your telephone immediately begins downloading its operational software, its IP address, and any special features programmed by your System Administrator from the server to which it is connected. - Page 38 Your administrator must administer settings for the Enhanced Dialing feature beyond the defaults. OPTIONS: No Options other than "View IP Settings" display: Your administrator has turned off all user-settable options. 4620/5620 Phone User Guide IP Office Page 38 Issue 2d (15th September 2005)
-
Page 39: Index
Account Code Entry Busy On 32 BUTTON Acct 26 PROGRAMMED 27, AD 26 AD Suppress 26 Adding 4620/5620 Phone User Guide IP Office New Speed Dial Call Appearance 6, Pressing 13 24, 25, 30 Speed Dial 14 Call Appearance Keys... - Page 40 Expl 27 Display Expl 28 Call Timer 19 Extension 21 Individual Log External WAP Entry 17 Websites 4620/5620 Phone User Guide IP Office Accessing 33 Hold 7 External WAP Hold 11 Websites 33 Hold icon 12 Extn Login 32 Hold Music 32...
- Page 41 Phone Exit 13, 14, NOTE 20 15, 17, 33 Num 35 Phone Icon 34 Number Phone Interface 20 Phone Screen 4620/5620 Phone User Guide IP Office select 23 Pressing 28 Phone Screen 23 Pressing 29 Phone Screen on Pressing 37...
- Page 42 Shows 37 Stands Slow 24 TEST 36, 37 Soft Hold icon Stands 36 changes 12 Stands 37 Soft Hold icon 12 4620/5620 Phone User Guide IP Office speakerphone 8 Step Use 8 proceed 12 Use 17 Step 12 Use 21...
- Page 43 Wireless Markup display 37 Language 33 Website 33 WML 33 Website 37 WML 1.2 33 WML1.2. 33 4620/5620 Phone User Guide IP Office Yes 24 Yes 33 Your Own Features set 23, 24, 33 Programming 25 Yes 22 Your Own Features...
-
Page 44: Ip Office Issue 2D (15Th September
Performance figures and data quoted in this document are typical, and must be specifically confirmed in writing by Avaya before they become applicable to any particular order or contract. The company reserves the right to make alterations or amendments to the detailed specifications at its discretion.
Need help?
Do you have a question about the 4620 and is the answer not in the manual?
Questions and answers