Table of Contents
Advertisement
Quick Links
2009-2014 Yamaha Zuma 125
I n s t a l l a t i o n I n s t r u c t i o n s
PLEASE READ ALL DIRECTIONS BEFORE STARTING INSTALLATION
IFC22901.01
www.powercommander.com
2191 Mendenhall Drive North Las Vegas, NV 89081 (800) 992-4993 www.powercommander.com
Parts List
1
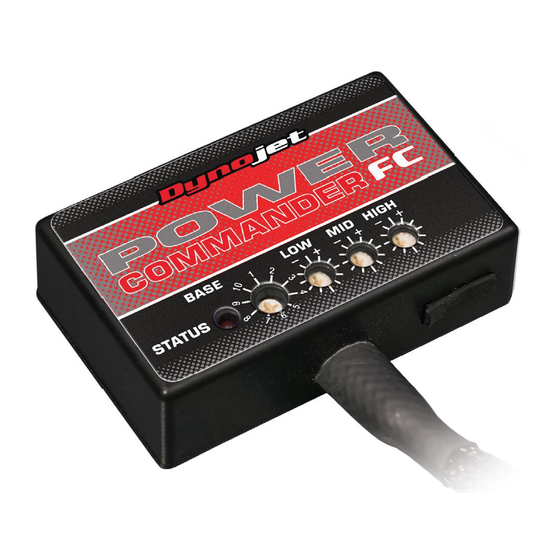
Power Commander FC
1
USB Cable
1
Installation Guide
2
Dynojet Decals
2
Velcro
1
Alcohol swab
1
Posi-tap
THE IGNITION MUST BE TURNED
OFF BEFORE INSTALLATION!
YOU CAN ALSO DOWNLOAD THE PCFC
CONTROL CENTER SOFTWARE AND
LATEST MAPS FROM OUR WEB SITE AT:
www.powercommander.com
2009-2014 Yamaha Zuma 125 - 1
Advertisement
Table of Contents

Summary of Contents for Dynojet Power Commander FC
-
Page 1: Parts List
Parts List Power Commander FC USB Cable 2009-2014 Yamaha Zuma 125 Installation Guide Dynojet Decals I n s t a l l a t i o n I n s t r u c t i o n s Velcro Alcohol swab Posi-tap THE IGNITION MUST BE TURNED... - Page 2 SELECTING THE MAP POSITION The Dynojet Power Commander Fuel Controller (PCFC) comes loaded with up to ten maps. Using a #1 Phillips screwdriver, turn the map select dial to toggle between the loaded maps. Refer to the map position table for the maps included in your PCFC. USING THE RPM RANGE DIALS The Low, Mid, and High RPM Dials refer to the RPM range, in thirds, of your vehicle. Each dial allows +/- 10% fuel adjustment on top of what fuel changes are done in the STATUS Light map. With the dial facing straight up, there is no additional fuel change. For example, if your vehicle revs to 6000 RPM: • The low RPM dial will adjust 0-2000 RPM • The mid RPM dial will adjust 2001-4000 RPM MAP Select • The high RPM dial will adjust 4001-6000 RPM LOW RPM Dial USING PCFC CONTROL CENTER USB Port MID RPM Dial Take your tuning to the next level with the PCFC Control Center software. HIGH RPM Dial Using your web browser, navigate to www.powercommander.com.
- Page 3 FIG.A Remove the battery cover (Fig. A). FIG.B Remove the 2 screws shown in Figure B. FIG.C Remove the engine cover by removing the 1 screw in the front and the 2 push tabs (1 on either side) (Fig.C). IFC22901.01 www.powercommander.com 2009-2014 Yamaha Zuma 125 - 3...
- Page 4 FIG.D Ground wire Install the PCFC next to the battery (Fig. D). Attach the ground wire from the PCFC to the negative side of the battery. Route the PCFC harness towards the engine following the stock harness. FIG.E From the right side of the bike unplug the stock wiring harness (Fig. E). The BLACK 4 pin connector is from the O2 sensor. The BLACK 2 pin connector is from the injector. Plug the harness from the PCFC in-line of the stock wiring harness. FIG.F Locate the Throttle Position Sensor on the left side of the throttle body (Fig. F) 10 Unplug the TPS from the throttle body. This allows access to the harness. IFC22901.01 www.powercommander.com 2009-2014 Yamaha Zuma 125 - 4...
- Page 5 FIG.G 11 Using the supplied posi-tap attach the GREY wire from the PCFC to the YELLOW wire of the stock TPS harness (Fig. G). 12 Connect the TPS harness back onto the throttle body. 13 Reinstall bodywork. FIG.H The PCFC for this model controls the stock closed loop area. This area is represented by the highlighted cells shown in Figure H. The PCFC is designed to achieve a target AFR of 13.6:1. To use this PCFC you must retain your stock O2 sensor. It is not recommended to alter the values in the highlighted area unless instructed to do so by a Dynojet technician. IFC22901.01 www.powercommander.com 2009-2014 Yamaha Zuma 125 - 5...


Need help?
Do you have a question about the Power Commander FC and is the answer not in the manual?
Questions and answers