
Related Manuals for Jadever JCL-3K


Summary of Contents for Jadever JCL-3K
-
Page 1: Table Of Contents
(II) Content 1. Introduction . .1 2. Precaution ........1 3. Before Using the Product 3-1 Unpacking and Checking ...1 3-2 Installing Components. 3-3 Leveling the Scale ..1 4. Product Introduction 4-1 Specifications & General Features 4-2 Front Panel 4-2-1 Display ..3 4-2-2 Keyboard... -
Page 2: Introduction
(II) 1. Introduction Thank you for deciding to purchase a JCL counting scale from Jadever. This goods has the excellent performance and splendid properties under severe quality management. It is recommended to read this manual in full before using it for good function application. -
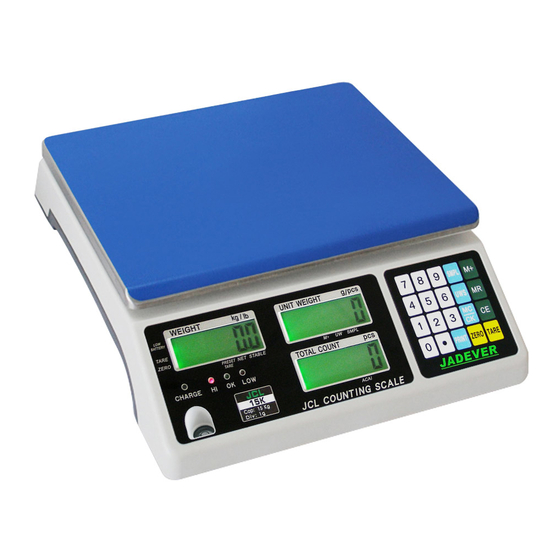
Page 3: Product Introduction
Stainless Steel weighing pan 6) On/Off Switch 7) Two-stage Switch 8) Power socket Transport protection screw Plug buckle 4-1 Specifications& General Features Specifications Model JCL-1.5K JCL-3K JCL-6K JCL-7.5K JCL-15K JCL-30K Capacity(kg) Weighing units Kg/g/lb Display 3 backlit LCD displays (6/5/6 Digits) Pan size 294X228X13.5mm... -
Page 4: Front Panel
· Low battery and charging status indication · Accumulation of weight and quantity (max 99 pieces) · Single point and linear calibration available · Auto shut off for power saving 4-2 Front Panel 4-2-1 Display Low battery indication Tare or Preset Tare indication Center of Zero indication, The zeroing range is ±2﹪of weighing capacity. -
Page 5: Keyboard
(II) recalculated. 11) “M+” Symbol “ ” points at “M+” when scale is in accumulation mode. 12) “UW” Under entering a known unit weight mode, Symbol “ ” points at “UW” when entered unit weight is lower than 4/5 of scale division. Unit weight is too small for ensuring accurate quantity calculations. -
Page 6: Power Supply
(II) one when inputting the figures. ZERO/ESC key Zeros the display (within 2% of max.capacity) or cancels Tare action. Exit from the setting or without saving. Recalls and displays the total Accumulation data (weight, total count and number of weightments ) and the first 10 records in details. Circle the choices in the setting. -
Page 7: Parameters
(II) TARE/ 2) Press key to circle the parameters G N/SET 3) Press key to enter the selected parameter. TARE/ 4) Press key to circle the items of present parameter. M+/SAVE 5) Press key to save after changing and return to parameters choosing. While ZERO/ESC Press key to return without saving. - Page 8 CX: CX large screen display (version 0.02) EXCEL: Work with the function of “Use Serial Keys” in Windows in outputting the data to Excel. Reference user manual: http://www.jadever.com.cn/Download.aspx U.KEY: U.KEY connector works with PC to send the weighing data to computer (WinXP/Win7) in form of Excel and so on.
-
Page 9: Single And Multi-Point Calibration
(II) SET11 printing format setting: prt01~prt03 SET12 filtering setting: 1, 2, 3, 4 1:Suitable in very stable environment with the quickest weighing 2:Suitable in the common environment 3:Suitable in a bit shaking environment 4:Suitable in the very shaking environment with the slowest weighing SET13 zeroing or taring setting: stable, auto, always stable :Taring or zeroing works when stable only... -
Page 10: Operation
(II) TARE/ press to start zero point calibration. 3. Wait till the window displays the first calibration value. Note: The first calibration value is default. If the value has been changed, the default value is 1/3 of full load. G N/SET If you need to change the value, do as the following: Press key to enter the TARE/... -
Page 11: Checking Function
(II) That is the weight of container. TARE/ ZERO/ESC. 4) To cancel tare action, clear the pan and press Preset Tare Method 1: TARE/ 1) Press for three seconds, it enters to preset tare setting. TARE/ Preset-tare value setting: Press M-/HI to shift and key PRINT/LO... -
Page 12: Upper & Lower Quantity Limit Checking
(II) M-/HI 1) Long press key under the weighing mode. The number leftmost is blinking. TARE/ M-/HI PRINT/LO Press key to shift and key to modify the value (or via numeric keys) G N/SET 3) Press key to start or close weighing checking M+/SAVE ZERO/ESC 4) Press key... -
Page 13: Basic Counting
(II) M+/SAVE ZERO/ESC 4) Press key to confirm and save. Press key to return to weighing mode without saving. Place the sample on the weighing pan. HI indication appears, when the item on the weighing pan is greater than the upper limit OK indication appears, when the item on the weighing pan is between upper and lower limits. -
Page 14: Accumulation, Accumulation Display And Accumulation Clear
(II) Note: ●The larger the sample size, the more accurate unit weight. ●Symbol “ ” points at “SMPL” when calculated unit weight is lower than 4/5 of scale division or the quantity of sample is less than 10 pieces. 2) Remove the samples and put the load on, the scale begins to count. M-/HI 3) Press key to exit and return to the weighing mode. -
Page 15: Initialization Of The Scale To Printer (Optional)
(II) Note: Maximum is 99 pieces. It is able to calculate the second deal when returning to zero after the first one under the condition of more than (or equal to) 20d with stability. Accumulation display 1) Press key to displays the total accumulation data (weight, count and number of weighments) TARE/ 2) Press key... -
Page 16: 7-7.The Control From Pc To Scale (Optional)
(II) When UNSUP appears, it means the printer needn’t initialization. Press key ZERO/ESC to return to the printer choosing. It needs to be initialized when init? M+/SAVE ZERO/ESC appears. Press key to start initialization or press key Step 3 return to the printer choosing without initialization. It displays ok when initialization is finished and shows the type of printer after one second. -
Page 17: Troubleshooting And Error Message
(II) 9. Troubleshooting and Error message Error Problem Solution Message The item on the pan should be within 2% of Exceed the zero range ERR0 full load. Model setting error. Resolution Adjust or reset the capacity first then adjust ERR1 should be within 300-300000 resolution 1.Remove the obstacle article under the pan... - Page 18 (II) Appendix 1 printing format Prt-01 Prt-02 2004-11-25 2004-11-25 12:27:58 12:28:26 1.000 kg 10 pcs Prt-03 Prt-04 2004-11-25 12:28:26 G.W.:+ 10000 g N.W.: 0.500 kg U.W.: 10.000g/pcs U.W.: 0.0500 kg/pcs Total: 1000pcs Total: 10 pcs Prt-05 1.000 kg ST GW + 100.00 1.000 kg BIRCH/GODEX/ZEBRA /GP printing format...
- Page 19 (II) Prt-03 Prt-03 (CK printing in Chinese) (printing in English) 2010-11-12 2010-11-12 13:14:15 13:14:15 N.W.: 净重: 0.500 kg 0.500 kg U.W.: 单重: 0.0500 kg/pcs 0.0500 kg/pcs Total: 总重: 10 pcs 10 pcs When the window of unit weight shows , the printing format of accumulation display is as follows 2010.01.01 06:31:54...
- Page 20 (II) Note: pls install usb driver first, if you use usb wire. 2. Parameter settings in scale: "PERI" = "EXCEL" (external device) "BAUD" = "2400"/"4800"/"9600" (baud rate) "PRT.M" = "KEY"/"STABLE" (printing model) "PRT.F" = "PRT.F01" (printing format) Enable the function of “Use Serial Keys” in the computer Set Windows XP as a example: 1.
- Page 21 (II) Export weighing data to Excel 1. Open Excel. 2. Press [Print], then Excel will show Date and Weighing data. 3. Use “Format Cells” to beautify Excel:...
-
Page 22: Troubleshooting
(II) Troubleshooting 1. Enable “Fast User Switching” function will disable “Use Serial Keys” in the computer. Note: Start->"Control Panel "->"User Account"-> “Fast User Switching” function. 2. The data export requires only “GND+RX+TX” three lines, while some wire include nine lines (including usb 9-25pin adapter), which may cause abnormal function. Note: cut other useless line to check if these three lines work well. - Page 23 (II) 2.ERP System:...
Need help?
Do you have a question about the JCL-3K and is the answer not in the manual?
Questions and answers