Table of Contents
Advertisement
Quick Links
INSTRUCTION
MANUAL
2MP Flexible Intensifier Technology
TVI Motorized Zoom Focus Camera
Speco Technologies is constantly developing product improvements.
We reserve the right to modify product design and specifications without notice and without incurring any obligation.
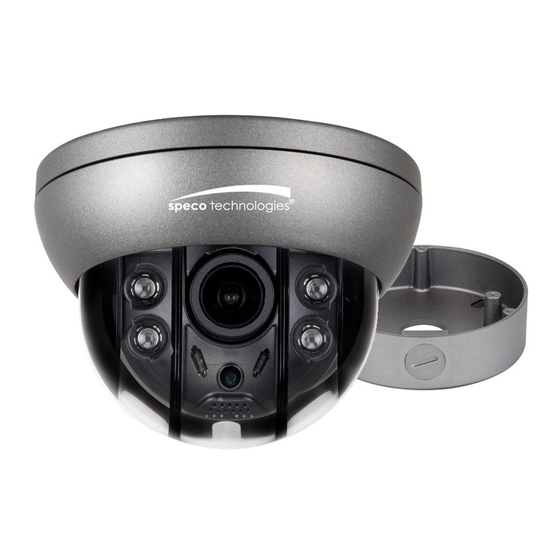
HTFB2TM
(Bullet Camera)
HTFD2TM
(Dome Camera)
Rev. 02/01/2017
Advertisement
Table of Contents

Related Manuals for Speco HTFB2TM


Summary of Contents for Speco HTFB2TM
- Page 1 2MP Flexible Intensifier Technology TVI Motorized Zoom Focus Camera HTFB2TM (Bullet Camera) HTFD2TM (Dome Camera) Speco Technologies is constantly developing product improvements. We reserve the right to modify product design and specifications without notice and without incurring any obligation. Rev. 02/01/2017...
-
Page 2: Table Of Contents
Contents Contents ............2 ◑ Precautions ..........3, 4 ◑ Safety Instructions ........5 ◑ Package Contents ........6 ◑ Camera Installation ........7-10 ◑ Lens Adjustment ......... 11 ◑ Specifications ..........12,13 ◑ Camera Dimension ........14 ◑ Features ............15 ◑... -
Page 3: Precautions
Precautions Do not install the camera in Do not install the camera under Do not touch the front lens of the extreme temperature conditions. unstable lighting conditions. camera. Only use the camera under conditions Severe lighting change or flicker can This is one of the most important parts of where temperatures are between cause the camera to work improperly. - Page 4 CAUTION RISK OF ELECTRIC SHOCK DO NOT OPEN CAUTION:TO REDUCE THE RISK OF ELECTRIC SHOCK DO NOT REMOVE COVER(OR BACK). NO USER-SERVICEABLE PARTS INSIDE. REFER SERVICING TO QUALIFIED SERVICE PERSONNEL. ISO14001 The lightning flash with an arrowhead symbol, within an equilateral triangle is intended to alert the user to the presence of uninsulated dangerous voltage within the product's enclosure that may be of sufficient magnitude to constitute a risk of electric shock to persons.
-
Page 5: Safety Instructions
Safety Instructions Precautions for use ◑ This camera should be installed by qualified personnel only ◑ There are no user serviceable parts inside ◑ Do not disassemble this camera other than to make initial adjustments ◑ Use a UL approved regulated 24 volt AC or 12 volt DC power supply ◑... -
Page 6: Package Contents
Package Contents Please make sure that the following items are included in the Package: 1) HTFB2TM • 1 Video Test Connector, Power Jack • 1 Focus Adjustment • 1 Bracket Base • 1 Wrench • Set Screw - 4 Tapping Screws 4x25... -
Page 7: Camera Installation
CAMERA INSTALLATION CAMERA INSTALLATION CONNECT POWER CABLE 1. WHEN USING 12 VOLTS DC (constant voltage 500mA) P o w e r In p u t :R E D C e n te r : (+) D C 12V P owe r S upply 2. - Page 8 CAMERA INSTALLATION Compatibility 1) HTFB2TM CVCJBB INTJBS INTCM 8.56” 3.90” 4.80” 2.95” 2) HTFD2TM INTWM CVCJBD INTCM INTPM - 8 -...
- Page 9 CAMERA INSTALLATION 1. HTFB2TM WALL SCREW TS T1, 4X25, TH, SUS, 4EA BRACKET ASSYEMBLY SCREW M5x10, HEXAGON SOCKET , SUS, BK, 4EA - 9 -...
-
Page 10: Camera Installation
CAMERA INSTALLATION 2. HTFD2TM LED VANDAL DOME MACHINE SCREW 4X15, 3EA COVER - 10 -... -
Page 11: Lens Adjustment
LENS ADJUSTMENT 1. HTFB2TM Open the cap VIDEO TEST SET UP LED LEVEL - 11 -... -
Page 12: Specifications
2MP FIT TVI Motorized Zoom Focus Camera 2.8-12mm MFZ Lens ■ HTFB2TM (2.8-12mm) SPECIFICATIONS IUGC3UN Image Sensor 1/2.9 Inch SONY 2Mega CMOS Sensor Pixels - total 2001 (H) X 1121 (V) Pixels - Effective 1985 (H) X 1105 (V) Resolution... -
Page 13: Specifications
2MP FIT TVI Motorized Zoom Focus Camera 2.8-12mm MFZ Lens ■ HTFD2TM (2.8-12mm) SPECIFICATIONS IUGE3UN Image Sensor 1/2.9 Inch SONY 2Mega CMOS Sensor Pixels - total 2001 (H) X 1121 (V) Pixels - Effective 1985 (H) X 1105 (V) Resolution 1920X1080(1080p@30f / 1080p@25f) 1280X720_CROP(720p@60f / 720p@50f) 1280X720_CROP(720p@30f / 720p@25f) -
Page 14: Camera Dimension
CAMERA DIMENSION 1) HTFB2TM 8.56” 3.90” 4.80” 2.95” 2) HTFD2TM 5.12” 3.94” 5.12” PHOTO SENSOR HEATER HI-POWER LED - 14 - LENS CASE... -
Page 15: Features
TV system is switchable 'NTSC' or 'PAL' with built-in OSD. Intelligent Function ● An extraordinary technology that enables Speco Technologies TVI to become the ultimate solution by providing intelligent features based on motion detection. It also strengthens crime prevention and detection. -
Page 16: Osd Menu Details
H-POS 0~20 V-POS 0~20 H-SIZE 0~20 V-SIZE 0~20 RETURN WEIGHT LOW, MIDDLE, HIGH RETURN 5. SPECO DNR OFF, LOW, MIDDLE, HIGH 6. DAY&NIGHT AUTO SMART IR. 0~20 EXTERN SW HIGH, LOW DELAY LOW, MIDDLE, HIGH IR LED ON / OFF... - Page 17 How to Set Up the camera menu ● Setup Menu MENU 7. IMAGE LEVEL LOW, MIDDLE, HIGH RETURN PRIVACY ZONE NUM 0~15 ZOME DISP ON / OFF H-POS 0~60 V-POS 0~34 H-SIZE 0~60 V-SIZE 0~34 Y LEVEL 0~20 CB LEVEL 0~20 CR LEVEL 0~20...
-
Page 18: Menu Set Up
Menu Set Up Menu items can be selected by using the OSD buttons of the camera. 1. PRESET SPECO TECH 1. PRESET INDOOR 2.MAIN SETUP 3.EXIT 1-1. Preset : INDOOR / OUTDOOR / LOW LIGHT / HALLWAY / LOBBY(WDR) / ELEVATOR. - Page 19 1. Move the triangular indicator to 2MOTOR using the Up and Down buttons on the Set Up menu screen. 2. Select the desired lens type by pressing the Left of Right button. MENU 1.2MOTOR AUTO 2.EXPOSURE 3.WHITE BAL AUTO 4.BACKLIGHT 5.SPECO DNR MIDDLE 6.DAY&NIGHT AUTO 7.IMAGE 8.MOTION 9.SYSTEM 10.EXIT - 19 -...
- Page 20 ◆ INITIAL : If you press OSD button 3~4 seconds, Lens Initializing start. EXPOSURE 1. On the Set Up menu, Select EXPOSURE by using the Up or Down button. MENU 1.2MOTOR 2.EXPOSURE 3.WHITE BAL AUTO 4.BACKLIGHT 5.SPECO DNR MIDDLE 6.DAY&NIGHT AUTO 7.IMAGE 8.MOTION 9.SYSTEM 10.EXIT - 20 -...
- Page 21 2. Select the desired shutter mode by pressing the Left or Right button. 2. EXPOSURE BRIGHTNESS IIIIIIIIIIIIIIIIIII| SHUTTER AUTO SENS-UP 20 IIIIIIIIIIIIIIIIIII| RETURN ◆ BRIGHTNESS : The brightness can be adjusted. The brightness control range is 1~20. ◆ SHUTTER : DC lens is launched with the setting of 1/30 and the manual lens is launched with the setting of Auto shutter, but the shutter speed can be adjusted from 1/30 to 1/30,000.
-
Page 22: White Balance
1. Move the triangular indicator to WHITE BAL on the SETUP menu screen using the Up and Down button. 2. Select the desired mode by using the left or Right button. MENU 1.2MOTOR 2.EXPOSURE 3.WHITE BAL AUTO 4.BACKLIGHT 5.SPECO DNR MIDDLE 6.DAY&NIGHT AUTO 7.IMAGE 8.MOTION 9.SYSTEM 10.EXIT ◆... - Page 23 1. Move the triangular indicator to BACKLIGHT on the SETUP menu screen using the Up and Down button. 2. Select the desired mode by using the left or Right button. MENU 1.2MOTOR 2.EXPOSURE 3.WHITE BAL AUTO 4.BACKLIGHT 5.SPECO DNR MIDDLE 6.DAY&NIGHT AUTO 7.IMAGE 8.MOTION 9.SYSTEM 10.EXIT ◆...
- Page 24 LEVEL 10 IIIIIIIIIIIIIIIIIII| COLOR RETURN ◆ BLC : This function is used to counterbalance the screen image by increasing the brightness so that a subject which appears dark due to a strong backlight can be displayed in more detail. If you select BLC, a submenu appears where you can make finer adjustments.
- Page 25 You can set different levels here. 1. Move the triangular indicator to SPECO DNR by useing the Up and Down button. 2. Select the mode to use by pressing the left or Right button and OFF/LOW/MIDDLE/HIGH level selectable.
- Page 26 - IR LED : ANTI SAT ON/OFF Function. - IR ADYUST : Adjust LED brightness(1~10). ◆ INTENSIFIER : Only color IMAGE When selecting, the following submenu will appear. MENU 1.2MOTOR 2.EXPOSURE 3.WHITE BAL AUTO 4.BACKLIGHT 5.SPECO DNR MIDDLE 6.DAY&NIGHT AUTO 7.IMAGE 8.MOTION 9.SYSTEM 10.EXIT - 26 -...
- Page 27 Here you can optimise the image quality by adjusting different options. 7. IMAGE SHARPNESS 11 IIIIIIIIIIIIIIIIIII| GAMMA COLOR GAIN 13 IIIIIIIIIIIIIIIIIII| MIRROR FLIP DEFOG PRIVACY RETURN ◆ SHARPNESS [1 ~ 20] : Adjusts the image sharpness. If the level goes up excessively, it may affect the video image and generate a noise.
- Page 28 This function is used to detect moving objects in the monitored area. When choosing ON, the following submenu will appear where you can adjust the settings for the MOTION function. MENU 1.2MOTOR 2.EXPOSURE 3.WHITE BAL AUTO 4.BACKLIGHT 5.SPECO DNR MIDDLE 6.DAY&NIGHT AUTO 7.IMAGE 8.MOTION 9.SYSTEM 10.EXIT...
- Page 29 1.When the SETUP menu is displayed, select SYSTEM using the Up and Down button. 2. Select one of the mode using the Up and Down button. MENU 1.2MOTOR 2.EXPOSURE 3.WHITE BAL AUTO 4.BACKLIGHT 5.SPECO DNR MIDDLE 6.DAY&NIGHT AUTO 7.IMAGE 8.MOTION 9.SYSTEM 10.EXIT...
- Page 30 9.SYSTEM COM. IMAGE RANGE USER OUTPUT MODE 1080_30P COLOR SPACE HD-Cbcr FRAME RATE 30 FPS CVBS NTSC LANGUAGE COLORBAR RESET RETURN ◆ COM. : This menu id used for RS-485 communication. Users are able to select 'CAM ID(0~255)' and 'BAU DRATE(2400/4800/9600/57600/115200).
-
Page 31: Trouble Shooting
Trouble Shooting PROBLEM POSSIBLE CAUSE Nothing appears on ☞ Check the power cable, power supply output and video the screen. connection between the camera and monitor. ☞ Are the camera lens or the lens glass dirty? Clean the lens / glass with a soft clean cloth. The image on the ☞... - Page 36 200 New Highway Amityville, NY 11701 631-957-8700 1 800 645 5516 www.specotech.com...
Need help?
Do you have a question about the HTFB2TM and is the answer not in the manual?
Questions and answers