Speco HT-INTB8 User Manual
Intensifier series cameras
Hide thumbs
Also See for HT-INTB8:
- User manual (40 pages) ,
- Instruction manual (32 pages) ,
- Specification sheet (2 pages)
Table of Contents
Advertisement
Intensifier™ Series
Cameras
HTINTB8/9/10
Please read this manual throughly before operation and keep
it handy for further reference.
Advertisement
Table of Contents

Related Manuals for Speco HT-INTB8


Summary of Contents for Speco HT-INTB8
- Page 1 Intensifier™ Series Cameras HTINTB8/9/10 Please read this manual throughly before operation and keep it handy for further reference.
- Page 3 Package Contents Precautions O S D Menu Operating Your Camera MENU SET UP LENS SET UP SHUTTER SPEED WHITE BAL. INTENSIFIER NEXT CAMERA TITLE C O L O R S Y N C MOTION DET. PRIVACY REVERSE DETAIL Troubleshooting Specification Camera Set Up How to Install Warranty...
-
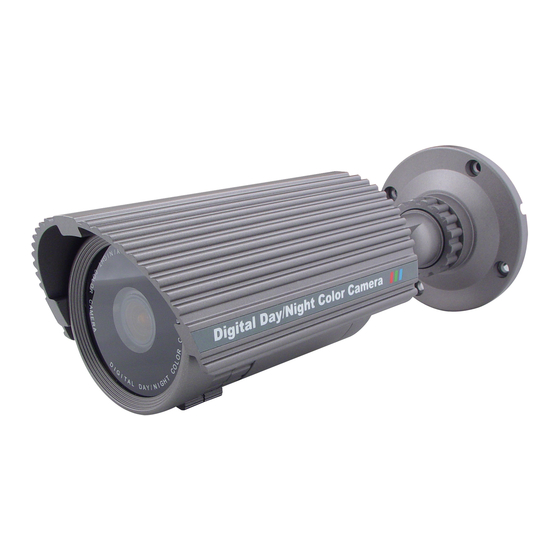
Page 4: Package Contents
PACKAGE CONTENTS Please make up sure that the following items are included in the package: HT - INTB CAMERA HT - INTB8 CAMERA SUNSHIELD MOUNTING SCREW MOUNTING BASE L - WRENCH USER'S MANUAL VIDEO TEST CABLE POWER PIGTAIL... - Page 5 PRECAUTIONS TO PREVENT A FIRE OR ELECTRONICAL HAZARD PLEASE USE PROPER POWER CABLE INSTALLATION SHOULD BE PERFORMED BY QUALIFIED PERSONNEL PLEASE USE A UL APPROVED REGULATED 24 VOLT AC OR 12 VOLT DC POWER SUPPLY PLEASE USE APPROPRIATE LOW VOLTAGE POWER CABLE TO PREVENT FIRE OR ELECTRICAL SHOCK.
-
Page 6: Osd Menu
● OFF ● F/L ● MANUAL WHITE BALANCE ● ATW ● AWC ● MANUAL SLC - ( Speco Light Compensation ) ● OFF ● LOW ● MIDDLE ● HIGH AUTO GAIN ● OFF ● LOW ● MIDDLE ● HIGH REDUCE NOISE ●... -
Page 7: Menu Set Up
UP or Down button. Select LENS TYPE desired SHUTTER SPEED WHITE BAL AUTO GAIN REDUCE NOISE INTENSIFIER NEXT PAGE EXIT MENU SET UP SPECO TECH DC IRIS MANUAL HIGH ----- ----- SPECO TECH MANUAL MANUAL HIGH ----- -----... - Page 8 1. Move the arrow indicator to " LENS " by UP or Down button on the SETUP menu. LENS TYPE SHUTTER SPEED WHITE BAL AUTO GAIN REDUCE NOISE INTENSIFIER NEXT PAGE EXIT arrow to desired feature SPECO TECH MANUAL HIGH ----- ----- MANUAL : Manual Lens...
- Page 9 You can control the brightness when DC is selected, Brightness control range will be 1~70 BRIGHTNESS Press Set to Return CAUTION Color mode is not available when AGC OFF SPECO TECH DC IRIS HIGH ----- ----- DC / VIDEO : DC Auto IRIS Lens...
- Page 10 WHITE BAL AUTO GAIN REDUCE NOISE INTENSIFIER NEXT PAGE EXIT FLK (1/100):Flicker mode LENS TYPE SHUTTER SPEED WHITE BAL AUTO GAIN REDUCE NOISE INTENSIFIER NEXT PAGE EXIT SPECO TECH DC LENS HIGH ----- ----- SPECO TECH MANUAL MANUAL HIGH ----- -----...
- Page 11 You can select from " 1/60 " to " 1/200,000" sec LENS TYPE SHUTTER SPEED WHITE BAL AUTO GAIN REDUCE NOISE INTENSIFIER NEXT PAGE EXIT MANUAL Press SET to Return SPECO TECH MANUAL MANUAL HIGH ----- ----- SHUTTER TYPE 1/60...
- Page 12 Press SET to Return ③ When completed, press " SET " CAUTION CAUTION Avoid pointing the camera directly at a fluorescent lamp. When the SUTTER menu is set to FLK mode, the INTENSIFIER will not work. SPECO TECH MANUAL HIGH ----- ----- Brightness...
- Page 13 BLC( Back Light ) 3) SLC ( Speco Light Compensation ) A built - in SR chip provides intelligent light level control to overcome severe Backlight conditions. ① Press the SET button to display the SETUP menu and move the arrow indicator to "...
- Page 14 " SLC " by the UP or DOWN button. ② SET " SLC " to desired mode by the LEFT or RIGHT button. LENS TYPE SHUTTER SPEED WHITE BAL AUTO GAIN REDUCE NOISE INTENSIFIER NEXT PAGE EXIT MIDDLE SPECO TECH HIGH ----- ----- HIGH...
- Page 15 In order to obtain the best result, press the set button while the camera focuses on the white paper. If the environment including the light source is changed, you have to adjust the white balance again. SPECO TECH HIGH -----...
- Page 16 WHITE BAL. MANUAL : To fine adjust, select the manual mode. You can increase the red or blue factor while monitoring the difference on the screen. Set the "MANUAL" mode and press the SET button. Increase or decrease the value for RED(R-Gain) and BLUE(B-Gain), watching the color of the picture and press the SET button when you obtain the best color.
- Page 17 HIGH : High reduction of the noise CAUTION If you change the "GAIN" menu from AGC-L to AGC-H, sensitivity is increased as well as noise on the screen. When the selected "GAIN" menu is OFF, REDUCE NOISE will not work. SPECO TECH HIGH -----...
- Page 18 2X ~ X128. Increasing the amount of intensification results in brighter pictures under low light conditions, and may increase image lag. Increasing the amount of intensification may cause image noise which is to be expected as a normal condition. SPECO TECH HIGH...
- Page 19 ① Press the SET button to display the SETUP menu and move the arrow indicator to " NEXT PAGE " by the UP or DOWN button. ② SET " NEXT PAGE " to desired mode by the LEFT or RIGHT button. SPECO TECH LENS TYPE SHUTTER TYPE...
- Page 20 CAMERA TITLE CAMERA TITLE DAY / NIGHT SYNC MOTION PRIVACY REVERSE DETAIL DEFAULT PAGE 1 ③ Press SET button to access the SETUP mode. ④ You can enter up to 15 characters. Ⓐ Move the cursor to character-enter location by using LEFT or RIGHT button.
- Page 21 CAMERA TITLE ⓓ Repeat above steps until you creat the full name you want. ⓔ Select the position at which the CAMERA TITLE will be located on the screen. - Move the cursor to "POS" and press SET button. - Select the position by using the 4-directional buttons, then press the SET button to confirm the position.
- Page 22 C O L O R 2) COLOR ① Press the SET button to display the SETUP menu and move the arrow indicator to " COLOR " by the UP or DOWN button. ② SET " COLOR " to desired mode by the LEFT or RIGHT button. CAMERA TITLE DAY / NIGHT SYNC...
- Page 23 S Y N C 3) SYNC ① Press the SET button to display the SETUP menu and move the arrow indicator to " SYNC " by the UP or DOWN button. ② SET to desired mode by the LEFT or RIGHT button. CAMERA TITLE DAY / NIGHT SYNC...
- Page 24 MOTION DETECTION 4) Whenever your camera detects motion, The words "motion detected" will appear on the screen. ① Press the SET button to display the SETUP menu and move the arrow indicator to " MOTION " by the UP or DOWN button. ②...
- Page 25 MOTION DETECTION OFF : Deactivation ON : Activated - Press the SET button. - Move the arrow indicator to " AREA SET " using UP and DOWN button. And then press the SET button. - Set the areas you want to observe. AREA SEL AREA STATE DOWN...
- Page 26 PRIVACY 5) PRIVACY: To make an area that you want to be private. ① Press the SET button to display the SETUP menu and move the arrow indicator to " PRIVACY " by the UP or DOWN button. ② SET " PRIVACY " to desired mode by the LEFT or RIGHT button. CAMERA TITLE DAY / NIGHT SYNC...
- Page 27 PRIVACY NEXT PAGE CAMERA TITLE DAY / NIGHT SYNC MOTION PRIVACY REVERSE DETAIL DEFAULT PAGE 1 OFF : Deactivation ON : Activated - Press the SET button. - Move the arrow to the area you want to mask. - Set "ON" using LEFT or RIGHT button. - Press the SET button and then set the area's bounds as for MOTION detection.
- Page 28 REVERSE 6) REVERSE: ① Press the SET button to display the SETUP menu and move the arrow indicator to " REVERSE " by the UP or DOWN button. ② SET " REVERSE " to desired mode by the LEFT or RIGHT button. CAMERA TITLE DAY / NIGHT SYNC...
- Page 29 DETAIL 7) DETAIL: ① Press the SET button to display the SETUP menu and move the arrow indicator to " DETAIL " by the UP or DOWN button. ② SET " DETAIL " to desired mode by the LEFT or RIGHT button. CAMERA TITLE DAY / NIGHT SYNC...
- Page 30 DETAIL OFF : Deactivation ON : DETAIL control mode ( level 0 ~ 31 ) When the level is up, the sharpness will increase. Control this level to get your best picture quality. If the level is to high, you can get an unnatural image. RESET / RETURN 8) DEFAULT : Use to reset your camera to FACTORY DEFAULT setting.
-
Page 31: Trouble Shooting
TROUBLE SHOOTING If you have trouble when operating your camera, please check the following PROBLEM Nothing appears on the screen The image on the screen is dim. The image on the screen is dark. The camera is not working properly and the surface of the camera is hot. - Page 32 TROUBLE SHOOTING If you have trouble when operating your camera, please check the following PROBLEM The color of the picture is not matched. The image on the screen flickers. L/L mode isn't able to be selected. SOLUTION ● Check that you have properly set the "WHITE- BAL"...
- Page 33 Scanning Frequency Scanning System Synchronization Resolution Minimum Illumination S / N Ratio White Balance Video Output Electronic Shutter Speed SLC( Speco Light Compensation ) Auto Gain Reduce Noise Day & Night ( Color ) Sharpness Privacy Power Supply Power Comsumption Lens Operation Temp.
-
Page 35: How To Install
HOW TO INSTALL Dimension & Installation How to install Camera adjustment... -
Page 36: Limited Warranty
VIDEO CAMERA MONITOR IR LEDs Time Labse VCR Drum Assembly & Heads DVRs TN, TT,TS, PC Series We warranty all products to be free from any manufacturing or material defects. This warranty will not extend to any products which have been subjected to misuse, neglect, accident, or improper installation, used in violation of instructions furnished by us;... - Page 37 M E M O...
- Page 38 M E M O...
- Page 39 M E M O...
Need help?
Do you have a question about the HT-INTB8 and is the answer not in the manual?
Questions and answers