Table of Contents
Advertisement
Advertisement
Table of Contents

Subscribe to Our Youtube Channel
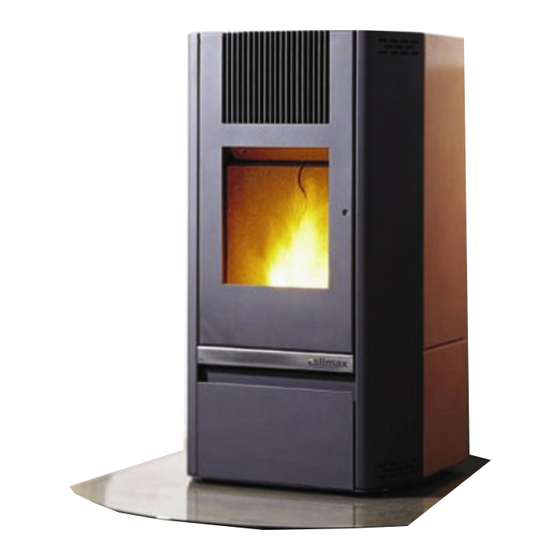
Related Manuals for calimax Solida PR 08 02 01


Summary of Contents for calimax Solida PR 08 02 01
-
Page 1: Operating Instructions
Operating instructions SOLIDA (PR 080201 and PR 100301) English... -
Page 3: Table Of Contents
Contents 1. General safety information .............. 5 2. General description of the device ..........5 2.1. General information about the Solida pellet stove ........6 2.2. Safety instructions ....................6 2.2.1. General ......................6 2.2.2. Stove-specific dangers ................7 2.3. Liability ......................... 8 2.4. - Page 4 5.2.5. Pellet stove-chimney connection piece..........20 5.2.6. External air inlet ..................20 5.2.7. Simultaneous operation of pellet stove and air-conditioning ... 20 5.2.8. Multiple configuration ................20 5.3. Initial commissioning ..................21 5.4. Setting the combustion air volume............... 22 5.4.1. Fine adjustment of the combustion air volume ........22 6.
-
Page 5: General Safety Information
If you have any difficulty understanding the operating instructions, please contact your Calimax sales partner. Safety information − The pellet stove may only be connected to the power supply after it has been cor- rectly connected to the chimney. -
Page 6: General Information About The Solida Pellet Stove
2.1. General information about the Solida pellet stove The Solida pellet stove may only be used in rooms suitable for living purposes. It en- ables room temperature controlled and automatic combustion of wood pellets. The pellet hopper can hold sufficient fuel for up to 60 hours of continuous operation (de- pending on the heating output). -
Page 7: Stove-Specific Dangers
Using the pellet stove for its intended use only is a prerequisite for safe operation. The pellet stove is being used as intended • When the pellet stove is used in rooms suitable for living purposes • When the pellet stove is never exposed to moisture •... -
Page 8: Liability
Behaviour in case of a chimney fire! Never pull the mains plug out. The integrated exhaust gas fan prevents burn-back into the pellet stove. WARNING! Danger of poisoning and suffocation The flue gases from the pellet stove contain components dangerous to health, including carbon monoxide. -
Page 10: General Information About The Fuel
2.6. General information about the fuel You have chosen to heat your home with CO neutral wood as a fuel . Pressing of waste wood into standardised wood pellets means that an inexpensive fuel can be produced from untreated wood waste and converted cleanly and ex- tremely efficiently into thermal energy when combusted. -
Page 11: Description Of Buttons And Display Overview
3. Description of buttons and display overview Menu navigation Changing values and parameters Operating status display Menu button Operating mode Room temperature Stove On/Off Malfunction knowledgement 4. Function features The Solida pellet stove is designed for the automatic combustion of wood pellets in residential dwellings. -
Page 12: Stove Operation With The Timer
4.3. Stove operation with the timer Setting the timer Press the button. Scroll to page K14 with the button. Switch the timer on/off with the buttons. Scroll to page K15 with the button. The reduced temperature can be changed with the buttons. -
Page 13: The Operating Phases
4.4. The operating phases 4.4.1. The start phase Wood pellets are fed into the burn grate for a specific time during the start phase. The ceramic ignition is activated at the same time. The wood pellets normally ignite after approx. 5 minutes with a visible flame. A precisely defined quantity of pellets is then conveyed into the burn grate to build up and maintain the bed of glowing em- bers. -
Page 14: The Cooling Phase
4.4.3. The cooling phase The screw conveyor is switched off when the cooling phase starts and no wood pel- lets are conveyed into the burn grate. 4.4.4. Standby mode Once the set temperature has been reached, the stove switches to the cooling phase. - Page 15 Combinations/Priority If automatic operation of the stove is set (external contact and timer), the required selection must be made after pressing the button, using the buttons. A query appears in the display after switching on: The stove starts immediately when Manual is selected, regu- lating according to the set target temperature until it is manually switched off again.
-
Page 16: Setting The Date And Time
4.6. Setting the date and time The Service menu is displayed with the buttons. (Press and hold down any arrow key. Briefly press the Menu button and then release the arrow key again). The various menu items can be displayed with the buttons. -
Page 17: Assembly And Installation
5. Assembly and installation 5.1. Assembly 5.1.1. Dimensions 5.1.2. Height-adjustment screws To function correctly, the Solida pellet stove must be absolutely levelled vertically. The height adjustment screws can be used to compensate for minor unevenness. 5.1.3. Room temperature sensor The integrated room temperature sensor must be correctly fed through the rear wall of the pellet stove before initial start up is implemented (Fig. -
Page 18: Cladding
5.1.4. Cladding Remove the cladding from the packaging. Pass the room temperature sensor through the rear panel. Push the lower lugs of the cladding into the lower bracket (Fig. 2). Lift the cladding up and hang the upper retaining lugs into the upper bracket (Fig. -
Page 19: Installing The Solida Pellet Stove
80 cm 5.2.3. Flue connection The flue must be connected to the chimney according to local regulations. Please contact your Calimax sales partner or appropriate local authority if there are any questions. Do not lay any cables over the flue pipe! -
Page 20: Chimney
The simultaneous operation of a pellet stove and an air-conditioning system (e.g. controlled ventilation, air extraction, etc.) can lead to malfunctions during the start up process and during pellet combustion. Please contact your Calimax sales partner for any questions regarding simultaneous operation and about legal guidelines. -
Page 21: Initial Commissioning
5.3. Initial commissioning − The operating instructions must be read carefully before the initial start up of the pellet stove. − Remove the cleaning tool from the ash pan. − Pass the room temperature sensor through the rear panel. − Mount the cladding - Never operate the stove with the rear open. −... -
Page 22: Setting The Combustion Air Volume
5.4. Setting the combustion air volume The control system makes it possible to easily select the operating mode (semi- automatic/automatic) and to adjust the combustion air volume to the individual in- stallation situation and pellet quality. 5.4.1. Fine adjustment of the combustion air volume The combustion air volume may need adjustment due to different pellet qualities and the individual conditions at the installation site. -
Page 23: Adapting The Convection Air Volume To The Room Volume To Be Heated
Adapting convection volume room volume to be heated The convection air volume can only be adapted to the room volume to be heated in the semi-automatic mode. The convection air fan speed is always coupled to the heating output in automatic mode. This allows you to adapt the air circulation to the room volume being heated. -
Page 24: Cleaning And Maintenance Work
7. Cleaning and maintenance work Please comply in full with the following cleaning in- structions! Non-compliance can lead to operating mal- functions or destruction of the device (risk of burn- back). The ash produced by the combustion of wood pellets means that cleaning and maintenance work must be repeated regularly. -
Page 25: Emptying The Ash Pan
To remove the ash from the combustion chamber during operation, pull the ash slide out and move it back and forth 3-4 times. To thoroughly remove ash from the com- bustion chamber, pull out the ash slide (Fig. 9) and then open the combustion chamber door. -
Page 26: Maintenance Work After 400 Kg Pellets Or After One Year
Occasionally operate the system until the pellet tank is empty and then check the tank for any fine residues before filling it again (sawdust). If there is an excessive amount of fine residue in the pellet tank, it needs to be cleaned. Excessive fine residues in the screw conveyor will hinder the take-up of pellets and reduce the heating output. -
Page 27: Cleaning The Flue Gas Collector Housing And Flue Gas Fan
(Fig. 16). You can also remove any deposits located on the heat exchanger at the same time. Fig. 15: Removing the baffle plate Fig. 16: Lower flues cleaning aperture 7.3.2. Cleaning the flue gas collector housing and flue gas fan Remove the right-hand cladding to check and clean the flue gas collector housing. -
Page 28: Components
Control system 8. Components Pellet tank Heat exchanger Baffle plate HT switch 1 (on side of combustion chamber) HT switch 2 Screw conveyor Screw motor Ignition Burn grate Flue gas fan Ash slide LT switch Convection air fan Ash pan 8.1. -
Page 29: Ceramic Ignition
8.4. Ceramic ignition The integrated ceramic ignition is protected against over-voltages (fuse 3.15A, fast- acting). The ceramic ignition glows red hot when a current is applied, heating the ignition air to the ignition temperature necessary for igniting the pellets. Ignition is ac- tivated for 7 minutes in each start process. -
Page 30: Control System
8.13. Flue connection The flue must be connected to the chimney according to local regulations. Please contact your Calimax sales partner or appropriate local authority if there are any questions. Because the pellet stove operates with a flue gas fan, excess pressure may occur at the flue gas outlet and possibly in the chimney. -
Page 31: Technical Data Solida
9. Technical data Solida Model Solida Solida Equipment PR 08 02 01 PR 10 03 01 Weight with cladding (steel panels) 140 kg Weight with cladding (ceramic) 150 kg Height 1045 mm Width 580 mm Depth 532 mm Flue gas pipe connection ø... -
Page 32: System Circuit Diagram
9.1. System circuit diagram No.: Designation cable tree Convection air fan Flue gas fan Ceramic ignition High temperature monitor Low temperature monitor External cut-off RT 1 Differential pressure monitor High temperature monitor Screw motor Page 32... -
Page 33: Troubleshooting - Tips
10. Troubleshooting - Tips Simple malfunctions can be rectified with the following tips. For further information, please contact your Calimax sales partner. PROBLEM CAUSE SOLUTION The target temperature is Increase the target temperature. The pellet stove will lower than the actual not start. - Page 34 Overview of error messages After a malfunction has been resolved, the display must be acknowledged by press- ing the Start button. Error number Designation Description HT switch or pressure monitor triggered Clean burn grate/heat exchanger Reduce fuel quantity, clean chimney and connection piece Increase convection air fan capacity Maximum PCB temperature...
- Page 35 Notes: Page 35...
Need help?
Do you have a question about the Solida PR 08 02 01 and is the answer not in the manual?
Questions and answers