Table of Contents
Advertisement
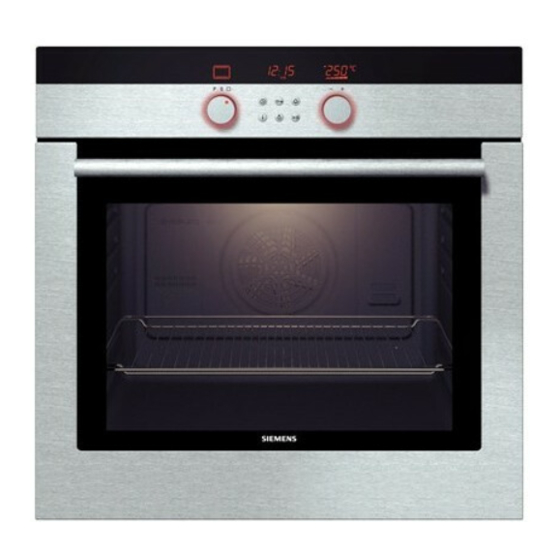
Making cooking as much fun as eating
Please read this instruction manual. This will ensure that you
make use of all the technical benefits the cooker has to offer.
You will be given important safety information. You will then
be introduced to the individual components of your new
cooker and we will show you how to adjust it step by step. It
is quite simple.
The tables list the settings and shelf heights for numerous
well known dishes. All these dishes are tested in our cooking
studio.
In the unlikely event of a fault, look here for information on
how to rectify minor faults yourself.
A detailed table of contents will help you to find your way
around quickly.
Enjoy your meal!
Instruction manual
HB 760.60 B
en
9000 183 249
111287
Advertisement
Table of Contents

Related Manuals for Siemens HB 760.60 B


Summary of Contents for Siemens HB 760.60 B
- Page 1 In the unlikely event of a fault, look here for information on how to rectify minor faults yourself. A detailed table of contents will help you to find your way around quickly. Enjoy your meal! Instruction manual HB 760.60 B 9000 183 249 111287...
-
Page 2: Table Of Contents
Table of contents Important information ..... . . Before installation ......Safety information . - Page 3 Table of contents Preparing food ......Programs ........How long will the meal take to cook? .
- Page 4 Table of contents Troubleshooting ......Replacing the oven light ..... . . Replacing the oven light .
-
Page 5: Important Information
Important information Read this instruction manual carefully. Only then will you be able to operate your cooker safely and correctly. Please keep the instruction and installation manual in a safe place. Please pass on the instruction manual to the new owner if you sell the appliance. Before installation Check the appliance after unpacking it. - Page 6 Hot oven Open the oven door carefully. Hot steam may escape. Never touch the internal surfaces of the microwave oven or the heating elements. There is a risk of being burnt. Children must be kept at a safe distance from the appliance.
-
Page 7: Reasons For Damage
Reasons for damage Baking tray, aluminium foil Do not place the baking tray on the oven floor. Do not or dishes on the oven floor cover it with aluminium foil. Do not place dishes on the oven floor. This will cause heat accumulation. The baking and roasting times will no longer be correct and the enamel will be damaged. -
Page 8: Your New Cooker
Your new cooker Here you will learn more about your new oven. The control panel and its switches and indicators are explained here. The heating modes and the accessories included with your oven will be explained here. The control panel Details vary according to the appliance model. -
Page 9: Rotary Knob
Settings Radiant grill large area Automatic self cleaning Easy roasting *Type of heating with energy efficiency class determined in accordance with EN50304. The oven light switches on when you select a function. Rotary knob The default values and set values can be altered using the rotary knob. -
Page 10: Control Buttons And Display Panel
Control buttons and display panel Clock button j Use this button to set the time of day, the cooking time ? and the completion time !. Key button p Use this button to switch the childproof lock on and off. Timer button a Use this button to set the timer. -
Page 11: Types Of Heating
Types of heating Different types of oven heating are available. You can therefore select the best method for cooking any dish. Top and bottom heating This ensures the even distribution of heat onto the cake or roast from the top and bottom of the oven. This type of heating is best for cake mixtures in tins or for bakes. - Page 12 Intensive hot air / pizza setting This type of heating uses bottom heating and the ring heating element. This type of heating is particularly suitable for deep frozen foods. It is ideal for cooking pizzas, chips or strudels, without requiring preheating. Bottom heat You can reheat or brown meals using bottom heating.
-
Page 13: Oven And Shelving Accessories
Notes Heating is interrupted if you open the oven door while the oven is in operation. To ensure that the heat is well distributed, the fan switches on for a short time during preheating for types of heating with top and bottom heating. Oven and shelving accessories The shelf can be inserted at 5 different heights in the... - Page 14 Optional accessory Optional accessories may be purchased from the after sales service or from specialist shops. The availability of optional accessories varies according to country. Please consult our sales brochures. Enamel baking tray HZ 331070 for cakes and biscuits. Push the baking tray with the sloping edge facing towards the oven door.
-
Page 15: Cooling Fan
Metal roasting dish HZ26000 It is intended for use in the extended cooking zone of the glass ceramic hob. The dish is suitable for the sensor cooking system as well as for the automatic roasting function. The roasting dish is enamel on the outside and has a non stick coating on the inside. -
Page 16: Before Using For The First Time
Before using for the first time This section will tell you everything you need to do before using the cooker for the first time. Heat the oven and clean the accessories. Read the safety instructions in the Important information" section. Firstly, check to see if the j symbol and three zeros are flashing in the display. -
Page 17: Setting The Oven
Setting the oven You have various options for setting the oven. Switching off the oven When your meal is ready, switch off the oven yourself. manually The oven switches off You can leave the kitchen for a long period. automatically The oven switches on and You can put your meal in the oven in the morning, for off automatically... -
Page 18: If The Oven Is To Switch Off Automatically
Switching off Switch off the function selector when the meal is ready. Changing the setting You may change the temperature or grill setting at any time. Preheating indicator The preheating indicator provides a visual display of the oven temperature increase. It is best to insert the dish in the oven when all segments are lit. -
Page 19: If The Oven Is To Switch On And Off Automatically
The cooking time has A signal sounds. The oven switches off. elapsed Switch off the function selector. Changing the setting Press the j clock button. Use the rotary knob to change the cooking time. Cancelling the setting Switch off the function selector. To call up the end time ! or time j: Press the j Calling up the settings clock button until the relevant symbol flashes. -
Page 20: Residual Heat Indicator
The cooking time has A signal sounds. The oven switches off. Switch off the elapsed function selector. Note You can change the setting while the symbol is flashing. The setting has been adopted if the symbol lights up permanently. You may change the waiting time that elapses before the setting is adopted. -
Page 21: Rapid Heating
Rapid heating This allows you to heat up the oven particularly quickly. Suitable types of heating t = Top/bottom heating f = Conventional Baking T = 3D hot air O = Intensive hot air R = Hot air grilling Setting procedure First set the oven. -
Page 22: Automatic Roasting
Automatic roasting Using automatic roasting, you will be able to produce delicious braised meals, juicy roasts and tasty stews without the need for turning or basting the meat which, in turn, keeps your oven clean. Ovenware The automatic roasting function is only suitable for roasting in a covered dish. -
Page 23: Programs
Close the dish with the lid. Place it on the wire grill at shelf position 2. Meat Add fluid to the empty dish if indicated in the roasting table. The base of the dish must be covered. Season meat, place it in the dish and close with the lid. - Page 24 Fresh meals Use for Program Weight Add liquid number range Roast pork with Shoulder with rind, belly 0.5 2.0 kg crackling Roast veal Shoulder, shank, thick flank, 0.5 2.5 kg topside, stuffed breast of veal Leg of lamb Boned 0.5 2.5 kg Poultry Chicken, duck, goose, 0.5 2.5 kg...
-
Page 25: How Long Will The Meal Take To Cook
Frozen Use for Program Weight Add liquid meals* number range Mutton, venison Shoulder, neck, breast 0.5 2.0 kg Venison, small game Leg of venison, leg of hare 0.5 2.0 kg N.B. If preparing frozen meat, the end time cannot be set to a later time. The meat would thaw out before the program starts. -
Page 26: The Oven Will Switch On And Off Automatically
4. Turn the rotary knob to enter the weight. The oven switches on after a few seconds. The time counts down in the display. A signal sounds. The oven switches off. The cooking time has elapsed Switch off the function selector. Cancelling the program Switch off the function selector. -
Page 27: Tips For Automatic Roasting
6. Use the rotary knob to set a later end time. The setting is adopted after a few seconds. The end time is shown in the display. The ! end symbol lights up. The oven switches on at the appropriate time. The cooking time has A signal sounds. - Page 28 You want to roast several chicken The drumsticks must be of approximately the same size. Enter drumsticks or other poultry the weight of the heaviest drumstick. Example: Two turkey drumsticks at the same time drumsticks weighing 1.4 and 1.5 kg. Enter 1.5 kg. You want to poach or bake The fish must be approximately the same size.
-
Page 29: Sabbath Setting
Sabbath setting With the Sabbath setting, you can use top/bottom heating t to keep the oven at a temperature of 85 ºC for 73 hours. During this time, you can keep meals warm without needing to switch the oven on or off. Setting procedure 1. -
Page 30: Time
Time When the oven is first connected, or following a power cut, the j symbol and three zeros flash in the display. Set the time. The function selector must be switched off. Setting procedure Example: 13:00 1. Press the j clock button. 12.00 appears in the display and the j symbol flashes. -
Page 31: Timer
Timer You can use the timer as a kitchen timer. It operates independently of the oven. The timer has a special signal. You can also set the timer if the childproof lock is active. Setting procedure Example: 20 minutes 1. Press the a timer button. The a symbol will flash. -
Page 32: Basic Settings
The timer and cooking time The symbols light up. The timer period counts down count down simultaneously visibly in the display. To call up remaining cooking time ?, end time ! or time j: Press the j clock button until the appropriate symbol flashes. -
Page 33: Changing The Basic Settings
Changing the basic settings There must be no program set. Example: Hiding the time 1. Press the j clock button and the p button simultaneously until a 1 appears in the display. This is the basic setting for the time in the foreground. 2. -
Page 34: Childproof Lock
Childproof lock The oven has a childproof lock to prevent children switching it on accidentally. The function selector must be switched off. Locking the oven Press the p key button until the p symbol appears in the display. This will take approximately 4 seconds. Press the p key button until the p symbol goes out. -
Page 35: Automatic Self Cleaning
Automatic self cleaning The oven is heated to approximately 500 ºC. Any food residues from roasting, grilling and baking are burnt to ash. You may choose from three cleaning levels. Level Degree of cleaning Duration approx. 1¼ hours Medium approx. 1½ hours Intensive approximately 2 hours What you should know... -
Page 36: Setting Procedure
Cleaning accessories at the Insert the universal pan at shelf position 2 for same time self cleaning. The wire grill is not suitable for self cleaning. Never clean metal sheets and dishes which have been coated with a non stick coating using the oven's automatic self cleaning function (pyrolysis operation). -
Page 37: Self Cleaning Should Switch On And Off Automatically
Calling up the cooking time To call up the remaining cooking time ? or end and end time time !: Press the j clock button until the relevant symbol flashes. Self cleaning should switch on This enables you to make use of the cheaper off peak and off electricity rates, for example. -
Page 38: Care And Cleaning
Care and cleaning Do not use high pressure cleaners or steam jets. Oven exterior Wipe the oven with water and a little washing up liquid. Dry it with a soft cloth. Caustic or abrasive substances are not suitable. If any such substances come into contact with the frontage, wipe it off immediately with water. - Page 39 Detaching the Make sure that you do not reach into the hinge. oven door There is a risk of injury. 1. Open the oven door fully. 2. Move the two locking levers on the left and right hand sides. 3. Half close the oven door. With both hands, grip the door on the left and right hand sides.
-
Page 40: Cleaning The Glass Panels
Cleaning the oven door The oven door cover can become discoloured. cover You must remove the cover in order to clean it. Proceed as follows: 1. Open the oven door fully. 2. Unscrew the cover at the top of the oven door. To do this, undo the right and left hand screws. - Page 41 3. Raise the upper panel and remove it (Fig B). 4. Unscrew the large clips on the left and right and remove them (Fig. C). Remove the middle panel. 5. The seal at the bottom of the panel can be removed for cleaning.
-
Page 42: Seal
3. Insert the middle glass panel (Fig. E). 4. Replace the seal again at the bottom of the panel. (Fig. E) 5. Put the small clips on the lower glass panel (Fig. F). 6. Fit the large clips and screw them into place (Fig. -
Page 43: Steam Filter
Steam filter The oven cover features a steam filter. This filters out grease particles in the extracted air, thereby reducing odours. The filter must be cleaned occasionally. Method 1. Using an Allen (6 mm), turn the filter head anticlockwise and remove. Figure A. 2. -
Page 44: Troubleshooting
Troubleshooting Should a malfunction occur, it is often only due to a minor fault. Please read the following instructions before calling the after sales service: Problem Possible cause Comments/remedy The oven does not work. Blown fuse Look in the fuse box and check that the fuse is in working order. -
Page 45: Replacing The Oven Light
Problem Possible cause Comments/remedy The oven door cannot be The oven door release Contact the after sales service. opened. The Er 7" error mechanism is faulty. message appears in the clock display. The Er 11" error message A button has been pressed Press all buttons separately. -
Page 46: Replacing The Oven Light
4. Pull out the bulb do not turn it and insert the new bulb. Figure B. Take care to position the pins correctly. Press the bulb in firmly. 5. Fit the glass cover back on. To do this, insert it on one side and press firmly on the other side. -
Page 47: After Sales Service
5. Put the glass cover back on. Make sure that the curvature of the glass is on the right. Insert the glass at the top and press it in firmly at the bottom. Fig C. The glass cover will now click into place. 6. -
Page 48: Packaging And Old Appliances
Packaging and old appliances Disposing in an Unpack the appliance and dispose of the packaging environmentally in an environmentally responsible manner. responsible manner ó This appliance is labelled in accordance with the European Directive 2002/96/EC concerning used electrical and electronic appliances (waste electrical and electronic equipment - WEEE). -
Page 49: Conventional Heat
Tables The values in the table apply to dishes placed in a cold oven. This saves energy. Shorten the baking times indicated by 5 to 10 minutes if you have preheated the oven. The tables show which type of heating is best for different cakes and bakes. - Page 50 3D Hot air Food Dish Shelf Cooking Temp. C Time, position method minutes Rich fruit cake Ø 23 cm round tin or 180 190 20 cm square cake tin Meringues universal pan 100 150 Pavlova universal pan 150*+ 100 120 Jacket Potatoes universal pan 60 70...
-
Page 51: Baking Tips
Food Dish Shelf Cooking Temp. C Cooking position method time, min Full meal universalpan + 75 85 wire rack Preheat oven ** When baking on two levels, use the universal pan provided, at shelf position three. When baking on three levels, use the universal pan at shelf position two. The universal pan can be removed earlier. Baking tips You wish to cook to your own Refer to the instructions in the tables for similar types of food. -
Page 52: Meat, Poultry, Fish
The fruit cake is too light at the Use the deeper universal pan next time. bottom. The fruit juice flows over. You were baking on several Always use 3D hot air T when baking on several levels. Baking levels. The food on the top baking trays that are placed in the oven at the same time will not tray is darker than that on the necessarily be ready at the same time. - Page 53 Place the pieces of meat directly onto the wire grill. If you are grilling just one piece of meat, it will turn out best if you place it in the centre of the wire grill. You should also insert the universal pan at level 3. The meat juices are collected here and the oven is kept clean.
-
Page 54: Tips For Roasting And Grilling
Food Shelf position Cooking method Grill Cooking time min per 1 lb. Toast, 4 pieces Toast, 9 pieces Tips for roasting and grilling The table does not contain Select the next lowest weight from the instructions and extend information for the weight of the the time. -
Page 55: Defrosting
Meal Use for Level Type of Temperature Cooking time in heating in ºC minutes Potato products* Chips 200 220 20 30 Duchess potatoes 200 220 20 30 Fried potatoes 200 220 20 30 Filled potato skins 200 220 15 25 Baked goods* Rolls 190 210... -
Page 56: Drying
In the 30 to 60 °C range, the oven light remains switched off. This gives best control. Drying Only use perfectly fresh fruit and vegetables, and wash them thoroughly. Allow the food to drain well and dry it yourself. Line the universal pan and wire rack with baking paper or greaseproof paper. - Page 57 The times specified in the tables are guidelines only. They can be influenced by the room temperature, the number of jars and the amount and temperature of the jar contents. Before you change settings or switch off the appliance, make sure that the contents of the jars are actually bubbling.
-
Page 58: Energy Saving Tips
Vegetables with cold stock in 1 litre jars After bubbling Reheating 120 140 ºC Cucumbers approx. 35 minutes Beetroot approx. 35 minutes approx. 30 minutes Brussel sprouts approx. 45 minutes approx. 30 minutes Beans, kohlrabi, red cabbage approx. 60 minutes approx. -
Page 59: Acrylamide In Foodstuffs
Acrylamide in foodstuffs Which foods are affected? Acrylamide is mainly produced in grain and potato products heated at high temperatures, such as potato crisps, chips, toast, rolls, bread, baked goods (biscuits, gingerbread, cookies). Tips for keeping acrylamide to a minimum when preparing food General Keep cooking times to a minimum. -
Page 60: Test Dishes
Test dishes referring to EN 60350. Baking Food Dish and notes Shelf Cooking Temp. ºC Cooking position method time min Small Cakes baking tray 170 190 20 30 Small Cakes* baking tray 140 160 20 30 (preheat baking tray + universal 140 160 25 35 oven) - Page 61 Notes...
- Page 62 Notes...
- Page 63 Notes...
- Page 64 Notes...
Need help?
Do you have a question about the HB 760.60 B and is the answer not in the manual?
Questions and answers