Table of Contents
Advertisement
Advertisement
Table of Contents

Subscribe to Our Youtube Channel
Related Manuals for Siemens HB76A1.60S


Summary of Contents for Siemens HB76A1.60S
- Page 1 [en] Instruction manual HB76A1.60S Built-in oven...
-
Page 3: Table Of Contents
Setting the core temperature............13 Suggested values for the core temperature ....... 13 Additional information on products, accessories, replacement Sabbath mode................14 parts and services can be found at www.siemens-home.com Starting Sabbath mode..............14 and in the online shop www.siemens-eshop.com Childproof lock ................. 14 Basic settings ................ -
Page 4: Safety Precautions
: Safety precautions Please read this instruction manual Improper repairs carefully. Please keep the instruction and Risk of electric shock! installation manuals in a safe place. Please Improper repairs are dangerous. Repairs may only be carried pass on these manuals to the new owner if out by one of our trained after-sales engineers. -
Page 5: Your New Oven
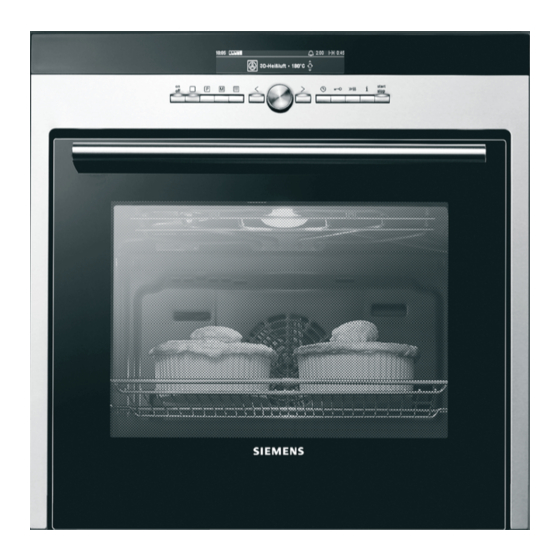
Your new oven Here you will learn about your new oven. The control panel and Control panel the individual operating controls are explained. You will find Here, you will see an overview of the control panel. Depending information on the cooking compartment and the accessories. on the appliance model, individual details may differ. -
Page 6: Temperature Indicator
Temperature indicator Accessories The temperature indicator bars show the heating phases or The accessories can be inserted into the oven at 5 different residual heat in the cooking compartment. levels. You can pull out the accessories two thirds of the way without Heating indicator them tipping. - Page 7 Special accessories Cooking Suitable for compart- number self-cleaning ment with Universal pan HZ332070 For moist cakes, pastries, frozen meals and large joints. It can also be used to catch dripping fat when you are grilling directly on the wire rack. Slide the universal pan into the oven with the sloping edge fac- ing the oven door.
-
Page 8: Door Lock
Special accessories Cooking Suitable for compart- number self-cleaning ment with System steamer HZ24D300 For easy preparation of vegetables and fish. After-sales service products service, specialist retailers or (in some countries) online via the eShop. Please specify the relevant product number. You can obtain suitable care and cleaning agents and other accessories for your domestic appliances from the after-sales Cleaning cloths for stainless-steel surfaces Product no. -
Page 9: Switch The Oven On And Off
Switch the oven on and off ‡ You can switch the oven on and off with the button. You can start the oven immediately with this setting or set a different type of heating or temperature ■ Switching on ‡ select a programme with the button ■... -
Page 10: Setting The Type Of Heating And Temperature
† Setting the type of heating and temperature Press the button. Appliance operation begins. Example in the picture: Setting for Top/bottom heating at 180 °C. " ‡ Switch on oven with the button, or press the button. symbol for 3D hot air and a temperature of 160 °C are Î... -
Page 11: Time-Setting Options
± Notes You can use the button to check the current cooking ■ compartment temperature during rapid heating. Rapid heating is cancelled if you change the type of heating. ■ To ensure an even cooking result, do not place your dish in ■... -
Page 12: Setting A Later End Time
Changing the cooking time Using the rotary selector, set a later end time. Use the button to select the cooking time. Change the Î cooking time using the rotary selector. Press the button repeatedly until the rotary symbol disappears from the clock display. -
Page 13: Starting The Memory
Press and hold the button until a signal sounds and the Press the button briefly. button lights up. The saved settings are displayed. † The setting is saved and can be started at any time. Press the button. The memory setting starts. Saving another setting Enter and save the new setting. -
Page 14: Sabbath Mode
Dish Suggested values for the core temperature in °C Pork Pork fillet 65-70 Pork joint (e. g. neck) 85-90 Veal Joint of veal 75-85 Knuckle of veal 85-90 Lamb Leg of lamb, medium 60-70 Lamb joint 80-90 Sabbath mode Àz When this setting is used, the temperature of the oven remains Press the button twice. -
Page 15: Changing The Basic Settings
Function Basic setting Options ™‚ ƒ ‚ Audible signal after a time has elapsed = 2 minutes = 10 seconds ƒ = 2 minutes „ = 5 minutes ™ƒ ‹ ‹ Confirmation tone when a button is pressed. = off = off ‚... -
Page 16: Automatic Switch-Off
You can now change other basic settings, as described in Cancelling ‡ points 2 and 3. ± Press the button. The changes are not applied. Press and hold the button until the display disappears. This takes about four seconds. All changes are saved. Automatic switch-off Your oven has an automatic switch-off function. -
Page 17: After Self-Cleaning
† Start the cleaning operation with Adjusting the cleaning level The oven door locks shortly after operation starts. The Once cleaning starts, the cleaning level can no longer be symbol lights up to indicate that the lock has been activated. changed. -
Page 18: Detaching And Attaching The Oven Door
Clean the rails with cleaning agent and a sponge. For stubborn Attaching the door deposits of dirt, use a brush. Reattach the oven door in the reverse sequence to removal. Refitting the rails When attaching the oven door, ensure that both hinges are inserted straight into the opening (figure A). -
Page 19: Removing And Installing The Door Panels
Removing and installing the door panels Clean the panels with glass cleaner and a soft cloth. Do not use sharp or abrasive materials or a glass scraper. This To facilitate cleaning, you can remove the glass panels from the may damage the glass. oven door. -
Page 20: Replacing The Bulb In The Oven Ceiling Light
“ Error messages with reset the time. If the error is shown again, call the after-sales “ service. If an error message with is shown in the display, press the button. This cancels the error message. You may then have to You can take remedial action yourself if the following error messages are displayed. -
Page 21: Energy And Environment Tips
To book an engineer visit and product advice After-sales service 0844 8928999 Calls from a BT landline will be charged at up to 3 pence per minute. A call set-up fee of up to 6 pence Please note that there will be a fee for a visit by a service may apply. -
Page 22: Programmes
Programmes When cooking several drumsticks, set the weight of the heaviest drumstick. The drumsticks must be approximately the same weight. Poultry Example: For 3 chicken drumsticks of 300 g, 320 g and 400 g, Place poultry in the roasting dish, breast side up. The set 400 g. - Page 23 Game Programme Weight range in kg Add liquid Weight setting number Rabbit, fresh 0.5-3.0 Weight of meat Fish Whole fish turns out particularly well if it is placed in the dish in a swimming position In other words, the dorsal fin is pointing Prepare the fish, then add vinegar, lemon juice or white wine upwards.
-
Page 24: Selecting And Setting A Programme
Pork Place ham joints in the dish with the layer of fat facing upwards. Cook in an uncovered dish until a brown crust forms. Joints with a crust should be placed in the dish with the crust side up. Score the rind to make a grid-like pattern, without When roasting joints of meat, set the weight of the meat. -
Page 25: Tips For The Automatic Programmes
Tips for the automatic programmes The weight of the joint or poultry is The weight range is deliberately limited. For very large joints, it is often impossible to greater than the weight ranges availa- obtain a sufficiently large roasting dish. Prepare large pieces with Top/bottom heating ble. - Page 26 Cakes in tins Level Type of Temperature Cooking time heating in °C in minutes Sponge cake, simple ring tin/round tin 160-180 50-60 3 loaf tins 140-160 60-80 Sponge cake, delicate ring tin/round tin 150-170 60-70 Flan base, sponge flan tin 160-180 20-30 Delicate fruit flan, sponge...
-
Page 27: Baking Tips
Small baked items Accessories Level Type of Temperature Cooking time heating in °C in minutes Viennese whirls (preheat) baking tray 140-150 30-40 baking tray 140-150 25-35 universal pan + baking tray 140-150 30-45 2 baking trays + universal pan 5+3+1 130-140 35-50 Macaroons... -
Page 28: Meat, Poultry, Fish
The fruit juice overflows. Next time, use the deeper universal pan, if you have one. Small baked items made out of yeast There should be a gap of approx. 2 cm around each item. This gives enough space for dough stick to one another when bak- the baked items to expand well and turn brown on all sides. - Page 29 Meat Weight Accessories and Level Type of Temperature Cooking time ovenware heating in °C, grill set- in minutes ting Pork Joint without rind (e.g. neck) 1.0 kg uncovered 190-210 1.5 kg 180-200 2.0 kg 170-190 Joint with rind (e.g. shoulder) 1.0 kg uncovered 190-210...
-
Page 30: Tips For Roasting And Grilling
Poultry Weight Accessories and Level Type of Temperature Cooking time ovenware heating in °C, grill set- in minutes ting Duck breast 300 g each wire rack 240-260 30-40 Goose, whole 3.5-4.0 kg wire rack 170-190 120-140 Goose legs 400 g each wire rack 220-240 40-50 Small turkey, whole... -
Page 31: Tips For Slow Cooking
Rapidly heat a little fat in a pan. Sear the meat on all sides, Table even on the ends, and place immediately on the preheated All tender joints of poultry, beef, veal, pork and lamb are ovenware. suitable for slow cooking. The slow cooking times depend on Put the ovenware containing the meat back in the oven and the thickness and the core temperature of the meat. -
Page 32: Convenience Products
Dish Accessories and ovenware Level Type of Temperature Cooking time heating in °C, grill set- in minutes ting Toast 4 slices, with topping wire rack + universal pan 160-170 10-15 12 slices, with topping wire rack + universal pan 160-170 15-20 Convenience products The cooking result greatly depends on the quality of the food. -
Page 33: Defrost
Dish Ovenware Type of Temperature Cooking time heating Yoghurt Cups or screw-top on the cooking 50 °C Preheat 5 mins jars compartment floor 50 °C 8 hrs Proving dough Heat-resistant dish on the cooking 50 °C Preheat 5-10 mins compartment floor Switch off the appliance and 20-30 mins place the yeast dough in the... -
Page 34: Acrylamide In Foodstuffs
Vegetables the type of vegetable, heat for approx. 35 to 70 minutes. Switch As soon as bubbles begin to form in the jars, set the off the oven after this time and use the residual heat. temperature back to between 120 and 140 °C. Depending on Vegetables with cold cooking water in one-litre jars When it starts to bubble Residual heat... -
Page 35: Grilling
Dish Accessories and tins Level Type of Temperature Cooking time heating in °C in minutes Viennese whirls (preheat*) baking tray 140-150 30-40 baking tray 140-150 25-35 universal pan + baking 140-150 30-45 tray 2 baking trays + universal 5+3+1 130-140 35-50 Small cakes (preheat*) baking tray... - Page 36 Siemens-Electrogeräte GmbH Carl-Wery-Straße 34 81739 München Germany *9000785783* 9000785783 920417...
Need help?
Do you have a question about the HB76A1.60S and is the answer not in the manual?
Questions and answers
The oven shuts Down
The Siemens HB76A1.60S oven may shut down due to the automatic switch-off function being activated. Pressing any button can restore operation.
This answer is automatically generated