Table of Contents

Advertisement

Making cooking as much fun as eating
Please read this instruction manual. This will ensure that you
make full use of all the technical benefits the oven has to offer.
It will provide you with important safety information. You will
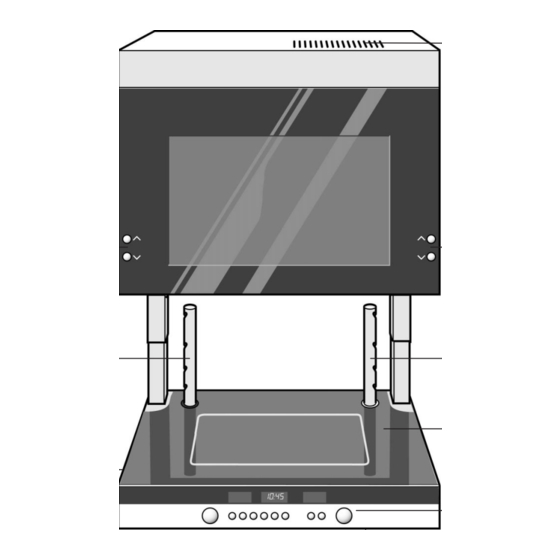
be familiarised with the individual components of your new
oven. And we will show you how to make settings step by
step. It is quite simple.
The tables list the adjustment values and shelf levels for
numerous popular dishes. All these dishes are tested in our
cooking studio.
In the unlikely event of a malfunction, look here for
information on how to rectify minor faults yourself.
A detailed table of contents will help you to find your way
around quickly.
Enjoy your meal!
Instruction manual
HB 76P.70
HB 76P.70 E
HB 76P.70 S
en
9000 152 929
S200686

Advertisement

Table of Contents
loading

Summary of Contents for Siemens HB 76P.70 S

  • Page 1 In the unlikely event of a malfunction, look here for information on how to rectify minor faults yourself. A detailed table of contents will help you to find your way around quickly. Enjoy your meal! Instruction manual HB 76P.70 HB 76P.70 E HB 76P.70 S 9000 152 929 S200686...
  • Page 2: Table Of Contents

    Table of contents Important information ....Important information for use ....Before installation .
  • Page 3 Table of contents How to operate your oven ... . Before using for the first time ....Setting the time .
  • Page 4 Table of contents Automatic programming ..... Ovenware ........Preparing the meal .
  • Page 5 Table of contents Opening the oven by hand ....Method ........After sales service .
  • Page 6: Important Information

    Important information Read this instruction manual carefully to make sure that you always use and maintain your oven safely and correctly. Please keep the instruction manual and installation instructions in a safe place. If the oven changes owners, the manual and instructions should always be included.
  • Page 7: Important Information For Use

    Important information for use Please read the following information so that nothing happens when handling your new oven and you can enjoy it for a long time. Before installation Observe the information in the installation instructions. Transport damage Check the oven for damage after unpacking it. It must not be connected if it has been damaged in transport.
  • Page 8: Causes Of Damage

    Cracks in the ceramic If there are cracks and fractures in the ceramic, stop using the oven. There is a risk of electrocution. Call the after sales service. Repairs Incorrect repairs are dangerous. There is a risk of electrocution. Repairs may only be carried out by one of our experienced after sales engineers.
  • Page 9 Ceramic Rough accessories and ovenware bases scratch the ceramic. Check your accessories and ovenware. Salt, sugar or sand causes scratches on the ceramic. When heating, marks may appear which you will not be able to remove. Do not use the ceramic as a work surface or storage space.
  • Page 10: This Is Your New Oven

    This is your new oven Use this section to familiarise yourself with your new oven. The lift up floor, control panel and its switches and indicators are explained. The types of heating available and the accessories included with your oven will be explained here.
  • Page 11: The Wall Oven

    The wall oven Ventilation slot Lift up floor buttons Lift up floor buttons Accessory holder Accessory holder Ceramic Lift up floor Control panel Ventilation slot The ceramic Heated surface...
  • Page 12: The Lift Up Floor

    The lift up floor With the lift up floor function, you can open your oven to attach the accessories and prepare your meals. This type of opening is very ergonomic and enables you to work comfortably with the oven. You no longer have to reach into the oven and can determine the optimum countertop level yourself.
  • Page 13 Anti trap guard If the lift up floor meets resistance, it stops and moves back a little. Close the oven so that the lift up floor and anti trap guard function again correctly. To avoid injury and damage in any case, make sure that hands do not become trapped.
  • Page 14: The Control Panel

    The control panel You can use the control panel to make settings for your oven. The different operational controls will be explained here. Overview Here is an overview of your control panel. The symbols will not all appear in the displays at the same time.
  • Page 15: Operating Buttons And Displays

    Operating buttons and displays You can use the operating buttons to start the oven and set various additional functions. You can read the values that you have set in the displays. You can make settings if there is a symbol flashing in the display.
  • Page 16: Function Selector

    Function selector Use the function selector to set the type of heating. The relevant symbol appears in the type of heating display. The default value for each type of heating appears in the temperature display. Type of heating Top/bottom heating for cakes in tins, cakes on trays, bakes and lean roasts Special baking* for pastries made of yeast dough, sponge mixture and Choux...
  • Page 17: Rotary Knob

    Rotary knob The set values can be altered using the rotary knob. Ranges Meaning 30 ºC 300 ºC Temperature for the types of heating Exceptions: > 3D hot air - 30 ºC to 275 ºC Y Defrost - 20 ºC to 60 ºC ñPreheat - 30 ºC to 60 ºC qV Keep warm - 65 ºC to 100 ºC Levels for x Radiant grilling...
  • Page 18: Oven And Accessories

    Oven and accessories Here you will find information about the oven and accessories. We will explain how to attach the accessories and use the ceramic. Oven The oven has a cooling fan. During operation, it switches on and off automatically as necessary. So that the oven cools down more quickly, it remains on for a fixed time after oven operation.
  • Page 19: Accessories

    Lift-up floor function Only the ceiling light lights up when the oven is open. Lights are switched off: The ceiling light switches on when the lift up floor is moving. It switches off as soon as the oven is closed. Lights are switched on: The side lights switch off when the lift up floor is moving.
  • Page 20: Accessory Holder

    Optional accessories HZ 304001 insert grid for grilling dishes in the universal pan HZ 915000 glass roasting dish for pot roasts and bakes, especially suitable for automatic programming HZ 26000 metal roasting dish for insertion into the oven, enamel on the outside and a non adhesive coating on the inside HZ 390800 XXL roasting dish for especially large portions or a high number of portions, granite enamel on the outside with ovenproof glass lid...
  • Page 21: Ceramic

    Ceramic You can use the ceramic as an additional surface on which to place many meals. Roasts and baked goods will turn out particularly well due to their contact with the heated surface, and no accessories are needed. Place the ovenware directly on the ceramic. When baking bread, place the dough directly on the ceramic without using ovenware.
  • Page 22: How To Operate Your Oven

    How to operate your oven Your oven has many different functions. Here we will start at the beginning and show you how to operate it correctly. You will find examples for setting the oven, e.g. the clock, timer and basic settings.
  • Page 23: Before Using For The First Time

    Before using for the first time Before using your oven for the first time, read the safety precautions in the "Important information" section. When the oven is ready for operation, heat it up and clean the accessories. Setting the time If the j clock symbol and four zeros flash in the clock display, the oven is not yet ready for operation.
  • Page 24: Cleaning Accessories

    Cleaning accessories To remove dirt gathered during transport, clean the accessories thoroughly with hot soapy water and a dish cloth. Switching the oven on and off There is a main switch to ensure that the oven is not switched on accidentally. This can only be set when the oven is on.
  • Page 25: Setting The Oven

    Setting the oven In the "Here are the correct setting values" section, you will find suitable settings for many dishes. There are various ways in which you can make settings. Switching off the oven You can switch the oven off yourself when the meal is manually ready.
  • Page 26: Setting

    Setting Switch on the oven with the @ main switch. Then you can make the settings. Example: t Top/bottom heating, 190 ºC 1. Select the desired type of heating using the function selector. 2. Set the required temperature or grill setting using the rotary knob.
  • Page 27: Switching Off Automatically

    Switching off Switch the oven off with the @ main switch when the meal is ready. Changing the settings You may change the type of heating or temperature at any time. Press the OK button to start the oven again. Switching off automatically Make the settings as described in steps 1 to 2.
  • Page 28 The cooking time has A signal sounds. The oven stops heating and the oven elapsed lights switch off. The ? Cooking time symbol flashes in the clock display and 0:00 is displayed as the cooking time. The temperature or grill setting flashes in the temperature display.
  • Page 29: Switching On And Off Automatically

    Switching on and off automatically Make sure that food does not remain in the oven for too long and spoil. Make the settings as described in steps 1 to 4. Set a later end time before you start the oven. Example: it is 10:45.
  • Page 30 The end time is reached A signal sounds. The oven stops heating and the oven light switches off. The ? Cooking time symbol flashes in the clock display and 0:00 is displayed as the cooking time. The temperature or grill setting flashes in the temperature display.
  • Page 31: Temperature Control

    Temperature control The temperature control shows the temperature increase or the residual heat in the oven. When you start the oven, the temperature control Temperature increase shows the temperature increase. When you preheat the oven, place your meal into the oven as soon as all five fields are filled.
  • Page 32: Time

    Time When the oven is first connected or after a power failure, four zeros and the j clock symbol flash in the clock display. Set the time. Setting The oven must be switched off and the timer must not be set. Example: 13:00 1.
  • Page 33: Timer

    Timer You can use the timer as a kitchen timer. It runs independently of the oven and has its own acoustic signal. Setting You can set the timer at any time. Example: 20 minutes 1. Press the a timer button. 0:00 appears in the clock display and the a timer symbol flashes.
  • Page 34: Basic Settings

    Changing the timer time Press the a timer button. The a timer symbol flashes in the clock display. Change the timer time using the rotary knob. Confirm with the a timer button. Clearing the timer time Press the a timer button three times. The timer, cooking time Both symbols light up in the clock display.
  • Page 35: Setting

    Setting The oven must be switched off and the timer must not be set. Example: Resetting all values 1. Press the & Info button until a signal sounds. In 1 appears in the clock display and the relevant basic setting that has been made appears in the temperature display.
  • Page 36: The Special Functions Of Your Oven

    The special functions of your oven Your new oven also has many special functions. These are very useful and facilitate operation of the oven.
  • Page 37: Rapid Heating

    Rapid heating During rapid heating, the oven reaches the required temperature particularly quickly. For an even cooking result, do not put your meal into the oven until rapid heating has ended. You can use rapid heating for the following types of heating: t Top/bottom heating f Special baking setting...
  • Page 38: Childproof Lock

    Changing the settings Rapid heating is interrupted if you change the type of heating, temperature or grill setting. Childproof lock Your oven has a childproof lock. This prevents children from switching the oven on accidentally or changing a setting. The operating buttons do not function when the childproof lock is active, except for a few exceptions: Childproof lock when the The acoustic signal for the timer or an elapsed...
  • Page 39: Automatic Time Limiter

    Deactivating the childproof Press the p key button until the p key symbol goes lock out in the temperature display. You can then use the oven again as normal. Locking the lift up floor You can change the basic settings so that the lift up function floor function is also locked when the childproof lock is active.
  • Page 40: Automatic Programming

    Automatic programming With automatic programming, elaborate pot roasts, tender roasts and delicious casseroles are quite easy. You do not have to turn, baste and stir. As the lid is not removed from the ovenware, the oven remains clean. Ovenware The automatic programming is only suitable for cooking in ovenware with the lid on.
  • Page 41: Preparing The Meal

    Preparing the meal The cooking result is dependent on the quality of the food. Weigh the fresh or frozen meat or fish and the vegetables for stews. You need the weight to make the settings. Meat Season the meat as usual. If specified in the programme table, pour liquid into the empty ovenware until the base is covered, e.g.
  • Page 42: Programmes

    Programmes Place the ovenware on the ceramic. Don't preheat the oven. Programme Suitable Weight Add liquid fresh meal range Beef joint Prime ribs, shoulder, roulade, 0.5 3.0 kg Yes marinated beef Roast beef, medium Roast beef, prime ribs 0.5 2.5 kg No English roast beef Roast beef, prime ribs 0.5 2.5 kg No...
  • Page 43 Programme Suitable Weight Add liquid frozen meal* range Beef joint Prime ribs, shoulder, roulade 0.5 2.0 kg Yes Roast pork Spare rib, neck, roulade, joint, roast 0.5 2.0 kg Yes chops Roast veal Shoulder, knuckle, roulade, filled 0.5 2.0 kg Yes veal Leg of lamb Boneless leg of lamb...
  • Page 44: Setting

    Setting When you have prepared your dish, select a suitable programme from the programme table. Switch on the oven using the @ main switch and make the settings. Example: medium roast beef, 1.2 kg, it is 10:45. Programme 2, the dish takes 65 minutes.
  • Page 45 5. Press the OK button to confirm. The ! End time symbol flashes in the clock display and the time at which the programme will end is displayed. 6. Press the OK button to start the oven. The ? cooking time symbol lights up in the clock display and you will see the cooking time counting down.
  • Page 46: Switching On And Off Automatically

    Switching on and off automatically Make sure that food does not remain in the oven for too long and spoil. Do not use frozen meat. It would defrost during the waiting time and would be inedible. Make the settings as described in steps 1 to 5. Set a later end time before you start the oven.
  • Page 47: Tips For Automatic Programming

    Clearing the end time Press the j clock button repeatedly until the ! End time symbol flashes in the clock display. Reset the end time using the rotary knob until the current time is set at which the programme ends. Press the OK button to confirm the change.
  • Page 48 You want to roast several poultry The legs must be approximately the same size. Set the weight legs at the same time for the heaviest pieces. Example: two turkey legs with 1.4 and 1.5 kg. Set 1.5 kg. You want to steam or roast The fish must be approximately the same size.
  • Page 49: Self Cleaning

    Self cleaning Self cleaning is a convenient way to keep your oven free from dirt. The oven is heated to approximately 500 ºC. Any food residues from roasting, grilling and baking are burnt to ash. Then you only need to wipe the ash out of the oven.
  • Page 50: Before Self Cleaning

    Before self cleaning Clean the oven and the ceramic around the oven seal. Do not scour the seal. Heat can burn the dirt in and damage the seal. Clean the area between the accessory holders and their brackets. The ash will otherwise make it more difficult to remove the accessory holders.
  • Page 51: Setting

    Setting Switch on the oven with the @ main switch. Then you can make the settings. Example: cleaning level 2, it is 10:35. 1. Use the function selector to select self cleaning. So that self cleaning cannot be started accidentally, level 0 flashes in the temperature display.
  • Page 52: Switching On And Off Automatically

    The cooking time has A signal sounds. The oven stops heating. elapsed The ? cooking time symbol flashes in the clock display and 0:00 is displayed as the cooking time. You can switch off the signal earlier by pressing the j clock button.
  • Page 53: After Self Cleaning

    The end time is reached A signal sounds. The oven stops heating. The ? cooking time symbol flashes in the clock display and 0:00 is displayed as the cooking time. You can switch off the signal earlier by pressing the j clock button.
  • Page 54: How To Maintain Your Oven

    How to maintain your oven With good care and cleaning, your oven will remain clean and fully functioning for a long time to come. However, do not use high pressure cleaners or steam jets. Here we will explain how to maintain and clean your oven correctly.
  • Page 55: Care

    Care If you take good day to day care of your oven, it will look good for longer and you will not have to clean it thoroughly so often. Avoiding heavy soiling If you observe a few simple rules every day, your oven will not become so dirty.
  • Page 56: Cleaning

    Cleaning Even if you look after your oven well, it will need to be thoroughly cleaned. Please observe the information in the table, so that you do not damage the various surfaces by using the wrong cleaning agents. Cleaning agents Do not use caustic or abrasive cleaning agents.
  • Page 57 Area Cleaning Accessory holders Hot soapy water: Clean with a sponge. Seal Hot soapy water: Do not remove. Clean with a dish cloth, do not scour. Accessories Hot soapy water: Soak and clean with a dish cloth or a brush. The universal pan and the enamel baking tray can be cleaned using the self cleaning.
  • Page 58: Removing And Refitting The Glass Panels

    Removing and refitting the glass The two outer glass panels on the front of the oven panels can be removed to assist cleaning. 1. Slide the front glass panel upwards and remove it Removal to the front. Caution: the front glass panel is loose as soon as it is unhooked.
  • Page 59 Installation 1. Hook in the second panel and push the spring retainers down fully with a coin. The small mark on the outside of the panel must be at the top right. 2. Hook in the front glass panel and push it down. Make sure that the lift buttons sit correctly in the openings in the front glass panel.
  • Page 60: Troubleshooting

    Troubleshooting Malfunctions often have simple explanations. Here you will learn how to remedy minor malfunctions and how to reach the after sales service.
  • Page 61: Rectifying Minor Faults Yourself

    Rectifying minor faults yourself Before you call the after sales service, try to solve the problem yourself using the table. Problem Possible cause Remedy/notes The oven cannot be switched on. The fuse is faulty. Look in the fuse box to make sure that the fuse for the oven is OK.
  • Page 62 Problem Possible cause Remedy/notes OFF appears in the temperature The automatic time limiter Switch off the oven with the @ display. was activated. main switch. The lift position cannot be The oven was not closed Close the oven fully again and then stored.
  • Page 63: Replacing The Oven Lights

    Repairs may only be carried out by fully trained after sales service engineers. Incorrect repairs to your oven may result in serious injury to the user. Replacing the oven lights If an oven light fails, it must be replaced. Heat resistant replacement bulbs can be obtained from the after sales service or specialist shops.
  • Page 64: Side Lights

    Side lights Only use 10 watt halogen bulbs. Hold the halogen bulb with a clean, dry cloth. This will increase its service life. The left and right side lights are replaced in the same way. 1. Switch off the circuit breaker in the fuse box. 2.
  • Page 65: Glass Covers

    Glass covers You must replace a damaged glass cover. Suitable glass covers may be obtained from the after sales service. Please specify the E number and FD number of your oven. Opening the oven by hand If the lift function fails, you can open the oven manually.
  • Page 66 2. Insert a size 4 Allen key into the socket. Push the socket in and turn it in a clockwise direction until the oven is open as required. 3. Refit the front glass panel and push it down. Make sure that the lift buttons sit correctly in the openings in the front glass panel.
  • Page 67: After Sales Service

    After sales service Our after sales service is there for you if your oven should need to be repaired. You will find the address and telephone number of your nearest after sales service centre in the phone book. The after sales service centres listed will also be happy to advise you of a service point in your local area.
  • Page 68: Here You Will Find The Correct

    Here you will find the correct setting values Here you will find a selection of meals and the ideal settings for them. You will receive many tips on the ovenware and preparation, as well as what to do if something goes wrong.
  • Page 69: Setting Values And Tips

    Setting values and tips The setting values apply to meals placed in a cold oven. This saves energy. The temperature and cooking time depend on the meal quantity and consistency. This is why temperature ranges are given in the tables. The tips provide you with additional information.
  • Page 70 Cakes in tins Level Type of Tempera Cooking heating ture in ºC time in minutes Fruit tart or cheesecake, shortcrust Springform cake tin 170 190 70 90 pastry* Fruit pie, delicate (sponge mixture) Springform cake 150 170 50 60 tin/ring cake tin Savoury tarts* Springform cake tin 170 190...
  • Page 71: Baking Tips

    Bread and rolls Accessories Level Type of Tempera Cooking heating ture in ºC time in minutes Preheat for 8 10 Sour dough bread with 1.2 kg without 45 55 flour* Bread rolls Baking tray 220 240 25 35 Crispy rolls Baking tray 200 220 10 20...
  • Page 72 You want to establish whether Approximately 10 minutes before the end of the baking time the sponge cake is baked specified in the recipe, stick a cocktail stick deep into the cake through. at the highest part. If there is no mixture left on the stick when it is removed, the cake is ready.
  • Page 73: Meat, Poultry, Fish

    Meat, poultry, fish Ovenware You may use any heat resistant ovenware. The universal pan is suitable for large roasts. Always place ovenware in the centre of the ceramic. Place hot glass dishes on a dry kitchen towel after they have been removed from the oven. The glass could crack on a cold or wet surface.
  • Page 74 Meat Salt steaks after grilling so that they do not dry out. Turn pieces of meat halfway through the cooking time and pieces of food that you are grilling two thirds of the way through. Meat Ovenware Level Type of Tempera Cooking heating...
  • Page 75 Poultry The weights indicated in the table are for unstuffed poultry that is ready for roasting. When cooking duck or goose, pierce the skin on the underside of the wings to allow the fat to escape. Poultry will turn out particularly crispy and brown if you baste it towards the end of the roasting time with butter, salted water or orange juice.
  • Page 76: Tips For Roasting And Grilling

    Tips for roasting and grilling The table does not contain Select the nearest weight from the instructions and change the information for the weight of your time accordingly. roast. You want to establish whether Use a meat thermometer (available from specialist shops) or the roast is ready.
  • Page 77: Braising

    Braising Braising is the ideal cooking method for all tender pieces of meat which are to be cooked medium rare or medium. Meat remains very succulent and extremely tender. Advantage: The benefit of this cooking method is that it allows lots of scope for menu planning because slow cooked meat is easy to keep warm.
  • Page 78: Tips For Braising

    Table All tender joints of beef, pork, veal and lamb are suitable for braising. Searing and braising times depend on the size of the piece of meat. Searing time refers to the time the meat spends in hot fat. Meal Searing on the hotplate Cooking in the oven in minutes...
  • Page 79: Bakes, Gratins, Toasts

    Bakes, gratins, toasts Gratins are bakes made from raw ingredients and grilled. Meal Ovenware Level Type of Tempera Cooking heating ture in ºC, time in grill minutes Sweet bake Ovenproof dish 170 190 45 55 (e.g. quark soufflé with fruit) Savoury bake made from cooked Ovenproof dish or 180 200...
  • Page 80: Preserving

    Note Turn very juicy fruit several times. Loosen the dried fruit and vegetables from the paper immediately after drying. Preserving Only use undamaged fruit and vegetables. Wash them thoroughly. Do not preserve more than six jars of fruit or vegetables at the same time. The times given in the tables are guidelines.
  • Page 81: Remove The Jars

    Preserving fruit As soon as the contents of the jars begin to bubble, after about 40 to 50 minutes, turn off the oven using the @ main switch. Remove the jars from the oven after 25 to 35 minutes. If left to cool down in the oven for longer, bacteria might form, which would cause the preserved fruit to spoil.
  • Page 82: Frozen Ready Made Meals

    Frozen ready made meals Place your frozen ready made meal directly on the ceramic or on a baking tray which is placed directly on the ceramic. This means that the contact heat can be > used with speed. speed Never place greaseproof paper directly on the ceramic.
  • Page 83: Defrosting

    Defrosting Remove the food from the packaging and place it in a suitable dish in the centre of the wire rack. Observe the manufacturers instruction on the packaging. Defrosting times depend on the type and amount of food. Meal Accessories Level Type of Temperature...
  • Page 84: Tips For Saving Energy

    Melting times depend on the type and amount of food. Do not use aluminium foil or cling film when melting food. They will melt to the surface. Level Type of heating Level Keeping warm with oven open Melting, dissolving e.g. chocolate, butter, gelatine Tips for saving energy Only preheat the oven if this is specified in the recipe...
  • Page 85: Acrylamide In Foodstuffs

    Acrylamide in foodstuffs Experts are currently discussing how harmful acrylamide is in food. We have compiled this information for you, based on the results of current research. Which foods are affected? Acrylamide is mainly produced in grain and potato products heated at high temperatures, such as potato crisps, chips, toast, rolls, bread, baked goods made from shortcrust pastry (biscuits, gingerbread, cookies).
  • Page 86: Test Dishes

    Test dishes These tables were drawn up for the various institutes to facilitate the testing of different ovens. In accordance with DIN 44547 and EN 60350 Baking The setting values apply to dishes placed in a cold oven. Meal Accessories/tin Level Type of Tempera...
  • Page 87 Grilling The setting values apply to dishes placed in a cold oven. Meal Accessories Level Type of Grill setting Cooking heating time in minutes Toasting bread Wire rack (preheat for 10 minutes) Beefburgers, 12 pieces* Wire rack 25 30 * Turn after of the time.
  • Page 88 Notes...

This manual is also suitable for:

Hb 76p.70 eHb 76p.70

Table of Contents