LG PREMTB100 Owners & Installation Manual
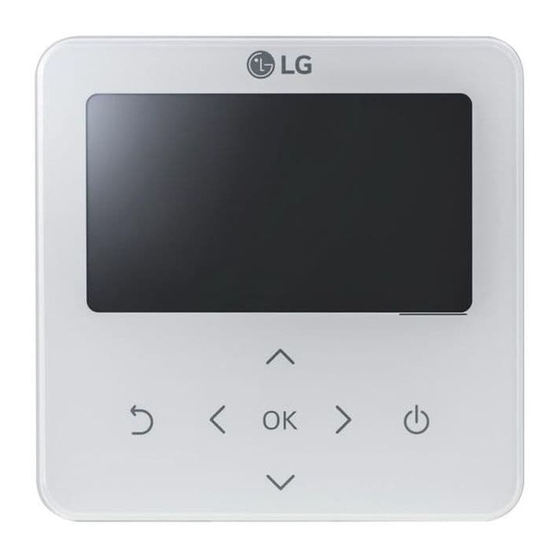
New standard remote controller
Hide thumbs
Also See for PREMTB100:
- Owners & installation manual (82 pages) ,
- Engineering product data book (48 pages)
Table of Contents
Advertisement
Quick Links
OWNER'S & INSTALLATION
MANUAL
NEW STANDARD
REMOTE
CONTROLLER
Please read this installation manual completely before installing the product.
Installation work must be performed in accordance with the national wiring standards by authorized personnel only.
Please retain this installation manual for future reference after reading it thoroughly..
Model type: NEW STANDARD REMOTE CONTROLLER
Model name: PREMTB100
P/NO : MFL69312302
Rev01.022216
www.lg.com
Advertisement
Table of Contents

Related Manuals for LG PREMTB100


Summary of Contents for LG PREMTB100
- Page 1 Installation work must be performed in accordance with the national wiring standards by authorized personnel only. Please retain this installation manual for future reference after reading it thoroughly.. Model type: NEW STANDARD REMOTE CONTROLLER Model name: PREMTB100 www.lg.com P/NO : MFL69312302...
-
Page 2: In-Use
TIPS FOR SAVING ENERGY IMPORTANT SAFETY INSTRUCTIONS TIPS FOR SAVING ENERGY IMPORTANT SAFETY INSTRUCTIONS READ ALL INSTRUCTIONS BEFORE USING THE APPLIANCE. Here are some tips that will help you minimize the power consumption when you use the air conditioner. You can use your air conditioner more efficiently by referring to the instructions Always comply with the following precautions to avoid dangerous situations and ensure peak performance of your product below:... -
Page 3: Table Of Contents
IMPORTANT SAFETY INSTRUCTIONS TABLE OF CONTENTS CAUTION TABLE OF CONTENTS In-use Check Room Temperature TIPS FOR SAVING ENERGY • Do not clean using powerful detergents like solvent but use soft cloths. There is risk of fire, electric shock, explosion, equipment malfunction or deformation. WIND SETTING IMPORTANT SAFETY IN- •... - Page 4 TABLE OF CONTENTS TABLE OF CONTENTS Turn-on Reservation Low noise mode time setting Primary heater setting(air conditioner) INSTALLATION METHOD Advanced fan speed “Auto” setting Air conditioner Fan operation interlocked SCHEDULE SETTING TO USE EXTERNAL DEVICE with ventilation setting (air conditioner) Delay time (exclusive for ventilation) How to enter schedule Cable connection method to use external...
-
Page 5: Description
DESCRIPTION READ BEFORE OPERATING THE CONTROLLER DESCRIPTION READ BEFORE OPERATING THE CONTROLLER Menu Structure LG RS3 Standard Wired remote controller Menu Sub function Energy Saving Plasma Purification Fan Auto Operation display window Humidification Electric Heater Robot Cleaning Back button On/Off Button... - Page 6 READ BEFORE OPERATING THE CONTROLLER READ BEFORE OPERATING THE CONTROLLER .......67 Filter Sign Energy .......68 Change Temperature .................52 Instantaneous Power .......69 Wi-Fi Pairing Energy Consumption .......70 Comfort Cooling ......54 Year-on-year Usage ODU Refrigerant Noise .......70 ......54 Reduction Weekly Usage .......71 ......54 Monthly Usage Defrost Mode...
- Page 7 READ BEFORE OPERATING THE CONTROLLER READ BEFORE OPERATING THE CONTROLLER ......124 Primary Heater Service ......93 AC Fan Operation Interlocked Service Contact ......125 With Ventilation ......94 Model Information ......126 IDU Auto-Start ......95 RMC Version Information ........xx Occupancy Duration Time ......96 Error History ......127 CN_CC ......97...
-
Page 8: Description Of The Operation
DESCRIPTION OF THE OPERATION DESCRIPTION OF THE OPERATION Setting screen DESCRIPTION OF THE OPERATION Select the category to set using [∧,∨(up/down)] button. Main screen In each detail screen of the menu, as in the box in the left figure, In the main screen, press [<, >(left/right)] button to select the category to set, and you can con- when “<,>”... -
Page 9: Monitoring / Additional Function Screen
DESCRIPTION OF THE OPERATION DESCRIPTION OF THE OPERATION Monitoring / Additional function screen Interface screen In the main screen, you can enter the monitoring / additional function screen by pressing [Back] Select the product (air conditioner or ventilation) to set using [<, >(left/right)] button. button and then pressing [<, >(left/right)] button. -
Page 10: Operation Setting
OPERATION SETTING OPERATION SETTING Cooling Operation OPERATION SETTING Cooling operation’s minimum setting temperature is 18°C. On / Off For some types of the indoor units, the desired temperature can be controlled in the units of 1°C or 0.5°C. Air conditioner and ventilator will be turned on or off. Press the remote controller’s (On/Off) button. -
Page 11: Heating Operation
OPERATION SETTING OPERATION SETTING Heating Operation Dry Operation The heating operation’s minimum setting temperature is 16°C. Dry operation’s initial fan speed is “Low”. For some types of the indoor units, the desired temperature can be controlled in the units of 1°C Dry operation does not have a separate desired temperature. -
Page 12: Fan Only Operation
OPERATION SETTING OPERATION SETTING Fan Only Operation AI / Auto operation Fan only operation’s initial wind strength is “High”. Auto operation’s initial desired temperature is 25°C. Fan only operation does not have a separate desired temperature. The cooling exclusive model’s initial desired temperature is “It’s Fine”. Cooling/heating model’s desired temperature can be controlled in the units of 1°C or 0.5°C. -
Page 13: Power Cool Operation
OPERATION SETTING OPERATION SETTING - VENTILATOR Power Cool Operation OPERATION SETTING - VENTILATOR Power cooling quickly lowers the indoor temperature. Operation mode Desired temperature: 18°C Fan speed : Power fan speed Ventilation (general and direct cooling type ventilation) operation mode supports the following op- eration modes. -
Page 14: Temperature Setting
TEMPERATURE SETTING TEMPERATURE SETTING Check Room Temperature TEMPERATURE SETTING You can check the current indoor temperature. Controlling Desired Temperature • In the remote controller’s the main screen, you can check the indoor temperature. You can easily control to the desired temperature. •... -
Page 15: Wind Setting
WIND SETTING ADDITIONAL OPERATION –VENTILATION WIND SETTING ADDITIONAL OPERATION –VENTILATION Fan speed control Additional operation You can easily coIn the main screen, press [<,>(left/right)] button to select the fan speed cate- You can change the additional operation of the ventilation product. gory, and press [∧,∨(up/down)] button to set the fan speed control the desired fan speed. -
Page 16: External Equipment Control Setting
EXTERNAL EQUIPMENT CONTROL SETTING ADDITIONAL FUNCTION SETTING EXTERNAL EQUIPMENT CONTROL SETTING ADDITIONAL FUNCTION SETTING External equipment control Additional function entrance and setting method It is the function to set the contact point output of the external equipment control mode. In the menu screen, press [<,>(left/right)] button to select the additional function category, and press [OK] button to move to the additional function setting list screen. -
Page 17: Energy Saving Setting
ADDITIONAL FUNCTION SETTING ADDITIONAL FUNCTION SETTING Energy Saving Setting Plasma Purification Setting The energy saving cooling function is the function to control the desired temperature during the It makes the indoor air clean and pleasant. cooling operation to improve the pleasant feeling of the user and to improve the power saving performance. -
Page 18: Fan Auto Setting
ADDITIONAL FUNCTION SETTING ADDITIONAL FUNCTION SETTING Fan Auto Setting Humidification setting Select fan operation after performing thermal control of indoor units. It is the function to activate the humidifier installed in the product when the indoor air is dry. If set to 'ON', fan operation keeps on after thermal operation of indoor units. NOTE NOTE The humidification function is an additional function, and it may not be displayed/operated in... -
Page 19: Electric Heater Setting
ADDITIONAL FUNCTION SETTING ADDITIONAL FUNCTION SETTING Electric Heater Setting Robot Cleaning Setting It is the function to reinforce the heating capability by turning on the electric heater during the Robot cleaning function is the function to automatically perform the filter cleaning with the heating operation. -
Page 20: Ventilation Kit Setting
ADDITIONAL FUNCTION SETTING ADDITIONAL FUNCTION SETTING Ventilation kit Setting Comfort Cooling Setting Function enables operation of an optional ventilation kit with indoor units The comfort cooling is the function to automatically control the cooling strength to maintain the pleasant feeling without turning off the product after the indoor temperature reached the desired temperature. -
Page 21: Lock Setting
LOCK SETTING TIMER SETTING LOCK SETTING TIMER SETTING How to enter lock setting Timer entrance and setting method • In the menu screen, press [<,>(left/right)] button to select “lock setting” category, and press • In the menu screen, press [<,>(left/right)] button to select the timer category, and press [OK] [OK] button to move to the lock setting list screen. -
Page 22: Simple Timer
TIMER SETTING TIMER SETTING Simple timer Sleep timer You can easily set the timer in the range of 1~7 hours in the units of 1 hour. Sleep timer is the function to operate the air conditioner in sleep mode before going to sleep for certain hours and stop the operation. -
Page 23: Turn-Off Reservation
TIMER SETTING TIMER SETTING Turn-off Reservation Turn-on Reservation The product is automatically turned Off at the set timer time. The product is automatically turned On at the set timer time. NOTE NOTE Even if the Turn-off Reservation operation is turned On/Off after the setting and before the Even if the Turn-on Reseravation operation is turned On/Off after the setting and before the timer operation, the set timer is not cleared. -
Page 24: Schedule Setting
SCHEDULE SETTING SCHEDULE SETTING Daily Schedule SCHEDULE SETTING It is the function that can check the status of the timer (schedule) saved in the remote controller. How to enter schedule • In the schedule list, select the daily schedule status category, and press [OK] button to move to the detail daily schedule status screen. -
Page 25: Schedules & Edit - Add Schedule
SCHEDULE SETTING SCHEDULE SETTING Schedules & Edit Schedules & Edit – Add schedule It is the function that can check the status of the timer (schedule) saved in the remote controller. Description of each stage in Add schedule • In the schedule list, select the daily schedule status category, and press [OK] button to move to the daily schedule status detail screen. -
Page 26: Exception Day
SCHEDULE SETTING ENERGY Exception day ENERGY It is the function to automatically stop the operation on the set timer day. How to enter energy • In the schedule list, select the exception day category, and press [OK] button to move to the Exception day designation detail screen. -
Page 27: Instantaneous Power Check
ENERGY ENERGY Instantaneous power check Energy consumption It is the function that can check the product’s instantaneous power. You can check the energy consumption (operation time, power consumption). ※There may be some error with the actual instantaneous power, so use it only for reference. ※There may be some error with the actual consumption, so use it only for reference. -
Page 28: Energy Saving - Temperature Setback Timer
ENERGY ENERGY Energy saving - Temperature Setback Timer • Operation time unit is time (hr.), and power consumption unit is kWh. • The power consumption display can be checked when it is connected to the indoor unit that It is the function to return to the desired temperature after the set time after the product opera- supports the power consumption information display function. -
Page 29: Energy Saving - Time Limit Control
ENERGY Energy saving - Time Limit Control Energy setting- outdoor unit capacity setting It is the function to stop the product operation after the set time after starting the product opera- It is the function that can set the outdoor unit capacity. tion for the energy saving. -
Page 30: Energy Setting - Target Instantaneous Power Setting
ENERGY Energy setting - target instantaneous power setting Energy setting - target power consumption It is the function that can set the Instantaneous power’s target value. It is the function to set the target power consumption per hour. You can set the target value to find the power consumption status. •... -
Page 31: Energy Setting - Target Operation Time
ENERGY ENERGY Energy setting - target operation time Energy setting - Alarm Popup Setting It is the function that can set the Instantaneous power’s target value. It is the function to set whether to use the target power consumption and the target operation time notice popup window. -
Page 32: Energy Setting - Usage Data Initialization
ENERGY FUNCTION SETTING Energy setting – Usage data initialization FUNCTION SETTING It is the function to initialize all of the power consumption and operation time information. How to enter function setting • In the energy setting list, select “consumption data initialization” category, and press [OK] but- ton to move to the consumption data initialization setting screen. -
Page 33: Function Setting
FUNCTION SETTING FUNCTION SETTING Function Setting Vane angle control setting You can control the wind blowing angle. Menu Description - In the function setting list screen, press [∧,∨(up/down)] button to select the vane angle control Vane up/down control category, and press [OK] button to move to the up/down vane angle detail screen. You can control the Air Direction angle. - Page 34 FUNCTION SETTING FUNCTION SETTING Elevation grill setting Robot cleaning setting It is the function to operate the Elevation grill for the indoor unit filter cleaning. Robot cleaning function is the function to perform the automatic filter cleaning with the cleaner of the product when the conditioner is used for certain period of time.
- Page 35 FUNCTION SETTING FUNCTION SETTING Filter sign check and initialization Change temperature setting When it becomes the time for the indoor unit filter cleaning, the filter cleaning message appears, Change Temperature is the function to set the automatic Change Temperature between cooling and it is the function to remove the message.
-
Page 36: Wi-Fi Pairing Setting
FUNCTION SETTING FUNCTION SETTING Wi-Fi pairing setting Comfort cooling setting It is the function to perform the pairing function of the Wi-Fi module connected to the indoor unit. It is the function to set the outdoor unit Comfort saving operation value. •... -
Page 37: Defrost Mode Setting
FUNCTION SETTING FUNCTION SETTING Defrost mode setting Smart load control(SLC) setting Change the outdoor unit’s defrost mode operation. Change the outdoor unit’s Smart Load Control stage value. (Smart load control is the function to calculate the indoor air temperature, outdoor air tempera- •... -
Page 38: Low Noise Mode Time Setting
FUNCTION SETTING FUNCTION SETTING Low noise mode time setting Advanced fan speed “Auto” setting It is the function to set the start and end time of the outdoor unit’s low noise mode operation. It is the function to set the indoor unit’s temperature based auto fan usage. •... -
Page 39: Delay Time (Exclusive For Ventilation)
FUNCTION SETTING FUNCTION SETTING Delay time (exclusive for ventilation) Midnight air cooling (ventilation interface) It is the function to set the ventilation operation to start after the delay time. It is the function to discharge indoor air and supply cool outdoor air into the indoor during sum- mer nights to save energy. -
Page 40: User Setting
FUNCTION SETTING FUNCTION SETTING Language setting USER SETTING Set the language to be displayed on the remote controller. How to enter user setting • In the user setting list, select the language category, and press [OK] button to move to the de- tail screen. -
Page 41: Temperature Unit Setting
USER SETTING USER SETTING Temperature unit setting Screen saver timer setting Set the temperature unit displayed on the remote controller. Adjust the screen Off time of the remote controller. • In the user setting list, select the temperature unit setting category, and press [OK] button to •... -
Page 42: Lcd Brightness In Idle Setting
USER SETTING USER SETTING LCD brightness in idle setting External device setting Adjust the remote controller’s screen brightness. Set the name of external equipment and equipment logic setting • Select the following setting values using [<,>(left/right)] button. • In the user setting list, select the external device setting category, and press [OK] button to move to the detail screen. -
Page 43: External Device Types
USER SETTING USER SETTING External device types On condition / Off condition It is the function to set the name of the External device attached to the remote controller. It is the function to set to use the information managed by the wired remote controller as the contact point control condition to widen the usage of the contact point (Digital Output) installed in •... -
Page 44: Date Setting
USER SETTING USER SETTING Date setting Time setting Set the date displayed on the remote controller. Set the time displayed on the remote controller. • In the user setting list, select the date category, and press [OK] button to move to the detail •... -
Page 45: Summer Time Setting
USER SETTING USER SETTING Summer time setting Password setting Set the daylight savings time dates in the remote controller. Set the password to prevent unauthorized change to remote controller settings. • In the user setting list, select the summer time setting category, and press [OK] button to •... -
Page 46: Schedule Initialization
USER SETTING USER SETTING Schedule initialization Theme setting Initialize all timer settings in the remote controller. Set the theme of the remote controller screen. • In the user setting list, select the schedule initialization setting category, and press [OK] button •... -
Page 47: System Restart
USER SETTING SERVICE SETTING System restart SERVICE SETTING Restart the remote controller. How to enter service setting • In the user setting list, select the system restart setting category, and press [OK] button to move to the detail screen. To enter the menu displayed at the bottom, you need to enter the service setting menu as fol- - In the detail screen, when you press [OK] button, a popup message is displayed, press the lows. -
Page 48: Service Contact
SERVICE SETTING SERVICE SETTING Service contact Model information Check and input the service center phone number that you can call when there is service issue. Check the indoor/outdoor product group and capacity information to which the remote controller is connected. •... -
Page 49: Rmc Version Information
SERVICE SETTING SERVICE SETTING RMC Version Information Error history Check the indoor/outdoor product group and capacity information to which the remote controller View the connected indoor unit’s error history. is connected. • In the service setting list, select ‘check error history’ category, and press [OK] button to move •... -
Page 50: Open Source License
SERVICE SETTING INSTALLATION Open source license INSTALLATION View the remote controller’s open source license. Installation of Remote Controller • In the service setting list, select the open source license category, and press [OK] button to move to the detail screen. •... -
Page 51: Group Control
INSTALLATION INSTALLATION Group control • When you remove the remote controller from the installation plate, insert a small flat head screwdriver into the bottom side separation hole and turn clockwise to separate the remote controller. • It connects and controls 2 or more air conditioner indoor units to one wired remote controller. - There are 2 separation holes at the bottom part. -
Page 52: Installation Method To Use External Device
INSTALLATION INSTALLATION METHOD TO USE EXTERNAL DEVICE INSTALLATION METHOD TO USE EXTERNAL - For the details on the wireless remote controller master/slave setting changes, refer to the wireless remote controller manual. DEVICE - After completing the master/slave setting in the indoor unit product, turn Off the power of the indoor unit product, and turn On the power after 1 minute. -
Page 53: Air Conditioner And Ventilation Interface
[general ventilation [General ventilation interfaced operation] and may void the LG warrenty. independent operation] • In the menu screen, press [<,>(left/right)] button to select the setting category, and press... -
Page 54: Installer Setting - Air Conditioner
INSTALLER SETTING INSTALLER SETTING Installer setting – air conditioner Menu Description This is the function that static pressure of the product is divided in 11 • You can set the product user functions. Static pressure step setting steps for setting. •... -
Page 55: Installer Setting - Ventilator
INSTALLER SETTING INSTALLER SETTING Installer setting - ventilator Test run setting (air conditioner / DX ventilator) • You can set the product user functions. After product installation, the Test run must be performed. For Test run related details, refer to the product manual. -
Page 56: Central Control Address Setting
INSTALLER SETTING INSTALLER SETTING Central control address setting (air conditioner / DX ventilator) ESP setting (air conditioner / general, DX ventilator) It is the function to set the central control address of the indoor unit to allow communication with It is the function to set the fan speed value corresponding to each fan speed for easy installation. a central controller, •... -
Page 57: Temperature Sensor(2Th) Setting(Air Conditioner)
INSTALLER SETTING INSTALLER SETTING Temperature sensor(2TH) setting(air conditioner) Ceiling height setting (air conditioner) It is the function to select the temperature sensor to decide the indoor temperature. It is the function to control the fan speed stage according to the ceiling height in the ceiling type product. -
Page 58: Static Pressure Setting(Air Conditioner)
INSTALLER SETTING INSTALLER SETTING Static pressure setting(air conditioner) Remote controller master / slave setting (air conditioner / General, DX ventilator) Static pressure setting can be set only in the duct products. (It cannot be set in other products.) • You can set the following setting values using [<,>(left/right)] button. This function sets configuration for the master/slave setting through the remote controller. -
Page 59: Override M/S Setting (Air Conditioner / General, Dx Ventilator)
INSTALLER SETTING INSTALLER SETTING Override M/S setting (air conditioner / General, DX ventilator) Dry contact mode setting (air conditioner / DX ventilator) The operation master / slave selection function is to avoid other mode operations, and it is the Dry contact function is the function that can be used only when the dry contact devices is sepa- function to prevent the selection of opposite mode of the indoor unit master by the indoor units rately purchased and installed. -
Page 60: Fixed Fan Speed Setting
INSTALLER SETTING INSTALLER SETTING Fixed fan speed setting (air conditioner / DX ventilator) Emergency heater setting (air conditioner) It is the function to apply different fan speeds automatically for each thermal control status. Enable the emergency heater control function and the usage environment. •... -
Page 61: Function Control During Group Control Setting (Air Conditioner)
INSTALLER SETTING INSTALLER SETTING Function control during group Control setting (air conditioner) External devices of indoor unit setting (air conditioner) This function enables the control of the common functions or some functions based on the mas- At the Code field, select when air cleaner/heater/humidifier/elevation grill/ventilation KIT/refriger- ter indoor unit during the group control. -
Page 62: Indoor Unit Address Verification (Air Conditioner)
INSTALLER SETTING INSTALLER SETTING Indoor unit address verification (air conditioner) Static pressure step setting (air conditioner) This function allows you to check the address of the indoor unit designated by the outdoor unit. It is the function to subdivide and set the product’s Static pressure to 11 stages. •... -
Page 63: Fan Speed In Cooling Thermal Off (Air Conditioner)
INSTALLER SETTING INSTALLER SETTING Fan speed in Cooling thermal off (air conditioner) Primary heater setting(air conditioner) Indoor unit fan, in cooling mode, during thermal off condition. It is the function to set the air conditioner fan operation if the ventilation is operated while the air conditioner operation is stopped when the air conditioner and the ventilation are installed to inter- •... -
Page 64: Air Conditioner Fan Operation Interlocked With Ventilation Setting (Air Conditioner)
INSTALLER SETTING INSTALLER SETTING Air conditioner Fan operation interlocked with ventilation setting Indoor unit Auto-Start setting(air conditioner) (air conditioner) It is a function that sets whether to restore the indoor unit operation by resuming the previous power-on state or as power-off state in the power failure compensation. It is the function to set the air conditioner fan operation if the ventilation is operated while the air •... -
Page 65: Occupancy Duration Time Setting(Air Conditioner)
INSTALLER SETTING INSTALLER SETTING Occupancy duration time setting(air conditioner) CN_CC setting (air conditioner) It is a function that sets the light-on/occupancy duration after motion is detected when installing It is the function to set the usage of the indoor unit’s CN_CC port. an occupancy sensor. -
Page 66: Cn_Ext Setting (Air Conditioner)
INSTALLER SETTING INSTALLER SETTING CN_EXT setting (air conditioner) Outdoor unit function master setting (air conditioner) It is the function to set to control the external input and output according to DI/DO set by the cus- It is the function to set the outdoor unit’s function Master / Slave. tomer using the indoor unit’s Dry Contact Port. -
Page 67: Fan Continuous Operation Setting (Air Conditioner)
INSTALLER SETTING INSTALLER SETTING Fan continuous operation setting (air conditioner) Low Noise Mode Priority setting (air conditioner) It is the function to set the indoor unit’s continued fan function usage. (It is the function to maxi- It is the function to set the low noise mode control main agent. (It is the function to set that only mize the cooling/heating efficiency by the outdoor unit operating the indoor unit fan operation one of the outdoor unit / remote controller can control the low noise operation.) longer than the previous operation method.) -
Page 68: Password Initialization (Air Conditioner / General, Dx Ventilator)
INSTALLER SETTING INSTALLER SETTING Password initialization (air conditioner / general, DX ventilator) Product direction (general ventilator) It is the function to initialize (0000) when you forgot the password set in the remote controller. It is the function to set the direction of the ventilation product. •... -
Page 69: Express Ventilation Priority (General , Dx Ventilator)
INSTALLER SETTING INSTALLER SETTING Express ventilation priority (general , DX ventilator) Humidification of stand-alone ventilation mode (general , DX ventilator) It is the function to set the priority of the air supply and air discharge during the express ventila- tion operation. It is the function to set whether to use the humidification function during the ventilation product •... -
Page 70: Humidification Of Ventilation With Heating Operation (Dx Ventilator)
INSTALLER SETTING INSTALLER SETTING Humidification of ventilation with heating operation Ventilation Fan Speed Alignment(DX ventilator) (DX ventilator) It is the function to change the standard fan speed of the ventilation product. • Select value using [<,>(left/right)] button. It is the function to set the heating humidification function of the direct ventilation to be auto- matic or manual. -
Page 71: Different Mode Operation
LG Electronics will also provide open source code to you on CD-ROM for a charge covering the cost of performing such distribution (such as the cost of media, shipping, and handling) upon email request to opensource@lge.com.
Need help?
Do you have a question about the PREMTB100 and is the answer not in the manual?
Questions and answers