Table of Contents
Advertisement
Advertisement
Table of Contents

Related Manuals for Launch CRP123


Summary of Contents for Launch CRP123
- Page 1 V1.00.002 2013-04-22...
- Page 2 Copyright Information Copyright © 2013 by LAUNCH TECH. CO., LTD. All rights reserved. No part of this publication may be reproduced, stored in a retrieval system, or transmitted in any form or by any means, electronic, mechanical, photocopying and recording or otherwise, without the prior written permission of LAUNCH.
- Page 3 General Limitations This is a license, not a transfer of title, to the materials, and LAUNCH retains ownership of all copies of the Materials. Customer acknowledges that the...
- Page 4 LAUNCH. Customer shall implement reasonable security measures to protect such trade secrets. To the extent required by law, and at Customer’s written request, LAUNCH shall provide Customer with the interface information needed to achieve interoperability between the Materials and another independently created program, on payment of LAUNCH’s applicable fee, if any.
- Page 5 Materials and any Document. Customer’s rights under this Agreement will terminate immediately without notice from LAUNCH if Customer fails to comply with any provision of this Agreement. Upon termination, Customer shall destroy all copies of Software in its possession or control.
- Page 6 • Neither LAUNCH nor its affiliates shall be liable to the purchaser of this unit or third parties for damages, losses, costs or expenses incurred by purchaser or third parties as a result of: accident, misuse, or abuse of this unit, or unauthorized modifications, repairs, or alterations to this unit, or failure to strictly comply with LAUNCH operating and maintenance instructions.
- Page 7 Don’t connect or disconnect any test equipment while the ignition is on or the engine is running. • Keep the CRP123 dry, clean, free from oil/water or grease. Use a mild detergent on a clean cloth to clean the outside of the CRP123, when necessary.
-
Page 8: Table Of Contents
LAUNCH Creader Professional CRP123 User's Manual Table of Contents 1. Introduction .....................1 2. General Information ..................1 2.1 On-Board Diagnostics (OBD) II ..............1 2.2 Diagnostic Trouble Codes (DTCs)..............2 2.3 Location of the Data Link Connector (DLC) ..........2 2.4 OBD II Readiness Monitors ................3 2.5 OBD II Monitor Readiness Status ..............4... - Page 9 LAUNCH Creader Professional CRP123 User's Manual 7. Help ........................28 7.1 DLC Location Information................ 28 7.2 DTC Library ..................... 28 7.3 Abbreviation..................... 29 7.4 Tool Information ..................30 7.5 About OBD ....................30 8. Update ......................31 8.1 User Registration..................31 8.2 Register a passport ................. 31 8.3 Fill in Product Information ...............
-
Page 10: Introduction
10 modes of OBD II test for a complete diagnosis. Featuring the 3.5” TFT color display, it enables users to read/clear DTCs, record, save and playback data in live graphic display. The CRP123 is also very easy to use. With built-in help menus and code definitions, diagnosing and repairing that dreaded Check Engine Light is now easier than ever! Moreover, CRP123 also features the following bi-directional “special tests”:... -
Page 11: Diagnostic Trouble Codes (Dtcs)
LAUNCH Creader Professional CRP123 User's Manual 2.2 Diagnostic Trouble Codes (DTCs) OBD II Diagnostic Trouble Codes are codes that are stored by the on-board computer diagnostic system in response to a problem found in the vehicle. These codes identify a particular problem area and are intended to provide you with a guide as to where a fault might be occurring within a vehicle. -
Page 12: Obd Ii Readiness Monitors
LAUNCH Creader Professional CRP123 User's Manual on-board computer. The DLC is usually located 12 inches from the center of the instrument panel (dash), under or around the driver’s side for most vehicles. If Data Link Connector is not located under dashboard, a label should be there telling location. -
Page 13: Obd Ii Monitor Readiness Status
LAUNCH Creader Professional CRP123 User's Manual and monitoring fuel demands. Non-Continuous Monitors -- Unlike the continuous monitors, many emissions and engine system components require the vehicle to be operated under specific conditions before the monitor is ready. These monitors are termed non-... - Page 14 LAUNCH Creader Professional CRP123 User's Manual computer that controls engine and drive train. Malfunction Indicator Light (MIL) -- Malfunction Indicator Light (Service Engine Soon, Check Engine) is a term used for the light on the instrument panel. It is to alert the driver and/or the repair technician that there is a problem with one or more of vehicle’s systems and may cause emissions to exceed federal...
-
Page 15: Product Descriptions
Creader Professional CRP123 User's Manual 3. Product Descriptions 3.1 Outline of CRP123 Figure 3-1 Name Descriptions Power indicator It will light up while CRP123 is energized. Communication It will flash when CRP123 is communicating indicator with ECU. Indicates test results. -
Page 16: Specifications
LAUNCH Creader Professional CRP123 User's Manual Move cursor up or down for selection. Move cursor left or right for selection; Or turn page up or down when more than one page is displayed. Confirms a selection (or action) from a menu list. -
Page 17: Connection
4.2 Install TF card 1) Take out the TF card from package box. 2) Insert the TF card into the CRP123 TF card slot perpendicularly. Make sure is fully inserted in the right place with the “micro” label facing upward. - Page 18 LAUNCH Creader Professional CRP123 User's Manual Plug one end of the diagnostic cable to diagnostic interface, then connect the other end to vehicle's DLC. Figure 4-1 Turn the ignition on. Engine can be off or running. After finishing, the system will start initializing. After initialization, the system will enter the main menu interface.
-
Page 19: Diagnose
LAUNCH Creader Professional CRP123 User's Manual 5. Diagnose Select [Diagnose] in Main Menu and press [ ], the screen will display Monitor Status interface as following figure 5-1: Figure 5-1 5.1 OBDII/EOBD Diagnosing In Figure 5-1, press [ ] to enter system, the screen will display as following... -
Page 20: Read Codes
LAUNCH Creader Professional CRP123 User's Manual Figure 5-3 Press [ ], a screen similar to Figure 5-4 will appear: Figure 5-4 If it fails to enter the system, a prompt message box will appear: Figure 5-5 Follow the on-screen instructions to check the possible cause and retry it. - Page 21 LAUNCH Creader Professional CRP123 User's Manual Figure 5-6 Press [ ] to enter to select the manufacturer. Figure 5-7 will be shown on the screen. Press [ ] to select different items; press [ ]/[ ] to turn to next or previous page.
-
Page 22: Erase Codes
LAUNCH Creader Professional CRP123 User's Manual display. The screen will also show the detailed description of the current DTC. You can use [ ] key to view the next code. If the DTC can not be found, a screen similar to figure 5-9 will appear:... -
Page 23: I/M Readiness
LAUNCH Creader Professional CRP123 User's Manual interface as shown in Figure 5-12: Figure 5-12 According to the above figure, press [ ] to clear the DTC. If successful, figure 5-13 will appear on the screen. Figure 5-13 Notes: • Before performing this function, make sure to retrieve and record the trouble codes. -
Page 24: Data Stream
LAUNCH Creader Professional CRP123 User's Manual a fault has been performed) to confirm that the repair has been performed correctly, and/or to check for Monitor Run Status. Select [I/M Readiness] and press [ ], the screen will display the interface as... - Page 25 LAUNCH Creader Professional CRP123 User's Manual then press [ ] button to confirm, the screen will display the interface as shown in figure 5-16: Figure 5-16 Select [View All Items] and press [ ] button, the screen will display the interface...
-
Page 26: View Freeze Frame
LAUNCH Creader Professional CRP123 User's Manual Press [ ] to return to Diagnostic Menu. Select [Select Items] in Datastream menu and press [ ], the screen will display the interface as shown below: Figure 5-19 Press [ ] button to select datastream items, and press [ ]/[ ] button to turn page. -
Page 27: O2 Sensor Test
LAUNCH Creader Professional CRP123 User's Manual Select [Freeze Frame] in Diagnostic menuand press [ ], the screen will display the interface as shown below: Figure 5-20 Press [ ]/[ ] button to view the data. Press [ ] to return to Diagnostic Menu. -
Page 28: On-Board Monitor Test
LAUNCH Creader Professional CRP123 User's Manual Figure 5-22 Press [ ]/[ ] button to turn to next or previous page. Press [ ] button to select the desired items, then press [ ] button, the screen will display as shown below:... -
Page 29: Evap System Test
LAUNCH Creader Professional CRP123 User's Manual Figure 5-24 Press [ ]/[ ] button to turn to next or previous page. Press [ ] button to select the desired items, then press [ ] button, the screen will display as shown below:... -
Page 30: Vehicle Info
LAUNCH Creader Professional CRP123 User's Manual external devices to control vehicle system. If the car supports this function, it will display as below: Figure 5-26 5.1.9 Vehicle Info Select [Vehicle Info] and press [ ], the screen will display the information, such... - Page 31 Notes: • Before diagnosing, please make sure the diagnostic program corresponding to certain vehicle model has been installed on your CRP123. • For vehicles manufactured by different vendors, it is possible that it has different diagnostic menus. For details, please follow the instructions on the screen to proceed.
- Page 32 LAUNCH Creader Professional CRP123 User's Manual Take VW for example. Select [VW] and press [ ], the screen will display as Fig. 5-30. Figure 5-30 Press [ ] button to select the desired item, then press [ ] button. Choose [Manually Select] and press [...
-
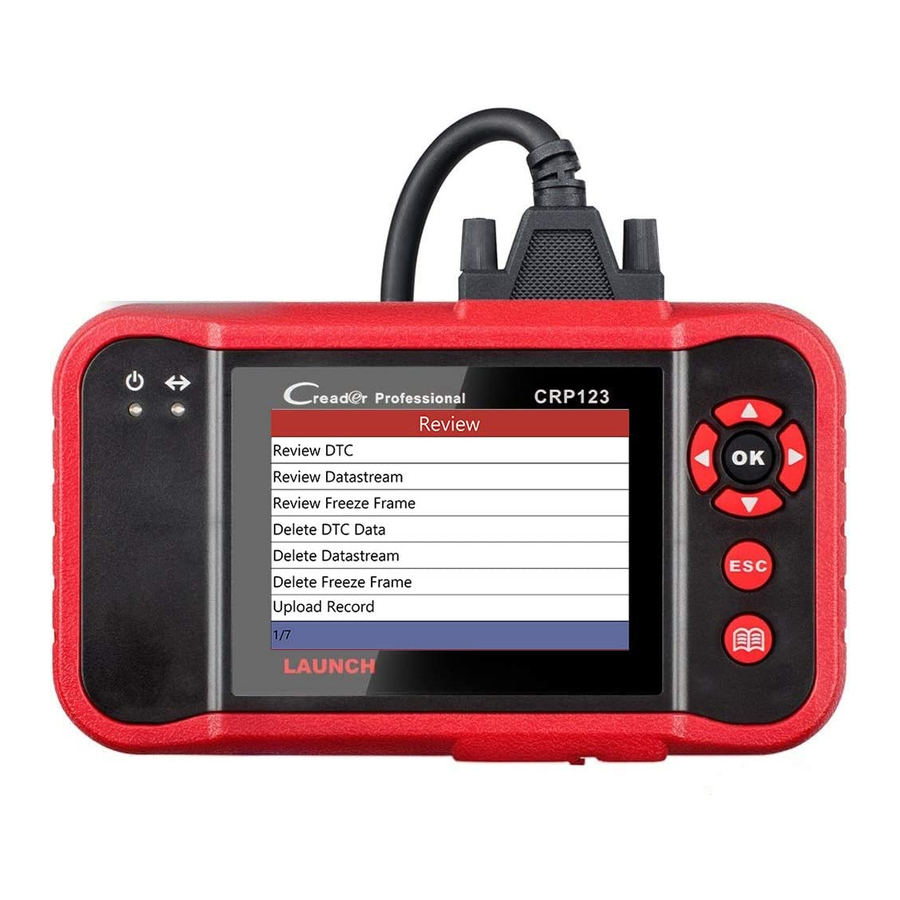
Page 33: Review
LAUNCH Creader Professional CRP123 User's Manual Figure 5-32 After communication is complete, the system will start diagnosing the selected item. If communication failed, a dialog box prompting you communication failure will appear as shown on Fig. 5-33. Figure 5-33 5.3 Review This function is used to review the recorded Data Streams, DTC, and Freeze Frame. -
Page 34: Settings
LAUNCH Creader Professional CRP123 User's Manual 6 Settings Select [Settings] in the main menu and press [ ], the system will enter the following screen: Figure 6-1 6.1 Language This option enables you to set the user interface language. ] to confirm, the screen will enter the language Choose [Language] and press [ selection interface. -
Page 35: Beeper
LAUNCH Creader Professional CRP123 User's Manual Choose [Unit of Measure] and press [ ] to confirm, the screen will enter the unit setting interface. Use the [ ] button to choose the desired one and press [ ] to save your change. - Page 36 Choose [Record Mode] and press [ ] to confirm, the screen enters Fig. 6-5. Press [ ] to switch between on and off. When recording is ON, the icon appears, then CRP123 can record DTC’s, record Data Stream and Freeze Frames. Figure 6-5...
-
Page 37: Help
LAUNCH Creader Professional CRP123 User's Manual 7. Help This menu enables you to view device information and OBD introduction. In main menu, select [Help] and press [ ] to enter Figure 7-1. Figure 7-1 7.1 DLC Location Information In Figure 7-1, select [DLC Location Information] and press [ ] to view the location of vehicle’s DLC. -
Page 38: Abbreviation
LAUNCH Creader Professional CRP123 User's Manual definition of the DTC, as indicated in figure 7-3: Figure 7-3 Press [ ] to return to the previous screen. 7.3 Abbreviation In Figure 7-1, select [Abbreviation] and press [ ] to enter the abbreviation word list. -
Page 39: Tool Information
LAUNCH Creader Professional CRP123 User's Manual Figure 7-5 Press [ ] to return to the previous screen. 7.4 Tool Information In Figure 7-1, select [Tool Information] and press [ ] to view the related information of CRP123. Figure 7-6 Note: You are strongly recommended to note down the Serial Number and Register Code in Figure 7-6 since these 2 pieces of information are required while registering your CRP123. -
Page 40: Update
LAUNCH Creader Professional CRP123 User's Manual 8. Update Hardware Requirement: 1. A computer that can access the Internet. 2. A CF card reader/writer and a CF card that need to be updated. 8.1 User Registration Log on http://www.x431.com, click the link shown on the top of the webisite, a... - Page 41 LAUNCH Creader Professional CRP123 User's Manual Click on “Confirm and agree with clause” to enter, a screen similar to the following will appear: Figure 8-3 Fill in your information (items with * can not be blank and must be entered). After filling, click [Register] to register a passport.
-
Page 42: Fill In Product Information
LAUNCH Creader Professional CRP123 User's Manual 8.3 Fill in Product Information Figure 8-5 Choose the desired product type from the pull-down list. The serial No. and register password can be found from the [Tool Information] in “Help” (See Chapter 7. Help). Dealer code can be obtained from dealer. -
Page 43: Software Update
3. Once a updated version is found, a message box prompting you to update will pop up on the screen after CRP123 is turned on. 4. Click “OK” to start updating and a progress bar will appear. It may takes several minitues to finish update if your upgrade package file is too large, please wait. -
Page 44: Faq
Creader Professional CRP123 User's Manual 9. FAQ Here we list some frequently asked questions and answers relating to CRP123. Question: System halts when reading data stream. What is the reason? Answer: It may be caused by a slackened connector. Please turn off the CRP123, firmly connect the connector, and switch on it again. - Page 45 The exclusive remedy for any automotive meter found to be defective is repair or replacement, and LAUNCH shall not be liable for any consequential or incidental damages.
- Page 46 Statement: LAUNCH reserves the rights to make any change to product designs and specifications without notice. The actual object may differ a little from the descriptions in the manual in physical appearance, color and configuration. We have tried our best to make the descriptions and illustrations in the manual...
Need help?
Do you have a question about the CRP123 and is the answer not in the manual?
Questions and answers