Table of Contents
Advertisement
Quick Links
Advertisement
Table of Contents

Related Manuals for Launch X-431 PRO MINI


Summary of Contents for Launch X-431 PRO MINI
- Page 1 Version: V1.00.000 Revised date: 2016-11-14 https://obd2.market...
- Page 2 LAUNCH is not responsible for any use of this information as applied to other units. Neither LAUNCH nor its affiliates shall be liable to the purchaser of this unit or third parties for damages, losses, costs, or expenses incurred by purchaser or...
- Page 3 Do not insert foreign objects into or place heavy objects on your device. Sensitive components inside might cause damage. Do not use X-431 PRO MINI in exceptionally cold or hot, dusty, damp or dry environments. In places using X-431 PRO MINI may cause interference or generate a potential risk, please turn it off.
- Page 4 LAUNCH X-431 PRO MINI User Manual Always perform automotive testing in a safe environment. If the VCI module remains unused for a long period of time, it is suggested to unplug the connector from vehicle’s DLC to conserve battery power.
-
Page 5: Table Of Contents
ROFILE ....................1 EATURES X-431 PRO MINI ............2 NOWLEDGE OF 1.3.1 X-431 PRO MINI whole set ..............2 1.3.2 X-431 PRO MINI handset ..............2 1.3.3 VCI module (Only applies for 12V cars) ..........4 ................. 4 ECHNICAL ARAMETERS .................. - Page 6 4.6.7 Tire Pressure Monitor System Reset ..........27 4.6.8 Diesel Particulate Filter (DPF) Regeneration ........27 4.7 R .................. 27 EMOTE IAGNOSIS 4.7.1 Interface Layout ................28 4.7.2 How to launch a remote diagnosis? ..........28 4.8 S ................... 29 OFTWARE PDATE 4.9 M .................. 29 AINTENANCE 4.10 P...
- Page 7 4.11 S ....................30 ETTINGS 4.11.1 Units of Measurement ..............31 4.11.2 Print Information................31 4.11.3 Launch wireless printer connection ..........31 4.11.4 Network Test ................... 33 4.11.5 About ....................33 4.11.6 Exit ....................33 5 OTHERS ......................34 5.1 E ......................
-
Page 8: Introductions
Through the simple Bluetooth communication between the VCI module and X-431 PRO MINI, it achieves full car model and full system vehicle trouble diagnosis, which includes Reading DTCs, Clearing DTCs, Reading Data Stream, Actuation Test and Special Functions. -
Page 9: Knowledge Of X-431 Pro Mini
1.3 Knowledge of X-431 PRO MINI 1.3.1 X-431 PRO MINI whole set X-431 PRO MINI is mainly composed of an X-431 PRO MINI handset, and a DBSCar II VCI module. 1.3.2 X-431 PRO MINI handset Fig. 1-1 X-431 PRO MINI handset... - Page 10 For housing the VCI module. POWER/Screen lock In Off mode, press it to turn X-431 PRO MINI on; In On mode, turn X-431 PRO MINI off with long press or lock screen with short press. Carry strap Air intake vent...
-
Page 11: Vci Module (Only Applies For 12V Cars)
LAUNCH X-431 PRO MINI User Manual 1.3.3 VCI module (Only applies for 12V cars) Fig. 1-2 VCI module ① OBD-16 diagnostic To connect on vehicle’s OBD2 DLC. connector ② Mini USB port For connecting the USB cable to the tablet to perform vehicle diagnosis. -
Page 12: Package List
20% ~ 90% 1.5 Package List While opening X-431 PRO MINI package for the first time, please carefully check the following components. Common accessories for each X-431 PRO MINI are same, but for different destinations, the accessories of X-431 PRO MINI may vary. -
Page 13: Preparations
While X-431 PRO MINI has low battery, a beep will sound. If it is very low, X-431 PRO MINI will be switched off automatically. -
Page 14: Lock & Unlock The Screen
2.5 Lock & unlock the screen Many screen lock modes are available on X-431 PRO MINI. Note: You are recommended to set screen lock as “None” since X-431 PRO MINI is a frequently used diagnostic tool. 2.5.1 Lock the screen When it is ON, press [POWER] once to lock the screen;... -
Page 15: Screen Layout
LAUNCH X-431 PRO MINI User Manual 2.6 Screen layout There are four on-screen buttons available on the bottom of the screen. BACK to return to the previous screen. HOME to navigate to the Android’s home screen. Recent Apps to view the recently launched applications. -
Page 16: Set Screen Lock
1. On the home screen, tap Settings > Security > Screen lock. 2. Choose the desired screen lock mode and follow the on-screen instructions to finish your setting. Note: You are recommended to set screen lock as “None” since X-431 PRO MINI is a frequently used diagnostic tool. -
Page 17: Wi-Fi Setting
Note: If you don’t need to use Wi-Fi for a while, you can turn it off to conserve battery life. X-431 PRO MINI has built-in Wi-Fi that can be used to get online. Once you’re online, you can register your X-431 PRO MINI, surf the Internet, get apps, send email, launch the remote diagnosis, and check for software updates etc. -
Page 18: How To Diagnose
X-431 PRO MINI. Fig. 4-1 4.2 Initial Use During initial use, tap the X-431 PRO MINI icon on the home screen to launch it and enter the main menu screen. 4.2.1 User registration Tap “Login” on the upper right corner of the main menu screen:... - Page 19 LAUNCH X-431 PRO MINI User Manual Fig. 4-2 1. If you are a new user, tap “New Registration”. See Fig. 4-3. Fig. 4-3 Note: To obtain better service, you need to provide real information. A. Create App account: In Fig. 4-3, fill in the information in each field and then...
- Page 20 LAUNCH X-431 PRO MINI User Manual Fig. 4-4 B. Activate the VCI module: In Fig. 4-4, input the Serial Number and Activation Code, which can be found in the password envelope. Product SN Product SN Activation code Fig. 4-5 Note: To exit and activate it later, tap “Skip”. In this case, you can activate your connector by tapping “Activate Connector”...
- Page 21 LAUNCH X-431 PRO MINI User Manual Fig. 4-6 To download the diagnostic software, tap “Yes” to enter the software download page. Tap “No” to download it later. Fig. 4-7 On the download page, tap “Update” to start downloading. It may take several minutes to finish it, please be patient to wait.
-
Page 22: Diagnostic Software Layout
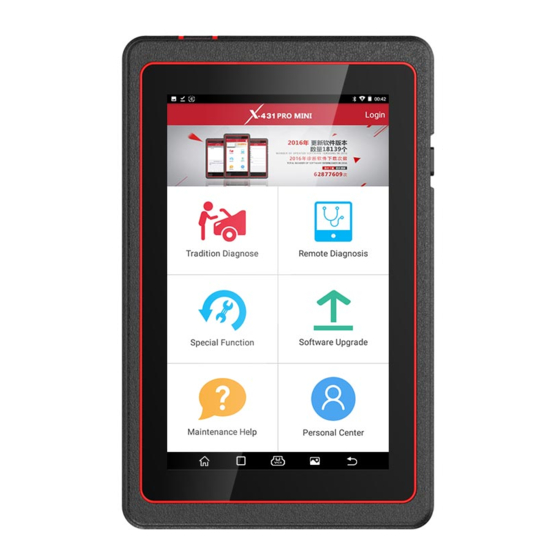
4.2.3 Function menu It mainly includes the following items: Name Description Tradition Diagnose Configures X-431 PRO MINI to operate as a diagnostic tool. Remote Diagnosis This option aims to help repair shops or technicians to get the repair job fixed faster. -
Page 23: Connections
Throttle should be in a closed position. Select the VCI module If X-431 PRO MINI is testing vehicles equipped with universal OBD II 16 PIN diagnostic socket, please use the included VCI module. (For vehicles with non-OBD II 16 PIN diagnostic socket, a non-16 PIN connector is required.) 4.3.2 DLC location... -
Page 24: Vehicle Connection
3. Choose one of the two ways to obtain power from: A. Power adaptor: Connect one end of the included power adaptor to DC IN port of X-431 PRO MINI tablet, and the other end to AC outlet. B. Internal battery pack For non-OBDII vehicle, proceed as follows: 1. -
Page 25: Bluetooth Setting
4.4 Bluetooth Setting Enter X-431 PRO MINI Bluetooth setting screen (“Settings” --> “Bluetooth”), slide the Bluetooth switch to ON and X-431 PRO MINI will start searching available Bluetooth device, tap the desired connector to pair. By default, the Bluetooth name is 98569*****00 (where ***** stands for 5 digits.). - Page 26 X-431 PRO MINI and the vehicle. Tap “OBD VIN” to scan the vehicle identification number of the vehicle. Once scanning is complete and successful, X-431 PRO MINI will enter the diagnostic software of the vehicle. Note: Before using this function, the corresponding diagnostic software and Auto search file need to be downloaded on your tool first while downloading the diagnostic software.
-
Page 27: Read Dtc
LAUNCH X-431 PRO MINI User Manual on-screen instruction to access the diagnostic software. Take Demo as an example to demonstrate how to diagnose a vehicle. 1). Tap the “DEMO” to enter the software selection page. 2). Tap “DEMO” to ignore Bluetooth connection and jump to the DEMO system selection screen. - Page 28 LAUNCH X-431 PRO MINI User Manual Fig. 4-17 Highlight a certain DTC item, and then tap to search the definition of the selected DTC online. On-screen Buttons: Exit: Tap it to return to the home screen. Report: To save the current diagnostic data.
-
Page 29: Clear Fault Memory
LAUNCH X-431 PRO MINI User Manual 4.5.2 Clear fault memory After reading the retrieved codes from the vehicle and certain repairs have been carried out, you can use this function to erase the codes from the vehicle. Before performing this function, please be sure the vehicle’s ignition key is in the ON position with the engine off. - Page 30 Exit: Tap it to return to the home screen. Print: Tap it to print the current screen. To perform printing, you need to purchase a Wi-Fi printer manufactured by LAUNCH separately. For details on printer setting, see Chapter 4.11.3 “Launch wireless printer connection”.
-
Page 31: Special Function
4.5.5 How to view History? Generally once a vehicle diagnosis is performed, X-431 PRO MINI will record the every details of diagnostic process. The History function provides a quick access to the tested vehicles and users can resume from the last operation, without the necessity of starting from scratch. -
Page 32: Special (Reset) Function
4. Tap the desired system to enter and follow the instructions on the screen to proceed. 4.6 Special (Reset) Function In addition to amazing & powerful diagnostic function, X-431 PRO MINI also features various service functions. The most commonly performed service functions contain:... -
Page 33: Electronic Throttle Position Reset/Learn
LAUNCH X-431 PRO MINI User Manual 2. Reset must be performed in the following cases: a) The brake pad and brake pad wear sensor are replaced. b) The brake pad indicator lamp is on. c) The brake pad sensor circuit is short, which is recovered. -
Page 34: Tire Pressure Monitor System Reset
The DPF regeneration control module is replaced. 4.7 Remote Diagnosis This option aims to help repair shops or technicians launch instant messaging and remote diagnosis, making the repair job getting fixed faster. Tap “Remote Diagnosis” to enter, the screen appears blank by default. -
Page 35: Interface Layout
X-431 PRO MINI User Manual 4.7.1 Interface Layout Fig. 4-20 Search bar Directly input the username of the X-431 PRO MINI to start searching, and then tap the desired one to add it into your friend list. Alphabetic The name of friends is sorted by alphabetic order. Tap the order list desired letter to quickly locate it. -
Page 36: Software Update
To perform this function, you need to download and install the corresponding vehicle diagnostic software. Make sure the VCI module is properly connected to the vehicle’s DLC and the Bluetooth communication between your X-431 PRO MINI and the VCI module works smoothly. Cancel To cancel this operation. -
Page 37: My Connector
LAUNCH X-431 PRO MINI User Manual diagnosis. Additionally, delete, share operations are also supported. Tap “My Report”, there are total 3 options available. If user records the running parameters while reading data stream, it will be saved as .x431 file and appear under Diagnostic Record tab. -
Page 38: Units Of Measurement
LAUNCH X-431 PRO MINI User Manual 4.11.1 Units of Measurement It is designed to set the measurement unit. Metric System and English System are available. 4.11.2 Print Information This option lets you define your print information. It mainly includes Workshop, Address, Telephone, Fax and License Plate. - Page 39 LAUNCH X-431 PRO MINI User Manual “Connect” to enter Step 2. Fig. 4-22 Step 2: Join the Wi-Fi printer into LAN: Tap “Scan” to select the desired local Wi-Fi network from the list, and type in the security password (If it is an open network, password is not required), and then tap “Confirm”.
-
Page 40: Network Test
LAUNCH X-431 PRO MINI User Manual Fig. 4-24 Now you can use the Wi-Fi printer to print! If the printer is not found, please reset the printer to default factory settings (refer to Step 2 for details) and check whether the current device and the printer are on the same LAN. -
Page 41: Others
3. Choose the desired account type. 5.2 Browser 5.2.1 Open browser On the home screen, tap Browser to launch the browser. You can choose the desired homepage or input the website address to browse. Fig. 5-1 Return to the previous page. -
Page 42: Download Files
Unknown sources switch to off. 5.3 Synchronization You can transfer media files and APK between the PC and X-431 PRO MINI. 5.3.1 Connect to PC 1. Use the USB cable to connect the X-431 PRO MINI to your PC. -
Page 43: Clear Cache
LAUNCH X-431 PRO MINI User Manual 5.4 Clear Cache Doing so clears all browsing records and accounts and enables X-431 PRO MINI to run smoothly and quickly. 1. Tap Settings > Apps. 2. Tap and select “Sort by size” to arrange all applications in size order. -
Page 44: Faq
If this happens while downloading the diagnostic software, please proceed as follows: 1. Get your X-431 PRO MINI username and password ready. If you forgot the password, please dial our hotline to retrieve it with the product serial number 98539*******. - Page 45 7. The date and time of X-431 PRO MINI cannot be set. It is because Automatic date & time is set on your X-431 PRO MINI. Tap “Settings” --> “Date & time”, deselect “Automatic date & time” and then set the date and time manually.
- Page 46 The exclusive remedy for any automotive meter found to be defective is repair or replacement, and LAUNCH shall not be liable for any consequential or incidental damages.
- Page 47 Longgang, Shenzhen, Guangdong P.R.China, 518129 Statement: LAUNCH reserves the rights to make any change to product designs and specifications without notice. The actual object may differ a little from the descriptions in the manual in physical appearance, color and configuration. We...
Need help?
Do you have a question about the X-431 PRO MINI and is the answer not in the manual?
Questions and answers