Table of Contents
Advertisement
Advertisement
Table of Contents

Related Manuals for Leixen UV-52


Summary of Contents for Leixen UV-52
- Page 2 Notice Please use the transceiver in compliance with local regulations. A Note To Users Thank you for purchasing the portable transceiver. We trust this transceiver will give you convenient and reliable communication for many years. For the best experience, we advise that you read this manual completely before using your new transceiver.
-
Page 3: Table Of Contents
Content Security Information ..........1 Accessories & Options ..........2 Supplied Accessories ............. 2 Optional Accessories ............. 2 Battery Information and Charge ......... 3 Getting Acquainted ............. 5 Keypad Operation ............7 LCD Display ............11 Basic Operation ............13 Power on/off ................ - Page 4 Ty/Dec Co ............... 25 ) 10/11 [ MENU+1+0/1] Encode Type and Encode Code E nc . ( Ty/Enc Co ................ 27 ) [ MENU+1+2] FM SCAN F M SCAN ....28 . ( ) [ MENU+1+3]FM SQL F M SQL ......
- Page 5 [ MENU+3+6]Save level S avlev ......35 . ( ) [ MENU+3+7] Scan Mode S CNMod ....35 . ( ) [ MENU+3+8] Scan add S CNADD ...... 37 . ( ) [ MENU+3+9] Squelch Level A S QL A ....
- Page 6 DTMF Function D TMF ..........43 ( ) Call C ALL ..............43 ( ) Transmit 1750Hz 1 750 ..........43 ( ) Scrambler S CRA ............43 ( ) Talk Around T alk ............43 ( ) Reverse Frequency R everse ..........
-
Page 7: Security Information
Security Information To use this transceiver safely and efficiently, please read the following safety information. Refer service to qualified technicians only. Turn off the transceiver while refueling or while parked in a gasoline service station. Please turn off the transceiver where flammable gases or fumes may be present. -
Page 8: Accessories & Options
Accessories & Options Welcome to your new transceiver. Please unpack it carefully and ensure that the below accessories are included. If you find any missing or damaged components, please contact your dealer immediately. Supplied Accessories Item Portable transceiver Antenna Li-ion Battery Pack Battery Charger 9V Adapter Belt Clip... -
Page 9: Battery Information And Charge
Battery Information and Charge . C harging the battery pack The battery pack is not charged at the factory; Charge it before use. Initially charging the battery pack after purchase or extended storage will not bring the battery pack to its normal operating capacity. After repeating the charge/discharge cycle two or three times, the capacity will increase to normal. - Page 10 The battery pack life is over when its operating time decreases even though it is fully and correctly charged. Replace the battery pack. Don’t charge the battery pack if it is already fully charged or it will short the life of the battery. Don’t charge the battery pack or radio while it is wet.
-
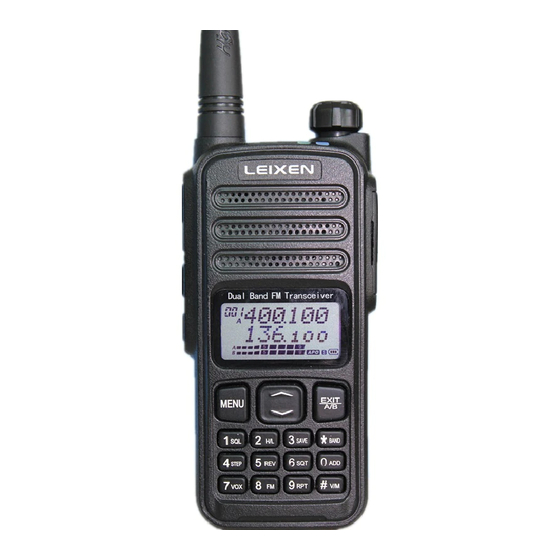
Page 11: Getting Acquainted
Getting Acquainted... - Page 12 Antenna: A part which to transmit and receive ① signal. Power/Volume Switch ② Speaker: For voice output ③ Microphone: For voice input ④ LCD display: Displays current frequency/channel ⑤ and operations. Keypad: Enters desired frequency/channel or ⑥ operations by keypad TX/RX indicate LED: Left one is for channel A, ⑦...
-
Page 13: Keypad Operation
Keypad Operation PTTA EXIT MENU ▲ PTTB ▼ *Band 1 SQL 2 L/H 3 SAVE Call 0ADD 5 REV 4 STEP 6 SQT #V/M 7 VOX 8 FM 9RPT SCAN Keypad operation: Keys Function 1.Function Keys PTTA Push to talk channel A PTTB Push to talk channel B Programmable key: PC... - Page 14 Press to down, hold to go fast. When ▼ transmitting a DTMF Code, press this key to input C. Press to Exit or switch A/B; hold is a EXIT programmable key. When transmitting a DTMF Code, press this key to input D. *band/Call Press to switch band, hold to start a call.
- Page 15 Press and hold to set squelch mode , Numeral OFF/CTC/NDCS/IDCS optional. Can 6:SQT input any CTCSS/DCS directly. Refer to attached Table CTCSS/DCS code. Numeral Press and hold to enable/disable Voice 7:VOX Operated Transmission Press and hold to enable/disable FM Numeral 8:FM Radio, Range 6 5-108MHz.
- Page 16 item number can input the two digits in rapid succession. For example, press the [MENU] key+ [5]key to fast reach menu 5; press the [MENU] key, and then press [2]key+[3]key in rapid succession to fast reach menu 23. 2. Call Operation: Push PTTA to transmit a channel A code, Push PTTB to transmit a channel B code.
-
Page 17: Lcd Display
LCD Display Icon Feature Description Operation Method Memory Channel A:001-199 B:001-199 Being A Channel Switch A/B Key Menu08-09 Decode Type and code, Menu10-11Encode CT enable Type and code ; VFO/MR mode: Press and hold key 6 Scrambler enable Menu 02 DCS enable The same as CT In VFO/MR mode,... - Page 18 Being B Channel Switch A/B Key Press and hold M Key Keyboard Lockout for 2 Seconds DW OFF Menu 07 Channel A and B signal strength. Indicate Power Push PTT A to transmit strength when transmitting, 9 grids for high power, 5 grids for small power.
-
Page 19: Basic Operation
FM enable Press and hold key 8 Narrowband Menu50 enabled In VFO/MR mode, Low power press and hold key 2 to switch Low/High power Offset enabled: In VFO/MR mode, RPT- press and hold key 9 and select via ▲ or Offset enabled: ▼key. -
Page 20: Transmitting And Receiving
press ▼ key to reduce volume. Or enter frequency direct by keypad. (Note: If you can’t select your desired frequency, please press and hold key 4 to modify step.) 2, In MR/CH mode, press ▲ key to increase channel, press ▼ key to reduce channel. Or enter channel number directly by keypad. -
Page 21: Function Menu Operation
and hold for 1.5 seconds). PE key has one programmable function, accessed by a long press. Each of these functions is set in one of the programmable key menus. Note: If you would like to change the hold time for Long Press, you may do so using the programming software. - Page 22 APRO OFF/COMP/Scra/TXSc/RXSc A udio ( (In A channel only: OFF/TXSc) Processing ) BC LO ON/OFF Busy Lock BEEP ON/OFF Key Beep Chsave A:001-199 B:001-199 (Save to MR) DTMF ON/OFF ON/OFF D ual Reception ( ) Dec Ty OFF/CTCSS/NDCS/IDCS D ecode type (...
- Page 23 87-108 MHz (US/Europe) 76-91 MHz (Japan) FM BAND 76-108 MHz (world wide) 65-76 MHz E ast Europe ( ) Font BIG/SMAL Half T he voice of ( Sub-channel is ON/OFF half of main-channel ) Keylck K+S/PTT/KEY/ ALL K eylock ( )...
- Page 24 PC L P C long OFF/FM/BAND/MOLO/SQM/ ( ) PC S HALF/SCAN/LOW/EMG/ Scra/DTMF/CALL/1750/ P C short ( ) PTTID/TALK/REV PE L P E Long ( ) Power High/Low PTT ID ON/OFF ON/OFF R everse ( ) Roger ON/OFF OFF/+RPT/-RPT (Offset) RPT SET 0.000-399.995 (Offset value) A=B/...
-
Page 25: Menu+1] Auto Power Off (Apo)
STEP 2.5K/5K/6K25/10K/12K5/25K Tail ON/OFF Talk ON/OFF T alk around ( ) 10S-120S/OFF (Time out Timer) TxStop ON/OFF (Transmit Stop) ON /OFF Vox D 1S/2S/3S/4S (Vox Delay) Vox S (Vox Sensitivity) (Vox Stop when ON/OFF radio receiving) WIDNAR WID/NAR (Width/Narrow) Auto Power Off .... -
Page 26: Menu+2]Apro(Apro)
. [ MENU+2]APRO(APRO) The audio processing menu allows you to set up the compander and voice scrambler. You can set this menu as :OFF, Compander(Comp), Scrambler (Scra) , TX Scrambler(TXSc), RX Scrambler(RX). In A channel, you can only set this menu as: OFF or TX Scrambler(TXSc) .... -
Page 27: Menu+6] Dtmf Function
. [ MENU+6] DTMF Function DTMF (Dual Tone Multi Frequency), dual tone multi-frequency, consists of high-frequency group and low frequency group, each group contains four frequencies. A high frequency signal and a low frequency signal superimposed to form a combined signal which representing a number. - Page 28 software. Note: a), If the transceiver is in CH mode, you can not enable or disable DTMF signaling from the transceiver’s front panel. In CH mode, this setting can only be modified from the programming software. b), In MR mode, each memory channel can be independently set to have DTMF signaling enabled or disabled.
- Page 29 Consider the following example. Set 10 transceivers as follows: Item Individual ID Unite ID Group ID. Transceiver 1 80811 Group 1 Transceiver 2 80812 Group 1 Transceiver 3 80813 Group 1 Transceiver 4 80814 Group 1 Transceiver 5 80815 Group 1 Transceiver 6 80831 Group 3...
- Page 30 Subgroup 3. Send the ID code: 808CC to call all transceivers in Group 1 and Subgroup 3 which are both in Group C. DTMF code transmission mode: Fill in the DTMF call list in the programming software. In VFO / MR / CH mode, be sure that DTMF Mode is enabled.
-
Page 31: Menu+7]Dual Reception D W
Remote RX Inhibition and RXTX Inhibition RX Inhibition: If RX Inhibit is enabled, the receiver will remain inactive until it receives the correct RX Enable code. RXTX Inhibition: With RX/TX Inhibit enabled, the transceiver will be unable to receive or transmit until it receives the correct RX/TX Enable code. - Page 32 squelch. IDCS: Only a signal on the channel containing a matching inverted DCS code will open the receiver’s squelch. After you have selected the decode type in Menu 08, enter any CTCSS or DCS code you desired directly in Menu 09. That means you can enter a standard CTCSS/DCS(Refer to the following tables) or a non-standard CTCSS/DCS code in the range of: CTC: 55.0-255.0...
-
Page 33: Menu+1+0/1] Encode Type And Encode Code
Encode Type and Encode Code 10/11 . [ MENU+1+0/1] ( ) E nc Ty/Enc Co Similar to the settings for “Decode Type” and “Decode Code” above, using Menu 10, “Enc Ty” and Menu 11”Enc co”, you may determine the CTCSS or DCS code that is used on a particular channel. -
Page 34: Menu+1+2] Fm Scanf M Scan
NDCS: Transmit a specified normal DCS code. IDCS: Transmit a specified inverted DCS code. Use Menu 11 to set the desired CTCSS or DCS tone, using the same range as for Menu 09. . [ MENU+1+2] FM SCAN ( F M SCAN )... -
Page 35: Menu+1+5]Fm Bandf M Band
. [ MENU+1+5]FM BAND ( F M BAND ) Base on the different FM frequency among countries, you can choose different FM frequency from the following FM band: 87-108 MHz (US/Europe) 76-91 MHz (Japan) 76-108 MHz (world wide) 65-76 MHz ( E ast Europe ) .... -
Page 36: Menu+1+9]Lamp Color L Amp C
second. You can choose what controls are locked as follows: KEY: Numeric and function keys, excluding the “Menu” key. K + S: KEY +▲▼. Numeric +function keys + “▲▼” excluding the “Menu”. PTT: PTT Key. ALL: KEY + ▲▼ + PTT excluding “Menu” key. Default is K + S. - Page 37 channel numbers. The default is OFF. It may be helpful for you to name particular channels with meaningful labels, such as callsigns, cities, or channel use. Your channel names can be up to six characters long. You can edit channel names using Menu 23. Access Menu 23, press key 2 to edit the first digit, press “▲▼”...
-
Page 38: Menu+2+4]Open Beep O Penbe
. [ MENU+2+4]Open Beep ( O penBe ) You can set whether the radio beep or not when it turned on. On: The radio has a beep tone when it turned on. OFF: No beep tone when turned on. . [ MENU+2+5]Open Display (... -
Page 39: Menu+3+0]Ptt Idp Tt Id
. [ MENU+3+0]PTT ID ( P TT ID ) PTT ID allows you to send a code that identifies your specific transceiver. The PTT ID code is defined in the programming software; the default ID is “123”. You can also set whether PTT ID’s are spoken or displayed. -
Page 40: Menu+3+2]Roger(Roger)
. [ MENU+3+2]Roger(Roger) The transceiver can send a “Roger beep” to mark the end of a transmission. Select “ON” to enable this feature, or “OFF” to disable it. The default setting is OFF. 33/34 . [MENU+3+3/4]Offset Frequency (RPT SET/RPT TYPE) You can set a channel to use different receive and transmit frequencies. -
Page 41: Menu+3+5]Ptt Set
Note: Offset frequency setting is only available in VFO mode. It cannot be set in already programmed memory channels. When using the programming software, you must specify both receive and transmit frequencies directly. A new offset value only can effect after the offset direction be chosen again. - Page 42 for five seconds, then scanning will continue, even if the channel is still active. Carrier operated (CO): Scanning stops when an active channel is encountered. Scanning resumes after two seconds of channel inactivity. The default setting is “TO”. Note: Press any key except ▲ or ▼ to stop scanning. Scan range: You may select two different scanning ranges: VFO frequency scan: All frequencies on the band...
-
Page 43: Menu+3+8] Scan Add
keys to enable or disable Scan Add. If Scan Add is disabled on a channel, that channel will be skipped during MR/CH scans. If a channel’s Scan Add is disabled, ▲will be indicated on the transceiver’s display. b) MR/CH Scan is only available if two or more channels are programmed with Scan Add enabled. -
Page 44: Menu+4+0] Squelch Level B S Ql B
. [ MENU+4+0] Squelch Level B ( S QL B ) Set the Squelch Level of channel B using Menu 40. There are nine levels of squelch setting; the default level is 2. . [ MENU+4+1]Step ( S TEP ) Step is the value in which the operating frequency increases or decreases with presses of the “▲▼”... -
Page 45: Menu+4+5] Tx Stop T Xstop
accidental, lengthy transmissions where transmitter does not properly unkey(a stuck PTT key, for instance). Not only could such transmissions be disruptive to other communications, they could damage the transmitter. Select Menu 44, and set the Time-Out Timer to OFF, or in 10-second intervals of up to 120 seconds. -
Page 46: Menu+5+0] Wide And Narrow Bandwidth W Idnar
VOX Sensitivity determines the level of sound that is needed for the VOX to key the transmitter. You should experiment with VOX Sensitivity to find a level that is appropriate to your voice but does not trigger on the presence of too much other background noise. Set Vox S using Menu 48. -
Page 47: User-Defined Keys Menu
User-defined Keys Menu As previously mentioned the PC long, PC Short, PE long are user programmable. The three keys can be programmed using Menus 26-28. Each of these keys has two programmable functions, accessed by a short press (press and release) or a long press (Press and hold for 1.5 seconds). -
Page 48: Sq Off Momentary S Qm
will open the squelch, while pressing it again will close the squelch again. If MOLO stays active for more than 10 seconds, squelch will automatically close. ( ) SQ OFF Momentary S QM If the SQM shortcut is enabled, pressing it will disable any CTCSS or DCS squelch, allowing any signal to activate the receiver. -
Page 49: Emergency E Mg
Emergency ( E MG ) The EMG key will sound an emergency alarm. When this alarm sounds, the indicator LED’s will alternate between flashing red and green and “TXSTOP” will display on the screen. This mode will remain in force until the PTT is pressed or the transceiver is powered down. -
Page 50: Reverse Frequency R Everse
Reverse Frequency ( R everse ) The Reverse shortcut enables or disables Reverse frequency mode. Reset Menu All Reset(ALLRST) All Reset resets the transceiver to all factory settings, leaving only the DTMF dial list untouched. ) To perform an All Reset, press and holding the Menu Key, rotate the Power Switch to power on the transceiver, the screen will display “ALL RST ". -
Page 51: Current Channel Delete (Chadel)
Press the Menu key a third time, and the screen will display “Wait”. When the transceiver restarts, the reset is complete. Note: You may cancel the reset by pressing any key other than the “Menu” key when the “Reset?” prompt appears. Current Channel Delete (ChaDel) Current Channel Delete will delete the current channel of the transceiver. -
Page 52: Special Function
Special Function Programming Password A programming password can be pre-set to the transceiver through the software. When a password pre-set to a transceiver, the password should be input in the software, or the communication between the computer and the transceiver would be failed. Lease Function The Lease function can be set to limit how long a transceiver can be used. -
Page 53: Maintenance
Any tampering, user performed maintenance or adjustment of the transceiver will void your warranty. Please refer any service or maintenance concerns to LEIXEN or a LEIXEN authorized dealer. Cleaning and Maintenance 1) Handle this equipment with care. Do not carry the transceiver by its antenna or external microphone. - Page 54 7) If your transceiver is defective or develops a problem, please send it only to an authorized service center. Please contact your local dealer for assistance.
-
Page 55: Specification
Specification Band VHF/UHF Dual Band TX Frequency 400~480MHz /136~174MHz 400~520MHz/136~174MHz/ RX Frequency 200-260MHz/65-108MHz Channel Capacity 199*2 Output Power 2W/6W Operation Mode Simplex Dimension 130×60×38mm (L*W*H) Weight 255g Modulation ≤±5KHz Limitation Spurious 60dB Radiation TX Current 1A/1.6A Frequency ±2.5PPM Stability Rx Sensitivity <0.18µV Modulation Type Audio Power... - Page 56 and completely, but errors and omissions may still exist. We do not assume any responsibility. We keep right to change product design and specifications at any time. As technology develops, design and product specifications are subject to change without notice.
Need help?
Do you have a question about the UV-52 and is the answer not in the manual?
Questions and answers