Table of Contents
Advertisement
Advertisement
Table of Contents

Related Manuals for Leixen VV-898


Summary of Contents for Leixen VV-898
- Page 1 Mobile Transceiver VV-898...
- Page 2 RF Radiation Information This product must be restricted to operations in an Occupational/Controlled RF exposure Environments. Users must be fully aware of the hazards of the exposure and able to exercise control over their RF exposure to qualify for the higher exposure limits. RF Radiation Profile Radio Frequency (RF) is a frequency of electromagnetic radiation in the range at which radio signals are transmitted.
- Page 3 than 50% of the time and always adhere to the following procedures: Antenna gain must not exceed 4.1dBi. The antenna installation must comply with the requirements of manufacturer or supplier, and it must be 1.00 meter away from human body. To ensure optimal performance and compliance with the occupational/controlled environment RF energy exposure limits in the above standards and guidelines, users should transmit no more than 50% of the time and always adhere to the following procedures;...
- Page 9 The device according to the regulation in Directive 1999/5/EC and complies with standards as follow: ETSI EN 301 489 1 V 1.9.2 EMC (Article 3.1b) ETSI EN 301 489 5 V 1.3.1 ETSI EN 300 086 1 V 1.4.1 Radio (Article 3.2) ETSI EN 300 086 2 V 1.3.1 EN 60950 1:2006+A11:2009+A1:2010+A12:2011 Safety (Article 3.1a)
- Page 10 Notice Please use the transceiver in compliance with local regulations. A Note To Users Thank you for purchasing the VV-898 Mobile transceiver. We trust this transceiver will give convenient reliable communication for many years. For the best experience, we advise that you read this manual completely before using your new transceiver.
-
Page 11: Table Of Contents
Contents Security Information ..........1 Accessories & Options..........2 Supplied Accessories..........2 Optional Accessories ..........2 Installation..............3 Connect Power ............3 Keeping the Transceiver Cool ........ 3 Install with Bracket ..........4 Connect Accessories..........4 Getting Acquainted............. 6 DTMF Microphone Panel .......... 8 LCD Display ............ - Page 12 Key Beep (Beep): Menu 04........17 Channel Save (CHASave): Menu 05....17 DTMF Function (DTMF): Menu 06 ....18 Dual Watch (DW): Menu 07 ........ 23 Decode Type and Decode Code (Menus 08 and 09) ................23 Encode Type and Encode Code (Menus 10 and 11) ................
- Page 13 ROGER(ROGER): Menu 32........ 35 REVERSE (REVERSE): Menu 33 ...... 35 Offset Frequency (RPT SET/RPT TYPE): Menus 34 and 35 .............. 35 Save Battery (SaveBat): Menu 36 ......37 Scan (SCAN): Menus 37, 38, and 39 ....37 Squelch Level (SQL): Menu 40 ......39 Step (Step): Menu 41..........
- Page 14 Mute MUTE ..........45 Scan SCAN ........... 45 High/Low Power LOW ......... 45 Emergency EMG ........... 45 V/M Mode Switch V/M ........ 45 DTMF Function DTMF ........ 46 Call Call ............46 A/B Mode Switch A/B ........46 Talk Around Talk ...........
-
Page 15: Security Information
Security Information To use this transceiver safely and efficiently, please read the following safety information. Refer service to qualified technicians only. Turn off the transceiver while refueling or while parked in a gasoline service station. Please turn off the transceiver where flammable gases or fumes may be present. -
Page 16: Accessories & Options
Accessories & Options Welcome to your new VV-898 transceiver. Please unpack it carefully and ensure that the below accessories are included. If you find any missing or damaged components, please contact your dealer immediately. -
Page 17: Installation
As with all modern electronics, it is very important that the transceiver not be allowed to overheat. The VV-898 has been designed to take advantage of natural air flow to keep it cool. Thus, to help in providing enough space for natural air flow, it is very... -
Page 18: Install With Bracket
important that you install the transceiver using the supplied mounting bracket. If the transceiver is installed without providing for adequate air flow, the transceiver may overheat. If adequate air flow is not available, the transceiver will be damaged from overheating. Do not place books or other equipment directly on the transceiver. - Page 19 internal speaker is muted when an earphone or external speaker is connected to this jack Antenna: The SO-239 mount connection is on the left of the rear panel of the transceiver. The antenna system is composed of an antenna, feedline, and ground network components.
-
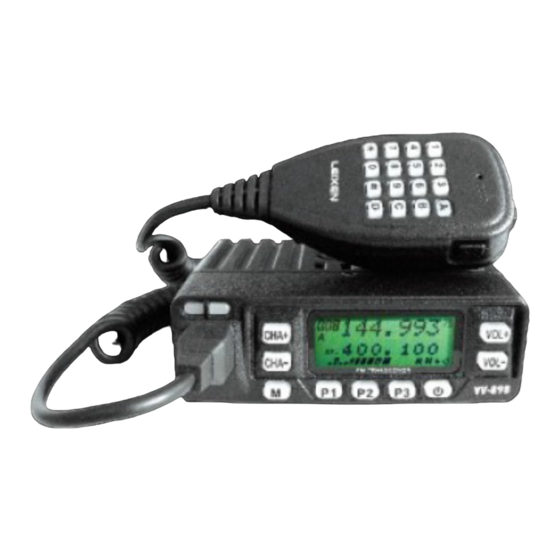
Page 20: Getting Acquainted
Getting Acquainted VV-898 Upper Panel VV-898 Front Panel... - Page 21 VV-898 Rear Panel 2, Indicator Light 1,Loudspeaker Red light, green light 3, MIC Connector (RJ45) 4,CHA+(Channel Up) 5, CHA-(Channel Down) 6, LCD display screen 7,VOL+(Volume Up) 8,VOL-(Volume Down) 10, P1 Key 9, Menu Key (User defined) 11, P2 Key 12, P3 Key...
-
Page 22: Dtmf Microphone Panel
DTMF Microphone Panel... - Page 23 1, PTT Push to Talk 2, MIC Microphone 3, UP Up, VOL+ 4, DN Down, VOL- 5, A Call 6, B VFO/MR Switch 7, C A/B mode Switch 8, D VFO Band Change 9, # CHA+ 10, * CHA-...
-
Page 24: Lcd Display
LCD Display Feature Icon Operation Method Description Memory Channel ---- Being A Channel Switch A/B Key Being B Channel Switch A/B Key Press M Key for 2 Keyboard Lockout Seconds VOX Open Refer to Menu 45... - Page 25 In VFO/MR mode Decode Type and Decode Code refer DCS Open to Menu08 and 09, Encoded Type and Encoded Code refer to Menu 10 and 11 The same as above CT Open (DCS) Refer to Menu 34 Offset Frequency and 35 Wireless Refer to Page 44 Frequency Open...
-
Page 26: Front Panel Description
Reverse Refer to Menu 33 Frequency Narrowband Refer to Menu 50 Refer to Menu 07 Dual Reception DTMF Refer to Menu 06 Displayed frequency value, channel names, menu items, and ---- other numbers, letters or symbols Information Front Panel Description Orient the transceiver with the front panel facing you. -
Page 27: Basic Operation
Basic Operation Power on/off Once power is connected, press the button to turn the transceiver on. Three ascending tones will sound, indicating that the transceiver has correctly powered on. Hold the key for 2 seconds to turn the transceiver off. Turn Volume Press “VOL+”... -
Page 28: Transmitting And Receiving
frequency in VFO mode. Hold the key to go fast 4) Input channel number by using the numeric keypad to select memory channel in MR mode. Note: This transceiver has a dual-watch function, you can switch between A and B channels using the “C” key (A/B switch key) on the microphone keypad. -
Page 29: Function Menu Operation
2 IN (5 cm) away from your mouth and speak normally. A red LED indicates that the transmitter is active. Function Menu Operation To modify settings in the VV-898’s settings menu, follow these steps: Press the “M” key. a, Use the “CHA+” and “CHA-“ keys, or the “VOL+”... -
Page 30: Auto Power Off(Apo): Menu 01
Auto Power Off(APO): Menu 01 Auto Power Off will automatically turn the transceiver off after a set length of inactivity. This function is disabled (off) by default. The Auto Power Off interval can be set to 10 minutes, 20 minutes, 30 minutes, 40 minutes, 50 minutes, 60 minutes, 90 minutes, 2 hours, 4 hours, 6 hours, 8 hours, 10 hours, 12 hours, 14 hours, or 16 hours. -
Page 31: Key Beep (Beep): Menu 04
Up to 199 of your favorite or most commonly used simplex or repeater channels can be stored in the VV-898 for quick and convenient recall. In VFO mode, enter the frequency you want to save by using the numeric keys on the microphone or the “CHA+”... -
Page 32: Dtmf Function (Dtmf): Menu 06
*, #, A, B, C, and D. TheVV-898 can generate and decode DTMF sequences in order to control other equipment, remotely control or inhibit other VV-898 transceivers, or page individual radio users or groups of users. Each of the 199 channels can be individually programmed for DTMF signaling to be enabled or disabled. - Page 33 “M” key to accept the change, followed by the key to exit the menu. Individual call/ group call Individual call: Using the VV-898 programming software, set the transceiver’s individual ID code. This can be any code of up to 15 characters, using the digits...
- Page 34 0-9, *, #, A, B, C, and D. The default transceiver individual call ID code is 1000. Group Call: Using a group call character in any part of a radio calling sequence will call all radios in a specific calling group. The only radios in the group that will not automatically respond to a group call are transceivers which are either set to selective call only or those which have receive or receive/transmit inhibit...
- Page 35 Transceiver 80831 Group 3 Transceiver 80832 Group 3 Transceiver 80833 Group 3 Transceiver 80834 Group 3 Transceiver 80835 Group 3 Send the ID code: 80814 to call "Transceiver 4". Send the ID code: 80832 to call "Transceiver 7". Send the ID code: 8081C to call all transceivers in Subgroup 1.
- Page 36 press UP / DOWN keys on the microphone or press “CHA+/CHA- or VOL+/VOL-”on the transceiver front panel to select. Slots 10-15 can only be selected by using the “UP/DOWN” buttons on the microphone or “CHA+/CHA-“ or “VOL+/VOL-“ keys on the transceiver front panel.
-
Page 37: Dual Watch (Dw): Menu 07
Dual Watch (DW): Menu 07 This setting determines whether the dual watch feature is enabled or disabled. With dual watch enabled, the transceiver will monitor two frequencies periodically. Select Menu 07 to modify this function, which can be turned ON or OFF. The default is ON. Decode Type and Decode Code (Menus 08 and 09) Using Menus 08 and 09, you may determine what will open the receiver’s squelch. - Page 38 CTCSS: 56-254.1 Hz (58 groups), NDCS: 107 groups Normal DCS code. IDCS: 107 groups Invert DCS code. CTCSS standard frequency table (58 groups)
-
Page 39: Encode Type And Encode Code (Menus 10 And 11)
DCS Standard Code Table Encode Type and Encode Code (Menus 10 and 11) Similar to the settings for “Decode Type” and “Decode Code” above, using Menu 10, “EncType” and Menu 11”Enc code”, you may determine the CTCSS or DCS code that is used on a particular channel. You may need such a code in order to access a repeater system... -
Page 40: Fm Radio Function(Fm): Menu 12
or other radio users who have CTCSS or DCS squelch enabled. You may set Menu 10 as follows: OFF: Disable. The transmitted signal does not send any CTCSS or DCS codes. CTCSS: Transmit a specified CTCSS tone (one of 56 tones) NDCS: Transmit a specified normal DCS code (one of 107 codes). -
Page 41: Fm Dualwatch (Fm Dw): Menu 13
You can also store your favorite radio stations using the VV-898 programming software. Note: To ensure good FM reception, please connect an antenna to the transceiver. -
Page 42: Fm Sql (Fm Sql): Menu 15
simply tune the radio in 50 KHz tuning steps. Setting FM Scan (Menu 14) to ON will increase tuning speed, as only active FM radio signals will stop tuning. FM SQL (FM SQL): Menu 15 The FM SQL menu determines the sensitivity of the FM broadcast scan. -
Page 43: Keypad Function(Keypad): Menu 18
Keypad Function(Keypad): Menu 18 Menu 18 is set depending on which microphone shipped with your VV-898 transceiver. If you received the DTMF microphone, set this menu to ON. Setting to OFF will not allow you to use the keys on the DTMF microphone. -
Page 44: Setting Channel Names: (Name): Menus 20 /21/22
KEY: Backlight is active only when a key is pressed. CONT: Backlight is always enabled. The default setting is CONT. Setting Channel Names: (Name): Menus 20 /21/22 Menu 20 determines whether the transceiver allowed the user-defined channel name displayed or not. If it is enable, all channel would display user-defined channel name, if it is disable, all user-defined channel name would not be displayed. -
Page 45: Set Opening Display (Opendis): Menu 23
“CHA+/CHA-/VOL+/VOL-” key to go fast. Edit Alias valid characters: space " % & ’ < > Set Opening Display (OpenDIS): Menu 23 You can select what displays when the transceiver first powers on by using Menu 23. Choose from the following options: ALL: Boot displayed as full screen display. -
Page 46: Custom Keys Set (P1-P3 M Key): Menus
P3 Long Press: SCAN (scan) P3 short Press: MUTE (mute) M Short Press: Enter the menu function Several keys on the front panel of the VV-898 are user programmable. Each key has two possible functions, defined in Menus 24 through 29. -
Page 47: High/Low Power Set (Power): Menu 30
The M long press is not user defined, as it locks or unlocks VV-898 keys and/or PTT. (See “Keylock”, Menu 17, for details. The default functions of the programmable keys are as follows: P1 Long Press: FM (FM transceiver) P1 Short Press: Time (Time display on screen) - Page 48 specific transceiver. The PTT ID code is defined in the programming software; the default ID is “123”. You can also set whether PTT ID’s are spoken or displayed. If voice is selected, ID’s of up to five digits will be spoken. However, up to 14 digit ID’s can be displayed if voice ID’s are disabled.
-
Page 49: Roger(Roger): Menu 32
ROGER(ROGER): Menu 32 The VV-898 can send a “Roger beep” to mark the end of a transmission. Select Menu 32, and select “ON” to enable this feature, or “OFF” to disable it. The default setting is OFF. REVERSE (REVERSE): Menu 33... - Page 50 Menus 34 and 35. First, you will need to set the offset amount, which is the difference between the receive and transmit frequencies. The VV-898 can accept offset values from 0.000 to 399.995 MHz. In VFO Mode, select Menu 34. Enter the offset value using the number keys on the DTMF microphone, or by using the “CHA+/CHA-“...
-
Page 51: Save Battery (Savebat): Menu 36
When using the programming software, you must specify both receive and transmit frequencies directly. Save Battery (SaveBat): Menu 36 Battery Save mode lowers current consumption by putting the receiver in a low power “sleep” mode periodically during quiet periods with no received signals. - Page 52 Note: Press any key except “UP”, “DOWN”, “CHA+/CHA-“, or “VOL+/VOL-“ to stop scanning. Scan Type: You may choose two different scanning modes: VFO frequency scan: All frequencies on the band will be scanned. In VFO mode, select Menu 37 and press M key to start scanning.
-
Page 53: Squelch Level (Sql): Menu 40
disabled on a channel, that channel will be skipped during MR/CH scans. A channel’s scan status will be indicated on the transceiver’s display. MR/CH Scan is only available if two or more channels are programmed with Scan Add enabled. Scan is only effective if the squelch is closed. Squelch Level (SQL): Menu 40 The squelch circuit allows you to only hear desired signals. -
Page 54: Tail Elimination (Tail): Menu 42
Tail Elimination (Tail): Menu 42 The Tail elimination function eliminates the burst of background noise encountered at the end of a transmission. . Set Menu 42 to ON if you would like to enable this feature, or OFF to disable it. The default is ON. -
Page 55: Tx Stop (Txstop): Menu 45
TX Stop (TXStop): Menu 45 The TXStop function disables the transmitter when it is enabled. If TXStop is enabled, pressing the PTT key will issue an audible alert tone, indicating that you are unable to transmit. Select Menu 45, and set it to ON if you would like to enable this feature. -
Page 56: Wide And Narrow Bandwidth Set (Widnar): Menu
unkey too frequently. Delay can be set from 1 to 4 seconds; the default setting is 3 seconds. VXB (VOX inhibited when receiving): Set Menu 49 to ON if you do not want VOX active while the receiver is active. To avoid the receiver keying the VOX by mistake, it is probably a good idea to leave this setting at its default ON state. -
Page 57: Off
You may set any of the programmable keys to perform the following functions: If a shortcut key is disabled, it is not usable unless Wireless Change Frequency is enabled. Please refer to Page 44 for details. FM FM Setting a shortcut to FM toggles the FM broadcast radio on or off. -
Page 58: Monitor Momentary Moni
Monitor Momentary MONI Setting a shortcut key to MONI will allow you to temporarily open the receiver squelch, in order to hear a weak signal that cannot break through at the current squelch setting. Pressing MONI will open the receiver’s squelch, and releasing will close it again. Note: MONI can only be set as Long press. -
Page 59: Mute Mute
Mute MUTE When the Mute shortcut is enabled, pressing the Mute key will disable audio from the receiver’s speaker. Press the key again to unmute the speaker. Scan SCAN Pressing the LOW shortcut will toggle the power level between HIGH and LOW power. High/Low Power LOW Pressing the LOW shortcut will toggle the power level between HIGH and LOW power. -
Page 60: Dtmf Function Dtmf
DTMF Function DTMF The DTMF shortcut will turn DTMF Mode on or off. Call Call The CALL shortcut will toggle the CALL function on and off. Transmit 1750Hz 1750Hz The 1750Hz shortcut will transmit a 1750Hz burst tone when pressed. A/B Mode Switch A/B The A/B shortcut will toggle between the A and B channel. -
Page 61: Reset Menu
Reset Menu All Reset All Reset resets the transceiver to all factory settings, leaving only the DTMF dial list untouched.) To perform an All Reset, press the key to turn the transceiver on. When the welcome screen is displayed, hold the M key for two seconds. The screen will display “Menu 0/ALL RES? ". -
Page 62: Programming Operation
LED will light continuously red. At this point, the user may only turn the transceiver power off. This function can only be reset with the VV-898 programming software. Remaining time: You can set the transceiver to display the time remaining for the transceiver lease. -
Page 63: Wireless Change Frequency
Wireless Change Frequency Wireless Frequency Change is a feature that allows VV-898 transceivers to be programmed with new frequency information remotely. In other words, one master transceiver can program several deployed transceivers in the field by sending the appropriate commands over the air. - Page 64 Frequency Change function. 3) The transceiver at the home office should be programmed as the “master” transceiver. It should also have a DTMF microphone. 4) The new channel should be programmed into one of the master transceiver’s 199 channels. For our example, we’ll program it into Channel 03.
-
Page 65: Rx Inhibit/Rxtx Inhibit
acknowledge the remote transceivers are ready for programming. The master radio would then initiate the change using the instructions in Step 6 below. Once programming is complete, the icon “ ” will disappear. If it does not disappear, programming successful. Once programming successful, the remote users can switch to the newly... -
Page 66: Setting Transmission Limits Per Minute
neither receive nor transmit until the correct RX/TX Enable code is received. If you attempt to transmit while RX/TX Inhibit is in force, the transceiver will not indicate transmission, and it will produce an error tone. RX inhibit and RXTX inhibit And Reactivate Codes: These codes are up to 15 characters long, using 0-9, A-D, * and #. -
Page 67: Maintenance
Any tampering, user performed maintenance or adjustment of the transceiver will void your warranty. Please refer any service or maintenance concerns to LEIXEN or a LEIXEN authorized dealer. Cleaning and Maintenance 1) Handle this equipment with care. Do not carry the transceiver by its power cable, microphone, or antenna. - Page 68 6) Please back up all settings and programmed data from your transceiver before sending it in for repair. 7) If your transceiver is defective or develops a problem, please send it only to Leixen or a Leixen authorized service center. Please contact your local dealer for assistance.
-
Page 69: Specification
Specification Model VV-898:Dual Band TX Frequency 400~470MHz/136~174MHz 400~470MHz/136~174MHz/ RX Frequency 87.5-108MHz Channel Capacity Output Power Operation Mode Half-Duplex Dimension 120×90×40mm (L*W*H) Weight 315g Modulation ±5KHz Limitation Spurious Radiation 60dB TX Current 1A/1.8A Frequency Stability ±2.5PPM Rx Sensitivity <0.18μV Modulation Type...
Need help?
Do you have a question about the VV-898 and is the answer not in the manual?
Questions and answers