Table of Contents
Advertisement
Quick Links
Download this manual
See also:
Owner's Manual
Advertisement
Table of Contents

Related Manuals for Teeter Contour Power


Summary of Contents for Teeter Contour Power
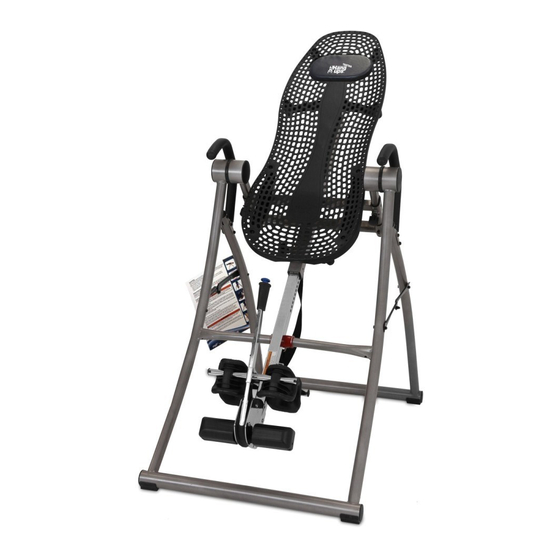
- Page 1 Inversion Table Assembly Instructions Contour Power YEAR *Inversion Table images may vary slightly from your model.
-
Page 2: Important Safety Instructions
BEFORE YOU BEGIN: Review all steps before beginning assembly and read all precautions before using the inversion table. Carefully adhere to the Assembly Instructions and Owner’s Manual to help ensure safety and product integrity. IMPORTANT SAFETY INSTRUCTIONS READ ALL INSTRUCTIONS BEFORE USING THE INVERSION TABLE. WARNING Read and understand all the instructions, view the instructional video, review all other accompanying documents, and inspect the equipment before using the inversion table. - Page 3 BEFORE YOU BEGIN: Review all steps before beginning assembly and read all precautions before using the inversion table. Carefully adhere to the Assembly Instructions and Owner’s Manual to help ensure safety and product integrity. IMPORTANT SAFETY INSTRUCTIONS READ ALL INSTRUCTIONS BEFORE USING THE INVERSION TABLE. WARNING •...
-
Page 4: Grounding Instructions
Grounding Instructions • This product must be grounded. If it should malfunction or break down, grounding provides a FIGURE 1 path of least resistance for electric current to reduce the risk of electric shock. This product is equipped with a cord having an equipment-grounding conductor and a grounding plug. The plug must be plugged into an appropriate outlet that is properly installed and grounded in accordance with all local codes and ordinances. -
Page 5: Unpacking Instructions
• Be sure to remove protective plastic from all items prior to assembly. Support Beam TIP: Unpack materials and prepare to set up your Contour Power Inversion Table in its permanent location. Keep in mind that you will require an electrical outlet to power your table. -
Page 6: Items For Assembly
Items for Assembly ITEM NUMBER ITEMS FOR ASSEMBLY CP-1100 A-Frame CP-1300 FlexTechnology Table Bed EP-1105 Head Pillow EP-1149 Bolts, Washers & Nuts (2) CP-0038 Chicago Post and Bolt (2) CP-1128 Pan Head Bolts (4) IA-1650 Decompression Arch E6-1374 Adjustable Acupressure Nodes (4pk) NX-1620 Main Shaft with Deluxe EZ-Reach Ankle Lock System... -
Page 7: Before Beginning
Before Beginning Before reading further, study the drawing below to familiarize yourself with the important components of your new Teeter Hang Ups inversion table. ® Head Pillow FlexTechnology Table Bed Rotation Control Button Motor Housing Safety Keys Handles Spreader Arms... -
Page 8: Warning Label Placement
Los tobillos deben estar propiamente asegurados antes de usarse. REEMPLACE LA ETIQUETA SI ESTÁ DAÑADA O SE HA PERDIDO. IA-2007-M We hope you enjoy your new Teeter Hang Ups Inversion Table! If you have any questions, please contact our Customer Service Department at 1.800.847.0143 or www.teeter-inversion.com. - Page 9 Step FIGURE 4 Open the A-Frame (CP-1100). • To stand the inversion table A-Frame upright, first move it onto its side (Figure 4), and then carefully lift it up onto its feet. • Open the A-frame wide enough so that it is stable and can stand upright on its own (Figure 5).
- Page 10 Step FIGURE 6 Install the Table Bed Assembly (CP-1300) to the A-Frame (CP-1100) IMPORTANT: The Table Bed Assembly is heavy - be sure to complete this step with two people. • Lift the Table Bed Assembly (CP-1300) and hold in inverted position. •...
- Page 11 Step 3 FIGURE 9 Attach the Upper Support Arms to the Table Bed (CP-1300). • Leave the Table Bed in the inverted position. • Push on the Support Beam on the back of the Table Bed Assembly so that the two holes align evenly with the holes at the base of the Upper Support Arms (Figure 9).
- Page 12 Step 4 FIGURE 11 Insert the Main Shaft (NX-1620) into the Table Bed (CP-1300). • Plug in the power supply. Be sure that the Hand Crank is not engaged in the motor and that the Safety Lock has been turned off (Figure 11). See Step 6 for more information on the Safety Lock.
- Page 13 Step 5 FIGURE 15 Attach the Hand Grips (P1-1015) to the Table Bed (CP-1300) Assembly • Insert a Hand Grip into the receiving end of the Table Bed Asssembly, located near the Motor Housing (Figure 15). • Screw in the handle and tighten (Figure 16). •...
- Page 14 • For your reference, the serial number can be found on the back of the Table Bed Main Shaft Housing. WARNING Read the Owner’s Manual lthoroughly before using your Teeter Hang Ups Inversion Table. Improper settings could result in serious injury or death!
-
Page 15: Maintenance & Storage
Maintenance / Storage FIGURE 19 Maintenance • Unplug the inversion table before performing maintenance. • To clean the Table Bed, wipe down with a damp cloth. • Do not use abrasive cleaners. Storing the Inversion Table • Loosen the De-Rattler Knob. •... - Page 16 30175 Hannover, Germany the UL Listing. U.S. and Foreign Patents Pending. Teeter Hang Ups is a registered trademark of Teeter. Specifications subject to change without notice. © COPYRIGHT 2012 Teeter. International Law Prohibits Any Copying. CP-1705 0712-2...
Need help?
Do you have a question about the Contour Power and is the answer not in the manual?
Questions and answers