
Related Manuals for Dahua PSD81602-A360


Summary of Contents for Dahua PSD81602-A360
- Page 1 Dahua Panoramic + PTZ Network Camera Web3.0 Operation Manual Version 1.0.0 ZHEJIANG DAHUA VISION TECHNOLOGY CO., LTD. ...
-
Page 2: Table Of Contents
Table of Contents Product Introduction ...................... 1 Product Overview ....................1 Function Features ..................... 2 Basic Config ........................5 Modify IP Address ..................... 5 2.1.1 Modify Individually ................5 2.1.2 Modify in Batches ................. 7 Log in WEB Interface ..................8 Modify User Password .................. - Page 3 4.2.12 Set QoS Parameter ................82 Set PTZ Function .................... 83 4.3.1 Set Preset ................... 83 Step 2 ......................... 84 4.3.2 Set Tour ....................84 4.3.3 Set Scan ..................... 85 4.3.4 Set Pattern ..................86 4.3.5 Enable Pan ..................87 4.3.6 Set PTZ Speed ...................
- Page 4 5.3.1 Backup Device Config Info ............... 179 5.3.2 Recover Device Config Info .............. 180 5.3.3 Default ....................181 Upgrade ......................181 Version ......................182 Log ........................ 182 Online User ....................184 ...
- Page 5 Important The following functions are for reference only. Some series products may not support all the functions listed below. ...
-
Page 6: Product Introduction
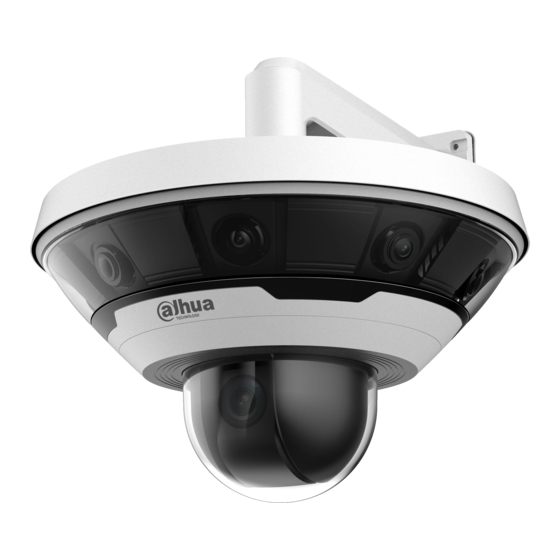
1 Product Introduction 1.1 Product Overview The product series is able to provide video preview, record, smart track and intelligent behavior analytics and so on based on the requirements of detail tracking, panoramic monitoring and large scene monitoring of various industries. The product is widely applied in government enterprise, public facility management and other industries, besides, it can provide practical serialized solutions separately or combined with storage device for several application fields such as safe city, industrial park security and public place safety etc. -
Page 7: Function Features
1.2 Function Features Realtime Monitoring Function Note Live Supports preview panoramic camera image and tracking speed dome image at the same time. It can monitor panorama via panoramic camera, meanwhile it can check details via manual tracking or intelligent activated positioning by tracking speed dome. Supports preview mode switch. - Page 8 Set alarm prompt mode or voice according to alarm type. Check alarm information. User Management Function Note User group Support to add, modify and delete new user group. management Support to manage user authority according to user group. User Support to add, modify and delete users. Management Support to set user authority.
- Page 9 Function Note Abnormity Supports SD card abnormity, network abnormity and illegal access detection. It supports linked relay-out and send email when SD card abnormity or illegal access alarm happens. It supports linked record and relay-out when network abnormity alarm happens. ...
-
Page 10: Basic Config
2 Basic Config 2.1 Modify IP Address The default IP address of all the devices is 192.168.1.108, please modify device IP address according to network planning for the first use or during network adjustment. You can modify device IP address individually or in batch via ConfigTool, you can also log in WEB client to modify the device IP address. - Page 11 Figure 2-1 Step 3 Set the device network segment, login user name and password, and then click OK. The system will display the searched devices after searching completes. Note The default username and password is admin and admin respectively. Step 4 Click the corresponding of the device whose IP needs to be modified.
-
Page 12: Modify In Batches
Step 5 Select the mode of setting IP address according to the actual situation. DHCP: Set mode as DHCP when there is DHCP server in the network, then the device will automatically acquire IP address from DHCP server. Manual mode: Set mode as Static and fill in the Target IP, Subnet Mask and Gateway, and then the device IP address is modified into the IP address which has been set. -
Page 13: Log In Web Interface
The system will pop out a dialog box of Modify IP, which is shown in Figure 2-4. Figure 2-4 Step 5 Select the mode of setting IP address according to the actual situation. DHCP: Set mode as DHCP when there is DHCP server in the network, then the device will automatically acquire IP address from DHCP server. - Page 14 Graphics Card Intel HD Graphics and higher Internal Storage 2GB and higher Monitor 1024×768 and higher Internet Explorer 8/9/10/11 Browser Table 2-1 Operation Steps Step 1 Open browser, input camera IP address into the address bar and click Enter button. The system will display Login interface after it is successfully connected, which is shown in Figure 2-5.
-
Page 15: Modify User Password
Figure 2-6 Note Click the Logout button on the upper right corner to log out the system. 2.3 Modify User Password Please make sure to modify the default password of the device and modify password regularly in order to guarantee device security. Meanwhile it is recommended to modify the password with high complexity. - Page 16 Figure 2-7 Step 2 Click . The system will pop out the dialogue box of Modify User. Step 3 Select Modify Password. The system will display the interface which is shown in Figure 2-8. ...
- Page 17 Figure 2-8 Step 4 Enter Old Password, New Password and Confirm Password. Step 5 Click Save to complete password modification. ...
-
Page 18: General Operation
3 General Operation 3.1 Live Users can implement a series of operations such as Live, Snapshot and Record etc. upon realtime monitoring image on the Live interface. Note Different devices may have different functions, please refer to the actual interface for more details. Double click the image and the image of this channel will be full screen displayed, double click or press Esc button, the image will be recovered to original size. -
Page 19: Video Window Function
Name Note System menu Click the function name on the system menu column to enter corresponding config interface. Code setting Stream media protocol, types of network transmission protocol, including TCP, UDP and multicast. Video window Please refer to "3.1.2 Video Window Function" for more details. function PTZ control Please refer to "3.1.3.5 PTZ Control"... -
Page 20: Video Window Adjustment
Name Note Regional It can realize auto focus in the selected area of the tracking speed dome. Focus Select channel image of the tracking speed dome, click the icon and click or select randomly on the channel image of the tracking speed dome, and then the speed dome can realize auto focus upon the selected region. - Page 21 Figure 3-3 3.1.3.1 Local Image Adjustment It is to adjust the brightness, contrast, hue and saturation of different channel video images on the local WEB end. Note Please refer to 4.1.1 Camera for more details about the operation of actual image parameter adjustment. Select channel image, click and it will display image adjustment interface on the right of preview interface, which is shown in Figure 3-4.
- Page 22 Click and the channel image will be displayed with full screen. In full screen mode, double click the channel image or press Esc button to exit full screen display. 3.1.3.3 Adjust Fluency It is to adjust the fluency of channel image. Select the channel image, click to select fluency level, it supports realtime, general and fluency.
- Page 23 Figure 3-5 Function Note Quick Position It is the function of quick position. Use mouse to draw a box in the monitoring image of tracking speed dome, and the PTZ will quickly position to the scene. Direction Button It supports 8 directions, which are up, down, left, right, upper left, upper right, lower left and lower right.
-
Page 24: Playback
Single picture: Click and select the channel which needs to be displayed, support to select panoramic camera 1, panoramic camera 2 or tracking speed dome. Double picture: Click and the tracking speed dome is displayed by default, select panoramic camera 1 or panoramic camera 2. Triple picture: Panoramic camera 1, panoramic camera 2 and tracking speed dome are displayed simultaneously, click and the panoramic cameras are displayed on the top and the tracking speed... -
Page 25: Video Playback
Figure 3-6 3.2.1 Video Playback Video playback includes interface introduction, function column, playback video, video clip and aux function. 3.2.1.1 Interface Introduction It is to play video according to the requirement. Select file type as "dav", and the system will display the interface of video playback, which is shown in Figure 3-7, refer to Table 3-5 for more details. - Page 26 Figure 3-7 Function Note Play control button, refer to "3.2.1.2 Play Control Bar" for more Play control bar details. Control the volume during playback, which includes following two states: Volume , it means mute state. adjustment bar , it means voice broadcast state, volume can be adjusted. After enabling "Rule Info", the preview interface will display intelligent rules and object detection box.
- Page 27 Function Note It is to display the record type and its period. Click some spot in the color area, then it will begin to playback from Progress bar the time point. Different record types mean different color, please refer to record type selection bar for corresponding relations.
- Page 28 Step 2 Select the channel which needs to playback video, set "File Type" as dav", "Data Source" as "SD card", which is shown in Figure 3-9. File type includes dav and jpg, "dav" means video playback and "jpg" means picture playback. Figure 3-9 Step 3 Select the month and year of the video which needs to be checked, click the date with blue background.
- Page 29 Click the in the file list, the record file of the selected date will be displayed in the list, double click the file in the list, which is shown in Figure 3-11. The system plays the double-clicked file, and at the same time it shown file size, begin time and end time.
- Page 30 Operation Note The system fails to support download and play video at the same time. Back Click to return to calendar interface. Table 3-7 3.2.1.4 Video Clip Clip some piece of video and save it to the designated storage path, which is shown in Figure 3-12. Figure 3-12 Step 1 Select "Record Format"...
-
Page 31: Picture Playback
Table 3-8 3.2.2 Picture Playback Picture includes function bar of interface and playback picture file. 3.2.2.1 Interface Introduction Select "File Type" as "jpg", the system will display the interface of "Picture Playback", which is shown in Figure 3-13. Figure 3-13 Function Note It includes following two types:... - Page 32 It is to inquire and play snapshot pictures according to requirements. Step 1 Select the snapshot type which needs to be checked in the "Snapshot Type Selection Bar', which is shown in Figure 3-14. Figure 3-14 Step 2 Select the channel which needs to playback pictures, set "File Type" as "jpg", which is shown in Figure 3-15.
-
Page 33: Configure Alarm Info
The system will play the double-clicked file. Please refer to Table 3-10 for more details. Figure 3-16 Operation Note Input begin time and end time, click Search Check all the picture files between start time and end time. Click , the file will be downloaded to local. Note Download Download operation may be different according to different browsers, please... -
Page 34: Subscribe Alarm Information
It has to understand the alarm type and the precondition which generates event, please refer to Table 3-11 for more details. Alarm Note Precondition type Motion It generates alarm when it It has enabled the function of motion Detect detects there is moving object detection, please refer to "4.4.2.1 Set Motion in the video image. - Page 35 Figure 3-17 Step 2 Select alarm type. Step 3 Select "Prompt", the system will prompt and record alarm info according to actual situation. When the subscribed alarm event triggers, the system is not on the "Alarm" interface, then it will show on the "Alarm"...
-
Page 36: Config
4 Config 4.1 Camera Setup It is to set the camera, video and audio conditions, which is to guarantee normal monitoring for the device. Note Different devices may have different functions, please refer to the actual interface for more details. 4.1.1 Set Camera Condition 4.1.1.1 Set Camera Parameter It is to set or check the camera parameters of tracking speed dome and panorama camera. - Page 37 Figure 4-1 Figure 4-2 Please refer to Table 4-1 for more details about camera parameters. ...
- Page 38 Parameter Note It is to set the config mode of camera condition, including general, day and Config File night. It is to set the camera image parameter, including brightness, contrast, Image saturation, chroma CNT, sharpness and Gamma etc. It is to set the exposure mode of camera, including auto, manual, shutter Exposure priority, gain priority and iris priority.
- Page 39 Step 2 It is to set image parameters, please refer to Table 4-2 for more details about parameter description. Parameter Note Brightness It is to adjust image overall brightness via linear adjustment mode. The bigger the value is, the brighter the image becomes; the smaller the value is, the darker the image becomes.
- Page 40 Figure 4-4 Step 2 It is to set exposure parameter, please refer to Table 4-3 for parameter details. Parameter Note 50Hz: When the current is 50Hz, system can auto adjust the exposure according to the environment brightness in case there is any stripe in the image.
- Page 41 Parameter Note It is to set exposure mode of the camera. Note: When “Anti-flicker” is set as “Outdor”, the “exposure mode” can be set as “shutter priority”, “iris priority” or "gain priority" mode. Different devices have different exposure modes; please refer to the actual interface.
- Page 42 Table 4-3 Step 3 Click "Save" to complete the setting. 4.1.1.1.3 Set Backlight Mode Backlight mode includes BLC, WDR and HLC. BLC: it can avoid cucoloris phenomenon of the darker area in the backlight environment. WDR: It can suppress the overbright area and compensate darker area by enabling WDR, which can make the overall image clear.
- Page 43 There might be video loss of a few seconds during the process when the camera is switched from non WDR mode to WDR mode. Backlight Mode Note The system can make exposure automatically according to the environment, which is to make the image in the darkest area clear to be seen.
- Page 44 Step 2 It is to set WB mode, please refer to Table 4-5 for more details. WB Mode Note The system can make white balance compensation upon different light Auto environments automatically, which is to make the image color normal. The system can implement general white balance compensation upon indoor Indoor light, which is to make image color normal.
- Page 45 Figure 4-7 Step 2 It is to set day/night mode parameter, please refer to Table 4-6 for more details. Parameter Note Mode The camera image is displayed as color or Day&Night mode. Note "Mode" setting is not affected by the setting of "Config File". Color: The camera image is displayed as color image.
- Page 46 Figure 4-8 Step 2 It is to set zoom and focus parameter, please refer to Table 4-7 for more details. Parameter Note Digital Zoom Select "ON" to enable digital zoom. When optical zoom reaches max, it can continue to implement digital zoom after it is enabled.
- Page 47 Step 3 Click "Save" to complete setting. Note Click "Lens Init" to implement lens initialization for the lens of tracking speed dome, at this moment the device lens will be stretched, which means correction upon lens zoom and focus. 4.1.1.1.7 Set Defog Mode The image quality will become lower when the device is located in the environment with fog and haze, it can enable defog function to adjust the image definition.
- Page 48 Step 3 Click "Save" to complete setting. 4.1.1.2 Profile Management For config profile management, it can select "General", "Full Time" and "Schedule". Step 1 Select "Setup > Camera > Conditions > Profile Management" and the system will display the interface of "Profile Management".
-
Page 49: Set Video Parameter
Figure 4-11 When the "Profile Management" is set as "Schedule", it can set some period as day and set some other period as night, if it sets 8:00~17:00 as day, then 0:00~8:00 and 18:00~24:00 are considered as night, the system will implement monitoring by adopting corresponding config in different time. - Page 50 4.1.2.1 Set Video It is to set the video stream parameters of tracking speed dome and panorama camera, which includes stream type, encode mode, resolution, frame rate, bit rate type, bit rate, I frame interval, SVC and watermark setting etc. Step 1 Select "Setup >...
- Page 51 Parameter Function It is the encode mode of video. Encode mode H.264: Main Profile encode mode. H.264B: Baseline Profile encode mode. H.264H: High Profile encode mode. MJPEG: In this encode mode, the video needs large bit stream to guarantee the video definition. You can use the max bit stream value in the recommended bit to get the better video output effect.
- Page 52 Parameter Function When the "Bit Rate Type" is set as "VBR", you can set Stream Upper Limit the parameter. It is to select the stream upper limit according to "Reference Bit Rate", the stream will change according to the monitoring scene, but the max stream value changes around the stream value which has been set.
- Page 53 Figure 4-14 Step 2 Select channel. When the "Channel" is set as "1", it can set the snapshot parameter of tracking speed dome. When the "Channel" is set as "2" or "3", it can set the snapshot parameter of panorama camera. Step 3 It is to set snapshot, please refer to Table 4-10 for more details.
- Page 54 It is to set the video overlay info of both tracking speed dome and panorama camera, which includes privacy mask, channel title, time title, text overlay, OSD info, font and picture overlay. 4.1.2.3.1 Set Privacy Masking It can set privacy mask when it needs to protect privacy of some area on the video image. Note Only panorama camera supports privacy mask function.
- Page 55 4.1.2.3.2 Set Channel Title It can set channel title when it needs to display channel title in the video image. Step 1 Select "Setup > Camera > Video > Overlay" and the system will display the interface of "Overlay". Step 2 Select channel.
- Page 56 Select "Setup > Camera > Video > Overlay" and the system will display the interface of "Overlay". Step 2 Select channel. When the "Channel" is set as "1", it is to set the video overlay of tracking speed dome. ...
- Page 57 Step 1 Select "Setup > Camera > Video > Overlay" and the system will display the interface of "overlay". Step 2 Set the "Channel" as "2" or "3". Step 3 Click "Text Overlay" and the system will display the interface of "Text Overlay", which is shown in Figure 4-18.
- Page 58 4.1.2.3.5 Set Picture Overlay It can set picture overlay when it needs to display picture info in the video image. Note Text overlay and picture overlay can't be enabled at the same time. Step 1 Select "Setup > Camera > Video > Overlay" and the system will display the interface of "Video Overlay". Step 2 Select channel.
- Page 59 Step 6 Click "Save" to complete setting. 4.1.2.3.6 Set Privacy Mask It can set privacy mask when it needs to protect the privacy of some areas in the image. Note Only tracking speed dome supports privacy mask function. The config of privacy mask takes effect realtime.
- Page 60 Adjust preview image to proper location via PTZ, select proper color and click "Draw", press the left button and drag out rectangular box in the preview image. Note Select "SN" and click "Go to", then the PTZ camera will move to the corresponding location of setting privacy mask.
- Page 61 Parameter Note Select "Enable", it will display the preset name in the image when Preset switching to the preset which has been set, such as , and it will disappear after 3 seconds. Select "Enable" and it will display internal temperature of the current Temperature device.
- Page 62 Figure 4-22 Step 2 Select channel. When the "Channel" is set as "1", it is to set the ROI of tracking speed dome. When the "Channel" is set as "2" or "3", it is to set the ROI of panorama camera. Step 3 Select "Enable"...
-
Page 63: Configure Audio Parameters
Step 1 Select "Setup > Camera > Video > Path" and the system will display the interface of "path", which is shown in Figure 4-23. Figure 4-23 Step 2 Click "browse" respectively and set the storage path of live snapshot, live record, playback snapshot, playback download and video clips. - Page 64 Step 1 Select "Setup > Camera > Audio" and the system will display the interface of "Audio", which is shown in Figure 4-24. Figure 4-24 Step 2 It is to set audio parameters, please refer to Table 4-13 for more details. Parameter Note It can enable audio only when video is enabled.
-
Page 65: Network Setup
Parameter Note It is the audio type which is connected to device. LineIn: The device has to externally connect to audio input AudioIn Type source Mic: The device doesn't need to externally connect to audio input source. The system will automatically filter the noise in the environment after Noise Filter enabling noise filter. - Page 66 Figure 4-25 Step 2 It is to set TCP/IP parameters, please refer to Table 4-14 for more details. Parameter Function Host Name It is to set current host device name. It supports max 15 characters. Ethernet Card Select the Ethernet card which needs to be configured, it is wired by default.
- Page 67 and "Subnet Mask" according to the actual situation. Subnet mask Note The device will make legal inspection to all the IPv6 addresses, IP address and default gateway have to be in the same segment, which means that it can pass inspection as long as the field of designated length of subnet prefix has to be the same.
- Page 68 Enable Select the check box, you can use ARP/Ping command to ARP/Ping to set modify or set the device IP address if you know the device device IP MAC address. address service. When it is enabled by default, ping packet can set device IP via specific length within 2 minutes during device reboot, the service is off 2 minutes later, the service will be closed immediately after setting IP successfully.
-
Page 69: Set Connection Parameter
4.2.2 Set Connection Parameter 4.2.2.1 Set Connection Port Parameter You can set the max number of ports which can be connected to device and each port value. Step 1 Select "Setup > Network > Connection > Connection" and the system will display the interface of "Connection", which is shown in Figure 4-26. - Page 70 HTTP Port HTTP communication port, it is 80 by default. If it sets other value, then it needs to add modified port number at the address when using browser to log in. RTSP port The RTSP port number is 554 by default. Please leave it blank if using default.
-
Page 71: Set Pppoe Parameter
The camera login "Username" and "password" are both admin via ONVIF, "Port" is 80. Step 1 Select "Setup > Network > Connection > ONVIF" and the system will display the interface of "ONVIF", which is shown in Figure 4-27. Figure 4-27 Step 2 Set "Authentication"... -
Page 72: Set Ddns Parameter
Please confirm if the device supports the type of DNS before config. It doesn't need to register domain name if DDNS type is Dahua DDNS. Please log in website registration domain name of DDNS service provider on the WAN PC if DDNS type is other types. - Page 73 Figure 4-29 Step 2 Select "Server Type" and configure DDNS parameters according to the practical situation. Please refer to Table 4-16 for DDNS parameter config if it selects DDNS type as "QUICK DDNS". Parameter Note It is the address of DDNS server provider, it is www.quickddns.com Server Address default, which can't be modified.
-
Page 74: Set Ip Filter
Figure 4-30 Parameter Note Server Type It is the name and address of DDNS server, the corresponding relation is shown as follows Dyndns DDNS address is: members.dyndns.org Server Address NO-IP DDNS address is: dynupdate.no-ip.com CN99 DDNS address is: members.3322.org Domain Name It is the domain name which is registered on the website of DDNS server provider Username... - Page 75 In order to enhance device network security and protect device data, users can set the user who is allowed to have access to the device via IP filter. White list: it can have access to the device only when the users' IP/MAC is in the white list, otherwise, it fails to have access to the device.
-
Page 76: Set Smtp Parameter
Step 3 Select "Enable" to enable white list. Step 4 Click "Save" to complete setting. Use the IP host in the white list to log in device WEB interface, and you can log in the device successfully. 4.2.6 Set SMTP Parameter It will send email immediately when alarm, video detection, abnormal events and intelligent events happen via setting Email. - Page 77 Step 2 Configure SMTP server, please refer to Table 4-19 for the config description of common email. Email Encryption SMTP Server Port Note Type Mode For encryption mode, it can't select "None". "SMTP" service has to be available to the Email.
-
Page 78: Set Upnp Parameter
Parameter Function It is the interval of sending emails, "0" means there is no Interval interval for sending emails. After setting interval, when alarm, video detection and abnormal event trigger E-mail, the Email won't send E-mail immediately according to the trigger of alarm signal, but send email according to the interval of previous same event email, which is mainly applied to the phenomenon that frequent abnormal events generate a large number of emails and too... -
Page 79: Set Snmp Parameter
Figure 4-33 Step 2 Select "Enable" to enable UPnP function. Step 3 Select mode and check corresponding service name. UPnP consists of two mapping modes which are auto and manual. Manual mapping mode allows users to modify external port. ... - Page 80 Operation Steps Step 1 Select "Setup > Network > SNMP" and the system will display the interface of "SNMP", which is shown in Figure 4-34 and Figure 4-35. Figure 4-34 ...
- Page 81 Figure 4-35 Step 2 Select "SNMP Version" and enable SNMP. Step 3 It is to configure SNMP parameters, please refer to Table 4-21 for more details. For Trap address, it has to fill in with IP address of PC which is installed with MG-SOFT MIB Browser, the other configs are default.
- Page 82 Parameter Function SNMP Version Select check box of corresponding version, and the device will deal with the info of corresponding version. Check SNMP v1, device only process v1 info. Check SNMP v2, device only process v2 info. Check SNMP v3, it can set username, password and encryption method.
-
Page 83: Set Bonjour Parameter
Parameter Function The password length is no less than 8 characters. Encryption Password Table 4-21 Step 4 Click "Save" to complete setting. Step 5 Check device info. 1. Run MIB Builder and MG-SOFT MIB Browser softwares. 2. Compile two MIB files via MIB Builder software. 3. -
Page 84: Set Multicast
Figure 4-36 Step 2 Select "Enable" and set server name. Step 3 Click "Save" to complete setting. It can have access to WEB interface via Safari browser in the operating system and client which support Bonjour, the steps are shown as follows: Step 1 Click the "Show All Bookmarks"... - Page 85 Figure 4-37 Step 2 Select "Enable" of main stream or sub stream and enable multicast function. Step 3 Input multicast address and port. Multicast port is not limited while the range of multicast IP address is limited, which is shown in Figure 4-38.
-
Page 86: Set 802.1X Parameter
All the other addresses can be used except the addresses above with specific meaning, which is shown in Figure 4-39. Figure 4-39 Step 4 Click "Save" to complete setting. Select "Protocol" as "Multicast" on the WEB preview interface, then you can monitor video image via multicast. -
Page 87: Set Qos Parameter
Parameter Note Authentication PEAP (protected EAP protocol) Username It is the username of identity authentication, it needs to be admitted and authorized by server end. Password It is to set the password which is corresponding to the username. Table 4-22 Step 4 Click "Save"... -
Page 88: Set Ptz Function
Parameter Note Realtime Monitor It is the priority level of network video monitoring data packet. Command It is the priority level of non-monitoring data packet such as device config and query etc. Table 4-23 Step 3 Click "Save" to complete setting. 4.3 Set PTZ Function Only tracking speed dome supports PTZ function setup. -
Page 89: Step 2
Figure 4-42 Step 2 Set preset. 1. Click "Add" to add a new preset. 2. Move the camera to the needed monitoring direction via controlling the PTZ control panel. 3. Double click the new preset title to modify title, click to complete setting. -
Page 90: Set Scan
Figure 4-43 Step 2 Set tour. 1. Click "Add" to add a new tour. 2. Click "Add" to add a new preset. Several clicks to add several presets. 3. Double click to select preset, and double click to set duration. 4. -
Page 91: Set Pattern
Select "Setup > PTZ > Function > Scan" and the system will display the interface of "Scan", which is shown in Figure 4-44. Figure 4-44 Step 2 Set scan. 1. Select scan number and set scan speed. 2. Click "Set" and the system will display "Set Left Limit" and "Set Right Limit". 3. -
Page 92: Enable Pan
Figure 4-45 Step 2 Set pattern. 1. Select pattern number. 2. Click "Set" and the system will display the buttons of "Start Rec" and "Stop Rec". 3. Click "Start Rec". 4. It can control camera monitoring direction, zoom and focus via operating PTZ control panel. 5. -
Page 93: Set Ptz Speed
Figure 4-46 Step 2 Set pan speed, click "Start" and the camera starts pan. Click "Stop" to stop pan. 4.3.6 Set PTZ Speed PTZ speed means the rotation speed of the PTZ. Step 1 Select "Setup > PTZ > Function > PTZ Speed" and the system will display the interface of "PTZ Speed", which is shown in Figure 4-47. -
Page 94: Set Idle Motion
Figure 4-47 Step 2 Select PTZ speed and complete setting. 4.3.7 Set Idle Motion Idle motion means that the camera implement the action which is set in advance if it fails to receive any valid command within specific period of time. It has to make sure the selected motion has completed config before setting idle motion. -
Page 95: Set Powerup
Figure 4-48 Step 2 Set idle motion. 1. Select "Enable" to enable idle motion. 2. Select idle motion, select the number if there is number for idle motion and set idle time. 3. Click "Save" to complete setting. 4.3.8 Set PowerUp PowerUp means the action that the camera will implement automatically after power up. -
Page 96: Set Time Task
Figure 4-49 Step 2 Set PowerUp. 1. Select 'Enable" 2. Select powerup and select corresponding number if there is one. Note The system will run the last movement which lasts 20s before power off when selecting "Auto". 3. Click "Save" to complete setting. 4.3.9 Set Time Task Time task means that it implements relevant task movements within the period which has been set. - Page 97 Select "Setup > PTZ > Function > Time Task" and the system will display the interface of "Time Task", which is shown in Figure 4-50. Figure 4-50 Step 2 Set time task. 1. Select "Enable" to enable time task function. 2.
-
Page 98: Ptz Restart
Figure 4-51 1. Select "Time Task No." which has already been configured with task number. 2. Select time task number which is to be configured in "Copy to Task No". 3. Click "Copy". 4. Click "Save" to complete the setting of time task. 4.3.10 PTZ Restart Restart the PTZ manually. -
Page 99: Default
Figure 4-52 Step 2 Click "PTZ Restart" to restart the PTZ. 4.3.11 Default Caution The function will delete all the PTZ configs implemented by users after it is enabled, please operate carefully. Step 1 Select "Setup > PTZ > Function > Default" and the system will display the interface of "Default", which is shown in Figure 4-53. -
Page 100: Event
Figure 4-53 Step 2 Click "Default" and the PTZ function will be restored to default config. 4.4 Event 4.4.1 Set Smart Track After enabling linkage tracking and setting calibration parameters, the tracking speed dome will be activated to corresponding location and track the object till it is out of the monitoring range when the intelligent rules of panorama camera triggers alarm. - Page 101 4.4.1.1 Enable Alarm Track Alarm track is off by default, smart track is valid only after enabling alarm track. Step 1 Select "Setup > Event > Smart Track > Alarm Track" and the system will display the interface of "Alarm Track", which is shown in Figure 4-54.
- Page 102 Figure 4-55 Step 2 Select the lens number below in sequence (which is shown in Figure 4-56 ), add calibration point for corresponding lens video image. Figure 4-56 ...
-
Page 103: Set Video Detection
1. Click and click video image to display calibration box, drag the calibration box to proper location. 2. After clicking "Position", click calibration location in the image of tracking speed dome, move the video image of tracking speed dome to the corresponding location of the calibration point. 3. - Page 104 Figure 4-57 Step 2 Select channel. When the "Channel" is set as "1", it will set the motion detection of tracking speed dome. When the "Channel" is set as '2" or "3", it will set the motion detection of panorama camera. Step 3 Select "Enable"...
- Page 105 Figure 4-58 2. Set area name, it is to set valid area of motion detection according to the actual situation, and it can set the value of sensitivity and threshold respectively. The bigger the sensitivity is, the easier it is to generate motion detection, the smaller the threshold is, the easier it is to generate motion detection;...
- Page 106 Parameter Function It is to set the alarm period, it can enable alarm event only during the period Working Period range which has been set. 1. Click “Setup” and the system will pop out the interface of “Working Period”. 2. It is to set working period according to the following methods: ...
- Page 107 Parameter Function Select check box and set the channel number of snapshot. The Snapshot corresponding channel will take snapshot automatically when alarm occurs. Note Please refer to "4.1.2.5 Set path" for snapshot storage path query and setting. It needs to enable motion snapshot before enabling the function, please refer to "4.5.1.2 Snapshot Schedule"...
- Page 108 Step 2 Select channel. When the "Channel" is set as "1", it is to set the video tamper detection of tracking speed dome. When the 'Channel" is set as "2" or '3", it is to set the video tamper detection of panorama camera. Step 3 Select "Enable"...
- Page 109 Parameter Function Select check box, set activation and corresponding serial number. The system will activate and move to the selected preset, tour or pattern when alarm occurs. Activation operation includes preset, tour and pattern. Note It needs to set PTZ before enabling the function, please refer to "4.3 Set PTZ"...
- Page 110 Figure 4-60 Step 2 Select channel. When the "Channel" is set as "1", it is to set the scene changing of tracking speed dome. When the 'Channel" is set as "2" or '3", it is to set the scene changing of panorama camera. Step 3 Select "Enable"...
- Page 111 Parameter Function It is to set the alarm period, it can enable alarm event only during the period Working Period range which has been set. 1. Click “Setup” and the system will pop out the interface of “Working Period”. 2. It is to set working period according to the following methods: ...
-
Page 112: Set Audio Detection
Table 4-26 Step 5 Click "Save" to complete setting. 4.4.3 Set Audio Detection Step 1 Select "Setup > Event > Audio Detection" and the system will display the interface of "Audio Detection", which is shown in Figure 4-61. Figure 4-61 ... - Page 113 Step 2 Select audio channel. Step 3 It is to set audio detection parameters, please refer to Table 4-27 for more details. Parameter Function Select the check box, it will generate alarm when it detects audio input Enable Input abnormity. Abnormal Select the check box, it will generate alarm when it detects there is audio Enable Intensity...
-
Page 114: Smart Plan
Parameter Function System can delay the alarm output for specified time after alarm ended. Alarm Delay Select check box, and the system will send email to inform users when Send Email alarm occurs. Note It needs to set Email before enabling the function, please refer to "4.2.6 Set SMTP Parameter"... - Page 115 Figure 4-62 Step 3 Enable corresponding intelligent function according to requirements. Enable heat map or people counting function. 1. Click the slider in the to enable function switch. 2. Click heat map or people counting to enable corresponding intelligent function. The selected intelligent function will be displayed with high brightness, click the selected intelligent function to cancel it.
-
Page 116: Set Ivs
Step 1 Select "Setup > Event > Smart Plan" and the system will display the interface of "Smart Plan". Step 2 Select "Channel" as "2" or "3" and the system will display the smart plan interface of panorama camera, which is shown in Figure 4-63. ... - Page 117 Make sure the target appears at least over 2 seconds continuously in the field; the movement distance has to be bigger than the width of the target itself and makes sure it is no less than 15 pixels (CIF image). ...
- Page 118 Step 2 Select channel. When the "Channel" is set as "1", it is to set the intelligent rules of tracking speed dome. When the "Channel" is set as "2" or "3", it is to set the intelligent rules of panorama camera. Step 3 Select "Preset"...
- Page 119 Click "Clear" to delete all the drawn rules. 3. Select max size or min size, click "Draw Target", and drag any angle of the filter box to enlarge or narrow the filter box to proper size. Note It will alarm only when the size of target is between two filter boxes. ...
- Page 120 Parameter Note Alarm delay It means the alarm delays a period of time to stop after alarm ends. Select check box, and the system will send email to inform users when alarm occurs. Note Send Email It needs to set Email before enabling the function, please refer to "4.2.6 Set SMTP Parameter"...
- Page 121 Step 3 Select "Preset" and the camera will quickly move to the corresponding position of the preset. Note It needs to implement the step when it is to set the intelligent rules of tracking speed dome. Step 4 It is to configure the rule of cross fence. 1.
- Page 122 In the state of drawing, select "Max Size" or "Min Size", click "Clear" to delete corresponding filtering box. 4. It is to set the parameters of tripwire, please refer to Table 4-29 for more details. Parameter Note It is to set the alarm period, it can enable alarm event only during the period range which has been set.
- Page 123 Parameter Note It needs to set Email before enabling the function, please refer to "4.2.6 Set SMTP Parameter" for more details. Select check box, set activation and corresponding serial number. The system will activate and move to the selected preset, tour or pattern when alarm occurs.
- Page 124 It is to configure the rule of intrusion. 1. Click , double click the new rule, set rule name, and select rule type as "Intrusion", which is shown in Figure 4-66. Figure 4-66 2. Click "Draw Rule" to draw rules on the monitoring image, right click to end drawing; Note ...
- Page 125 In the state of drawing, select "Max Size" or "Min Size", click "Clear" to delete corresponding filtering box. 4. It is to set the parameters of intrusion, please refer to Table 4-30 for more details. Parameter Note It is to set the alarm period, it can enable alarm event only during the period range which has been set.
- Page 126 Parameter Note Alarm delay It means the alarm delays a period of time to stop after alarm ends. Select check box, and the system will send email to inform users when alarm occurs. Note Send Email It needs to set Email before enabling the function, please refer to "4.2.6 Set SMTP Parameter"...
- Page 127 Step 3 Select "Preset" and the camera will quickly move to the corresponding position of the preset. Note It needs to implement the step when it is to set the intelligent rules of tracking speed dome. Step 4 It is to configure the rule of abandoned object. 1.
- Page 128 Click "Clear" to delete all the drawn monitoring areas. 3. Select max size or min size, click "Draw Target", and drag any angle of the filter box to enlarge or narrow the filter box to proper size. Note It will alarm only when the size of abandoned target is between two filter boxes. ...
- Page 129 Parameter Note when alarm occurs. Alarm delay It means the alarm delays a period of time to stop after alarm ends. Select check box, and the system will send email to inform users when alarm occurs. Note Send Email It needs to set Email before enabling the function, please refer to "4.2.6 Set SMTP Parameter"...
- Page 130 It is to configure the rule of fast moving. 1. Click , double click the new rule, set rule name, and select rule type as "Fast Moving", which is shown in Figure 4-68. Figure 4-68 2. Click "Draw Rule" to draw rules on the monitoring area, right click to end drawing; Note Click "Clear"...
- Page 131 Parameter Note It is to set the alarm period, it can enable alarm event only during the period range which has been set. 4. Click “Setup” and the system will pop out the interface of “Working Period”. 5. It is to set working period according to the following methods: ...
- Page 132 Parameter Note Select check box, set activation and corresponding serial number. The system will activate and move to the selected preset, tour or pattern when alarm occurs. Activation operation includes preset, tour and pattern. Note It needs to set PTZ before enabling the function, please refer to "4.3 Set PTZ"...
- Page 133 Figure 4-69 2. Click "Draw Rule" to draw monitoring area on the monitoring image, right click to end drawing; Note Click "Clear" to delete all the drawn monitoring areas. 3. Select max size or min size, click "Draw Target", and drag any angle of the filter box to enlarge or narrow the filter box to proper size.
- Page 134 Parameter Note You can input time numerical value or press the left mouse button to drag on the setup interface to set. Click the "Setup" of corresponding week, select the check box in front of the period on the bottom of the interface, and input time value, there are six periods to be set every day.
- Page 135 Parameter Note Select check box and set the channel number of snapshot. The corresponding channel will take snapshot automatically when alarm occurs. Note Snapshot Please refer to "4.1.2.5 Set path" for snapshot storage path query and setting. It needs to enable motion snapshot before enabling the function, please refer to "4.5.1.2 Snapshot Schedule"...
- Page 136 Figure 4-70 2. Click "Draw Rule" to draw monitoring area on the monitoring image, right click to end drawing; Note Click "Clear" to delete all the drawn monitoring areas. 3. Select max size or min size, click "Draw Target", and drag any angle of the filter box to enlarge or narrow the filter box to proper size.
- Page 137 Parameter Note 1. Click “Setup” and the system will pop out the interface of “Working Period”. 2. It is to set working period according to the following methods: You can input time numerical value or press the left mouse button to drag on the setup interface to set.
- Page 138 Parameter Note Select check box, set activation and corresponding serial number. The system will activate and move to the selected preset, tour or pattern when alarm occurs. Activation operation includes preset, tour and pattern. Note It needs to set PTZ before enabling the function, please refer to "4.3 Set PTZ"...
- Page 139 Figure 4-71 2. Click "Draw Rule" to draw monitoring area on the monitoring image, right click to end drawing; Note Click "Clear" to delete all the drawn monitoring areas. 3. Select max size or min size, click "Draw Target", and drag any angle of the filter box to enlarge or narrow the filter box to proper size.
- Page 140 Parameter Note You can input time numerical value or press the left mouse button to drag on the setup interface to set. Click the "Setup" of corresponding week, select the check box in front of the period on the bottom of the interface, and input time value, there are six periods to be set every day.
- Page 141 Parameter Note Select check box and set the channel number of snapshot. The Corresponding channel will take snapshot automatically when alarm occurs. Note Snapshot Please refer to "4.1.2.5 Set path" for snapshot storage path query and setting. It needs to enable motion snapshot before enabling the function, please refer to "4.5.1.2 Snapshot Schedule"...
- Page 142 Figure 4-72 2. Click "Draw Rule" to draw monitoring area on the monitoring image, right click to end drawing; Note Click "Clear" to delete all the drawn monitoring areas. 3. Select max size or min size, click "Draw Target", and drag any angle of the filter box to enlarge or narrow the filter box to proper size.
- Page 143 Parameter Note drag on the setup interface to set. Click the "Setup" of corresponding week, select the check box in front of the period on the bottom of the interface, and input time value, there are six periods to be set every day. 3.
- Page 144 Parameter Note Select check box and set the channel number of snapshot. The Corresponding channel will take snapshot automatically when alarm occurs. Note Snapshot Please refer to "4.1.2.5 Set path" for snapshot storage path query and setting. It needs to enable motion snapshot before enabling the function, please refer to "4.5.1.2 Snapshot Schedule"...
- Page 145 Figure 4-73 Step 2 Select "Preset" and the camera will quickly move to the corresponding position of the preset. Note It needs to implement the step when the device supports to select preset. Step 3 Add detect area and exclude area. 1.
- Page 146 Step 4 Calibration area. 1. Click "Add Calibration" and draw calibration area in the monitoring image, right click to end drawing. 2. Select "Horizontal" and set the corresponding actual length of the horizontal ruler, and draw horizontal ruler in the calibration area. 3.
-
Page 147: Set Face Detection
Step 6 Click "Save" to complete setting. 4.4.6 Set Face Detection The system will generate alarm and activate the actions which have been set when it detects human face in the video image. Precondition Please refer to "4.4.4 Set Smart Plan" for the IVS smart plan which has been set preset face detection for the tracking speed dome. - Page 148 Parameter Note It is to set the alarm period, it can enable alarm event only during the period range which has been set. 1. Click “Setup” and the system will pop out the interface of “Working Period”. 2. It is to set working period according to the following methods: ...
-
Page 149: Set People Counting
Parameter Note Select check box and set the channel number of snapshot. The Corresponding channel will take snapshot automatically when alarm occurs. Note Snapshot Please refer to "4.1.2.5 Set path" for snapshot storage path query and setting. It needs to enable motion snapshot before enabling the function, please refer to "4.5.1.2 Snapshot Schedule"... - Page 150 Figure 4-75 Step 2 Select serial number of people counting in the area which needs people number statistics via PTZ control panel. Step 3 Click "Draw Rule" and press left button to draw people counting area on the monitoring image. Step 4 Select "Enable"...
- Page 151 Parameter Note range which has been set. 1. Click “Setup” and the system will pop out the interface of “Working Period”. 2. It is to set working period according to the following methods: You can input time numerical value or press the left mouse button to drag on the setup interface to set.
- Page 152 Parameter Note Select check box and set the channel number of snapshot. The Corresponding channel will take snapshot automatically when alarm occurs. Note Snapshot Please refer to "4.1.2.5 Set path" for snapshot storage path query and setting. It needs to enable motion snapshot before enabling the function, please refer to "4.5.1.2 Snapshot Schedule"...
- Page 153 Figure 4-76 Step 2 Select the serial number of people counting which needs to be inquired. Step 3 It is to set search condition, please refer to Table 4-40 for more details. Parameter Note It is the report period and display form of people counting report, report Report Type period can select day, month or year, report display form can select bar chart or line chart.
-
Page 154: Heat Map
4.4.8 Heat Map It can generate report according to the density statistics of object movement. The color ranges from blue to red, blue means the minimum of heat value while red means the maximum of heat value. The original data will be removed when mirror or view angle changes. 4.4.8.1 Set Rule ... - Page 155 Step 3 Select "Enable" to enable heat map function. Step 4 Configure working period. 1. Click "Setup" and the system will pop out the interface of "Working Period", which is shown in Figure 4-78. Figure 4-78 2. Set alarm period. ...
-
Page 156: Set Alarm
Precondition It has enabled heat map function, please refer to "4.4.8.1 Set Rule" for more details. Operation Steps Step 1 Select "Setup > Event > Heat Map > Report" and the system will display the interface of "Report", which is shown in Figure 4-79. ... - Page 157 Figure 4-80 Step 2 Select "Enable" to enable alarm linkage. Step 3 It is to set the parameters of alarm, please refer to Table 4-41 for more details. Parameter Function It is to select external alarm device. Relay-in It is to set the alarm period, it can enable alarm event only during the period Working Period range which has been set.
- Page 158 Parameter Function System only records one alarm event during the anti-dither period. Anti-dither It is to select NO or NC according to the type of external alarm device Sensor Type sensor. Select check box and set record channel, the corresponding channel will Record implement alarm and record automatically when alarm happens.
-
Page 159: Abnormity
4.4.10 Abnormity Abnormity includes SD card abnormity, network abnormity and illegal access. Note Only the device with SD card function has these three statuses: No SD card, Capacity warning, and SD card error. 4.4.10.1 SD Card Abnormity The system can generate alarm and activate the actions which have been set when SD card is abnormal. - Page 160 Parameter Function Relay-out Connect alarm output port to alarm device (such as lamplight, siren and so on), select check box and set alarm output device, enable alarm linkage output port, and the system can activate corresponding alarm output device when alarm occurs. System can delay the alarm output for specified time after alarm ended.
- Page 161 Step 2 Set event type. Step 3 Select "Enable" to enable the function of network abnormity detection. Step 4 It is to set the parameters of network abnormity, please refer to Table 4-43 for more details. Parameter Function Select check box and set record channel, the corresponding channel will Record implement alarm and record automatically when alarm happens.
- Page 162 Figure 4-83 Step 2 Select "Enable" to enable the function of illegal access function. Step 3 It is to set the parameters of illegal access detection, please refer to Table 4-44 for more details. Parameter Function It is the times of continuously inputting wrong password when logging in the Login Error device.
-
Page 163: Storage
Click "Save" to complete setting 4.5 Storage 4.5.1 Set Schedule Config schedule includes configuring record, snapshot and holiday. Note The device will fail to record or snapshot according to the schedule if the record mode is off in the record control. 4.5.1.1 Set Record Schedule It is to set the record schedule of panorama camera or tracking speed dome, record type includes general, motion and alarm. - Page 164 Step 2 When the "Channel" is set as "1", it is to set the record schedule of tracking speed dome. When the "Channel" is set as "2", it is to set the record schedule of panorama camera. Step 3 Select record type and set period.
- Page 165 it is to set snapshot schedule of panorama camera or tracking speed dome, snapshot type includes general, motion and alarm. Step 1 Select "Setup > Storage > Schedule > Snapshot Schedule" and the system will display the interface of "Snapshot Schedule", which is shown in Figure 4-86. ...
- Page 166 Figure 4-87 2. Select day and the check box in front of the period, and set period. Note There are six periods which can be set every day. The setting will be applied to the whole week if it selects all, you can also select the check box in front of the day to make separate setting upon several days.
-
Page 167: Destination
Figure 4-88 Step 2 Select "Record" or "Snapshot". Step 3 Click the date which needs to be set as holiday. The selected date will display yellow shading. Step 4 Click "Save" to complete setting. 4.5.2 Destination 4.5.2.1 Set Path Path can help to configure the storage mode of record and snapshot according to the event type, you can select local SD card, FTP or NAS for storage. - Page 168 Only the device which supports SD card can display "Local". Step 1 Select "Setup > Storage > Destination > Path" and the system will display the interface of "Path", which is shown in Figure 4-89. Figure 4-89 Step 2 Select storage mode for the corresponding type the event of record or snapshot according to the actual situation.
- Page 169 Figure 4-90 4.5.2.3 Set FTP FTP function can be enabled when destination selects FTP storage mode. When network disconnection or malfunction occurs, it can emergently store all record or snapshot to the local SD card. Step 1 Select "Setup > Storage > Destination > FTP" and the system will display the interface of "FTP", which is shown in Figure 4-91.
- Page 170 Parameter Note It is the password which is used to log in FTP server. Remote Store it to the directory on the FTP server. Directory Emergency Select the check box, record or snapshot will be stored to local SD card (Local) when FTP is abnormal.
-
Page 171: Record Control
Step 4 Click "Save" to complete setting. 4.5.3 Record Control It is to configure pack duration, pre-event record, disk full, record mode and record stream. Step 1 Select "Setup > Storage > Record Control" and the system will display the interface of "Record Control", which is shown in Figure 4-93. -
Page 172: System
Parameter Note The system will begin to record when selecting manual mode; the system Record Mode will begin to record within the period of record schedule set by the system. Record Stream It includes main stream and sub stream. Table 4-48 Step 3 Click "Save"... - Page 173 Parameter Note Video Standard It is to display the video standard of the device, such as 50Hz. Table 4-49 Step 3 Click "Save" to complete setting. 4.6.1.2 Date & Time It is to set date format, time format, time zone, system time, enable DST or set NTP server. Step 1 Select "Setup >...
- Page 174 Parameter Note Date Format It is the date format displayed by the system. It is the time format displayed by the system, including 24-hour system and Time Format 12-hour system. Time Zone It is the time zone where the device is located. Current It the current system time of the device.
-
Page 175: Account
Step 3 Click "Start" and the system will begin to splice the panorama camera which has been selected. 4.6.2 Account Users can implement user management operation only when they have user management authority. The user name or group supports max 31 characters, which only consists of letter, number, underline, spot or @. - Page 176 Figure 4-97 Step 2 Click "Add Group" and the system will pop out the dialog box of "Add Group", which is shown in Figure 4-98. Figure 4-98 Step 3 Fill in the group name and remark information, select authority list of the group. ...
- Page 177 Step 4 Click "Save" to complete adding. It will display newly-added group in the group list, which is shown in Figure 4-97. Note Click after adding group, you can modify the remark and authority of the group; click delete the added group, admin and user group can't be deleted. ...
- Page 178 Figure 4-100 Step 2 Click "Add User" and the system will pop out the dialog box of "Add User", which is shown in Figure 4-101. ...
- Page 179 Figure 4-101 Step 3 It is to configure the parameters of user, please refer to Table 4-51 for more details. Parameter Note User name It is the unique name which is used to identify user. It can't be repeated. Password It is the password and confirm password of user.
-
Page 180: Add Onvif User
Step 4 Click "Save" to complete adding. The newly-added user will be displayed in the user list, which is shown in Figure 4-102. Note Click after adding user, you can modify user password, group to which the user belongs, remark and authority;... - Page 181 Figure 4-103 Step 2 Click "Add User" and the system will pop out the dialog box of "Add User", which is shwon in Figure 4-104. Figure 4-104 Step 3 Input user name, password and confirm password, and select group. Group includes admin, operator and user for you to select according to the actual situation.
- Page 182 Note Click after adding user, you can modify user password, group to which the user belongs, remark and authority; click to delete the added user, admin user can't be deleted. Click the corresponding of admin user and it can modify the password of admin user. ...
-
Page 183: System Maintenance
5 System Maintenance 5.1 Maintenance Requirements It is recommended to implement system management, backup and maintenance according to the following operations in order to make sure the system is normal and it operates safely. Check monitoring image of the device regularly. ... -
Page 184: Delete Old Files
5.2.2 Delete Old Files Delete the video or pictures stored in SD card, FTP or NAS server according to the time which has been set. Step 1 Select "Setup > System > Auto Maintain" and the system will display the interface of "Auto Maintain", which is shown in Figure 5-2. -
Page 185: Recover Device Config Info
Figure 5-3 Step 2 Click "Import/Export" and select backup path. The "Backup Path" will display export path after export is configured. 5.3.2 Recover Device Config Info It can import config file and quickly configure device info or recover device config info via configuring import and export function. -
Page 186: Default
5.3.3 Default Caution All the device configs will be restored to default except network IP address and user management, please operate carefully. Select "Setup > System > Default" and the system will display the interface of "Default", which is shown in Figure 5-5. -
Page 187: Version
The upgrade file is a type of *.bin file. Step 3 Click "Upgrade" and the system will begin to upgrade firmware. 5.5 Version It is to check system harware characteristics, software version and WEB version etc. Note Different devices may have different version info, please refer to the actual interface for more details. Select "Setup >... - Page 188 Figure 5-8 Step 2 Set "Start Time" and "End Time", and select log type. The earliest start time is Jan 1 2000, and the latest end time is Dec 31 2017. Log type includes system operation, config operation, data operation, event operation, record operation, user management and clear log.
-
Page 189: Online User
Click "backup" to back up the seached log info to local PC. Click "Clear" to clear all the log info on the device, please operate carefully. Figure 5-9 5.7 Online User It is to check info of the users who has currently logged in the WEB. Select "Setup >... - Page 190 If there is any uncertainty or controversy, please refer to the final explanation of us. Please visit our website for more information. ZHEJIANG DAHUA VISION TECHNOLOGY CO., LTD. Address: No.1199, Bin'an Road, Binjiang District, Hangzhou, P.R. China Postcode: 310053...
Need help?
Do you have a question about the PSD81602-A360 and is the answer not in the manual?
Questions and answers