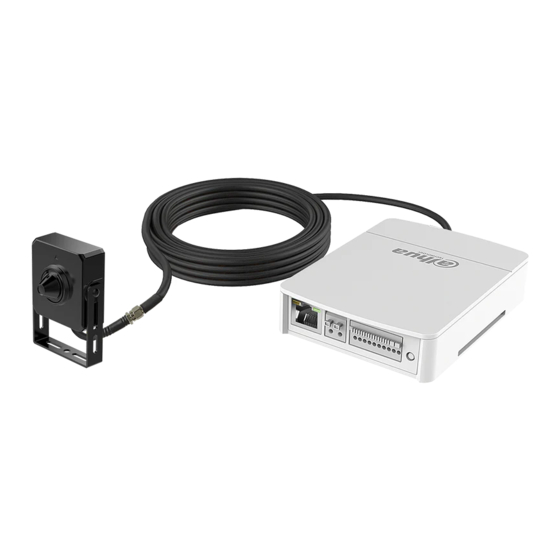
Summary of Contents for Dahua Pinhole
- Page 1 Dahua HD Pinhole Network Camera Quick Start Guide Dahua HD Pinhole Network Camera Quick Start Guide Version 1.0.0 Dahua Vision Technology Co., Ltd.
-
Page 2: Important Safeguards And Warnings
Dahua HD Pinhole Network Camera Quick Start Guide Welcome Thank you for purchasing our network cameras. This user’s manual is designed to be a reference tool for your system. Please read the following safeguards and warnings carefully before you use this series product. - Page 3 Dahua HD Pinhole Network Camera Quick Start Guide Do not dismantle the device as there is no component that can be fixed by users themselves in the device. Otherwise, it might cause water leakage or bad image for the device due to unprofessional dismantling.
- Page 4 Dahua HD Pinhole Network Camera Quick Start Guide FCC Information 1. FCC conditions: This device complies with part 15 of the FCC Rules. Operation is subject to the following two conditions: This device may not cause harmful interference ...
-
Page 5: Table Of Contents
Dahua HD Pinhole Network Camera Quick Start Guide Table of Contents Device Framework ..........................1 Structure and Dimension ...................... 1 1.1.1 Structure and Dimension of Modular Pinhole Network Camera ........1 1.1.2 Structure and Dimension of All-in-one Pinhole Network Camera ......... 4 Bidirectional Talk ........................5 1.2.1 Device-end to PC-end .................... -
Page 6: Device Framework
1.1.1 Structure and Dimension of Modular Pinhole Network Camera 1.1.1.1 Structure You can refer to the following figures for port information. See 错误!未找到引用源。 and Figure 1-2. - Page 7 Dahua HD Pinhole Network Camera Quick Start Guide Table 1-1 Description of Port Function Port Port Name Connector Function Note Audio output Output audio signal to the speakers and other AUDIO devices. port Audio input Input audio signal, receive analog audio signal...
- Page 8 Dahua HD Pinhole Network Camera Quick Start Guide 1.1.1.2 Dimension Please refer to the following figures for dimension information of different models for modular pinhole camera. The unit is mm. Please refer to Figure 1-3 for the dimension of model A.
-
Page 9: Structure And Dimension Of All-In-One Pinhole Network Camera
Dahua HD Pinhole Network Camera Quick Start Guide Figure 1-6 Dimension of rear end Please refer to Figure 1-6 for the dimension of rear end for the three models described above. 1.1.2 Structure and dimension of All-in-one Pinhole Network Camera You can refer to the following figures for more details. -
Page 10: Bidirectional Talk
It is used to fix the camera. Bracket adjusting screw It is used to adjust the camera angle. Front cover 1.2 Bidirectional Talk Note: This function is only supported by HD modular pinhole network camera. 1.2.1 Device-end to PC-end Device Connection... -
Page 11: Pc-End To The Device-End
1.3 Alarm Setup Note: This function is only supported by HD modular pinhole network camera. Please refer to Figure 1-9 for more information. Figure 1-9 Alarm setup screen Alarm input and output steps:... - Page 12 Dahua HD Pinhole Network Camera Quick Start Guide 2. Connect alarm output device to the alarm output port of I/O cable, alarm output port can only be connected to NO alarm device. 3. Open the Web, set alarm input and output correspondingly. Alarm input 01 on WEB corresponds to the first alarm input of I/O cable on device.
-
Page 13: Device Installation
Dahua HD Pinhole Network Camera Quick Start Guide 2 Device Installation Note: All the installation figures below are for reference only due to the different models and appearances; please refer to the actual devices for exact details. 2.1 Installation of HD Modular Pinhole Network Camera This product is a kind of separate device, and both the front end and the rear end of the device have to be installed respectively. - Page 14 Dahua HD Pinhole Network Camera Quick Start Guide Figure 2-2 Installation of round front end 1. Take out the installation bracket from the accessories bag (with installation foam) 2. Tear off the film of the foam, and stick it on the surface to be installed.
-
Page 15: Installation Of Hd All-In-One Pinhole Network Camera
4. Take out the decoration enclosure from the accessories bag, aim the device and press it hard to install. 2.2 Installation of HD All-in-one Pinhole Network Camera Note: The pinhole camera mainly adopts ceiling installation. The installation surface has to be thick enough to sustain at least 3X weight of the camera. - Page 16 Dahua HD Pinhole Network Camera Quick Start Guide Figure 2-5 Installation of device Install the camera: Use screws to fix the camera on the installation wall, as it is shown in Figure 2-1. Location /angle adjustment: 1. Install the camera on the fixed wall together with the bracket.
-
Page 17: Network Configuration
Dahua HD Pinhole Network Camera Quick Start Guide 3 Network Configuration The IP address of all the cameras is the same when leaving factory (default IP192.168.1.108). To make the camera get access to the network smoothly, please plan the useable IP segment reasonably according to the actual network environment. -
Page 18: Login Web Interface
Dahua HD Pinhole Network Camera Quick Start Guide 4. Modify the camera IP address on the “Net” interface, click “Save” to finish modification. See Figure 3-2 for more details. Figure 3-2 Network parameters 3.2 Login WEB Interface Note: Different devices may have different WEB interfaces, the figures below are just for reference,... - Page 19 Dahua HD Pinhole Network Camera Quick Start Guide 2. The login interface is shown below, please input your user name and password (Default user name is admin and password is admin respectively), click “login”. 3. Install controls according to the system prompt. See Figure 3-4 for the WEB main interface.


Need help?
Do you have a question about the Pinhole and is the answer not in the manual?
Questions and answers