Table of Contents
Advertisement
Advertisement
Table of Contents

Related Manuals for Dahua SD6980-HN


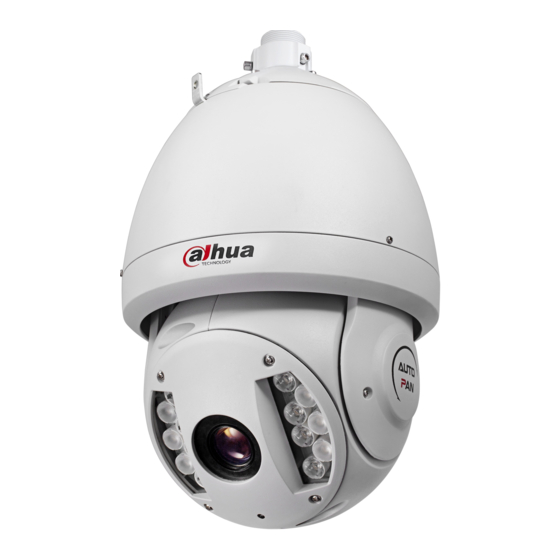
Summary of Contents for Dahua SD6980-HN
- Page 1 IR Speed Dome User’s Manual Version 1.1...
-
Page 2: Table Of Contents
Table of Contents 1 1 1 1 FEATURES AND FUNCTIO FEATURES AND FUNCTIONS FEATURES AND FUNCTIO FEATURES AND FUNCTIO NS ..................8 General Intr General Introduction oduction ............................8 General Intr General Intr oduction oduction Features Features ................................8 Features Features 1.2.1 On-Screen Menu ............................8 1.2.2 On-screen Tips ...............................8... - Page 3 3 3 3 3 CABLE CONNECTION ....................16 CABLE CONNECTION CABLE CONNECTION CABLE CONNECTION RS485 and Power Cable Connection RS485 and Power Cable Connection RS485 and Power Cable Connection RS485 and Power Cable Connection ......................16 Alarm Cable Connection ..........................17 3.2.1 System Layout ..............................
- Page 4 RS485 Bus Main Feature RS485 Bus Main Feature RS485 Bus Main Feature RS485 Bus Main Feature ..........................39 RS485 Bus Transmission Distance RS485 Bus Transmission Distance RS485 Bus Transmission Distance RS485 Bus Transmission Distance ........................ 39 Connection Methods and Terminal Resistance Connection Methods and Terminal Resistance Connection Methods and Terminal Resistance Connection Methods and Terminal Resistance ...................
- Page 5 Welcome Thank you for purchasing our product! This user’s manual is designed to be a reference tool for the operation of your system. Here you can find information about this speed dome features and functions, as well as a detailed menu tree.
-
Page 6: Important Safeguards And Warnings
Important Safeguards and Warnings 1. . . . Electrical safety All installation and operation here should conform to your local electrical safety codes. The power shall conform to the requirement in the SELV (Safety Extra Low Voltage) and the Limited power source is rated 24V AC in the IEC60950-1. We assume no liability or responsibility for all the fires or electrical shock caused by improper handling or installation. - Page 7 6. About Accessories Always use all the accessories recommended by manufacturer. Before installation, please open the package and check that all the components are included in the package: Contact you local retailer ASAP if something is missing in your package.
-
Page 8: Features And Functio Features And Functions Features And Functio Ns Ns
1 1 1 1 Features and Features and F F F F unction unctions s s s Features and Features and unction unction 1.1 General Introduction General Introduction General Introduction General Introduction This series IR speed dome product is an integrated high intelligent speed dome. It adopts water drop configuration design and has small and delicate shape. -
Page 9: Auto Scan
1.2.6 Auto Scan Camera scans back and forth regularly in a horizontal field. Here you need to set left and right limit and scan speed. You can set 5 scanning paths. 1.2.7 Auto Touring Add addresses into a routine in a desired order and then set time and stop duration for each address. The dome will begin an auto touring between these addresses. -
Page 10: Backlight Compensation
Auto focus allows the lens to remain in focus during zoom-in, zoom-out and motion functions to get vivid image. You can use FAR or NEAR button to adjust focus manually. 1.2.16 Backlight Compensation Balance the brightest and darkest sections of a scene to produce a more vivid picture. 1.2.17 Pan Tilt and Zoom Supports zoom in and zoom out during tilt and pan movement. -
Page 11: Technical Specifications
All digital design. All data are in the connection board. No data loss when power off occurs. Integrated design, high stability. IR speed dome max support 255 presets. Support 8 auto touring. Each touring max has 32 presets. 5 auto scan. Built-in 5 auto pattern. - Page 12 Power AC 24V/3A(±20%)(Includes temperature control circuit) Camera Driver Consumption ≤20W IR Light Consumption Decoder Built-in Engine Stepper motor Preset 255( in PELCO protocol) Auto Tour Auto Pattern Auto Scan Privacy Mask Maximum 8 zones Alarm Input/Output Information Time, address, dome title, dome coordinates, temperature and etc.
-
Page 13: Protocol, Baud Rate, Protocol, Baud Rate, Address Setup Protocol, Baud Rate, Address Setup
2 2 2 2 Protocol Protocol Protocol Protocol, , , , B B B B aud aud R R R R ate ate, , , , A A A A ddress ddress ddress setup ddress setup setup setup Before you operate, you need to set protocol, baud rate and address. Otherwise you can not control the product! 2.1 Protocol and Protocol and B B B B aud... -
Page 14: Set Address Dial Switch
Please refer to the protocol sheets for detailed information. Protocol Baud rate Parity Connect to the 120 Please note the speed dome cans automatically recognize the DH-SD, PELCO-D. PELCO-P. Usually you do not need to set. Communication Protocol DH-SD ( Compatible with China industrial standard protocol)... - Page 15 to the following sheet for more information. Address …… …………………………………………………………………...
-
Page 16: Cable Connection
3 3 3 3 Cable Connection Cable Connection Cable Connection Cable Connection 3.1 RS485 and RS485 and P P P P ower ower C C C C able able C C C C onnection onnection RS485 and RS485 and ower ower able able... -
Page 17: Alarm Cable Connection
Right now the device does not support this function. VIDEO Ground port. Video output port. Power port connection interface is shown as in Figure 3-3. Figure 3-3 Name Function AC24V 24V power port. Connect to the power cable. EARTH Ground port. AC24V 24V power port. -
Page 18: System Layout
when there is high voltage. Low voltage will not activate the alarm. Note: Dome alarm input message is ground mode. Dome alarm input signal are two modes: normal open and normal close. 3.2.1 System Layout 3.2.1.1 BUS connection Please refer to Figure 3-5 and Figure 3-6 for BUS cable connection. Figure 3-5 Figure 3-6 Note:... -
Page 19: Alarm Connection
Figure 3-7 3.2.2 Alarm Connection Please refer to Figure 3-8 for alarm connection information. Figure 3-8 3.2.3 Keyboard Connection This series dome supports keyboard operation. You can use keyboard to control the dome and PTZ. The display and control can work simultaneously. One keyboard can control maximum 255 speed domes. Please refer to Figure 3-9. - Page 20 Please contact us freely if some matrix systems do not support dome camera communication protocol. The most direct and easy way is to use current system to process video signal and add some control keyboards to control speed dome. See Figure 3-10. Figure 3-10...
-
Page 21: Menu
4 4 4 4 Menu Menu Menu Menu 4.1 Screen Menu Index Note: ERR means current setup is invalid. … means there is submenu. INITIAL INFORMATION… SYSTEM ADDR INFORMATION… INFORMATION SYSTEM TIME SETTING… SET NORTH :ENGLISH LANGUAGE PTZ AUTO STOP:15S FACTORY DEFAULT RESTART BACK... -
Page 22: Self
EXIT The above diagram illustrates the overall structure of the speed dome setup menu. Note: ERR means current setup is invalid. Please make sure all the cable connections are right. 4.2 S S S S elf elf- - - - diagnosis S diagnosis System ystem I I I I nformation nformation... -
Page 23: Menu Operation
CAMERA PARAMETERS:Display dome white balance setup, exposure setup, day/night setup, focus setup. FUNCTION SETTING : Set preset, pan, scan, auto cruise, pattern, idle motion, time task and privacy mask function. IR LIGHT SETTING: Set dome IR sensitivity, switch rate, reference height, IR control principle, medium and far light bright, far light bright, IR light compensation and etc. -
Page 24: Display Setting
FACTORY DEFAULT: Restore dome factory default setup. Please move the cursor to the option and then click confirm button until you see O.K. Now you can see the IP dome begin rebooting to restore factory default setup. RESTART: Reboot the speed dome. BACK: Go back to the previous menu. -
Page 25: Camera Setting
:ON PRESET TITLE :ON AZIMUTH DISP :OFF TIME DISP :OFF POSITION :OFF ZOOM DISP :℃ INSIDE TEMP :OFF OUTSIDE T&H IDLE TIME : 1 Min :OFF TITLE DISP BACK EXIT Move the cursor to DISPLAY SETUP and then click confirm button, you can go to the third submenu. Please use the left/right button on the keyboard or in the speed dome terminal menu to set. - Page 26 DAY/NIGHT: Set day/night mode. Move the cursor to current option and then click confirm button, you can go to the third menu. There are three options: auto/manual/off. Please use the left/right button on the keyboard or in the speed dome terminal menu to set. FOCUS MODE: There are two modes: Manual/Auto.
- Page 27 Manual: It becomes valid after you set the gain setting, shutter, iris setting, wide dynamic region (WDR). AV: It becomes valid after you set the exposure setting, iris setting, wide dynamic region (WDR). TV: It becomes valid after you set the shutter setting, exposure compensation, wide dynamic region (WDR).
-
Page 28: Function Setting
NIGHT TIME: Current setup becomes valid when day/night mode is Time. Move the cursor to DAY TIME item and then click confirm button to go to setup. Please user up/down button to set the value. After completed setup, please click confirm button to exit and move the cursor to save button to save current setup. - Page 29 SCAN: Move the cursor to SCAN and then click confirm button to go to the third submenu. AUTO CRUISE: Move the cursor to AUTO CRUISE and then click confirm button to go to the third submenu. PATTERN: Move the cursor to PATTERN and then click confirm button to go to the third submenu. IDLE MOTION: Move the cursor to IDLE MOTION and then click confirm button to go to the third submenu.
- Page 30 Move the cursor to PAN button and then click confirm button to go to setup interface. PAN SPEED: Set dome rotation speed. The Value ranges from 1 to 255. Please use the left/right button on the keyboard or in the speed dome terminal menu to set. RUN: Move the cursor to call item and then click confirm button.
- Page 31 CRUISE SETTING: Move the cursor to cruise setting item and then click confirm button. You can see the following interface. Here you can add or remove the preset, and set the corresponding dwell time and call speed. One cruise can max include 32 presets. The preset value ranges from 0 to 200. PRESET DWELL SPEED …...
- Page 32 PROGRAM STOP:Here is to set pattern stop point. After all the movement, move the cursor to PROGRAM STOP and then click confirm button. Now you have set one pattern. System pops up an icon OK to prompt you system has memories one pattern. RUN:Here is to activate pattern.
- Page 33 PRIVACY NO:Here is to set privacy mask zones. Please use the left/right button on the keyboard or in the speed dome terminal menu to set. The value ranges from 1 to 8. ACTIVATE: There are two settings: on and off. When activate function is on, the privacy mask function will be activated and displays in the screen.
-
Page 34: Ir Light Setup
• EXIT: Log out system menu. 4.4.4.8 Time Task :OFF TIME TASK :06H 00M START TIME END TIME : 10H 00M TASK ACTION : SCAN PRESET : 001 SCAN : 001 TOUR : 001 PATTERN : 001 SAVE BACK EXIT •... -
Page 35: Alarm Setup
SWITCH ZOOM: It is the zoom rate of the near light, and far light. HEIGHT: It is the speed dome installation height from the ground. IRLIGHT CTRL: There are three options: Zoom rate has the higher priority, height has the higher priority, manual. -
Page 36: Dome Abnormal Phenomenon Operation
EXIT: Log out system menu. 4.5 Dome Abnormal Phenomenon Operation 4.5.1 Restore to Factory Default Setup From main menu-> SYSTEM INFORMATION, move cursor to FACTORY DEFAULT and click confirm button. Dome will reboot and all the setups restore to factory default setup. 4.5.2 PTZ Movement is not smooth From menu to SYSTEM INFORMATION, move cursor to RESTART and click confirm button. -
Page 37: Faq
5 5 5 5 FAQ 5.1 Daily Maintenance Please clean dome cover regularly to get vivid image. Handle the cover with care. Use water to wash. Don’t use cloth to clean. Use mild detergent to clean if there is too much dust. Note: The sweat from your hand may erode plating surface, your nail may scrape dome cover result in blur image. -
Page 38: Appendix Ⅰ Ⅰ Ⅰ Ⅰ Thunder Proof And Su Appendix Appendix Thunder Proof And Su Thunder Proof And Surge Protection Rge Protection
6 6 6 6 Appendix Ⅰ Appendix Ⅰ Thunder Proof and Surge Protection Thunder Proof and Surge Protection Appendix Ⅰ Appendix Ⅰ Thunder Proof and Surge Protection Thunder Proof and Surge Protection This series speed dome adopts TVS lighting protection technology. It can effectively prevent damages from various pulse signals below 1500W, such as sudden lighting and surge. -
Page 39: Appendix About Rs485 Bus
7 7 7 7 Appendix Appendix Ⅱ Ⅱ Ⅱ Ⅱ About RS485 B About RS485 Bus Appendix Appendix About RS485 B About RS485 B us us 7.1 RS485 Bus Main Feature RS485 Bus Main Feature RS485 Bus Main Feature RS485 Bus Main Feature RS485 is semi duplex communication cable of impedance 120Ω. - Page 40 conform to RS485 Bus standard. When the distances between devices are too long, the signal reflection occurs and anti-jamming decreases, thus the signal reliability becomes very low. You can see speed dome is not under control or speed dome is running automatically and can not stop. Figure 7-3 In this situation, we recommend RS485 distributor.
-
Page 41: Appendix Toxic Or Hazardous Materials Or Elements
8 8 8 8 Appendix Appendix Appendix Appendix Toxic or Hazardous Materials or Elements Toxic or Hazardous Materials or Elements Toxic or Hazardous Materials or Elements Toxic or Hazardous Materials or Elements Toxic or Hazardous Materials or Elements Component Name Cr VI PBDE Sheet Metal...
Need help?
Do you have a question about the SD6980-HN and is the answer not in the manual?
Questions and answers