Table of Contents
Advertisement
Advertisement
Table of Contents

Related Manuals for Dahua PTZ SDZ Series


Summary of Contents for Dahua PTZ SDZ Series
- Page 1 Block Camera User’s Manual Version 1.1.1...
- Page 2 Welcome Thank you for purchasing our block camera! This user’s manual is designed to be a reference tool for your system. Please read the following safeguard and warnings carefully before you use this series product! Please keep this user’s manual well for future reference!
-
Page 3: Important Safeguards And Warnings
Important Safeguards and Warnings 1.Electrical safety All installation and operation here should conform to your local electrical safety codes. We assume no liability or responsibility for all the fires or electrical shock caused by improper handling or installation. ... - Page 4 Before installation, please open the package and check that all the components are included in the package: Contact you local retailer ASAP if something is missing in your package.
-
Page 5: Table Of Contents
Table of Contents General Introduction ........................1 Overview ........................1 Features ......................... 1 Framework ........................... 2 Rear Panel ........................2 Side Panel ........................5 Front Panel ........................5 Installation............................ 7 Pedestal ......................... 7 SD Card ......................... 7 3.2.1 General Series ....................... 7 3.2.2 Special Series ...................... - Page 6 FAQ ............................18 Appendix Toxic or Hazardous Materials or Elements ............... 19...
-
Page 7: General Introduction
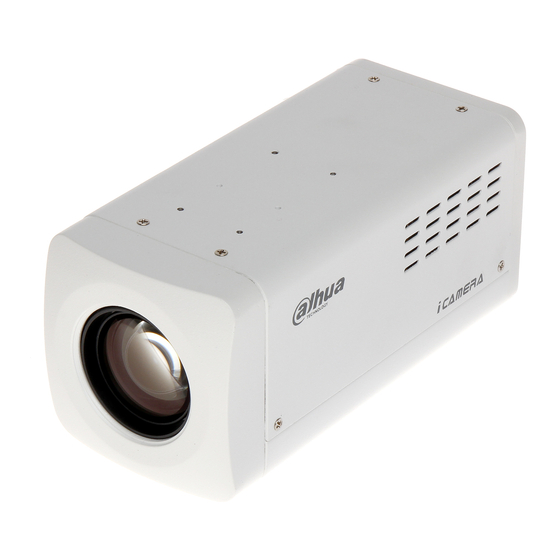
1 General Introduction 1.1 Overview This series camera integrates the traditional camera and network video technology. It adopts audio/video data collection, transmission, and storage together. This series network camera uses standard H.264 video compression technology, PCM, G.711a/u audio compression technology and etc. It supports bidirectional talk, digital water mark and etc. -
Page 8: Framework
2 Framework 2.1 Rear Panel The rear panel is shown as below. See Figure Figure 2-1 Please refer to the following sheet for detail information. Interface Name Connector Function VIDEO OUT Video output port Output analog video signal. Can connect to TV monitor to view video. - Page 9 STATUS Indicator Light Camera working status indictor light. System boot up- red light is on System upgrades- red light flashes System resets-red light flashes. 1-channel alarm Alarm output port. To output port output alarm signal to the alarm device. ...
- Page 10 COM send out end. RS232 ground end RESET RESET button Restore factory default setup. When system is running normally (indicator light is green), press the RESET button for at least 5 seconds, system can restore factory default setup. AUDIO OUT Audio output port Audio output 3.5mm...
-
Page 11: Side Panel
in write mode. Otherwise it may result in data loss or card damage. Before hot swap, please stop record operation. Please make sure the device is securely earthed to prevent the thunderstorm strike. 2.2 Side Panel Please refer to the following interface for side panel dimension information. The unit is mm. See Figure 2-2. - Page 12 Figure 2-3...
-
Page 13: Installation
3 Installation 3.1 Pedestal Please refer to the steps listed below to install the pedestal. See Figure 3-1 and Figure 3-2. a) Take the connection adapter and four screws from the accessories bag, line up the connection adapter to the four holes at the bottom of the camera and then sue the crosshead screwdriver to fix the four screws firmly. -
Page 14: Special Series
a) Press the rear end of the SD card, system can pop up the SD card. b) Take the SD card out. See and Figure 3-4. Figure 3-3 Figure 3-4 3.2.2 Special Series Important Please note, the following operation is for professional engineer only. We are not liable for any problem resulting from the unauthorized operation. - Page 15 Figure 3-5 b) Refer to Figure 3-6.to open the cover. Figure 3-6 c) Take or remove SD card. See Figure 3-7.
-
Page 16: Bidirectional Talk
Figure 3-7 d) Follow the reverse sequence to uninstall/install the screws and covers. 3.3 Bidirectional Talk Please refer to the steps listed below to connect. See Figure 3-8. a) Connect the microphone to the audio input port at the rear panel of the camera. b) Connect the earphone to the audio output port at the rear panel of the camera. -
Page 17: Lens Protection Film
Figure 3-9 3.5 Lens Protection Film Note Before you use the camera, please remove the lens protection film to guarantee video quality. Please refer to Figure 3-10 to remove the lens protection film. Figure 3-10... -
Page 18: Quick Configuration Tool
4 Quick Configuration Tool 4.1 Overview Quick configuration tool can search current IP address, modify IP address. At the same time, you can use it to upgrade the device. Please note the tool only applies to the IP addresses in the same segment. 4.2 Operation Double click the “ConfigTools.exe”icon, you can see an interface is shown as in Figure 4-1. - Page 19 Figure 4-2 Select the “Open Device Web” item; you can go to the corresponding web login interface. See Figure 4-3. Figure 4-3 If you want to modify the device IP address without logging in the device web interface, you can go to the configuration tool main interface to set. In the configuration tool search interface (Figure 4-1), please select a device IP address and then double click it to open the login interface.
- Page 20 Figure 4-4 After you logged in, the configuration tool main interface is shown as below. See Figure 4-5. Figure 4-5 For detailed information and operation instruction of the quick configuration tool, please refer to the Quick Configuration Tool User’s Manual included in the resources...
-
Page 21: Web Operation
5 Web Operation These series block camera products support the Web access and management via PC. Web includes six modules: encode setup bar, window adjust bar, system menu bar, window function option bar, PTZ control bar, PTZ setup/menu. 5.1 Network Connection Please follow the steps listed below for network connection. - Page 22 Figure 5-2 If it is your first time to login in, system pops up warning information to ask you whether install control webrec.cab or not after you logged in for one minute. Please click OK button, system can automatically install the control. When system is upgrading, it can overwrite the previous Web too.
- Page 23 Figure 5-4 Please refer to the Web Operation Manual included in the resource CD for detailed operation instruction.
- Page 24 6 FAQ I can not boot up Please click RESET button for at least five seconds to restore the device or can factory default setup. not control the device. Audio function Please use active device for the audio monitor input, otherwise there is no audio in the client-end.
-
Page 25: Appendix Toxic Or Hazardous Materials Or Elements
Appendix Toxic or Hazardous Materials or Elements Toxic or Hazardous Materials or Elements Component Name Cr VI PBDE ○ ○ ○ ○ ○ ○ Sheet Metal ○ ○ ○ ○ ○ ○ Casting fitting ○ ○ ○ ○ ○ ○ ○...
Need help?
Do you have a question about the PTZ SDZ Series and is the answer not in the manual?
Questions and answers