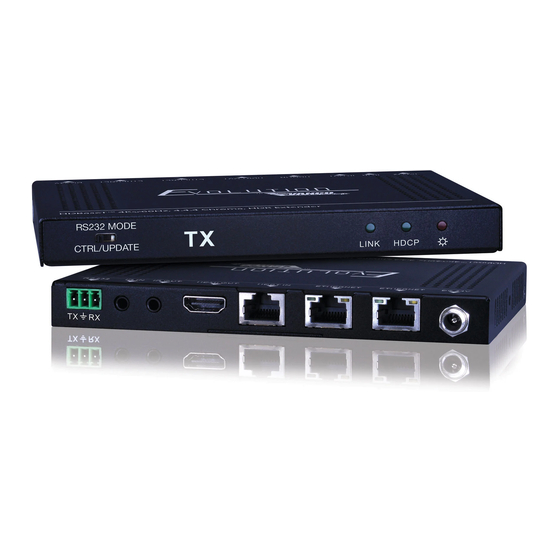
Summary of Contents for Vanco EVEXHDB2
- Page 1 HDBaseT™ 4K@60Hz 4:4:4 Chroma, HDR Extender Vanco Part Number EVEXHDB2 HDBaseT™ 4K@60Hz, 4:4:4 Chroma, HDR Extender www.vanco1.com • 800.626.6445...
- Page 2 DEAR CUSTOMER Thank you for purchasing this product. For optimum performance and safety, please read these instructions carefully before connecting, operating or adjusting this product. Please keep this manual for future reference. This product is 100% inspected and tested in the United States to verify HDMI performance parameters.
- Page 3 In addition, RS-232 and bi-directional IR pass-through allows for source and/or display control. For extending full 4K resolution with up to 60Hz, 4:4:4 chroma subsampling, and HDR, the EVEXHDB2 is a great plug and play solution for connecting the latest components! The EVEXHDB2 includes two units: transmitting unit (EVEXHDB2-TX) and receiving unit (EVEXHDB2-RX).
-
Page 4: Specifications
Power Supply ............Input: 100VAC~240VAC, 50/60Hz; Output: 24VDC 1.25A Dimensions (mm) ............152 W x 16.2 H x 104 D Net Weight ............... 240g - TX, 240g - RX PACKAGE CONTENTS • EVEXHDB2 (TX & RX) • IR Transmitter (IR TX) • IR Receiver (IR RX) •... -
Page 5: Connection Diagram
CONNECTION DIAGRAM 1. Connect a source such as a Blu-Ray Player, game console, A/V Receiver, Cable or Satellite Receiver, etc. to the HDMI input on the Transmitting unit. 2. Connect a display such as an HDTV or HD Projector to the HDMI output on the Receiving unit. 3. -
Page 6: Panel Descriptions
PANEL DESCRIPTIONS EVEXHDB2-TX (Transmitting Unit) 1. RS-232 Mode Switcher - Option for RS232 pass-through with selections to update firmware (See RS-232 Mode Switcher section) 2. Link Status LED - OFF: No Link; GREEN: Link successful 3. HDCP Status LED - OFF: No HDMI signal (no picture); GREEN: HDMI signal with HDCP; Blinking: HDMI signal without HDCP 4. -
Page 7: Usage Precautions
PANEL DESCRIPTIONS EVEXHDB2-RX (Receiving Unit) 1. RS-232 Mode Switcher - Option for RS232 pass-through with selections to update firmware (See RS-232 Mode Switcher section) 2. Link Status LED - OFF: No Link; GREEN: Link successful 3. HDCP Status LED - OFF: No HDMI signal (no picture); GREEN: HDMI signal with HDCP; Blinking: HDMI signal without HDCP 4. -
Page 8: Ir Pass-Through
IR RECEIVER (RX) To control the source: Plug IR Receiver into IR IN port of receiver unit (EVEXHDB2-RX); place receiver at or near display. To control the display: Plug IR Receiver into IR IN port of transmitter unit (EVEXHDB2-TX); place receiver in... - Page 9 IR Receiver IR Transmitter NOTICE Vanco HDMI and Cat5e/6 cables are strongly recommended for use with this product to ensure best results. Incorrect placement of IR Transmitter and Receiver may result in the failure of the IR extenders. Please check carefully before plugging in the IR extender to the respective IR sockets.
-
Page 10: Troubleshooting
4. If you are still encountering issues, attempt the “hot-plug” concept. With all of the HDMI cables disconnected, turn on the source and plug in the HDMI cable into it’s output, then power up the Vanco unit and plug the HDMI cable into it’s input, finally turn on the display and plug the HDMI cable from the receiver into it. -
Page 11: Limited Warranty
If repairs are needed during the warranty period the purchaser will be required to provide a sales receipt/sales invoice or other acceptable proof of purchase to the seller of this equipment. The seller will then contact Vanco regarding warranty repair or replacement. - Page 12 ® Vanco International 506 Kingsland Drive Batavia, Illinois 60510 call: 800.626.6445 fax: 630.879.9189 visit: www.vanco1.com...


Need help?
Do you have a question about the EVEXHDB2 and is the answer not in the manual?
Questions and answers