Table of Contents
Advertisement
Quick Links
Advertisement
Table of Contents

Related Manuals for Craftex CX08HC


Summary of Contents for Craftex CX08HC
- Page 1 MODEL CX08HC 8" JOINTER WITH HELICAL CUTTERHEAD USER MANUAL Version 1.0...
-
Page 3: General Safety Instructions
GENERAL SAFETY INSTRUCTIONS Extreme caution should be used when operating all power tools. Know your power tool, be familiar with its operation, read through the owner’s manual and practice safe usage procedures at all times. ALWAYS read and understand the knives or making other adjustments or user manual before operating the repairs. - Page 4 CX08HC. If you fail to do so, serious OPERATIONS MUST performed with the guards in place to injury could occur. ensure safety. WARNING! The safety instructions given above can not be complete because the environment in every shop is different.
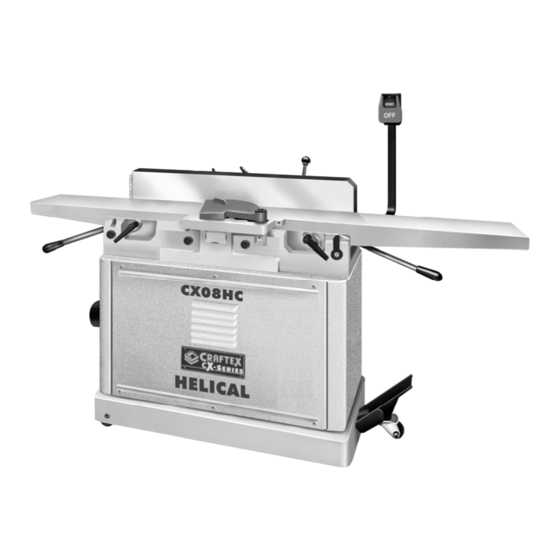
- Page 5 FEATURES MODEL CX08HC - 8” JOINTER WITH HELICAL CUTTERHEAD As part of the growing line of Craftex woodworking equipment, we are proud to offer the CX08HC, an 8” Jointer with Helical Cutterhead. By following the instructions and procedures laid out in this user manual, you will receive years of excellent service and satisfaction. The CX08HC is a professional tool and like all power tools, proper care and safety procedures should be adhered to.
- Page 6 CX08HC PHYSICAL FEATURES ON/OFF Fence Tilt Lock Switch Outfeed Table Cutterhead Fence Guard Lock Fence Tilt Knob Fence In-feed Table Outfeed Table Adjustment Lever Depth Scale Infeed Table Lock Outfeed Table 4” Dust Adjustment Outfeed Mobile Hood Lever Table Base...
- Page 7 WARNING! The hardware (screws, washers & etc) CX08HC is a heavy machine. Do not might be shipped in a plastic bag. After the over-exert yourself. Use fork truck or machine has been un-packed, check that other devices for safe moving.
-
Page 8: Proper Grounding
CX08HC is for use on a normal 110 volt In case if you really find it necessary to use circuit. Make sure that the machine is... -
Page 9: Mobile Base
MOBILE BASE JOINTER BED To install the mobile base of your jointer Once the stand assembly of your jointer is you need to lay the stand on its side so that on the ground, now it is time to install the you can have access to the underneath of jointer bed to the stand. -
Page 10: Extension Table
EXTENSION TABLE FENCE Take the extension table and locate the To install the fence first you have to install holes for the cap screws on the in-feed the fence carriage to the table stand using table. Attach the extension table to the in- washers and cap screws (finger-tighten). -
Page 11: Cutter-Head Guard
TILT KNOB AND FENCE CUTTER-HEAD GUARD LOCK HANDLE To install the cutter-head guard move the fence backward so that you have enough The tilt lever is used to tilt the fence up and space. Now insert the cutter-head guard down to your desired angle. shaft and use the set screws to tight it. -
Page 12: Pedestal Switch
DUST HOOD Attach the dust hood to the side on the stand assembly by using the hex bolts, flat washers and hex nuts provided. See figure- Figure-12 Installing the pedestal switch V-BELT Your machine is provided with a V-belt that Figure-11 Installing the dust hood goes around the motor pulley and the cutter-head pulley. -
Page 13: Basic Controls
BASIC CONTROLS TEST RUN The basic controls of the jointer are shown Once you have assembled your machine in the figure below. Use this figure and read completely, it is then time for a test run to the text to know what the basic controls of make sure that the machine works properly your machine are. -
Page 14: Workpiece Inspection
DUST COLLECTOR Never plane stock against the grain direction of the wood. It can cause a kick CX08HC features a 4” diameter dust ports back or there is a possibility of tear-out on to connect to a dust collector. When the wood. -
Page 15: Bevel Cutting
BEVEL CUTTING Bevel cutting is the cutting operation to cut a desired angle on the edge of the work piece. To perform bevel cutting operation on a jointer it is recommended to set the cutting depth between 1/16” and 1/8”. The fence of the jointer can be set to different angles and it has a stop that Figure-17 Bevel cutting... -
Page 16: Adjusting/ Replacing Cutter-Head Knives
INSPECTING THE CUTTER-HEADS KNIVES The cutter-heads are supposed to be at the same height with each other and with the out-feed table. If one of the carbide inserts is higher than the others, you will get a poor result while doing any cutting operation. To inspect the cutter-heads disconnect the jointer from the power source and remove Figure-19 Removing the carbide inserts... - Page 17 Now, place the straightedge halfway across TABLE PARALLELISM the in-feed table and halfway over the out- For the best cutting results, the in-feed and feed table to adjust the in-feed table with out-feed tables of the jointer must be the out-feed table. paralleled to the cutter-head and to each other.
- Page 18 SETTING THE SETTING THE INFEED OUTFEED TABLE TABLE HEIGHT The height of the out-feed table must be The positive stop bolts located at the back equal to the height of the cutter-head of the machine allows you to adjust the knives.
- Page 19 CX08HC TABLE PARTS BREAKDOWN...
- Page 20 CX08HC JOINTER TABLE PARTS LIST REF# PART# DESCRIPTION REF# PART# DESCRIPTION DJ-001 KNOB DJ-019 INDES PIN ASSEMBLY DJ-002 STUD GB879 3X20MM ROLL PIN DJ-003 BUSHING DJ-020 SPRING DJ-004 ECCENTRIC SHAFT GB5782 M6X25 HEX BOLT M6X16MM HEX SOC SET GB6170 M6 HEX NUT GB80 SCR.
- Page 21 60104 BEARING GB97 M6 FLAT WASHER HELICAL CUTTERHEAD GB5782 M6X12MM HEX HD SCR DJ-041 6X35 KEY DJ-011 FLAT WASHER GB893 47MM INT. RET. RING DJ-063B TABLE LOCK LEVER 60105 BEARING DJ-056B ECCENTRIC BUSHING DJ-035B BEARING BLOCK RH DJ-057B TABLE SHAFT M8X16MM HEX SOC HD DJ-042B CUTTER HEAD PULLEY...
- Page 22 CX08HC CABINET PARTS BREAKDOWN...
- Page 23 CX08HC JOINTER CABINET PARTS LIST REF# PART# DESCRIPTION REF# PART# DESCRIPTION GB1096 5X30 KEY GB818 M5X16MM PAN HD SCR 1-1/2HP MOTOR GB96 5MM FLAT WASHER M8X25MM SOC HD SCR PANEL GB70 M6X12MM FLANGE SCR GB93 8MM LOCK WASHER BELT GUARD...
-
Page 24: Warranty
This warranty shall not apply to consumable products such as blades, bits, belts, cutters, chisels, punches etceteras. Craftex shall in no event be liable for injuries, accidental or otherwise, death to persons or damage to property or for incidental contingent, special or consequential damages arising from the use of our products.
Need help?
Do you have a question about the CX08HC and is the answer not in the manual?
Questions and answers