
Related Manuals for Riva RC4602SV-7416A-30


Summary of Contents for Riva RC4602SV-7416A-30
-
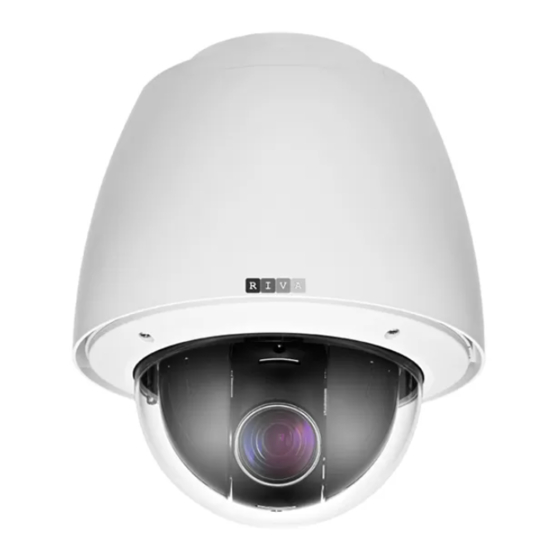
Page 1: Installation Guide
RC4602SV-7416A-30 Installation Guide www.rivatech.de Specification subject to change without notice... -
Page 2: Precautions & Notes
RC Series RC4602SV-7416A-30 Installation Guide Precautions & Notes Please read this manual carefully before installing the unit. Never disassemble the camera. Unauthorized disassembly may cause equipment failure or damage to the unit. Please do not install the camera in a place exposed to direct sunlight. -
Page 3: Table Of Contents
RC Series RC4602SV-7416A-30 Installation Guide Table of Contents Precautions & Notes ....................2 1. FEATURES ......................5 2. PACKAGE CONTENTS..................... 6 3. PART NAMES ......................7 4. INSTALLATION ...................... 8 4.1. Installing the camera ......................8 Installation without bracket ....................8 Wall Mount ......................... -
Page 4: Www.rivatech.de
RC Series RC4602SV-7416A-30 Installation Guide APPENDIX (D): HEXADECIMAL-DECIMAL CONVERSION TABLE ......... 35 REVISION HISTORY ....................36 04-2017-A www.rivatech.de... -
Page 5: Features
RC Series RC4602SV-7416A-30 Installation Guide 1. FEATURES Camera Sony STARVIS Exmor 1/2.8” 1080p CMOS Image Sensor True Day/Night Auto Iris Lens 30x Optical and 12x Digital zoom Weather Proof (IP66) Vandal Proof (IK10) Video ... -
Page 6: Package Contents
RC Series RC4602SV-7416A-30 Installation Guide 2. PACKAGE CONTENTS Unpack and handle the equipment with care. The packaging contains: Camera Quick Installation Guide Terminal Blocks Ferrite Cores The contents above are subject to change without prior notice. Note 04-2017-A www.rivatech.de... -
Page 7: Part Names
RC Series RC4602SV-7416A-30 Installation Guide 3. PART NAMES Top View of PCB ⑥ ⑤ ④ ③ ② ① Top View of Camera’s Main Body ⑨ ⑦ ⑧ * Models and their appearance are subject to change without any prior notice. -
Page 8: Installation
RC Series RC4602SV-7416A-30 Installation Guide 4. INSTALLATION 4.1. Installing the camera Installation without bracket Install the device after removing the bubble wrap inside the dome cover. Caution 1) Loosen the three screws on the top of the camera, and detach the safety ring from the top. - Page 9 RC Series RC4602SV-7416A-30 Installation Guide Sealing gaps is recommended as gaps may appear after the camera installation. Gaps may cause problems such as moisture, water leakage, and etc., which negatively affect the operation of the camera if gaps remain unsealed.
-
Page 10: Wall Mount
RC Series RC4602SV-7416A-30 Installation Guide Wall Mount Model Name WMB-4600 Contents Washer Based Self-Drilling Screw 4x32 Plain Washer M6 Wall Mount Bracket Installation 1) Drill four holes for screws and one bigger hole for cables on the wall based on the screw holes of the wall mount bracket. -
Page 11: Wall / Corner Mount
RC Series RC4602SV-7416A-30 Installation Guide Wall / Corner Mount Model Name WMB-4600 CMA-4600 Contents WMB-4600 Flat Washer M6 Wall Mount Bracket Washer Based Self-Drilling Screw 4x32 CMA-4600 Washer Based Self-Drilling Screw 4x32 PH M8x16L Bolt 4ea Plain Washer M6 Plain Washer M8 4ea Corner Mount Adaptor *Plain washer M8 is applied to be installed with WMB-4600. - Page 12 RC Series RC4602SV-7416A-30 Installation Guide Installation of the corner mount adaptor PLAIN WASHER M6 WASHER BASED SELF-DRILLING SCREW 1) Drill four holes on the installation surface based on the screw holes of each side of the corner mount adaptor. 2) Insert the plain washers (M6) into the screws.
- Page 13 RC Series RC4602SV-7416A-30 Installation Guide Combination of wall mount bracket and corner mount adaptor PLAIN WASHER 1) Insert plain washers into the PH M8x16L bolts. 2) Attach the wall mount bracket to the corner mount adaptor aligning the holes on both brackets.
-
Page 14: Wall / Pole Mount
RC Series RC4602SV-7416A-30 Installation Guide Wall / Pole Mount Model Name WMB-4600 PMA-4600 Contents WMB-4600 Flat Washer M6 Wall Mount Bracket Washer Based Self-Drilling Screw 4x32 PMA-4600 Pole Mount Adaptor PH M6x12L Bolt 4ea SUS Band 2ea 04-2017-A www.rivatech.de... - Page 15 RC Series RC4602SV-7416A-30 Installation Guide Installation of the pole mount adaptor 1) Push each SUS band through the holes on the pole mount adaptor like the image on the left. 2) Encircle the pole with the SUS bands attached on the pole mount adaptor.
- Page 16 RC Series RC4602SV-7416A-30 Installation Guide HOLE SCREW 3) Push each SUS band’s end through the fastener’s hole located on the SUS band’s head. FASTENER 4) Fasten each SUS band by tightening the screw on the fastener clockwise. 5) Fasten enough both fasteners and...
- Page 17 RC Series RC4602SV-7416A-30 Installation Guide Combination of wall mount bracket and pole mount adaptor 1). Attach the wall mount bracket to the corner mount adaptor aligning the holes on the bracket and the adaptor. 2) Insert PH M6x12L bolts into the holes on the corner mount adaptor through the wall mount bracket, and firmly tighten the bolts.
-
Page 18: Ceiling Mount
RC Series RC4602SV-7416A-30 Installation Guide Ceiling Mount Model Name CMB-4600 Contents Ceiling Mount Bracket Washer Based Self-Drilling Screw 4x32 Flat Washer M6, 4ea Installation of the ceiling mount bracket 1) Drill four holes on the ceiling based on the screw holes on the ceiling mount bracket. -
Page 19: Adjusting Angle Of The Camera
RC Series RC4602SV-7416A-30 Installation Guide 4.2. Adjusting angle of the camera The device is a 360° rotating camera and it is fully controlled by the web user interface. Refer to the provided webpage user’s manual for more details. 4.3. Adjusting zoom and focus The device is equipped with the 30x optical zoom lens with the auto focus feature and it is fully controlled by the web user interface. -
Page 20: Connections
RC Series RC4602SV-7416A-30 Installation Guide 5. CONNECTIONS Top View ④ ② ③ ① ⑤ ⑥ * Models and their appearance are subject to change without any prior notice. ① Audio connection The camera provides a mono audio input and output. Due to low audio output power, an amplified speaker is recommended for enhanced sound (Refrain from connecting a headphone or an earphone directly to the camera). - Page 21 RC Series RC4602SV-7416A-30 Installation Guide ③ Alarm(DO) connection Only the relay type is supported. Relay Rating: Max 30VDC/2A, 125VAC/0.5A, and 250VAC/0.25A. Name Descriptions Normal Close 1 COM1 Common 1 Normal Open 1 Normal Close 2 COM2 Common 2 Normal Open 2 Do not exceed the maximum relay rating.
- Page 22 RC Series RC4602SV-7416A-30 Installation Guide ⑥ Micro SD slot Located on top of main device, next to 32-pin socket, a user must push the upper cover as inscribed arrow direction next to “OPEN” to open the case. Slide the micro SD card into the opened cover with its gold contacts facing down.
-
Page 23: Configuration
RC Series RC4602SV-7416A-30 Installation Guide 6. CONFIGURATION 6.1.Set up network environment The default IP address of the device is 192.168.XXX.XXX. Users can identify the IP address of the device from converting the MAC address’s hexadecimal numbers, which is attached to the device. -
Page 24: Custom Ip Environment
RC Series RC4602SV-7416A-30 Installation Guide 6.1.2. Custom IP Environment Please access our website and download necessary IPAdminTool first: http://www.rivatech.de/en/downloads/software IPAdminTool is a management tool, which automatically scans all the network products for users to perform administrative tasks, which includes network configurations, firmware update, device reboot, and device organizations. - Page 25 RC Series RC4602SV-7416A-30 Installation Guide 3. On the New Information table in the Single IP Change window, modify the last two digits of the device’s IP address, and modify the rest parts including subnet mask, gateway, and DNS if necessary by checking the user/ PC network area information.
-
Page 26: View Video On Web Page
RC Series RC4602SV-7416A-30 Installation Guide 6.2. View video on web page Type the proper IP address to view the live streaming images through a web browser. The default username and password is root / pass. 6.2.1. ActiveX Installation When the browser asks to install the AxUMF software, click Install to proceed. -
Page 27: View Video Using Ipadmin Tool
RC Series RC4602SV-7416A-30 Installation Guide 6.2.2. View video using IPAdmin Tool IPAdminTool automatically searches all activated network encoders and IP cameras and shows the product name, IP address, MAC address and etc. 1. From the IPAdminTool’s product list, select the device by highlighting it. -
Page 28: Reboot
RC Series RC4602SV-7416A-30 Installation Guide 6.3. Reboot Perform the following procedures to reset your device: On the camera Press the Reset button for 2 seconds while the device is powered on. Wait for the system to reboot. Reset Button Location Please do not hold the reset button for more than 2 seconds. -
Page 29: Safe Mode
RC Series RC4602SV-7416A-30 Installation Guide 2. Select the items among network settings, user account information and time zone setting to keep from the factory default. 3. Click Reset All Settings. A dialog box will appear to ask you if you want to reset all settings. - Page 30 RC Series RC4602SV-7416A-30 Installation Guide The messages above will appear on the webpage when your device has been rebooted in safe mode. Then, you should follow the instructions on the webpage according to each step. There is another method to update firmware, which is using IPAdminTool.
-
Page 31: Appendix (A): Specifications
RC Series RC4602SV-7416A-30 Installation Guide APPENDIX (A): SPECIFICATIONS Summary Camera Module Image Sensor Sony STARVIS 1/2.8” 1080p CMOS CMOS Scanning system Progressive scanning Resolution 1920 x 1080 Color: 0.1Lux(50 IRE) Min. 0.01Lux(50 IRE, Sens-up) ELECTRICAL Illumination B/W: 0.006Lux(50 IRE) 0.0015Lux (50 IRE, Sens-up) -
Page 32: Electrical Characteristics
RC Series RC4602SV-7416A-30 Installation Guide Audio Input/output 3.5mm stereo jack for speaker and microphone Compression Format G.711 uLaw Function Digital Input/output 4/2 channel RS-485 Network 10/100 Base-T Power over Ethernet Supported QoS Layer 3 DiffServ, TCP/IP, UDP/IP, HTTP, HTTPS, FTP, RTSP, RTCP, RTP/UDP, RTP/TCP, mDNS, UPnP™, SMTP, DHCP,... -
Page 33: Appendix (B): Power Over Ethernet
RC Series RC4602SV-7416A-30 Installation Guide APPENDIX (B): POWER OVER ETHERNET The Power over Ethernet (PoE) is designed to extract power from a conventional twisted pair Category 5 Ethernet cable, conforming to the IEEE 802.3af Power-over-Ethernet (PoE) standard. IEEE 802.3af allows for two power options for Category 5 cables. -
Page 34: Appendix (C): Dimensions
RC Series RC4602SV-7416A-30 Installation Guide APPENDIX (C): DIMENSIONS (Unit: mm) 04-2017-A www.rivatech.de... -
Page 35: Appendix (D): Hexadecimal-Decimal Conversion Table
RC Series RC4602SV-7416A-30 Installation Guide APPENDIX (D): HEXADECIMAL-DECIMAL CONVERSION TABLE Refer to the following table when you convert the MAC address of your device to IP address. BA 186 BD 189 AA 170 AB 171 AD 173 DA 218 DB 219... -
Page 36: Revision History
RC Series RC4602SV-7416A-30 Installation Guide REVISION HISTORY MAN# DATE(M/D/Y) Comments 01-2017-A 01/11/2017 First release version Added some network protocols to the specification table 04-2017-A 04/03/2017 Corrected the size of the image sensor (1/2.9” -> 1/2.8”) 04-2017-A www.rivatech.de...
Need help?
Do you have a question about the RC4602SV-7416A-30 and is the answer not in the manual?
Questions and answers