
Related Manuals for Gazebo penguin 43200-32


Summary of Contents for Gazebo penguin 43200-32
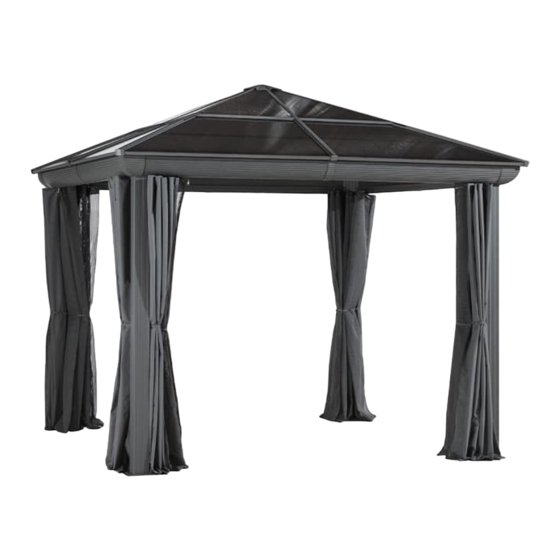
- Page 1 43200-32 10’x10’ GAZEBO ASSEMBLY INSTRUCTIONS Two or more adults required for assembly ZZZ-212.43200-32.1127-15.GP.EN.HER.doc HER-HP...
-
Page 2: Corner Plate
Assemble beams “A” and “B” using center plate “F”, securing tightly with 8 bolts “Pp”. Lay out the assembled beams in a rectangle and join at each corner with a corner plate “E”, again securing tightly with 8 bolts “Pp”. Step 2: For each leg “G”, attach foot plate “H” using 3 bolts “Pp”. ZZZ-212.43200-32.1127-15.GP.EN.HER.doc HER-HP... -
Page 3: Corner Cover
“Pp”. Repeat until all four legs are in place. Step 4: Install middle joint cover “J” at each of the 4 beam junctions, using 4 screws “Qq” each. Install corner cover “I” at each of the corners, using 4 screws “Qq” each. ZZZ-212.43200-32.1127-15.GP.EN.HER.doc HER-HP... -
Page 4: Central Hub
2 screws “Qq”. Use the set of holes closes to the inside. Repeat with remaining “N” rafters. Step 6: Once all rafters are in place, install top cap “K” over central hub “L”. Use flat washers and acorn nuts “Vv” to secure tightly. ZZZ-212.43200-32.1127-15.GP.EN.HER.doc HER-HP... -
Page 5: Zzz-212.43200-32.1127-15.Gp.en.her.doc
“Qq” on the inside. The notched end of a flashing will always go in a corner of the gazebo. Step 8: Install the curtain rails “T” on the inside of the beam assembly using bolts “Pp”. ZZZ-212.43200-32.1127-15.GP.EN.HER.doc HER-HP... -
Page 6: Zzz-212.43200-32.1127-15.Gp.en.her.doc
Insert the middle roof joints in between the rafters and slide them up under the polycarbonate panels. Tap lightly to ensure the panel is fully in the slot. Seen from above, most of the joint as well as the drain holes should be beneath the roof panels. ZZZ-212.43200-32.1127-15.GP.EN.HER.doc HER-HP... -
Page 7: Zzz-212.43200-32.1127-15.Gp.en.her.doc
Tap to make sure panels fit securely and do not extend past the ends of the rafters. Step 12: Starting from any end, install all edgings, with end caps “Gg” or “Hh” at each junction or corner respectively. Use bolts “Pp” to secure. ZZZ-212.43200-32.1127-15.GP.EN.HER.doc HER-HP... -
Page 8: Washer
Repeat this step with the lower crossbars. Step 14: a) Secure each foot plate into the ground using screws “Rr” and washers “Tt”. b) Use lag shields (Ss) if needed for harder surfaces. ZZZ-212.43200-32.1127-15.GP.EN.HER.doc HER-HP... -
Page 9: Curtain Rail Cap
2 panels, each set covering half the gazebo. Ww/Xx Ww/Xx IMPORTANT NOTES: Make sure all screws and bolts are tight. If conditions are windy, you may have to add cable guides at the corners. ZZZ-212.43200-32.1127-15.GP.EN.HER.doc HER-HP... - Page 10 RIGHT MIDDLE TOP CAP ROOF JOINT (11-671) 33 1/4”x58 1/8” (13-035-32) LEFT LOWER ROOF CENTRAL HUB PANEL (11-672) 33 1/4”x58 1/8” (11-669-32) 83 5/8” RIGHT LOWER ROOF RAFTER ROOF PANEL (11-670-32) (11-651-32) 58 7/8” 61” ROOF RAFTER LEFT EDGING ZZZ-212.43200-32.1127-15.GP.EN.HER.doc HER-HP...
-
Page 11: Crossbar
17 ½” (11-659-32) (13-036) LEFT UPPER SCREEN CURTAIN CROSSBAR (set of 2 panels) 17 ½” (11-661-32) (13-037) RIGHT UPPER PRIVACY CURTAIN CROSSBAR (set of 2 panels) (08-158-32) (11-705) BOLT CURTAIN HOOKS (M6x16mm) (08-156-32) SCREW 10 mm KEY (M4x16mm) ZZZ-212.43200-32.1127-15.GP.EN.HER.doc HER-HP... - Page 12 ZZZ-212.43200-32.1127-15.GP.EN.HER.doc HER-HP...
- Page 13 2. The product is not warranted against damages due to extreme weather conditions, such as thunderstorms, hail, strong wind or snow storms, or any other acts of God. 3. The product is only warranted in the event it is installed in accordance with the Gazebo Penguin’s written instructions enclosed with the product.
Need help?
Do you have a question about the 43200-32 and is the answer not in the manual?
Questions and answers