Table of Contents
Advertisement
Advertisement
Table of Contents

Subscribe to Our Youtube Channel
Summary of Contents for Inseego Skyus DS
- Page 1 Skyus DS Installation Guide...
-
Page 2: Intended Use
Trademarks and Patents Inseego Corp. and the Inseego logo are trademarks of Inseego Corp. Skyus, Skyus 3G, Skyus 4G, Skyus Global, CIRA, CIRA X, CIRA X2, and Axiom are trademarks of Inseego Corp. VaraSight and the VaraSight logo are trademarks of Inseego Corp. -
Page 3: Table Of Contents
Inserting and Ejecting SIMs ................................... 11 Switching the Active SIM ..................................... 11 If Two SIMs Are Already Installed ................................11 Adding a Second SIM ....................................... 12 Flashing the Skyus DS Firmware ................................. 12 Contacting Inseego ........................................ 13 Online Library ........................................13 FCC Compliance ........................................14... -
Page 4: Overview
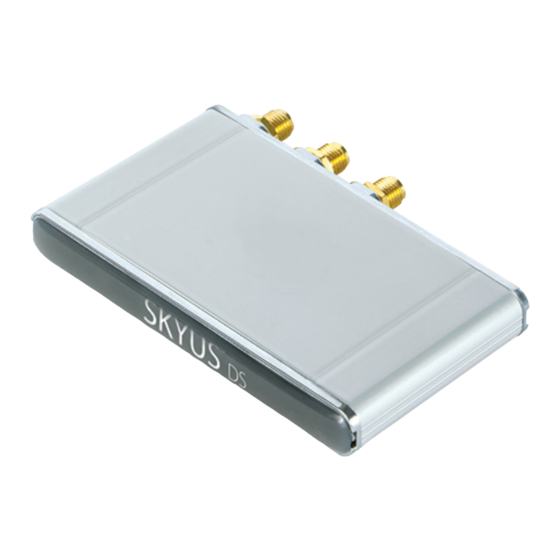
Figure 2: Skyus DS Ports Intended Audience This document is intended for users responsible for the initial setup of the Skyus DS and assumes the user has a basic working knowledge of computer networking, wireless routing, and network administration. Scope... -
Page 5: Specifications
Skyus DS Installation Guide Specifications Hardware Power USB powered, host must provide 5W continuously Environmental • Operating / Non-User Accessible: -30°C to 70°C (-22°F to 158°F) • Operating / User Accessible: -30°C to 30°C (-22°F to 86°F) • Storage: -40°C to 85°C (-40°F to 185°F) Dimensions 3.220”... -
Page 6: Installation
If you are working on the device you intend to use the Skyus DS with, proceed with installation on the local drive. If you are working on a separate device from the one you intend to use the Skyus DS with, save the file to a portable media device and use it to install the drivers on the separate device. - Page 7 Skyus DS Installation Guide Figure 3: Sierra Wireless Driver Installation A successful installation initialization should show a progress bar in the dialog box and display a message just above the system tray. Figure 4: Sierra Wireless Driver Install Initialization Figure 5: Sierra Wireless Installing - System Tray...
-
Page 8: Installing The Mounting Bracket
Installing the Mounting Bracket The Skyus DS attaches easily to the mounting bracket (sold separately). The figure below shows the dimensions and mounting hole locations of the plate. The hardware used to secure the bracket depends on the mounting surface. -
Page 9: Connecting To A Computer Or Router
Skyus DS through an SMA extension cable for proper operation. Note: It is not necessary to connect a GPS antenna if the GPS function of the Skyus DS is not being used. The cellular functions of the Skyus DS operate as designed without a GPS antenna attached. -
Page 10: Provisioning
Once your device is activated and you connect to the cellular carrier for the first time, your device will perform Over- the-Air provisioning, if necessary. The Skyus DS will provision over the air automatically upon initial power up. This process may take up to 45 minutes to complete. Do not unplug the device or attempt to connect during provisioning. -
Page 11: Removing The Faceplate
Skyus DS Installation Guide Removing the Faceplate Locate the two tabs along the bottom edge of the faceplate. Tabs Figure 12: Faceplate Tabs Insert your thumbnail between one of the tabs and the chassis. Then slide your thumb toward the center of the faceplate to separate it from the chassis. -
Page 12: Inserting And Ejecting Sims
Skyus DS Installation Guide Inserting and Ejecting SIMs The Skyus DS comes with a multi-purpose tool that you can use to insert and eject SIMs, shown below. (The tool also serves as a SIM select plug, which activates SIM slot 2.) -
Page 13: Adding A Second Sim
Allow time for the device to perform over-the-air provisioning. Adding a Second SIM Follow the steps below if your Skyus DS is equipped with only one SIM and you want to install a second SIM for a different carrier. Disconnect the USB cable to remove power from the unit. -
Page 14: Contacting Inseego
Contacting Inseego For help with installing, operating, maintaining, and troubleshooting this product, refer to this document and any other documentation provided. See the Skyus DS User Manual for troubleshooting tips If you still have questions, contact us during business hours: Monday through Friday, excluding holidays, between 8 a.m. -
Page 15: Fcc Compliance
This equipment generates, uses, and can radiate radio frequency energy and, if not installed and used in accordance with the instruction manual, may cause harmful interference to radio communication. Inseego does not guarantee that interference will not occur in a particular installation.


Need help?
Do you have a question about the Skyus DS and is the answer not in the manual?
Questions and answers