Lutron Electronics Sivoia QS Installation Instructions Manual
Roller 64 dual mount
Hide thumbs
Also See for Sivoia QS:
- Installation manual (24 pages) ,
- Wiring and programming manual (20 pages) ,
- Setup manual (2 pages)
Table of Contents
Advertisement
Advertisement
Table of Contents

Related Manuals for Lutron Electronics Sivoia QS


Summary of Contents for Lutron Electronics Sivoia QS
- Page 1 Sivoia ® Installation Instructions roller 64 ™ dual mount...
-
Page 2: Installation Instructions
Wire Cutter/Stripper Level Pliers Power Drill #2 Phillips Screwdriver Box Contents: (2) Sivoia QS roller 64 units (4) Cable tie anchors Left and right dual brackets (2) 4-pin terminal blocks (10) Mounting screws (4) 4 in. (102 mm) Cable ties (#8x1.75 in. - Page 3 Warning: Incorrect installation can lead to severe injury, follow all installation instructions. Notes: • The Sivoia QS roller 64 must be used only with window treatments approved by Lutron ® • There must be a clearance of at least 1.3 feet (0.4 meters) between the fully lowered system and any permanent object.
- Page 4 System width System height ing the fabric down far enough to expose the tube. System width (Bracket to bracket width) Sivoia QS EDU (electronic drive unit) hembar System height Page 3 Sivoia roller 64 Dual Mount Installation instructions ®...
- Page 5 Position the mounting brackets Mark the location of the mounting brackets so that they are centered over the window, ensuring that you are mounting to a structural member, such as a stud. Note: Bracket to Bracket distance = Fabric Width + 1.5 in (38 mm) = System Width. Note: Do not use the uninstalled shade to determine the bracket location.
- Page 6 Pre-drill for cable run Choose one of the three options below to drill for cable access. Note: Cables may exit through any of the large holes in the dual brackets, on the EDU side of the shades. Note: 12-18 in. (30-45 cm) cable exposed for each of the two shades. Page 5 Sivoia roller 64...
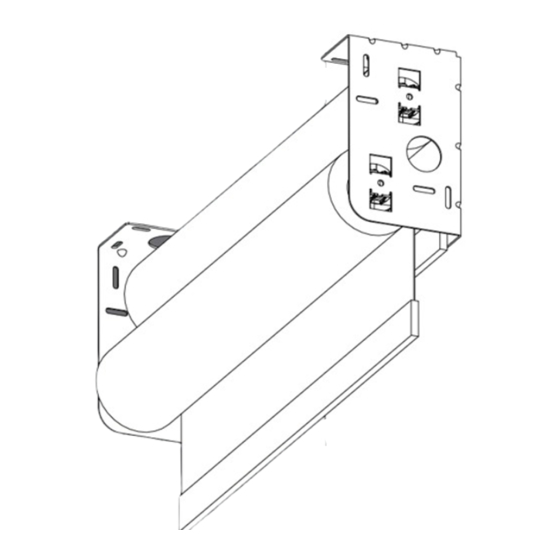
- Page 7 Install dual brackets Install the first mounting bracket with the bracket oriented such that the upper shade mount is closest to the glass. Upper and lower shade positions Install the second mounting bracket as shown in the figure below. Note: Each bracket should use four mounting screws, in either the ceiling holes or the wall holes. Note: The brackets should be mounted to support at least 300 lbs (136 kg).
- Page 8 Wire 4-Pin terminal block Strip 2 in. (50 mm) of jacket off the cables that run from the wall. Wire 4-Pin terminal block (provided) to cable using the included screwdriver. Make sure to tighten the screws tightly and that no insulation is inside of the terminal block. Note: The EDU connector will support wire sizes from AWG 12 (2.5 mm ) to AWG 26 (0.2 mm See the instruction sheet for your power supply to choose an appropriate wire size for your application.
- Page 9 Orient the buttons and wiring For the following bracket and button orientations, route the wires as shown. Note: The buttons should be accessible when the shade is installed. Note: Make sure the wires are not pitched or damaged. Note: The wires may go in either of the indicated slots. Wire Slot Buttons Page 8...
- Page 10 Mount the shade Install the idler side of the shade onto its bracket. Depress the spring-loaded idler (shown in 7.1) by pressing the shade towards the idler, and install the EDU side of the shade onto its bracket. Page 9 Sivoia roller 64 Dual Mount...
- Page 11 Adjust the shade Ensure that the shade is level and centered by shimming the bracket. Note: You do not need to level the second shade. Adjust shade by removing the necessary screws and moving the brackets as needed. Note: You may have to remove the shade to access the bracket screws. Reinstall and tighten the screws.
- Page 12 Connect terminal blocks Plug 4-pin terminal block on cable into EDU terminal block. Dress wires to ensure fabric does not rub while the shade is moving. Use the cable ties and anchors provided. Page 11 Sivoia roller 64 Dual Mount Installation instructions ®...
- Page 13 Secure the shade 10.1 Tighten retaining screws in each bracket to secure the shade. Page 12 Sivoia roller 64 Dual Mount Installation instructions ®...
- Page 14 Check shade tracking Reconnect power to the shade power supply. Use the programming stylus to run the shade up and down using the adjustment buttons on the EDU ( ). Re-level if needed. To set Limits from the EDU, proceed to the next section. Observe: Pay careful attention to the shade roll up to ensure that it does not telescope extremely to one side or the other.
- Page 15 Setting limits from the EDU Setting the open limit from the EDU The open and close limits define the top and bottom of the shade, and are used to determine which direction the shade must turn in order to raise or lower. Refer to the keypad’s instruction sheet to set the limits remotely.
- Page 16 Setting limits from the EDU (continued) Setting the close limit from the EDU 12.4 Tap the “close limit button” ). The green LED on the roller 64 EDU will turn on steady, indicating that the EDU is in “set close limit Green LED mode”.
- Page 17 Verify limits 13.1 Verify the open limit by double-tapping the open limit ( ) button. The shade will travel to the open limit. 13.2 Verify the close limit by double-tapping the close limit ( ) button. The shade will travel to the close limit.
- Page 18 Install the second shade 14.1 Install the lower shade by repeating steps 6-13. Page 17 Sivoia roller 64 Dual Mount Installation instructions ®...
- Page 19 Verify communications 15.1 Enter “link diagnostics mode” by pressing and holding the “close limit button” ( ) on the EDU for 5 seconds. The green LED will flash quickly for two seconds then turn on steady, indicating Green LED the EDU is ready to begin verifying communications with other devices.
- Page 20 Programming | restoring default settings Returning an EDU to its factory default setting Returning an EDU to its factory defaults will clear out any programming to keypads, but will not affect the limits. 16.1 Press and hold the “close limit button”( ) on the EDU for 5 Flashing green...
-
Page 21: Troubleshooting
Troubleshooting Symptom Solution Shade will not move using ...EDU is not powered - check EDU power adjustment buttons on EDU... by unplugging and re-plugging in EDU. LED should flash for 5 seconds..Shade is caught on something - free shade. Shade does not fully open or fully close... -
Page 22: Limited Warranty
Roller Shade EDU, shade fabric and shade hard- installation, neglect, accident, interference or ware of the Sivoia QS Shade System. If any environmental factors, such as (a) use of incorrect manufacturing defect exists in the External Sivoia line voltages fuses or circuit breakers;... - Page 23 BREACH OF WARRANTY OF LUTRON OR Lutron, the Sunburst logo, Sivoia QED, and Sivoia ANY OTHER PARTY, AND EVEN IF LUTRON are registered trademarks, and Sivoia QS is a OR SUCH OTHER PARTY WAS ADVISED OF trademark of Lutron Electronics Co., Inc.
- Page 24 92300 Levallois Perret, Lutron GL Ltd. email: shadinginfo@lutron.com France 15 Hoe Chiang Road Tel: +33.1.41.05.42.80 #07-03 Tower Fifteen Fax: +33.1.41.05.01.80 ©2007 LUTRON Electronics Co., Inc. Singapore 089316 FREEPHONE: 0800.90.12.18 Tel: +65.6220.4666 lutronfrance@lutron.com Printed in the U.S.A. Fax: +65.6220.4333 Spain-Madrid lutronsea@lutron.com P/N 045-1407 Rev.
Need help?
Do you have a question about the Sivoia QS and is the answer not in the manual?
Questions and answers