Table of Contents
Advertisement
Advertisement
Table of Contents

Subscribe to Our Youtube Channel
Related Manuals for Sangean BTR-160


Summary of Contents for Sangean BTR-160
- Page 1 BTR-160 / DPR-16C Version 1...
- Page 2 The Bluetooth ® word mark and logos are registered trademarks owned by Bluetooth SIG, Inc. and any use of such marks by SANGEAN ELECTRONICS INC. is under license.
-
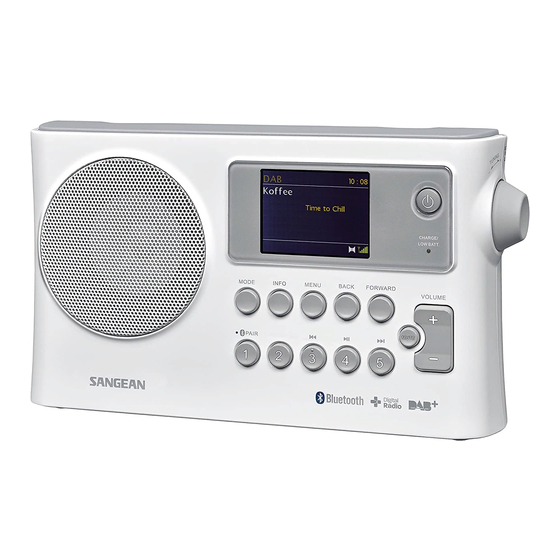
Page 3: Controls And Connections
Controls and connections BTR-160 DPR-16C... - Page 4 10. Tuning Control Rotary/Select/Seek knob 11. Volume button 12. Mute button 13. BTR-160:Preset 5/Fast-forward button DPR-16C: Preset 5 14. BTR-160: Preset 4/Play/Pause button DPR-16C: Preset 4 15. BTR-160: Preset 3/Rewind button DPR-16C: Preset 3 16. Preset 2 17. BTR-160:Preset 1/Bluetooth pairing button DPR-16C: Preset 1 18.
-
Page 5: Battery Operation Using Rechargeable Batteries
Battery operation Battery operation using rechargeable batteries Battery operation using alkaline batteries 1. Slide the battery switch to the NiHM position. 1. Remove the battery cover on the rear of the unit by pressing the 2. Insert 4 UM-1 batteries into spaces in the compartment. Make catch. -
Page 6: Using The Ac Power Adaptor
2. Pressing the Mode button gives you access to each of the operating modes: DAB+ radio, FM radio and BLUETOOTH (available only in BTR-160). 3. Pressing the Menu button will access the menu system, whereas the Info button allows the display of information relating to the radio station or music file being played. -
Page 7: Using The Radio For The First Time
Start now? 3. When you apply power, the display on the radio will light up and say: 'SANGEAN'. The first time that you use your radio (or after Factory Reset) the display will show “Setup wizard” and “YES”... -
Page 8: Dab Radio
DAB Radio Using DAB mode for the first time 1. Carefully extend the telescopic aerial. 2. Press the Standby button to switch on the radio. If the radio has been used before the last used mode will be selected. 3. Press the Mode button and rotate the Tuning control Rotary as needed so that DAB radio radio DAB Radio mode is selected on the display. -
Page 9: Selecting A Dab Radio Station
Selecting a DAB radio station 1. When playing a DAB radio station, the display normally shows the name of the current station 12:34 with other related information. Heart More music variety on 2. Rotate the Tuning Control Rotary to access the radio station list and to scroll through the Heart available stations. -
Page 10: Display Modes
Display modes Your radio has a range of display options when in DAB mode: 16:32 SHORT X-PAD 1. Press the Info button to cycle through the different options. *** Short X-PAD” a. Text Displays text messages such as the artist or track name, DLS”... -
Page 11: Finding New Dab Radio Stations
Finding new DAB radio stations Should you wish to use your radio for DAB reception in a new location, or if no stations were detected during the initial scan, you can follow this procedure to allow your radio to find out which Station list >... -
Page 12: Manual Tuning
Manual Tuning Manual tuning allows you to tune directly to the various Band III DAB channels (5A to 13F). 1. When in DAB mode press the Menu button so that the display shows the DAB menu. Station list > Scan 2. -
Page 13: Dynamic Range Control Setting
Dynamic Range Control setting Dynamic Range Control (also known as DRC) can make quieter sounds easier to hear when your radio is used in a noisy environment by reducing the dynamic range of the audio signal. 1. Press the Standby button to switch on your radio. radio 2. -
Page 14: Station Order Setup
Station order setup Your radio has 3 station order settings from which you can choose. The station order settings are, alphanumeric, ensemble and valid. Note: radio DAB Radio The default station order on your radio is alphanumeric. 1. Press the Standby button to switch on your radio. 2. -
Page 15: Prune Stations
Prune stations If you move to a different part of the country, some of the stations which were listed may no longer be available. Also, from time to time, some DAB services may stop broadcasting, or may change location or frequency. Stations which cannot be found, or which have not been received radio DAB Radio for a very long time are shown in the station list with a question mark. - Page 16 FM Radio Operating your radio in FM mode 1. Carefully extend the telescopic aerial and press the Standby button to switch on your radio. 10:38 2. Press the Mode button and rotate the Tuning Control Rotary as needed to highlight FM radio 104.90MHz mode.
- Page 17 Manual tuning 1. Carefully extend the telescopic aerial and press the Standby button to switch on your radio. 10:38 2. Press the Mode button and rotate the Tuning Control Rotary as needed to highlight FM radio 104.90MHz mode. Press the Tuning Control Rotary to select the option. radio 3.
- Page 18 Display modes Your radio has a range of display options when in FM mode: 1. Press the Info button to cycle through the different options. 10:39 a. Text Displays text messages such as the artist or track name, phone in V.H.B.N.
-
Page 19: Scan Setting
Scan setting When using the FM mode your radio can be set to either scan local stations or to scan all 10:38 stations including distant radio stations. 104.90MHz 1. Press the Mode button and rotate the Tuning Control Rotary as needed to highlight FM radio radio mode. -
Page 20: Stereo / Mono Switching
Stereo / Mono switching If the FM radio station being listened to has a weak signal, some hiss may be audible. It is 10:38 possible to reduce this hiss by forcing the radio to play the station in mono rather than stereo. 104.90MHz 1. -
Page 21: Presetting Stations In Dab And Fm Modes
Presetting stations in DAB and FM modes There are 5 memory presets each for DAB and FM radio. They are used in the same way for each operating mode. Preset stored 1. Press the Standby button to switch on your radio. 2. - Page 22 Be aware that during the period of disconnection, no other Bluetooth device can pair or link with your radio. 3) If ‘BTR-160’ shows in your Bluetooth device list but your device cannot connect with it, please delete the item from your list and pair the device with the radio again following the steps...
- Page 23 Displays the artist information for the track Playing a previously-paired Bluetooth source device currently playing. The BTR-160 can memorize up to 8 sets of paired Bluetooth source b. Album Displays the album information for the track devices, when the memory exceed this amount, the earliest paring currently playing.
-
Page 24: Clock And Alarms
Disconnecting your Bluetooth device Press and hold the Bluetooth pairing button for 2-3 seconds to disconnect with your Bluetooth device. You can also press the Mode button and rotate the Tuning Control Rotary to select any mode other than Bluetooth mode and then press the Tuning Control Rotary or turn off Bluetooth on your Bluetooth source device to disable the connection. -
Page 25: Setting The Clock Format
Setting the clock format The clock display used in standby mode and on the playing mode screens can be set to 12 or 24 System settings hour format. The selected format is then also used when setting the alarms. Backlight >... -
Page 26: Manually Setting The Clock
Manually setting the clock 1. Press the Standby button to switch on your radio. System settings 2. To set all time settings press the Menu button to access the menu for the current mode. Backlight > Equaliset > 3. Rotate the Tuning Control Rotary until 'System settings' is highlighted on the display. Press Time/Date >... -
Page 27: Setting The Alarm Clock
Setting the alarm clock Your radio has two separate alarms which can be set to wake you to either the radio or a buzzer Alarms alarm. In the event of a power interruption your radio has built in memory that will retain your Alarm 1: Off [00:00] Alarm 2: Off [00:00] alarm settings. - Page 28 8. The alarm can be set to buzzer,DAB radio, FM radio. For whichever radio mode is selected, Alarm 1 the radio alarm may be set to any of the stations which have been stored as presets or to the Enable:Once Time: 07:30 station most recently listened to.
-
Page 29: When The Alarm Sounds
When the alarm sounds The buzzer or radio alarm will sound at the selected times for up to 60 minutes unless cancelled. Alarms The volume used for the alarm will be as specified during the alarm setting procedure. If the Alarm 1: On [07:30] Alarm 2: Off [00:00] radio cannot connect to the specified radio station, the buzzer alarm will be used instead. -
Page 30: Snooze Timer
Snooze timer 1. The buzzer or radio alarm can be silenced for 5 minutes by pressing any button other than the 17:32 Standby button. Snooze 2. Should you wish for a longer snooze duration this can be extended. Press the Menu button to access the menu for the current mode. -
Page 31: Inactive Standby
Inactive standby Your radio can be set to standby mode automatically if it idles for a preset period of time. The idle System settings time setting can be adjusted between 2, 4, 5 and 6 hours. Backlight > Equaliser > 1. -
Page 32: Display And Audio
Display and Audio Equalizer function The sound on your radio can be adjusted to suit your personal taste for the material that you are listening to. The radio has a range of equalizer modes. Alternatively you may set the treble and Scan Setting Audio Setting bass levels to your own preferences which can be accessed from the My EQ menu item. - Page 33 Setting up your My EQ profile If you find the preset equalizer functions not to your liking, you may set up a custom treble and Equaliser bass setting as follows: Classic News 1. Follow steps 1-2 in the previous section in order to enter the Equalizer menu. Movie 2.
-
Page 34: Brightness Control
Brightness control The brightness of the display can be adjusted for when the radio is in standby and for when it is in use. If you use the unit in the bedroom, you may prefer a lower standby brightness level than a Scan Setting Audio Settting higher brightness setting. -
Page 35: Headphone Socket
Headphone socket A 3.5mm Headphone Socket located on the left hand side of your radio is provided for use with headphones. Inserting a plug automatically mutes the internal loudspeaker. Please be aware that the sensitivity of headphones can vary widely. We therefore recommend setting volume to a low level before connecting headphones to the radio. - Page 36 Information Factory reset If you wish to completely reset your radio to its initial state this may be performed by following System settings this procedure. By performing a factory reset, all user entered settings will be erased. Equaliser > > Time/Date 1.
-
Page 37: Usb Socket For Software Upgrade
USB upgrade port. You should not attempt to update your radio unless it is recommended to you by Sangean Customer Services. Updating the software may remove radio station presets and alarm settings from your radio. - Page 38 Cautions Do not allow your radio to be exposed to water, steam or sand. ● The radio shall not be exposed to dripping or splashing and no Do not leave your radio where excessive heat could cause damage. objects filled with liquids, such as vases, shall be placed on the radio. The name plate is located on the rear of the radio.
-
Page 39: Specifications
4 x UM-1(D size, LR20), Alkaline or NiMH Aerial System Telescopic aerial Telescopic aerial battery Frequency Coverage 87.5 - 108 MHz 174.928 - 239.200 MHz Bluetooth (available only in BTR-160) Bluetooth specification Bluetooth® 4.1 EDR compliant Profile Support A2DP, AVRCP Bluetooth Audio CODEC AAC, SBC Transmitting Power...
Need help?
Do you have a question about the BTR-160 and is the answer not in the manual?
Questions and answers