Table of Contents
Advertisement
Advertisement
Table of Contents

Subscribe to Our Youtube Channel
Related Manuals for Oricom SC520


Summary of Contents for Oricom SC520
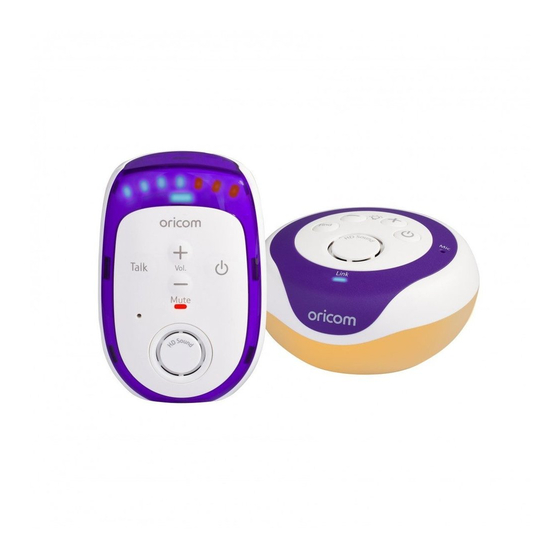
- Page 1 SC520 Digital Baby Monitor with Lightshow User Guide KEEP THIS USER GUIDE FOR FUTURE REFERENCE Always retain your proof of purchase in case of warranty service and register your product on line at: AUSTRALIA: www.oricom.com.au NEW ZEALAND: www.oricom.co.nz...
- Page 2 Welcome... to your SC520 Digital Baby Monitor • Digital high definition sound gives you crystal clear audio and zero interference. • Wireless range of up to 300m outdoors and up to 50m indoors (in ideal conditions, where there is a clear line of sight between the units) – giving you the freedom to move around with clear reception and no interference from other baby monitors • Out of range warning...
- Page 3 Please read this guide carefully and unit (part No. 2B0028) keep it for future reference. • Parent unit charger • 2 x power adaptors (part No. 2B0027). Need help? • Tilt cup If you need assistance setting up or using your Oricom product now or in the future, call Oricom Support. Australia 1300 889 785 or 02 4574 8888 www.oricom.com.au Mon-Fri 8am – 6pm AEST New Zealand 0800 67 42 66 www.oricom.co.nz Mon-Fri 10am – 8pm NZST...
-
Page 4: Important Safety Information
WarninG • It is very important that you read the User Guide carefully as it contains detailed information you will need to get Risk of suffocation! the most from your Oricom baby monitor. If you have Keep all packaging materials any issues setting up or using your Oricom baby monitor and protective foils out of please call our Customer Support team. -
Page 5: Table Of Contents
In this guide Important safety information ....4 Adjust the loudspeaker volume ..19 Your SC520 Digital Baby Monitor Lightshow ...........20 Parent unit ..........7 Using the tilt cup .........20 Parent unit display icons.......8 Switch lightshow on/off using the Baby unit ......21 Parent unit charger .......9 Switch lightshow on/off Baby unit..........10 using the Parent unit......21... - Page 6 In this guide Turn music on/off Adjust the temperature .......35 using the Baby unit ......27 Reset the temperature ......35 Turn music on/off Crying alert .........36 using the Parent unit......27 Select the type of crying alert .....36 Choose a song to play using the Parent unit......28 Backlight ..........37 Set a play time for music ....29 List of tones ........37...
-
Page 7: Your Sc520 Digital Baby Monitor
Your SC520 Digital Baby Monitor Parent unit Battery LED status indicator Baby sound level LEDs (on top of unit) Indicates the level of Red flashing light indicates the received sound. The LEDs batteries are low and need re- will light up progressively charging. Solid red indicates as the sound increases. the Parent unit is charging. -
Page 8: Parent Unit Display Icons
Your SC520 Digital Baby Monitor Parent unit display icons Menu options: Lightshow Nightlight Music Feed Timer Setup Battery status Medium charge (51-74%) Temperature alert (vibrate on) Low charge (25-50%) Temperature alert (vibrate off) Empty (8-24%) Displays the temperature as Flashing (0-7%). Typically you will be able to use your Parent measured at the Baby unit... -
Page 9: Parent Unit Charger
Your SC520 Digital Baby Monitor Parent unit charger Front Charging light Red when the Parent unit is correctly placed on the charger. Back Power socket For connection to the mains power socket via the power adaptor cable supplied. -
Page 10: Baby Unit
Your SC520 Digital Baby Monitor Baby unit Temperature sensor Make sure the sensor is placed with clear space around it and not in contact with any surfaces to ensure it works effectively. Power on/off Press and hold to switch Lightshow the power on or off. Press to switch the Lightshow on Volume +/–... -
Page 11: Back Of The Baby Unit
Your SC520 Digital Baby Monitor Back of the Baby unit Power socket Tilt cup For connection to the Place the Baby unit on the tilt mains power socket cup to direct the projection of the via the power adaptor lightshow. cable supplied. -
Page 12: Parent Unit Menu Map
Your SC520 Digital Baby Monitor Parent unit menu map Turn (On/Off)? Lightshow 5 min Timer 10 min 15 min Constant Turn (On/Off)? High nightlight Brightness Medium 5 min 15 min Timer 60 min Constant (Play/Stop)? Scroll Options Lullabies Play All Choose Song Music Scroll Options 5 min Nature Play All Timer... -
Page 13: Setting Up
Rechargeable batteries will need to be replaced. already fitted Remove this tab and New batteries can be charge batteries for 24 hours before use. purchased from www.oricom.com.au. removing the batteries If you ever need to remove the batteries, simply slide open the battery compartment cover and use the ribbon to eject the batteries. - Page 14 Setting up The Parent unit rechargeable 3. Place the Parent unit into the charger. The red batteries will lose charge charging light will illuminate on the charger, the over a period of time, even if battery icon will start scrolling on the Parent switched off. unit display and the battery LED will be solid Battery low warning –...
-
Page 15: Baby Unit
Setting up Baby unit Positioning your units The Baby unit should ideally 1. Plug the remaining power adaptor cable into be within 1m-2m of your baby for best performance. the socket marked on the back of the Baby Make sure both the Baby unit and plug the other end into the mains unit and mains power cable power and switch on. are connected securely and positioned out of baby’s reach. - Page 16 Setting up Once the units are linked the green Link indicator on the Parent unit and the Baby unit will stop flashing and remain a steady green. The units are now ready to use. important: The link confirmation between the two units is vital for use so they can communicate. If the link between the units is broken at any time, the Link indicators on both units will flash green as they try to search for each other. The Parent unit displays I’m Linking...
-
Page 17: Using Your Sc520 Digital Baby Monitor
Using your SC520 Digital Baby Monitor Switching on/off Switch the Baby unit on 1. Press and hold the button until the nightlight briefly illuminates and the green Link indicator flashes. Once linked the green Link indicator will remain on. Switch the Parent unit on 1. Press and hold the button on the Parent unit until all the LEDs briefly illuminate. The green Link indicator will flash and the display will show I’m Linking. Once the units are linked the green Link indicators on the Parent and Baby units will stop flashing and remain a steady green. The... -
Page 18: Baby Sound Level Led Indicators
Using your SC520 Digital Baby Monitor Baby sound level LED indicators LEDs 1-4 = Green LEDs 5-7 = Red LEDs 1-4 = Green LEDs 5-7 = Red The seven LEDs across the top of the Parent unit light up to indicate the level of sound being received from the Baby unit. The LEDs light up progressively as the sound increases. -
Page 19: Adjust The Loudspeaker Volume
Using your SC520 Digital Baby Monitor adjust the loudspeaker volume If you try and set the volume higher or lower than the 5 settings available on either At the Parent unit: unit you will hear an error 1. Press to select the required level. tone. The first press will show the current setting. The default loudspeaker There are 5 volume levels and off (Mute). The volume on both units is Level 3. -
Page 20: Lightshow
Using your SC520 Digital Baby Monitor Lightshow The Baby unit has a lightshow feature that projects a starry image onto the ceiling of your baby’s room. A tilt cup is supplied and can be placed underneath the Baby unit to enable you to direct the lightshow projection. You can set a period of time for the lightshow to illuminate using the Parent unit menu. -
Page 21: Switch Lightshow On/Off Using The Baby Unit
Using your SC520 Digital Baby Monitor Switch lightshow on/off using the Baby unit 1. To switch on, press the button. The Baby unit must be 2. To switch off, press the button. switched on for the lightshow to work but need not be Switch lightshow on/off using the Parent linked to the Parent unit. unit 1. Press . Lightshow is displayed, press 2. Press to display either Turn On? -
Page 22: Talk Back
Using your SC520 Digital Baby Monitor You will be able to activate Talk Back Talk Back mode even if You can use the Parent unit Talk Back feature other functions have been as a one way intercom to comfort and reassure activated at the Baby unit like Music playback or your baby. By speaking into the Parent unit Nightlight on. your baby will hear your voice from the Baby Press on the Baby unit. Please note that when using Talk Back... -
Page 23: Find
Using your SC520 Digital Baby Monitor Find You can press the button on the Baby unit to make the Parent unit sound an alert to help you find it if it’s been misplaced. If the Parent unit loudspeaker volume had been Muted (or set to volume off), the volume level will be reset to the default setting of Level 3. 1. Press on the Baby unit. The paging alert will sound at the Parent unit and the display will show Here I am! 2. To stop the alert, press any button on the... -
Page 24: The Parent Unit Menu
Using your SC520 Digital Baby Monitor The Parent unit menu button on the Parent unit can be used to select and change settings on the Baby unit without having to risk disturbing your baby. You can access the settings by: 1. Press then press to scroll through the menu options shown on the top of the display. Press when the option you want is displayed. -
Page 25: Nightlight
Using your SC520 Digital Baby Monitor nightlight The Baby unit must be switched on for the nightlight to work, but need not be You can set a comforting nightlight on the linked to the Parent unit. Baby unit. There are 3 brightness levels to choose from and you can set a period of time for the nightlight to illuminate. Switch nightlight on/off using the Baby unit To adjust the brightness level or set the nightlight 1. To switch on, press the... -
Page 26: Select The Nightlight Brightness Level Using The Parent Unit
Using your SC520 Digital Baby Monitor Select the nightlight brightness level using the Parent unit 1. Press . Lightshow is displayed, press display Nightlight and press 2. Turn On/Off? is displayed, press to display Brightness and press 3. Press to display either Low, Medium or High and press to select. -
Page 27: Play Music From The Baby Unit
Using your SC520 Digital Baby Monitor Play music from the Baby unit The Baby unit has 18 tracks that can be played to gently soothe your baby. The songs have been grouped into 4 categories: Lullabies, Nature, Classical and White Noise. You can select one song to play repeatedly After power-on, there may or select the Play All option for a medley of be a delay of a few seconds the songs from your selected category. -
Page 28: Choose A Song To Play Using The Parent Unit
Using your SC520 Digital Baby Monitor You need to turn the music Choose a song to play using the Parent on before you can choose a unit song. 1. Press . Lightshow is displayed, press until Music is displayed and press 2. Play? (or Stop) is displayed, press display Choose Song and press 3. Use the... -
Page 29: Set A Play Time For Music
Using your SC520 Digital Baby Monitor Set a play time for music 1. Press . Lightshow is displayed, press until Music is displayed and press 2. Play? is displayed, press until Timer is displayed and press 3. Use the buttons to scroll through the options: 5 min, 10 min, 15 min or Constant... -
Page 30: Start The Feed Timer Countdown
Using your SC520 Digital Baby Monitor The timer can be set from 3. The display will show 02h:00m (or the 1 minute to 99 hours 59 currently set timer). Use the buttons minutes. to select the first digit and press . Repeat this procedure for each digit and press The display will show Saved and you’ll hear a confirmation beep. Start the feed timer countdown If the Parent unit is switched 1. Press... -
Page 31: Cancel The Feed Timer Countdown
Using your SC520 Digital Baby Monitor Cancel the feed timer countdown 1. Press . Lightshow is displayed, press until Feed Timer is displayed and press 2. Stop? is displayed, press . The display will briefly show Timer Off, the timer will then disappear. Switch timer repeat option on or off 1. Press... -
Page 32: Select The Type Of Feed Timer Alert
Using your SC520 Digital Baby Monitor Select the type of feed timer alert Feed timer alert options: Beep = Parent unit will emit 1. Press . Lightshow is displayed, press an alert beep only. until Feed Timer is displayed and press . Beep&Vibe = Parent unit 2. Start? (or Stop? if the feed timer is already will emit an alert beep and vibrate. -
Page 33: Temperature Monitor Indicators
Using your SC520 Digital Baby Monitor Temperature monitor indicators iMPOrTanT! The temperature sensor used in this SC520 Digital On the Baby On the Parent Temperature Baby Monitor is intended as unit unit a guide, to provide parents with an indication of the Sensor Light Display shows Below 16°C room temperature in which glows Blue... -
Page 34: Select The Type Of Temperature Alert
Using your SC520 Digital Baby Monitor Select the type of temperature alert Pre-set temperature alert range 1. Press . Lightshow is displayed, press The Baby unit comes with display Setup and press pre-set maximum and minimum temperatures, 2. Temperature is displayed, press which should be used 3. Press until Temp Alert is displayed and... -
Page 35: Adjust The Temperature
Using your SC520 Digital Baby Monitor adjust the temperature If you find the temperature displayed on the Parent unit is slighlty different to another thermometer or thermostat in your house, you can adjust it to match. 1. Press . Lightshow is displayed, press display Setup and press 2. Temperature is displayed press 3. Press until Adjust temp? is displayed and press 4. Enter Temp XX is displayed (where XX is the... -
Page 36: Crying Alert
Using your SC520 Digital Baby Monitor Crying alert Crying alert options Beep = Parent unit will The crying alert will only be activated if the beep, Crying Alert will be displayed and icon will Parent unit volume has been switched to flash. volume off. Beep&Vibe = Parent unit will With Mute switched on, if your baby starts to beep and vibrate. Crying... -
Page 37: Backlight
Backlight is displayed and press 3. Use the buttons to display either On w alerts or Off w alerts and press select. The display will show Saved and you will hear a confirmation beep. List of tones Your SC520 Digital Baby Monitor can produce various tones. They have the following meaning: Tone Meaning Confirmation tone e.g. setting Single tone saved. -
Page 38: Reset The Units
Using your SC520 Digital Baby Monitor User Alert tones can be silenced by pressing any button on the Parent unit. System Alerts can be silenced for a 5 minute period by pressing any button on the Parent unit. Resetting the units is reset the units only advisable if you are experiencing difficulties with Resetting either units will return the settings at your product. -
Page 39: Troubleshooting
− The feed timer has been set, see pages 29-32. − The crying alert is switched on, see page 36. − The temperature alert has been triggered, see pages 32-35. − The batteries are low, see pages 13-14. − The Find button has been pressed on the Baby unit, see page 23. If the Parent unit still beeps after checking the points opposite, please try switching the Baby unit off at the power for approximately 30 minutes. Ensure the Parent unit is clean by wiping with a damp cloth. If the problem persists call the Oricom Customer Support for advice. - Page 40 Troubleshooting Problems Solutions Link light does − Check that both the Baby and Parent units are not come on switched on. − Check that the batteries in the Parent unit are correctly installed and that they are charged. − Check that the mains power is plugged in and switched on at the Baby unit. − Check that the units are within range of each other. Link light is − If you have pressed to use the Talk Back feature, the flashing green Link light will flash to indicate one-way communication between the units. The units are searching for a communication link. − Check units are within range of one another. − Check both units are turned on. Link light is − The link between your units is broken. You will also hear an alert on the Parent unit to let you know there is no communication between the units. If this happens, check that the mains power (or batteries) is correctly connected and that the units are within range of one another. See page 15 for instructions on linking...
- Page 41 Troubleshooting Problems Solutions Battery low on − Charge the Parent unit batteries by either putting the Parent unit Parent unit back on the charger or plugging directly into a wall power socket. − Place Parent unit back on the charger as frequently as possible or ideally leave it on the charger to ensure the batteries remain charged. − To fully charge the batteries, the Parent unit should be on charge for approximately 16 hours if switched off and 24 hours if switched on to reach maximum charge. − To speed up the charging process turn the Parent unit off when charging if it is not being used. Parent unit remains silent or very quiet − You may have set the volume too low, see page 19 to increase the volume.
-
Page 42: General Information
General information Cleaning Both units have splash resistant grilles and casing. To clean, wipe with a damp cloth. Product disposal instructions Always dispose of your products at the end of their life in accordance with your local waste disposal requirements. Packaging materials all cardboard and paper packaging should be recycled in accordance with your local council waste regulations. -
Page 43: Customer Support
Customer Support Customer Support If you have any problems setting up or using this product you will find useful tips and information in the Troubleshooting section of this user guide as well as “Frequently Asked Questions” on our website www.oricom.com.au. If you have further questions about using the product after reviewing the resources above or would like to purchase replacement parts or accessories please call our Customer Support Team on 02 4574 8888 or 1300 889 785 AUS/ 0800 674 266 NZ. Our dedicated local support team are more likely to be able to help you than the retailer where you made your purchase. important Please retain your purchase receipt and attach to the back page of this user guide as you will need to produce this if warranty service is required. -
Page 44: Express Warranty
Express Warranty (Australia) Express Warranty (australia) This Express Warranty is provided by Oricom International Pty Ltd ABN 46 086 116 369, Unit 1, 4 Sovereign Place, South Windsor NSW 2756, herein after referred to as “Oricom”. Oricom products come with guarantees that cannot be excluded under the Australian Consumer Law. You are entitled to a replacement or refund for a major failure and compensation for any other reasonably foreseeable loss or damage. You are also entitled to have the goods repaired or replaced if the goods fail to be of acceptable quality and the failure does not amount to a major failure. Oricom warrants that the product is free from defects in materials or workmanship during the Express Warranty Period. This Express Warranty does not extend to any product from which the serial number has been removed or was purchased outside of Australia. - Page 45 No change to the conditions of this Express Warranty is valid unless it is made in writing and signed by an authorised representative of Oricom. Oricom will not be liable under this Express Warranty, and to the extent permitted by law will not be liable for any defect, loss, damage or injury arising out of or in connection with a: 1. Failure by you to adhere to the warnings and follow the instructions set...
- Page 46 Please note that if a Customer Support Team member advises that your product does not qualify for return, this warranty does not apply to your product. Products that are authorised to be returned to Oricom in Australia must include all of the following: • A completed Return Authorisation form...
-
Page 47: Important Information
Express Warranty (Australia) Please note that this Express Warranty excludes expenses incurred by you in returning any faulty product to us. You must arrange and pay any expenses incurred (including postage, delivery, freight, transportation or insurance of the product) to return the faulty product to us, however, we will arrange delivery of the repaired or replaced faulty product to you. important information repair notice Please be aware that the repair of your goods may result in the loss of any user-generated data (such as stored telephone numbers, text messages and contact information). - Page 48 Contact Details for Oricom Support and Express Warranty Claims in australia Oricom International Pty Ltd Locked Bag 658 South Windsor, NSW 2756 Australia Email: support@oricom.com.au Phone: 1300 889 785 or (02) 4574 8888 (Monday to Friday 8am to 6pm AEST) Web: www.oricom.com.au Fax: (02) 4574 8898 Contact Details for Oricom Support and Express Warranty Claims in new Zealand Email: support@oricom.co.nz Phone: 0800 674 266 (Monday to Friday 10am to 8pm NZST) Web: www.oricom.co.nz...
Need help?
Do you have a question about the SC520 and is the answer not in the manual?
Questions and answers