
Related Manuals for Oricom Secure715


Summary of Contents for Oricom Secure715
- Page 1 Baby Monitor Secure715 User Guide KEEP THIS USER GUIDE FOR FUTURE REFERENCE Always retain your proof of purchase in case of warranty service. AUSTRALIA: www.oricom.com.au NEW ZEALAND: www.oricom.co.nz...
-
Page 2: Table Of Contents
ThE BABy mONITOr TrOuBLEShOOTING EXprESS wArrANTy Need Help? If you need assistance setting up or using your Oricom product now or in the future, call Oricom Support. Australia 1300 889 785 or 02 4574 8888 www.oricom.com.au Mon-Fri 8am – 6pm AEST... -
Page 3: Safety Information
• Never place the baby unit or parent unit inside your as it contains detailed information you will need to get baby’s cot, bed or playpen. the most from your Oricom baby monitor. If you have any • Never cover the parent or baby units with clothes, towels issues setting up or using your Oricom baby monitor, or blankets or any other item. - Page 4 Improper use, or use of unapproved batteries, may present a risk of fire, explosion, or other hazard, and may invalidate any approval or warranty. • If you believe the battery is damaged, remove product from the charger and stop using the product. Contact Oricom for assistance. Never use a damaged battery.
-
Page 5: Overview Of Functional Component Positions
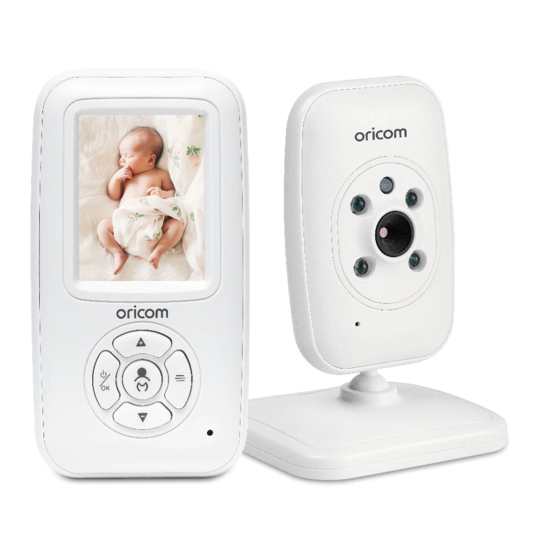
OvErvIEw OF FuNCTIONAL COmpONENT pOSITIONS 2 Your Baby Monitor 1 Power 2 Power / OK Button Parent Unit 3 Up Button 4 PTT / Lullaby Button 5 Menu Button 6 Down Button... - Page 6 2 Pairing Button Check pack contents SC715 1 Baby unit (camera) 1 AC adaptor for the baby unit 1 Parent unit 2 x AA 800mAh NiMH batteries 1 AC adaptor for the parent unit If any items are missing, contact Oricom customer support on 1300 889 785 or support@oricom.com.au.
-
Page 7: Getting Started
It will take a few seconds to Only use Rechargeable Nickel Metal Hydride batteries in start up the unit. The LCD will display Oricom loading this product, as any other type may cause damage. screen. - Page 8 4.1.2 Brightness adjustment Press and hold the <POWER> button for approx. 2 seconds, During video mode, you can press the <UP> key to enable until the Oricom logo appears on the parent unit. The brightness adjustment, you can now adjust the brightness camera image will then appear. by pressing the <UP>/<DOWN> keys.
-
Page 9: Using The Baby Monitor
uSING ThE BABy mONITOr NOTE: NOTE: Different options can be selected via the <UP>/<DOWN> Lullabies will continue to play on the baby unit when the buttons, press <OK> button to confirm. Press the <MENU> parent unit is turned OFF. To turn off the lullabies on the baby button any time to exit the MENU. unit: turn the parent unit back ON, then turn the lullabies off in the menu. - Page 10 uSING ThE BABy mONITOr (2) VOX timer 4.2.4.1 Camera registration / de-registration After setting the VOX sensitivity level, you can then select In the camera registration / de-registration option in the the VOX timer. VOX timer duration can be selected with settings menu, the camera registration status is shown.
- Page 11 uSING ThE BABy mONITOr 4.3 Lost link indication When the baby unit is not powered on or is out of range, the following graphic will be shown on the LCD display and the POWER LED in parent unit will flash. 4.4 Cleaning Wipe down the monitor with a clean dry cloth. DO NOT use any chemical cleaner or solvents on your baby monitor.
- Page 12 ThE BABy mONITOr 5 Customer Support Should you experience difficulties operating the SC715, please refer to the troubleshooting guide below. If you still experience difficulties, please contact Oricom Customer Support on 1300 889 785 for assistance. Troubleshooting Problems Solutions Equipment does not function − Check both parent unit and baby unit are turned on Check parent unit is charged or placed on charge.
- Page 13 (in that order) Battery not charging − Check batteries and battery connections are clean and free of corrosion. − After a period of time, the batteries may need to be replaced due to everyday usage. Please visit www.oricom.com.au to purchase replacement batteries. Parent unit beeping Move the parent unit closer to the baby unit until they are within range. No picture after 10 seconds VOX function is activated.
-
Page 14: Troubleshooting
Up to 150 meters under optimum conditions. Range is reduced in buildings through walls, doors etc. Frequency range 2.4 GHz Digital FHSS Permissible ambient temperature 0°C to 40°C NOTE For a replacement battery pack or other spare parts, please contact Oricom. -
Page 15: Express Warranty
Oricom warrants that the product is free from defects in (30) days or for the remainder of the Express Warranty materials or workmanship during the Express Warranty Period of the Oricom branded product in which they are Period. This Express Warranty does not extend to any... - Page 16 Australia defect, loss, damage or injury arising out of or in connection Oricom has a simple warranty process for you to follow: with a: • P lease call or email our Customer Support Team, 1300 1.
- Page 17 EXprESS wArrANTy Send the approved returns to: Oricom International Pty Ltd Locked Bag 658 South Windsor NSW 2756 Australia Please note that this Express Warranty excludes expenses incurred by you in returning any faulty product to us. You must arrange and pay any expenses incurred (including postage, delivery, freight, transportation or insurance of the product) to return the faulty product to us, however, we will arrange delivery of the repaired or replaced faulty product to you.
-
Page 18: New Zealand 0800 67 42
Oricom have a trained and dedicated team of Customer Support Representatives, each with the knowledge and resources to assist in answering your questions quickly and efficiently. Oricom Support - Australia For all product enquiries, troubleshooting or to discuss the range of Oricom products, feel free to contact Oricom or visit our website for answers to frequently asked questions. 1300 889 785 Monday - Friday 8am –...
Need help?
Do you have a question about the Secure715 and is the answer not in the manual?
Questions and answers