Table of Contents

Related Manuals for Oricom SC320


Summary of Contents for Oricom SC320
- Page 1 SC320 Digital Baby Monitor User Guide KEEP THIS USER GUIDE FOR FUTURE REFERENCE Always retain your proof of purchase in case of warranty service and register your product on line at: AUSTRALIA: www.oricom.com.au NEW ZEALAND: www.oricom.co.nz...
- Page 2 Welcome... to your SC320 Digital Baby Monitor • High definition digital sound gives you crystal clear audio quality and zero interference. • Wireless range of up to 300m outdoors and up to 50m indoors (in ideal conditions, where there is a clear line of sight between the units) – giving you the freedom to move around with clear reception and no interference from other baby monitors • Out of range and battery low warnings...
- Page 3 Parent Please read this guide carefully and unit supplied (2B0028) keep it for future reference. • 2 x power adaptors (part No. 2B0027) Need help? If you need assistance setting up or using your Oricom product now or in the future, call Oricom Support. Australia 1300 889 785 or 02 4574 8888 www.oricom.com.au Mon-Fri 8am – 6pm AEST New Zealand 0800 67 42 66 www.oricom.co.nz Mon-Fri 10am – 8pm NZST...
-
Page 4: Important Safety Information
WarninG • It is very important that you read the User Guide carefully as it contains detailed information you will need to get Risk of suffocation! the most from your Oricom baby monitor. If you have Keep all packaging materials any issues setting up or using your Oricom baby monitor and protective foils out of please call our Customer Support team. -
Page 5: Table Of Contents
In this guide Important safety information ....4 Parent unit battery LED indicator..16 Your SC320 Digital Baby Monitor ..6 Find.............16 Parent unit ..........6 List of tones ........17 Baby unit..........7 Reset the units........18 Back of the Baby unit......8 Reset the Parent unit ......18 Setting up ..........9 Reset the Baby unit ......18... -
Page 6: Your Sc320 Digital Baby Monitor
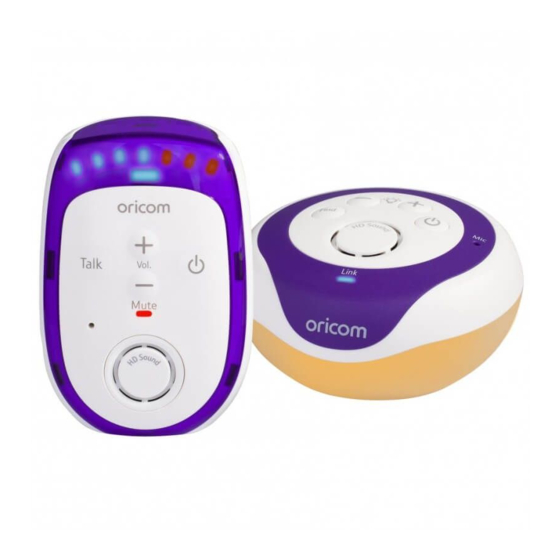
Your SC320 Digital Baby Monitor Parent unit Battery LED status indicator (top of unit) Red flashing light indicates the batteries are low and need re-charging. Solid red indicates the Parent unit is charging. Lanyard attach point You can loop a lanyard (not supplied) through here. Baby sound level LEDs Indicates the level of received + Vol. -
Page 7: Baby Unit
Your SC320 Digital Baby Monitor Baby unit Nightlight Press to switch the nightlight on or off. Press and hold for 2 seconds Power on/off to switch off. Press and hold to switch the power on or off. Find Press to emit an alert beep Microphone from the Parent unit – useful for finding the Parent unit if you’ve misplaced it. -
Page 8: Back Of The Baby Unit
Your SC320 Digital Baby Monitor Back of the Baby unit Power socket For connection to the mains power socket via the power adaptor cable supplied. -
Page 9: Setting Up
Remove this tab and Parent unit. Eventually they charge batteries for 24 hours before use. will need to be replaced. New batteries can be purchased from www. oricom.com.au. The Parent unit rechargeable batteries will lose charge over a period of time, even if switched off. - Page 10 Setting up Battery low warning – Baby unit Parent unit 1. Plug the remaining power adaptor cable into When the batteries are low – within 1 hour of running out the socket marked on the back of the Baby – the Parent unit will emit a unit and plug the other end into the mains low battery alert and the low power and switch on.
- Page 11 Setting up important: removing the batteries If you ever need to remove The link confirmation between the two units is the batteries, simply vital for use so they can communicate. If the slide open the battery link between the units is broken at any time, compartment cover and use the ribbon to eject the the Link indicators on the Parent and Baby batteries.
-
Page 12: Using Your Sc320 Digital Baby Monitor
Using your SC320 Digital Baby Monitor Switching on/off Switch the Baby unit on 1. Press and hold the button for 1 second. The nightlight will briefly illuminate and then the green LED will flash until it links with the Parent unit. Once linked the green LED will remain on. Switch the Parent unit on 1. Press and hold the button on the Parent unit until all the LEDs on the top of the unit briefly illuminate. The green Link indicator will... -
Page 13: Baby Sound Level Led Indicators
Using your SC320 Digital Baby Monitor Baby sound level LED indicators Equivalent sound level examples: LEDs 1-4 = Green LEDs 5-7 = Red 60dB-70dB = normal conversation 75dB = loud conversation 83-95dB = loud traffic noise The seven LEDs across the top of the Parent unit light up to indicate the level of sound being received from the Baby unit. The LEDs light up progressively as the sound increases. -
Page 14: Adjust The Parent Unit Loudspeaker Volume
Using your SC320 Digital Baby Monitor If you try and set the volume adjust the Parent unit higher or lower than the 5 loudspeaker volume settings available on either unit you will hear a double There are 5 volume levels and off (Mute). alert tone. The default loudspeaker volume is Level 3. If the buttons 1. Press to select the required level. are pressed while Mute... -
Page 15: Nightlight
Using your SC320 Digital Baby Monitor nightlight The Baby unit must be switched on for the nightlight to work, but doesn’t need to You can set a comforting nightlight on the be linked to the Parent unit. Baby unit. There are three levels of brightness. Switch Baby unit nightlight on/off 1. To switch on, press either the button. It will take 3 seconds to illuminate to the highest brightness level. -
Page 16: Parent Unit Battery Led Indicator
Using your SC320 Digital Baby Monitor 1. Press and hold down the button on the Do not press the button when the Baby unit and Parent unit to speak to your baby. Parent unit are positioned in Whilst the button is depressed the green the same room. High-pitch Link indicators will flash on both units. noise will be generated if the... -
Page 17: List Of Tones
Using your SC320 Digital Baby Monitor List of tones Your Baby Monitor unit can produce various tones. They have the following meaning: Tone Meaning Confirmation tone e.g. setting Single tone saved. Error tone e.g. max volume reached Double tone (fast) when adjusting volume. User alert e.g. crying alert, paging Double tone (slow) alert etc. System alert e.g. link lost, battery Triple tone (fast) low etc. -
Page 18: Reset The Units
Using your SC320 Digital Baby Monitor Resetting the units is reset the units only advisable if you are experiencing difficulties with Resetting either units will return the settings at your product. It is a useful that unit back to its default settings. feature that ensures your Baby Monitor is returned reset the Parent unit to its new “out of the box” 1. Within 3 seconds of the Parent unit being settings. -
Page 19: Troubleshooting
− The Find button has been pressed on the Baby unit, see page 16. If the Parent unit still beeps after checking the above, please try switching the Baby unit off at the power. Ensure the Parent unit is clean by wiping with a damp cloth. If the problem persists call the Oricom Customer Support for advice. - Page 20 Troubleshooting Problems Solutions Link indicator − Check that both the Baby and Parent units are does not come switched on. − Check that the batteries in the Parent unit are correctly installed and that they are charged. − Check that the units are within range of each other. − Check that the mains power is plugged in and switched on at the Baby unit. Link light is − If you have pressed to use the Talk Back flashing green feature, the Link light will flash to indicate one-way communication between the units. − The units are searching for a communication link. − Check units are within range of one another. − Check both units are turned on. Link indicator − The Link between your units is broken. You will is flashing red also hear an alert on the Parent unit to let you know there is no communication between the units.
- Page 21 Troubleshooting Problems Solutions Battery low on − Put the Parent unit back on charge. Parent unit − Place the Parent unit back on charge as frequently as possible or ideally leave it on charge to ensure the batteries remain charged. − To fully charge the batteries, the Parent unit should be on charge for approximately 24 hours if switched on or 16 hours if switched off to reach maximum charge. − To speed up the charging process turn the Parent unit off when charging if it is not being used. Parent unit − You may have set the volume too low, see page 14 to remains silent increase the volume.
-
Page 22: General Information
General information Cleaning Both units have splash resistant grilles and casing. To clean, wipe with a damp cloth. Product disposal instructions Always dispose of your products at the end of their life in accordance with your local waste disposal requirements. Packaging materials all cardboard and paper packaging should be recycled in accordance with your local council waste regulations. -
Page 23: Customer Support
Customer Support Customer Support If you have any problems setting up or using this product you will find useful tips and information in the Troubleshooting section of this user guide as well as “Frequently Asked Questions” on our website www.oricom.com.au. If you have further questions about using the product after reviewing the resources above or would like to purchase replacement parts or accessories please call our Customer Support Team on 02 4574 8888 or 1300 889 785 AUS/ 0800 674 266 NZ. Our dedicated local support team are more likely to be able to help you than the retailer where you made your purchase. important Please retain your purchase receipt and attach to the back page of this user guide as you will need to produce this if warranty service is required. -
Page 24: Express Warranty
Oricom warrants that the product is free from defects in materials or workmanship during the Express Warranty Period. This Express Warranty does not extend to any product from which the serial number has been removed or was purchased outside of Australia. - Page 25 No change to the conditions of this Express Warranty is valid unless it is made in writing and signed by an authorised representative of Oricom. Oricom will not be liable under this Express Warranty, and to the extent permitted by law will not be liable for any defect, loss, damage or injury arising out of or in connection with a: 1.
- Page 26 Please note that if a Customer Support Team member advises that your product does not qualify for return, this warranty does not apply to your product. Products that are authorised to be returned to Oricom in Australia must include all of the following: • A completed Return Authorisation form...
-
Page 27: Important Information
Express Warranty (Australia) Please note that this Express Warranty excludes expenses incurred by you in returning any faulty product to us. You must arrange and pay any expenses incurred (including postage, delivery, freight, transportation or insurance of the product) to return the faulty product to us, however, we will arrange delivery of the repaired or replaced faulty product to you. important information repair notice Please be aware that the repair of your goods may result in the loss of any user-generated data (such as stored telephone numbers, text messages and contact information). - Page 28 Contact Details for Oricom Support and Express Warranty Claims in australia Oricom International Pty Ltd Locked Bag 658 South Windsor, NSW 2756 Australia Email: support@oricom.com.au Phone: 1300 889 785 or (02) 4574 8888 (Monday to Friday 8am to 6pm AEST) Web: www.oricom.com.au Fax: (02) 4574 8898 Contact Details for Oricom Support and Express Warranty Claims in new Zealand Email: support@oricom.co.nz Phone: 0800 674 266 (Monday to Friday 10am to 8pm NZST) Web: www.oricom.co.nz...
Need help?
Do you have a question about the SC320 and is the answer not in the manual?
Questions and answers