
Related Manuals for Oricom Secure895


Summary of Contents for Oricom Secure895
- Page 1 Video Baby Monitor Secure895 User Guide KEEP THIS USER GUIDE FOR FUTURE REFERENCE Always retain your proof of purchase in case of warranty service. AUSTRALIA: www.oricom.com.au NEW ZEALAND: www.oricom.co.nz...
- Page 2 SettIngS CUStomer SUPPort troUBLeShootIng eXPreSS Warranty Need Help? If you need assistance setting up or using your Oricom product now or in the future, call Oricom Support. Australia 1300 889 785 or 02 4574 8888 www.oricom.com.au Mon-Fri 8am – 6pm AEST...
-
Page 3: Important Safety Information
• It is very important that you read the User Guide carefully as it contains detailed information you will need to get the most from your Oricom baby monitor. If you have any issues setting up or using your Oricom baby monitor, please call our Customer Support team. - Page 4 Safety InformatIon • Never cover the parent or baby units with clothes, towels, blankets or any other item. Never use or place your parent or baby unit in or near moisture or water (e.g. near bath or pool). Immersing in water could cause electric shock and even death.
- Page 5 Improper use, or use of unapproved batteries, may present a risk of fire, explosion, or other hazard, and may invalidate any approval or warranty. • If you believe the battery is damaged, remove product from the charger and stop using the product. Contact Oricom for assistance. Never use a damaged battery.
- Page 6 Safety InformatIon Disposal Always dispose of your products at the end of their life in accordance with your local waste disposal requirements. Packaging materials including cardboard and paper packaging, should be recycled in accordance with your local council waste regulations.
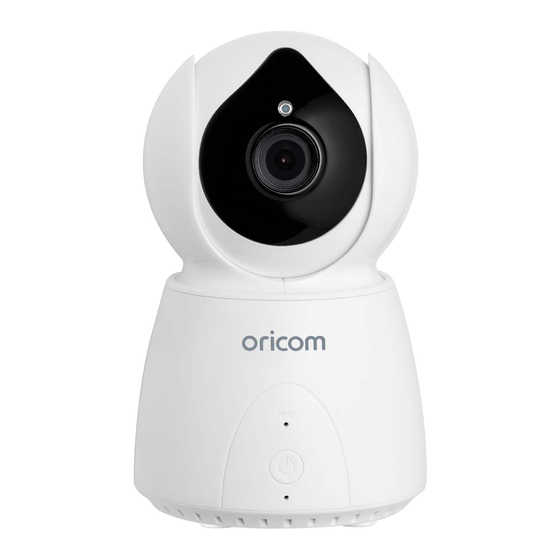
- Page 7 oVerVIeW of fUnCtIonaL ComPonent PoSItIonS Parent Unit 1 MENU AND BACK 2 OK AND ZOOM 3 UP / DOWN, VOLUME + / - 4 LEFT/RIGHT BUTTONS 5 TALK AND VIDEO 6 ON/OFF BUTTON 7 CHARGING PORT Camera Unit 1 CHARGING PORT 2 ON/OFF BUTTON 3 PAIR BUTTON...
- Page 8 1 Li-ion Polymer rechargeable battery pack for the parent unit 1 AC adaptor for the parent unit 1 User guide If any items are missing, contact Oricom customer support. 1. Setting up your Video Baby Monitor Power adaptor markings Please ensure you connect the correct power adaptor to parent and baby units.
- Page 9 SettIng UP yoUr VIdeo BaBy monItor 1.1. Connecting the power adaptor to the baby unit • Connect the small plug of the power adaptor to the rear of the Baby Unit. The other end will plug into the power socket. • Only use the supplied adaptor (5V DC/1.5A). Warning Do not place the AC Adaptor cable in a high "wear and tear"...
- Page 10 SettIng UP yoUr VIdeo BaBy monItor 1.2 Aligning the baby unit To get the best performance, place your baby unit between one and two metres away from your baby. Point the baby unit towards the baby or object you want to monitor. Check that the baby or object is suitably displayed on the parent unit screen.
- Page 11 SettIng UP yoUr VIdeo BaBy monItor Desk stand In-use time and battery charging Depending on the usage, the parent unit will work for up to 8 hours on a fully charged battery with power save turned ON. When the battery charge becomes low on the parent unit, the battery icon will turn red.
- Page 12 When the in-use time becomes noticeably shorter than normal, it is time to purchase a new battery pack. How to purchase spare parts You can purchase battery packs (Part number: 2B0103) and extra camera units from Oricom www.oricom.com.au...
-
Page 13: Parent Unit
BaSIC oPerat Ion of the keyS 2. Basic operation of the keys PARENT UNIT Press and hold to switch the Parent Unit ON/OFF ON/OFF button Press to turn the video screen ON/OFF Press to tilt the camera upward or downward Press to adjust volume level UP/DOWN buttons (can also be used to pan... - Page 14 menU oPtIonS and fUnCtIonS 3. MENU options and functions Camera Press MENU button. 1) Select Camera icon. Press “OK’’ button to confirm. 2) Press add camera (SC895 supports up to 4 cameras). Press OK button to confirm. 3) Press the “Pair’’ button on the camera unit to pair within 30 seconds.
- Page 15 menU oPtIonS and fUnCtIonS...
- Page 16 menU oPtIonS and fUnCtIonS View Press MENU button: 1) Select the view icon for multiple camera options. Press “OK’’ button to confirm. 2) Choose camera 1/camera 2/camera 3/camera 4 or choose to scan between the connected cameras.
- Page 17 menU oPtIonS and fUnCtIonS Lullabies Press MENU button: 1) Select the Lullabies icon. Press “OK’’ button to confirm. 2) Choose the lullaby to play from lullabies list. It will automatically single cycle once you chose a lullaby. Note: If chose ALL, it will automatically repeat all lullabies list.
- Page 18 menU oPtIonS and fUnCtIonS Feeding Timer Press MENU button 1) Select Feeding Timer icon. Press “OK’’ button to confirm. 2) Choose your preferred feeding reminder time, once selected a countdown will appear when monitor is in viewing mode. When the predefined time has elapsed, monitor will alarm for 5 seconds.
- Page 19 menU oPtIonS and fUnCtIonS...
- Page 20 menU oPtIonS and fUnCtIonS Auto Tracking Press MENU button 1) Select Auto Tracking icon. 2) Press “ON/OFF’’ to enable/disable this function. 3) With Auto tracking turned on, the camera will automatically follow the movement of an object or person in its sight.
- Page 21 SettIngS 4. Settings 4.1 Language Setting User can select the language to display in the settings menu.
-
Page 22: Brightness Setting
SettIngS 4.2 Brightness Setting You can select the brightness level in the settings menu. - Page 23 SettIngS 4.3 Date & Time Setting You can set the device date and time in the settings menu.
- Page 24 SettIngS 4.4 High-low Temperature alarm setting You can adjust the highest and lowest temperature limitation setting. When room temperature exceeds the limitation setting, parent unit will alarm automatically.
- Page 25 SettIngS 4.5 Temperature °C/°F switch You can switch between °C & °F easily by accessing the Temp °C/°F setting.
- Page 26 SettIngS 4.6 Frequency You can switch between 60Hz & 50Hz in the Frequency setting.
- Page 27 SettIngS 4.7 Motion Detecting Turning this function ON allows you to hear an alarm if any movement is detected by the baby unit.
- Page 28 SettIngS Note: The Motion Detecting function is not recommended when in Camera Scan Mode. 4.8 VOX With this feature turned on, you will hear an alarm noise when the baby unit detects sound or noise.
- Page 29 SettIngS Note: The VOX function is not recommended when in Camera Scan mode. While playing a lullaby, VOX may be triggered by the audio level.
-
Page 30: Power Saving
SettIngS 4.9 Power saving By turning this function ON, the monitor will enter into power saving mode automatically within 10 seconds. The screen will be in sleep mode and will only wake by briefly pressing the power button. Only turn power saving ON when you turn on VOX or Motion detection. The alarm will also turn the display back on for 10 seconds. -
Page 31: Default Settings
defaULt SettIngS 5.0 Default Settings You can restore your monitor to its default factory settings with this option. Please note: you will lose all linked cameras and settings. -
Page 32: Customer Support
CUStomer SUPPort Customer Support Should you experience difficulties operating your SC895, please refer to the troubleshooting guide below. If you still experience difficulties, please contact Oricom Customer Support on 1300 889 785 for assistance. Troubleshooting Problems Solutions Equipment does − Check both parent unit and... - Page 33 troUBLeShootIng No Link − Move the parent unit closer to displaying on the baby unit. parent unit Try resetting your monitor to avoid busy channels: 1. Turn both camera and parent units off and remove the battery i n t h e p a r e n t u n i t . L e a v e unplugged for 20 seconds.
- Page 34 − After a period of time, the battery may need to be replaced due to everyday usage. Please visit www.oricom.com.au to purchase replacement batteries. Parent unit Move the parent unit closer beeping to the baby unit until they are within range.
- Page 35 Oricom warrants that the product is free from defects in materials or workmanship during the Express Warranty Period. This Express Warranty does not...
- Page 36 All component parts removed under this Express Warranty become the property of Oricom. In the unlikely event that your Oricom product has a recurring failure, Oricom may always, subject to the Competition and Consumer Act 2010, at its...
- Page 37 2. wilful misconduct or deliberate misuse by you of the product; 3. a ny external cause beyond our control, including but not limited to power failure, lightning or over voltage; 4. modification to the product or services carried out on the product by anyone other than Oricom or Oricom’s authorised service provider.
- Page 38 Warranty eXPreSS Warranty How to make a claim under your Express Warranty in Australia Oricom has a simple warranty process for you to follow: • P lease call or email our Customer Support Team, 1300 889 785 or support@oricom.com.au. • A Customer Support Team member will verify after troubleshooting with you if your product qualifies under warranty.
-
Page 39: Important Information
Warranty eXPreSS Warranty Send the approved returns to: Oricom International Pty Ltd Locked Bag 658 South Windsor NSW 2756 Australia Please note that this Express Warranty excludes expenses incurred by you in returning any faulty product to us. You must arrange and pay any... - Page 40 Oricom Support - Australia For all product enquiries, troubleshooting or to discuss the range of Oricom products, feel free to contact Oricom or visit our website for answers to frequently asked questions. 1300 889 785 Monday - Friday 8am –...
Need help?
Do you have a question about the Secure895 and is the answer not in the manual?
Questions and answers