Table of Contents
Advertisement
Available languages
Available languages
Quick Links
Advertisement
Chapters
Table of Contents

Subscribe to Our Youtube Channel
Related Manuals for ProLights Diamond 193


Summary of Contents for ProLights Diamond 193
- Page 1 DIAMOND193 ENTERTAINMENT LASER EFFECT Manuale Utente User Manual...
- Page 2 REV.001-05/11...
-
Page 3: Table Of Contents
DIAMOND193 INDICE Sicurezza Avvertenze generali Attenzioni e precauzioni per l’installazione Sicurezza laser e istruzioni operative Informazioni generali Descrizione e specifiche tecniche 1. 1 Elementi di comando e collegamenti 1. 2 Descrizione 1. 3 Specifiche tecniche 2 Installazione 2. 1 Montaggio 3 Funzioni e impostazioni 3. -
Page 4: Avvertenze Generali
DIAMOND193 ATTENZIONE! Prima di effettuare qualsiasi operazione con l’unità, leggere con attenzione questo manuale e conservarlo accuratamente per riferimenti futuri. Contiene informazioni importanti riguardo l’installazione, l’uso e la manutenzione dell’unità. SICUREZZA Avvertenze generali • I prodotti a cui questo manuale si riferisce sono conformi alle Direttive della Comunità Europea e pertanto recano la sigla . -
Page 5: Sicurezza Laser E Istruzioni Operative
DIAMOND193 Sicurezza laser e istruzioni operative • Non utilizzare il proiettore laser senza lettura e comprensione sulla sicurezza laser e sulle istruzioni operative contenute in questo manuale. • Il raggio laser può causare danni permanenti agli occhi ed alla pelle. • Non dirigere il raggio laser su persone o animali. -
Page 6: Informazioni Generali
DIAMOND193 I dispositivi laser con radiazioni accessibili recano etichette in modo da indicare: - il segnale d’avvertimento laser; - la classe di appartenenza del dispositivo laser unitamente all’indicazione cautelativa e di avvertimento pertinente, nonché - i dati di identificazione e i dati del tipo. LASER EMISSION DATA Laser Classification Class 3B... -
Page 7: Descrizione E Specifiche Tecniche
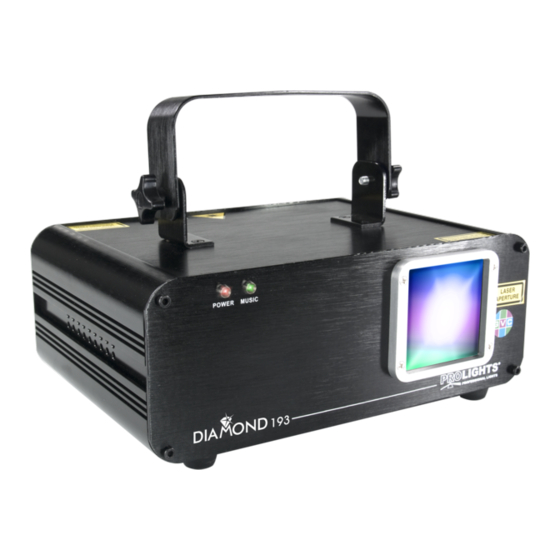
DIAMOND193 - 1 - DESCRIZIONE E SPECIFICHE TECNICHE 1.1 Elementi di comando e collegamenti POWER MUSIC LASER APERTURE Fig.1 VISTA FRONTALE 1. STAFFA DI MONTAGGIO. 2. MANOPOLA DI FISSAGGIO per la staffa di montaggio. 3. INDICATORE DEL SEGNALE MUSICALE: il LED blue si accende se il microfono (13) rileva un segnale musicale di volume sufficiente per comandare il raggio laser. - Page 8 DIAMOND193 SAFETY EYE SERIALE N° ATTACH SAFETY COOLING FAN OUTPUT: KEEP THE OUTPUT FREE CABLE HERE CONTROL POWER FUNC DOWN ENTER DISPLAY FUNCTION DISPLAY FUNCTION LOCK AUTO SHOW SOUND COLOR 2 AUTO COLOR 1 SOUND COLOR 3 AUTO COLOR 2 SENSITIVITY AUTO COLOR 3 DMX MODE...
-
Page 9: Descrizione
Prestazioni ed evoluzione tecnologica sono tra le prerogative nella progettazione e nello sviluppo delle novità Prolights. La serie Diamond di proiettori laser è la più recente evoluzione del segmento destinato al settore dell’intrattenimento multimediale. Sviluppati per rispondere sia alle necessità dei professionisti più... -
Page 10: Installazione
DIAMOND193 - 2 - INSTALLAZIONE 2.1 Montaggio Il DIAMOND193 può essere collocato su un piano solido. Inoltre, grazie alle possibilità di fissaggio sulla staf- fa (fig.3), l’unità può essere montata con versatilità su una traversa. Per il fissaggio occorrono dei supporti robusti per il montaggio. -
Page 11: Funzioni E Impostazioni
DIAMOND193 - 3 - FUNZIONI E IMPOSTAZIONI 3.1 Funzionamento Inserire la spina del cavo di alimentazione in una presa di rete (230V~ 50Hz). Accendere il DIAMOND193, con l’interruttore (16). Si accende il LED rosso (4) di funzionamento. Per azionare il raggio laser, inserire la chiave in dotazione nella serratura relativa (11) e girare la chiave in posizione ON. -
Page 12: Struttura Del Menu
DIAMOND193 3.3 Struttura del menu ENTER ENTER FUNC DOWN FUNC ENTER DOWN 001-511 ENTER DOWN ENTER ENTER 3.4 Funzionamento in modalità Stand Alone In questa modalità l’unità è impostata come Master. Per entrare nella modalità Stand Alone bisogna proce- dere come segue: • Premere il tasto FUNC fino a quando sul display non appare la scritta lampeggiante [Aut ] (fig.5), quindi premere il tasto ENTER. -
Page 13: Modalità Musicale, Impostazione Sensibilità
DIAMOND193 DISPLAY STAND ALONE MODE LASER EFFECT AUTOMATIC SHOW with GVC colors AUTOMATIC SHOW with single VIOLET color AUTOMATIC SHOW with single GREEN color AUTOMATIC SHOW with single CYAN color SOUND ACTIVATED SHOW with GVC colors SOUND ACTIVATED SHOW with VIOLET color SOUND ACTIVATED SHOW with GREEN color SOUND ACTIVATED SHOW with CYAN color 3.5 Modalità... -
Page 14: Modalità Slave
DIAMOND193 3.6 Modalità Slave Questa modalità consente di collegare in linea più unità DIAMOND193 senza un controller. La prima unità sarà impostata come master e le altre funzioneranno come slave con lo stesso effetto. • Premere il tasto FUNC fino a quando sul display non appare la scritta lampeggiante [SLA ] (fig.7). • Per confermare l’impostazione premere il tasto ENTER. -
Page 15: Collegamenti Della Linea Dmx
DIAMOND193 Segue un esempio con indirizzo 33 di start: Numero Indirizzo di Indirizzo DMX Prossimo indirizzo di start Prossimo indirizzo di start Prossimo indirizzo di start canali DMX start (esempio) occupati possibile per unità n°1 possibile per unità n°2 possibile per unità n°3 33-41 3.10 Collegamenti della linea DMX La connessione DMX è... -
Page 16: Tabella Canali Dmx
DIAMOND193 3.12 Tabella canali DMX Channel Function in the 10 channel mode DMX value LASER OFF 000-027 AUTOMATIC SHOW with GVC colors 028-055 AUTOMATIC SHOW with single VIOLET color 056-083 AUTOMATIC SHOW with single GREEN color 084-111 AUTOMATIC SHOW with single CYAN color 112-139 Operating mode SOUND ACTIVATED SHOW with GVC colors... -
Page 17: Tabella Pattern Nel Canale
DIAMOND193 3.13 Tabella Pattern nel canale 2 Patterns Patterns Patterns Patterns 000 - 007 064 - 071 128 - 135 190 - 197 008 - 015 072 - 079 136 - 143 198 - 205 016 - 023 080 - 087 144 - 151 206 - 213 024 - 031... -
Page 18: Manutenzione
DIAMOND193 - 4 - MANUTENZIONE 4.1 Pulizia sistema ottico e manutenzione • Durante gli interventi, assicurarsi che l’area sotto il luogo di installazione sia libera da personale non qualificato. • Spegnere l’unità, scollegare il cavo di alimentazione ed aspettare finché l’unità non si sia raffreddata. • Tutte le viti utilizzate per l’installazione dell’unità... - Page 21 DIAMOND193 TABLE OF CONTENTS Safety General instructions Warnings and installation precautions Laser safety and operating instructions General information Description and technical specifications 1. 1 Operating elements and connections 1. 2 Description 1. 3 Technical specifications 2 Installation 2. 1 Mounting 3 Functions and settings 3.
-
Page 22: General Instructions
DIAMOND193 WARNING! Before carrying out any operations with the unit, carefully read this instruction manual and keep it with cure for future reference. It contains important information about the installation, usage and maintenance of the unit. SAFETY General instructions • The products referred to in this manual conform to the European Community Directives and are therefore marked with . -
Page 23: Laser Safety And Operating Instructions
DIAMOND193 Laser safety and operating instructions • Do not operate laser without first reading and understanding all safety and technical data in this manual. • This laser product can potentially cause instant eye injury or blindness if laser light directly strikes the eyes. -
Page 24: General Information
DIAMOND193 LASER SAFETY LABEL REPRODUCTIONS - Class 3B laser radiation, when open, avoid exposure to beam. - Laser radiation avoid exposure to beam class 3B laser product. - The label indicates the laser beam output aperture. LASER EMISSION DATA Laser Classification Class 3B Green Laser Medium DPSS Nd:YVO4, 532nm... -
Page 25: Description And Technical Specifications
DIAMOND193 - 1 - DESCRIPTION AND TECHNICAL SPECIFICATIONS 1.1 Operating elements and connections POWER MUSIC LASER APERTURE Fig.1 FRONT VIEW 1. MOUNTING BRACKET; 2. LOCKING KNOB for the mounting bracket; 3. MUSIC INDICATOR: synchronize to detected music signal; 4. POWER INDICATOR: when this indicator is on, the fixture is switched on;... - Page 26 DIAMOND193 SAFETY EYE SERIALE N° ATTACH SAFETY COOLING FAN OUTPUT: KEEP THE OUTPUT FREE CABLE HERE CONTROL POWER FUNC DOWN ENTER DISPLAY FUNCTION DISPLAY FUNCTION LOCK AUTO SHOW SOUND COLOR 2 AUTO COLOR 1 SOUND COLOR 3 AUTO COLOR 2 SENSITIVITY AUTO COLOR 3 DMX MODE...
-
Page 27: Description
DIAMOND193 1.2 Description Performances and technical innovations are the prerogatives in design and development of new PROLIGHTS products. Diamond series are latest laser-based projectors for multimedia lighting. Developed to meet demands of high-end professionals and of enthusiastic LJs as well, project behind Diamond projectors combines build quality and technical solutions allowing outstanding performances and full flexibility of control. -
Page 28: Installation
DIAMOND193 - 2 - INSTALLATION 2.1 Mounting DIAMOND193 may be set up on a solid and even surface. The unit can also be mounted upside down to a cross arm. For fixing, stable mounting clips are required. The mounting place must be of sufficient stability and be able to support a weight of 10 times of the unit’s weight. -
Page 29: Functions And Settings
DIAMOND193 - 3 - FUNCTIONS AND SETTINGS 3.1 Operation Connect the supplied main cable to a socket (230 V~/50 Hz). Switch on the DIAMOND193 with the mains switch (13). The red LED POWER (4) lights up as a power indication. To switch on the laser beam, connect the supplied key to the lock of the switch (17) and turn the key to position ON. -
Page 30: Menu Structure
DIAMOND193 3.3 Menu structure ENTER ENTER FUNC DOWN FUNC ENTER DOWN 001-511 ENTER DOWN ENTER ENTER 3.4 Operation in Stand Alone mode In this mode, the unit is set as Master. In this operation mode the unit independently runs through its show program: • Press the FUNC button so many times until the display shows [Aut ] (fig.5), and press ENTER button to confirm the selection. -
Page 31: Sound Mode Sensitivity Setting
DIAMOND193 DISPLAY STAND ALONE MODE LASER EFFECT AUTOMATIC SHOW with GVC colors AUTOMATIC SHOW with single VIOLET color AUTOMATIC SHOW with single GREEN color AUTOMATIC SHOW with single CYAN color SOUND ACTIVATED SHOW with GVC colors SOUND ACTIVATED SHOW with VIOLET color SOUND ACTIVATED SHOW with GREEN color SOUND ACTIVATED SHOW with CYAN color 3.5 Sound Mode sensitivity setting... -
Page 32: Slave Mode
DIAMOND193 3.6 Slave mode This mode will allow you to link up the units together without a controller. Choose a unit to function as the Master. The unit must be the first unit in line; other units will work as slave with the same effect. • Press the button FUNC so many times until the display shows [SLA ] (fig.7). -
Page 33: Connection Of The Dmx Line
DIAMOND193 An example with the start address 33 is shown below: Number of Start address DMX Address Next possible start Next possible start Next possible start DMX channels (example) occupied address for unit No. 1 address for unit No. 2 address for unit No. -
Page 34: Dmx Control
DIAMOND193 3.12 DMX control Channel Function in the 10 channel mode DMX value LASER OFF 000-027 AUTOMATIC SHOW with GVC colors 028-055 AUTOMATIC SHOW with single VIOLET color 056-083 AUTOMATIC SHOW with single GREEN color 084-111 AUTOMATIC SHOW with single CYAN color 112-139 Operating mode SOUND ACTIVATED SHOW with GVC colors... -
Page 35: Pattern List In Channel
DIAMOND193 3.13 Pattern list in channel 2 Patterns Patterns Patterns Patterns 000 - 007 064 - 071 128 - 135 190 - 197 008 - 015 072 - 079 136 - 143 198 - 205 016 - 023 080 - 087 144 - 151 206 - 213 024 - 031... -
Page 36: Maintenance
DIAMOND193 - 4 - MAINTENANCE 4.1 Cleaning the unit and maintenance • Make sure the area below the installation place is free from unwanted persons during setup. • Switch off the unit, unplug the main cable and wait until the unit has cooled down. • All screws used for installing the device and any of its parts should be tightly fastened and should not be corroded. - Page 37 Place Stamp Here Affrancare Spett.le Music&Lights S.r.l. Via Appia Km 136.200 04020 Itri (LT) Italy "...
- Page 40 Music & Lights S.r.l. entertainment technologies Via Appia km 136,200 - 04020 Itri (LT) ITALY ISO 9001:2008 tel. +39 0771 72190 fax +39 0771 721955 Certified Company www.musiclights.it info@musiclights.it...
Need help?
Do you have a question about the Diamond 193 and is the answer not in the manual?
Questions and answers