Table of Contents
Troubleshooting

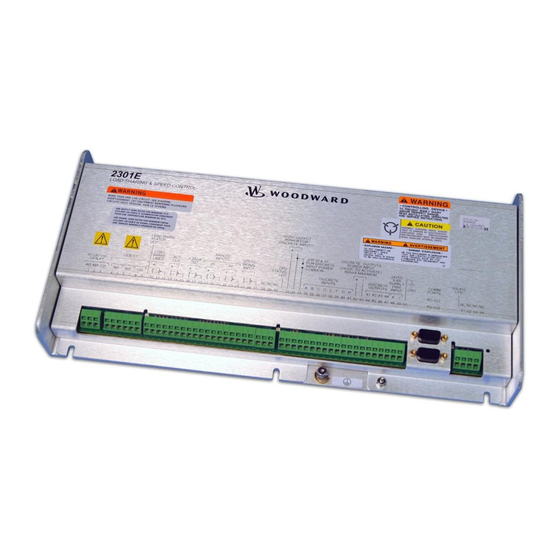
Related Manuals for Woodward 2301E


Summary of Contents for Woodward 2301E
- Page 1 Product Manual 26641 (Revision K, 7/2016) Original Instructions 2301E Digital Load Sharing and Speed Control for Engines 8273-1011 / Ordinary Locations 8273-1012 / Hazardous Locations Installation and Operation Manual...
- Page 2 Revisions—Changes in this publication since the last revision are indicated by a black line alongside the text. Woodward reserves the right to update any portion of this publication at any time. Information provided by Woodward is believed to be correct and reliable. However, no responsibility is assumed by Woodward unless otherwise expressly undertaken.
-
Page 3: Table Of Contents
Manual 26641 2301E Digital Control Contents ................ARNINGS AND OTICES ..........LECTROSTATIC ISCHARGE WARENESS ..............EGULATORY OMPLIANCE 1. G ............1 HAPTER ENERAL NFORMATION Description ......................1 Applications ......................2 Control Options ....................... 3 References ......................3 2. I ................. 9... - Page 4 Control Assistant PC Interface ................46 Control Assistant Features ...................46 System Requirements ..................47 Acquiring Control Assistant and the SOS Servlink OPC Server Software ...47 2301E Toolkit Service Tool ...................58 Entering the Configure Mode ................71 Configure Menu Descriptions ................71 Exiting the Configure Mode ..................80 Service Menu Descriptions ...................80...
- Page 5 Manual 26641 2301E Digital Control 2301E Control Modbus Addresses ..............140 Modbus Scale Factors ..................141 Shutdown Command through Modbus ............... 141 Start Command through Modbus ............... 142 For More Modbus Information ................142 9. P ......143 HAPTER RODUCT...
- Page 6 Figure 1-1a. 2301E Outline Drawing (Ordinary Locations) ........4 Figure 1-1b. 2301E Outline Drawing (Hazardous Locations) ......... 5 Figure 1-2a. 2301E Control Wiring Diagram (sheet 1) ........... 6 Figure 1-2b. 2301E Control Wiring Diagram (sheet 2) ........... 7 Figure 1-2c. 2301E Control Wiring Diagram (notes) ..........8 Figure 2-1.
-
Page 7: Warnings And Notices
Start-up On- and off-highway Mobile Applications: Unless Woodward's control functions as the supervisory control, customer should install a system totally independent of the prime mover control system that... -
Page 8: Electrostatic Discharge Awareness
Do not touch the components or conductors on a printed circuit board with your hands or with conductive devices. To prevent damage to electronic components caused by improper handling, read and observe the precautions in Woodward manual 82715 , Guide for Handling and Protection of Electronic Controls, Printed Circuit Boards, and Modules. -
Page 9: Regulatory Compliance
Manual 26641 2301E Digital Control Regulatory Compliance European Compliance for CE Mark These listings are limited only to those units bearing the CE Marking. Low Voltage Directive: Directive 2014/35/EU on the harmonisation of the laws of the Member States relating to the making available on the... - Page 10 2301E Digital Control Manual 26641 Lloyd’s Register LR Type Approval Test Specification No. 1, 2002 for of Shipping: Shipping: Environmental Categories ENV1, ENV2 and ENV3 Nippon Kaiji Kyokai: Requirements specified in Chapter 1, Part 7 of Guidance for the approval and Type Approval of materials and equipment for Marine use and relevant Society’s Rules.
-
Page 11: Chapter 1. General Information
The 2301E provides control in either isochronous mode, droop mode, or base load mode. The 2301E will allow for soft load transfer when being added to or removed from a bus. The isochronous mode is used for constant prime mover speed with: ... -
Page 12: Applications
Frequency) needs to be within 90 to 3600 rpm. The frequency from the magnetic pickup must be within the range of 100 to 25 000 Hz at rated speed. The 2301E speed range needs to be configured using an external computer during installation. -
Page 13: Control Options
Precise Frequency Control on isolated systems References The following publications contain additional product or installation information on Load Sharing and Speed Controls, and related components. They can be ordered from any Woodward office. Manual Title 25070 Electric Governor Installation Guide... -
Page 14: Figure 1-1A. 2301E Outline Drawing (Ordinary Locations)
2301E Digital Control Manual 26641 Figure 1-1a. 2301E Outline Drawing (Ordinary Locations) Woodward... -
Page 15: Figure 1-1B. 2301E Outline Drawing (Hazardous Locations)
Manual 26641 2301E Digital Control Figure 1-1b. 2301E Outline Drawing (Hazardous Locations) Woodward... -
Page 16: Figure 1-2A. 2301E Control Wiring Diagram (Sheet 1)
2301E Digital Control Manual 26641 Figure 1-2a. 2301E Control Wiring Diagram (sheet 1) Woodward... -
Page 17: Figure 1-2B. 2301E Control Wiring Diagram (Sheet 2)
Manual 26641 2301E Digital Control Figure 1-2b. 2301E Control Wiring Diagram (sheet 2) Woodward... -
Page 18: Figure 1-2C. 2301E Control Wiring Diagram (Notes)
2301E Digital Control Manual 26641 Figure 1-2c. 2301E Control Wiring Diagram (notes) Woodward... -
Page 19: Chapter 2. Installation
ESD bag, at least until it is grounded. Power Requirements The 2301E control requires a voltage source of 18 to 36 Vdc, with a current capacity of at least 600 mA for operating power. If a battery is used for operating power, an alternator or other battery charging device is necessary to maintain a stable supply voltage. -
Page 20: Location Considerations
For example, relay contact wiring and electric motor drive or ignition system wiring should be at least 30 cm (12 inches) from any 2301E wiring. And for example, analog inputs/output wiring should be separated from power wiring by at least 15 cm (6 inches). -
Page 21: Shields And Grounding
(exception, see note below on cabinet installations). Shields can be grounded at both ends (2301E and load) if the cable length is sufficiently short (i.e., within a cabinet, less than about 10 m straight line between the ground points) to prevent ground loop current in the shield. -
Page 22: Setting Speed Range
Real Power Load Calculation The 2301E does not used the Real Power Equation. Instead the control uses the equation Power = 3 * I * COS Theta, I = current, and COS Theta = Power Factor or the phase difference between the voltage and the current. -
Page 23: Power Supply (Terminals 48-50)
Use shielded cable and connect the load-sharing lines directly to terminals 10(+) and 11(–). Connect the shield to terminal 12(chassis). When all controls in the system are of the 2301E, 2301D or 2301A types, the shields may be connected continuously between controls. When load sharing with different controls, do not connect the shields at the point where connections are made to the load-sharing- line bus or if needed, connect only through a capacitor. -
Page 24: Discrete Inputs (Terminals 34-41)
PT/CT circuits. Discrete Inputs (Terminals 34–41) Discrete inputs are the switch or contact input commands to the 2301E control. They interact in such a way as to allow engine control and power management under a variety of conditions. -
Page 25: Close To Run Or Minimum Fuel (Terminal 34)
Manual 26641 2301E Digital Control The discrete inputs are capable through software programming to change the logic or state of the input. Please verify the state of your input before starting the engine. Close to Run or Minimum Fuel (Terminal 34) -
Page 26: Failed Speed Override
2301E Digital Control Manual 26641 Failed Speed Override A contact to override the failed speed signal circuit can be installed in series with the discrete input configured for the Failed Speed Override and the dc power to the discrete inputs. When the contact is open, the control operates normally, turning the control output off in the event of a loss of speed signal. -
Page 27: Idle / Rated Speed
Manual 26641 2301E Digital Control Idle / Rated Speed The external contact used to activate the Rated Speed command connects to terminal 36 (default). This discrete input changes the control operation by increasing the speed reference to RATED SPEED and decreasing the speed reference to IDLE SPEED. -
Page 28: Derate Kw Load Reference
The dual dynamics control function is enabled by the Service menu item ENABLE DYNAMICS 2 W/CB. The 2301E has a droop tracking feature which allows the control to constantly monitor the system load. If the unit is in isochronous mode, and the unit is switched to the droop mode, the unit will maintain the current load level and also maintain the current engine speed (rpm). -
Page 29: Lower Speed/Load Contact (Terminal 39)
Manual 26641 2301E Digital Control The input switch or relay contact used to activate the Raise Speed/Load command connects to terminal 38 (Discrete Input E). This discrete input changes the control operation by increasing the speed reference ramp when the CB Aux input is open, and by increasing the base load reference when in base load mode. -
Page 30: Load Generator (Terminal 40)
Contact discrete input must be “TRUE” for the Load Generator input to affect the control. Note: When using the 2301E in a single engine, emergency standby application, this input must be “True”. The logic function of this input can be modified to be normally open or normally closed. - Page 31 Manual 26641 2301E Digital Control The 2301E control is designed to receive either 4–20 mA, ±2.5 Vdc, or 1–5 Vdc, representing a minimum Remote Speed/Load setpoint to a maximum Remote Speed/Load setpoint. Separate software minimum and maximum settings are provided for remote speed (rpm), remote load (kW) and MAP Limit.
-
Page 32: Analog Input #1 (Terminals 19-20)
2301E Digital Control Manual 26641 Analog Input #1 (Terminals 19-20) The function for this input is default for #4, Sync Input with the hardware type fixed at ±2.5 Vdc. Selects the function for the analog input: 1 = NOT USED... -
Page 33: Speed Sensor (Terminals 25-26)
This input is limited to a frequency range of 100–24 950 Hz and a voltage range of 1.7–35 Vac. (The MPU voltage at the 2301E must be above 2.7 Vac in case of a signal above 13 000 Hz.) With proper MPU, gear size and MPU-to-gear clearance, speed measurement should be capable down to 100 Hz. -
Page 34: Ma Output (Terminals 16-17)
48(+) and 49(–-). The PWM functionality is limited to use on skid applications. When PWM drivers are used, the 2301E must be located on the same power bus as the driven circuitry. The 2301E and the device being driven need to be co-located on the same engine. -
Page 35: Figure 2-3. Rs-232 Pin Assignments For Serial Communication Cable
Manual 26641 2301E Digital Control The communication ports must be connected with an approved jacketed serial communication cable. The connector must be secured to the 2301E to prevent contact with other circuits. RS-232 See Figure 2-3 for cable connection. 2301E Figure 2-3. -
Page 36: Figure 2-5. Rs-422 Terminator Locations
The RS-422 specifications state that a common/RS-422 ground wire is needed if there is no other ground path between units. The RS-422 on the 2301E is isolated, so there is no other path for common other than wiring to the pin. -
Page 37: Figure 2-6. Preferred Multipoint Wiring Using Shielded Twisted-Pair Cable With A Separate Signal Ground Wire
Manual 26641 2301E Digital Control Figure 2-6. Preferred Multipoint Wiring Using Shielded Twisted-pair Cable with a Separate Signal Ground Wire The SG (signal ground) connection is not required if signal ground is unavailable. Figure 2-7. Alternate Multipoint Wiring Using Shielded Twisted-pair Cable without... -
Page 38: Installation Check-Out Procedure
2301E Digital Control Manual 26641 Installation Check-out Procedure With the installation completed as described in this section, perform the following check-out procedure before beginning the start-up adjustments in Chapter 5. Visual Inspection 1. Check the linkage between the actuator and the prime mover for looseness or binding. -
Page 39: Chapter 3. Description Of Operation
This chapter provides an overview of the features and operation of the 2301E Load Sharing and Speed Control. The 2301E Load Sharing and Speed Control uses a 32 bit microprocessor for all control functions. All control adjustments are made with an external computer that communicates with the control via the RS-232 serial port. -
Page 40: Control Dynamics
2301E Digital Control Manual 26641 Figure 3-1. Speed Control System The digital control compares the numeric output of the speed sensor to the numeric number of the speed reference at the summing junction. If the speed is lower or higher than the reference, a response calculated by the PID (Proportional-Integral-Derivative control) is sent to the actuator driver calling for an increase or decrease in actuator current. -
Page 41: Minimum Fuel Function
Manual 26641 2301E Digital Control Constant dynamics refers to dynamics parameters that will remain constant as entered and do not vary with engine speed. Dynamics may be configured to vary with load by using the 5-Gain mapped dynamics. Constant dynamics are useful for fuel systems and processes that tend to be equally stable throughout the prime movers speed and load range. -
Page 42: Maximum Fuel Function
2301E Digital Control Manual 26641 Maximum Fuel Function The Maximum Fuel Function is a software-adjustable maximum fuel limit on the fuel demand. It is used to set a maximum position of the actuator. This is generally used to prevent engine overloading or other situations where the maximum fuel delivered to the engine should be limited. -
Page 43: Torque Limiter
Setting up the MAP limiter see service menu M**Fuel Limiters 2/2**. Speed/Load Reference and Ramps The 2301E control provides local control with discrete inputs for raising and lowering speed/load. For remote speed/load setting, the control provides a remote reference analog input. Input functions are enabled as follows: ... -
Page 44: Speed Reference And Ramp Functions
2301E Digital Control Manual 26641 contact is closed, and Remote Reference input is selected as Speed Reference setting or as Baseload reference setting. Speed Reference and Ramp Functions This section describes the operation of the speed reference and ramp functions and their relation to each other. -
Page 45: Figure 3-3. Remote Speed Reference
Manual 26641 2301E Digital Control will ramp to the Remote Reference input value at the remote reference increase or decrease rate settings. This may not be the desired mode of operation, so be sure to understand the implications of operating the control in this manner. -
Page 46: Speed Bias And Synchronizer Summing
2301E Digital Control Manual 26641 Speed Bias and Synchronizer Summing There are three functions that can change the speed reference from the set point that was determined in the above paragraphs: Synchronizer bias input Load bias input ... - Page 47 Manual 26641 2301E Digital Control When in baseload operation, the baseload reference determines the load on the generator without regard to other units connected to the same load. When the generator is carrying less load than the base load reference, the load bias is positive and the closed loop path increases the fuel to the engine.
-
Page 48: Droop Function
2301E Digital Control Manual 26641 If the load command discrete input contact is opened (unload) while the breaker (CB AUX) input contact is closed, the generator will soft unload from the present load level to the unload trip level. Once the generator load has reached the unload trip level or the reference has been there for 5 seconds (tunable), the Open Gen Breaker relay output will open for 1 second (tunable). -
Page 49: Figure 3-4. Paralleling System
Manual 26641 2301E Digital Control The 2301E has a droop tracking feature which allows the control to constantly monitor the system load. If the unit is in isochronous mode, and the unit is switched to the droop mode, the unit will maintain the current load level and also maintain the current engine speed (rpm). -
Page 50: Figure 3-5. Droop Mode
2301E Digital Control Manual 26641 The output of the load amplifier is adjusted by the load gain set point. By setting the load gain voltage on each unit to the same level at full load, proportional load sharing is achieved. Regardless of differences in generator set capacities in the system, each generator set is loaded to the same percentage of its capacity. -
Page 51: Figure 3-6. Isochronous Mode
Manual 26641 2301E Digital Control Droop can also be accomplished by using the actuator output current, or Fuel Demand to predict what the load is. This is called Actuator Position Droop. This feature is enabled in the “N** LOAD SETTINGS **” menu. An actuator output at no load fuel demand percentage, an actuator output at full load fuel demand and an actuator droop percentage number is required for proper droop operation. -
Page 52: Droop/Isochronous Load Sharing On An Isolated Bus
2301E Digital Control Manual 26641 Droop/Isochronous Load Sharing on an Isolated Bus Droop/isochronous load sharing combines the first two modes. All generator sets in the system except one are operated in the droop mode. The one unit not in droop is operated in the isochronous mode. It is known as the swing machine. In this mode, the droop machines will run at the frequency of the isochronous unit. -
Page 53: Isochronous Load Sharing On An Isolated Bus
Droop is dependent on load (this is the measured kW) or on the actuator position. As already mentioned, droop based on the measured load in kW by the PTs and CTs (terminals 1 to 9) of the 2301E is used. With actuator droop the speed reference is decreased when the actuator output increases. -
Page 54: Figure 3-9. Load Pulse / Rejection
2301E. These signals measure the actual kW Load coming into the control. The 2301E calculates the derivative (rate of change) of the load, or basically how fast the load is changing with respect to time. If full load is applied to a generator, there is a small amount of time where the generator sees the load, but the engine has not yet started to slow down. - Page 55 The Generator Breaker Open Pulse feature must utilize the PT and CT signals connected to the 2301E. These signals measure the actual kW Load coming into the control. When the Load is greater than a preset value and the generator breaker opens, the fuel demand will instantly go to zero fuel for an adjustable period of time.
-
Page 56: Chapter 4. Entering Control Set Points
Control Assistant software or the 2301E Toolkit Service Tool software. Because of the variety of installations, plus system and component tolerances, the 2301E control must be tuned and configured for each system to obtain optimum performance. This chapter contains information on how to enter control set points through the control's menu system using the Control Assistant and the 2301E Toolkit Service Tool software. -
Page 57: System Requirements
Acquiring Control Assistant and the SOS Servlink OPC Server Software The Control Assistant software is available from the Woodward, Inc. website at: http://www.woodward.com/software. Type in “Control Assistant” into the first search engine and click on Search. Click on Download to retrieve the Control Assistant software. -
Page 58: Figure 4-1. Null Modem Cable
The 2301E default baud rate is 115200, which can be entered in the SOS Servlink OPC Server window or it will automatically detect the correct baud rate. - Page 59 Follow these steps to communicate with the control: Step 1: Download the Control Assistant software from www.woodward.com/software. Go to Start \ Programs \ Woodward \ Control Assistant \ Control Assistant. This is what the window should look like: Step 2:...
- Page 60 2301E Digital Control Manual 26641 Step 3: An OPC connection will appear. Check the radio buttons as shown below and click on Connect. Woodward...
- Page 61 Manual 26641 2301E Digital Control Step 4: An OPC connection will be made. Step 5: When the communication is complete, the window should look as follows: Step 6: Minimize the SOS Servlink OPC Server program (don’t close it down). Woodward...
- Page 62 2301E Digital Control Manual 26641 Step 7: Click on the “ ” icon in the Main Window. This will open up a WinPanel window, with all of the Service and Configure menu header tabs: Step 8: The Configure and Service Menu Tabs are located across the top, as seen...
- Page 63 Manual 26641 2301E Digital Control Step 9: Scroll Arrows can be used to scroll left or right through the menu’s, as seen below: Step 10: This manual will explain each menu header and all of the variable tunables. Start by going through the Configure Menu headers then the Service Menu headers to complete the configuration of the control.
- Page 64 Manual 26641 Step 12: To upload the settings file from a 2301D to a 2301E, the same steps are applied. Not all of the settings from the 2301D are compatible with the 2301E and list will be generated with the settings that cannot be loaded. That list is shown below: These items need to be manually loaded.
- Page 65 Manual 26641 2301E Digital Control Step 13: The control needs to be re-booted using the “Reset” icon . This show the Reset Control pop up window: Read the warnings and put a check mark in the selected box. Select Save Values first, then Reset.
- Page 66 2301E Digital Control Manual 26641 Send Tunable List is selected to send the tunables from the currently active tunable view window to the Control. The tunables are sent using the device selected in the Communications dialog. The Communications dialog will automatically appear if the preferred transfer protocol, OPC, is not selected.
- Page 67 Manual 26641 2301E Digital Control Step 16: To download the saved file (.tc) back into a control, the engine must be shutdown. Click on the Lock I/O icon. . It will warn you that Locking the I/O will cause a control shutdown. Are you sure you want to continue. Select Yes to continue.
-
Page 68: 2301E Toolkit Service Tool
Manual 26641 2301E Toolkit Service Tool Another option to connect to the 2301E is the 2301E Service Tool – Toolkit. The computer and the 2301E ToolKit Service Tool software is not required, and not necessary, for normal operation of the prime mover. - Page 69 1. That you are using a Null Modem (Cross-over) type cable. 2. That the cable is connected to the correct port on your computer. 3. That the cable is connected to the RS-232 Port on the 2301E. 4. That the Baud Rate is selected for 115,200 BPS.
- Page 70 2301E Digital Control Manual 26641 Step 4: The left hand side of the each page of the ToolKit shows a “Display Menu”. It is duplicated on each page of the 2301E Service Tool and looks like this: Woodward...
- Page 71 Manual 26641 2301E Digital Control Step 5: The first page is the “START UP” and displays information showing various engine functions including: Engine Speed and Speed Reference, Fuel Demand, Start Fuel Limit Level, Discrete Input and Output status, Fuel Control Mode, Shutdown / Alarm status, Analog Inputs, and a High Peak Speed value.
- Page 72 It assures that when pressed, the values in the 2301E are permanently saved to memory. Failure to save the variables, if changed, could result in a loss of changed values and the 2301E will revert back to defaults!
- Page 73 Once the “Save Values” icon is pushed, you will get this message back: Step 8: To start the configuration of the 2301E, go to the “CONFIGURATION” page: For the first time set-up, these four pages are required to be setup first.
- Page 74 2301E Digital Control Manual 26641 Step 11: Once the Configuration is done, select the Service Menu’s button. Select each of the Service Menu’ and continue through each one until done. Note: The Service Menu variables can be adjusted while the engine is running! Please be careful and understand the settings before making an adjustment! Refer to the manual for an explanation of each variable.
- Page 75 Step 14: The TUNING page allows the user to adjust the PID (Proportional, Integral, and Derivative) dynamics to match the 2301E to the engine. This must be done for proper performance of the engine. A display of which Dynamics are in use is displayed. This assures the user that...
- Page 76 After changing any variables using the Service Tool, press the Save Values icon: This will write the information changed to the memory. If this is not done and power is lost to the 2301E, the unit will revert back to the default values. Woodward...
- Page 77 Step 18: First Time Configuration Wizard: A new feature in revision C of the 2301E Toolkit Service Tool is the “First Time Configuration Wizard” and the “Final Configuration Settings” buttons located on the Main Screen. The “First Time Configuration Wizard”, when pushed, will step a new user through the configuration of the 2301E with explanations of what each item does.
- Page 78 2301E Digital Control Manual 26641 The Wizard will any or most of the tunable variables associated with setting the 2301E up for the first time. This screen shows the particular sections of the Wizard: Woodward...
- Page 79 Manual 26641 2301E Digital Control At the end of the Wizard, make sure to commit all of the changes: There are a few items that are not setup in the Configuration Wizard. These are listed below: 1. Serial Communications 2. Load Pulse / Load Rejection / Generator Breaker Pulse 3.
- Page 80 2301E Digital Control Manual 26641 This screen shows an example of the Final Settings: Woodward...
-
Page 81: Entering The Configure Mode
Manual 26641 2301E Digital Control Entering the Configure Mode The Configure Mode can be accessed from either Control Assistant or the 2301E Service Tool. The engine must be shut down before performing this operation, as the inputs and outputs of the control all go to zero. - Page 82 08 OVERSPEED SETTING (RPM) dflt = 1035.00 (0.00–4000) Set this for the maximum speed that the engine will see, typically 115% of rated speed. The 2301E initiates a shutdown when the engine speed reaches this level. 09 RST TO RATED AT CB CLOSE...
- Page 83 Manual 26641 2301E Digital Control B**ENG—GEN CNTRL FUNCTIONS** 01 ENTER NUM OF GEAR TEETH dflt = 60 (8, 500) This is the number of teeth or holes of the gear or flywheel that the speed sensor is on. If the gear is on the cam shaft or other drive not turning at the prime mover speed, the number of teeth needs to be adjusted to compensate.
- Page 84 2301E Digital Control Manual 26641 03 ENTER NUMB OF CYLINDERS dflt = 8 (1.0–24.0) This is the number of cylinders the engine has, and is also the number of speed samples the control will take during each engine revolution. If engine is greater than 24, set to half the number of cylinders.
- Page 85 D**DISCRETE OUT OPTIONS** The 2301E has four discrete output driver channels. Terminals 44, 45, 46, and 47 are configurable and can be programmed to perform one of the following functions. Any of the four relays can also be programmed to function as a level switch.
- Page 86 9 = LEVEL SWITCH 10 = CPU FAILURE 11 = FORCE OUTPUTS 12= IN REMOTE SPEED CONTROL Parameters 11 thru 14 are only applicable for the 2301E with Modbus (see Chapter 8, Communications): 12 = MODBUS RELAY #1 13 = MODBUS RELAY #2...
- Page 87 Manual 26641 2301E Digital Control E**ANALOG INPUT OPTIONS** 01 CONFIGURATION ERROR ? (monitor) If this value is TRUE, then both analog inputs are configured for the same function. You must configure both analog inputs different from each other (other than a 1, Not Used).
- Page 88 Forward-acting actuators require current increase to increase fuel. Reverse-acting actuators require current decrease to increase fuel (reverse- acting actuators should always incorporate a mechanical ballhead backup governor, such as the Woodward EGB). 04 SD ACT ON INTERNAL SD dflt = TRUE (FALSE, TRUE) Set to TRUE will cause the fuel demand to go to 0% on any internal shutdown (Forward acting or reverse acting).
- Page 89 Manual 26641 2301E Digital Control G**DISCRETE IN ACTION** 01 SEL DI “A” ACTION dflt = FALSE (FALSE, TRUE) Selects the logic function of the discrete input “A”, terminal 34. When this input is selected to FALSE, the input will be OFF or De-energized when the contact is open and ON or Energized when the contact is closed.
-
Page 90: Exiting The Configure Mode
2301E Digital Control Manual 26641 Exiting the Configure Mode To exit out of the Configure Mode, click on the “Reset” icon . Make sure to save the values. The control will then reboot, which takes about 20-30 seconds Service Menu Descriptions The service menus are meant to monitor and tune the engine, while the engine is running. - Page 91 Manual 26641 2301E Digital Control 13 ANALOG INPUT #1 = (monitor) Displays the value of the analog input #1 in milliamps or volts. 14 ANALOG INPUT #2 = (monitor) Displays the value of the analog input #2 in milliamps or volts.
- Page 92 2301E Digital Control Manual 26641 03 OVERSPEED (monitor) When TRUE indicates an engine overspeed. 04 MPU FAIL (monitor) When TRUE indicates an MPU failure. 05 ANALOG INPUT #1 FAIL (monitor) When TRUE indicates a signal input failure. 06 ANALOG INPUT #2 FAIL (monitor) When TRUE indicates a signal input failure.
- Page 93 Manual 26641 2301E Digital Control D**ALARMS** 01 ALARM STATUS (monitor) The status shows TRUE when an alarm is active. 02 FIRST ALARM (monitor) This will display a message of possible alarm conditions: NO ALARMS ANALOG INPUT #1 FAIL ANALOG INPUT #2 FAIL...
- Page 94 2301E Digital Control Manual 26641 06 LOWER SPEED/LOAD F (monitor) The status of discrete input F. 07 LOAD GENERATOR G (monitor) The status of discrete input G. 08 SELECT BASE LOAD H (monitor) The status of discrete input H. 09 DISCRETE OUTPUT #1 (monitor) The status of discrete output DO-1.
- Page 95 Manual 26641 2301E Digital Control 09 ACTUATOR CURRENT (mA) (monitor) The calculated actuator output current in milliamps. This calculation is based on the percent fuel demand and the actuator type/range selected. External wiring may affect the accuracy of the actual current.
- Page 96 2301E Digital Control Manual 26641 07 DECEL RAMP TIME (SEC) dflt = 20.00 (1.00–300.00) The time required for the control to ramp the engine speed from rated speed to idle speed. The ramp is started whenever the Idle/Rated contact is opened.
-
Page 97: Figure 4-2. Control Gain As A Function Of Speed Error
Manual 26641 2301E Digital Control 02 RATED PROP GAIN 1 dflt = 2.00 (0.001–100.00) Determines how fast the control responds to an error in engine speed from the speed-reference setting. The gain is set to provide stable control of the engine at rated speed and light or unloaded conditions. -
Page 98: Figure 4-3. Control Gain As A Function Of Fuel Demand (Load)
2301E Digital Control Manual 26641 07 GAIN SLOPE dflt = 0.00 (-50.00–50.00) Sets the percent output above which the Gain Slope becomes effective. It should usually be set just above the minimum load output. (See Figure 4-3.) 08 GAIN BREAKPOINT dflt = 20.0 (0.00–100.00) -
Page 99: Figure 4-4. Speed Filter
Manual 26641 2301E Digital Control As the filter frequency is reduced, steady state stability improves but transient performance may worsen. As the filter frequency is increased, steady state stability worsens but transient performance may improve. If the calculated firing frequency is greater that 15.9 Hz, then disable the filter by setting the filter cutoff frequency at or above 15.9 Hz. -
Page 100: Figure 4-5. Typical Transient Response Curves
2301E Digital Control Manual 26641 Figure 4-5. Typical Transient Response Curves Woodward... - Page 101 Manual 26641 2301E Digital Control I**Dynamics #2** The Dynamics 2 control parameters are adjusted the same as Dynamics 1 described above. To enable the use of two sets of dynamics, it is necessary to set Enable 2nd DYNAMICS w/CB below to TRUE. These parameters are in...
- Page 102 2301E Digital Control Manual 26641 J**Dynamics #1 5 Pt Gain** This menu and control function is enabled when Configure Menu: A**SPEED CONTROL FUNCTIONS** parameter 07 ENABLE 5 SLOPE GAIN MAP is TRUE and provides a 5-point curve as a function of prime mover load for the variable GAIN set point.
- Page 103 Manual 26641 2301E Digital Control 14 GAIN RATIO 1 dflt = 1.00 (1.00–10.00) The ratio of the gain setting at steady state to the gain setting during transient conditions. The gain ratio operates in conjunction with the Window Width and gain adjustments by multiplying the gain set point by the gain ratio when the speed error is greater than the window width.
- Page 104 2301E Digital Control Manual 26641 K**Dynamics #2 5 Pt Gain** The Dynamics 2 control parameters are adjusted the same as Dynamics 1 described above. These parameters are in control only when the CB Aux contact input is closed, or if a discrete input is configured for Select 2 Dynamics and this input is closed.
-
Page 105: Figure 4-6. Non-Linear Valve Power Curve
Manual 26641 2301E Digital Control 20 PID DYNAMICS IN USE (monitor) This value will indicate which set of dynamics are in use by the controller. The choices that are shown here are: PID USING DYNAMICS 1 PID USING DYNAMICS 2 ... -
Page 106: Figure 4-8. Linearized Gain Plot
2301E Digital Control Manual 26641 Note that in both charts the valve position falls on a curve. The menu does not permit the construction of a curve. However, with four slope segments (5 breakpoints) available, a rough approximation of the curve can be created (see Figure 4-8). - Page 107 Manual 26641 2301E Digital Control Load the engine with as many load points as are practical. At each load point, Gain A may need to be varied to maintain engine stability. Do not change Reset or Actuator Compensation after the first setting in step b.
-
Page 108: Figure 4-9. Start Limit Function
2301E Digital Control Manual 26641 5. Set the Gain B Breakpoint at the point slightly above the first inflection point in the load plot. Gain B should now be adjusted to obtain good control at the inflection point B. Note: you may already have obtained the correct value in Step 1c. -
Page 109: Figure 4-10. Soft Start Fuel Limit Function
Manual 26641 2301E Digital Control 03 SOFT START FUEL LIMIT ON dflt = FALSE (FALSE, TRUE) When set TRUE enables a ramp to the start fuel limit. When the engine is started and MPU is sensed, the fuel demand ramps from zero at the “Start Ramp Rate (%FD/S), until the start fuel limit is reached. - Page 110 2301E Digital Control Manual 26641 10 SPEED 1 TORQUE LIMIT dflt = 800.00 (0.00–4000.00) This sets the speed breakpoint 1 of the TLC. It should be adjusted to the rpm which represents the torque limit breakpoint. 11 TORQUE LIMIT BREAKPOINT 1 dflt = 100.00 (0.00–100.00)
-
Page 111: Figure 4-11. Torque Limiter Function
Manual 26641 2301E Digital Control TORQUE LIMITER FUNCTION TORQUE LIMIT SPEED TORQUE LIMIT BREAK % FUEL POINT DEMAND TORQUE LIMIT SPEED SPEED SPEED BRKPOINT SPEED TORQUE TORQUE TORQUE LIMIT LIMIT LIMIT SPEED Figure 4-11. Torque Limiter Function Figure 4-12. Dual Start Fuel Limit with Ramp... - Page 112 2301E Digital Control Manual 26641 02 PRESSURE X1 dflt = 6.000 (–1000.00–1000.00) This sets the pressure at the first breakpoint. The limit on fuel demand below this point is extrapolated from this point and the pressure X2 below. 03 MAP LIMIT Y1 dflt = 100.000 (0.00–100.00)
-
Page 113: Figure 4-13. Map Limiter Function
Manual 26641 2301E Digital Control MAP LIMITER FUNCTION MAP LIMIT Y3 MAP LIMIT Y4 MAP LIMIT Y5 % FUEL MAP LIMIT Y2 DEMAND MAP LIMIT Y1 MANIFOLD AIR PRESSURE Figure 4-13. MAP Limiter Function N**LOAD SETTINGS** The Load Setting section is the set-up of the generator load control parameters. - Page 114 2301E Digital Control Manual 26641 06 ACT OUT AT RATED NO LOAD dflt = 20.00 (0.00–100.00) The minimum setting where actuator position droop is calculated from. Adjust this setting at the same reading of the Fuel Demand % when engine is running at rated rpm but with no load.
- Page 115 Manual 26641 2301E Digital Control O**ACTUATOR BUMP SETUP** 01 BUMP ENABLED dflt = FALSE (TRUE, FALSE) Set to TRUE to enable the actuator bump for 60 minutes. Set to FALSE to disable this function. When this prompt is set FALSE, the Actuator Bump tunable in the Dynamics sections described above is disabled.
- Page 116 2301E Digital Control Manual 26641 08 BSLOAD W/RMT IN@MIN (KW) dflt = 20.000 (0.00–30000.00) Sets the Base Load reference value when the remote reference input is at the low value for the selected range. This value may be less than or greater than the value entered when the input is at maximum.
- Page 117 Manual 26641 2301E Digital Control Q**DISCRETE OUT SETTINGS *8 The 2301E has four discrete output driver channels. Terminals 41, 42, 43 and 44 are configurable and can be programmed to perform one of the following functions. And any of the four relays can also be programmed to function as a level switch.
- Page 118 2301E Digital Control Manual 26641 10 RELAY 2 OFF LEVEL= dflt = 0.000 (-32000.00, 32000.00) Enter the level switch OFF setting in engineering units. (Must be less than the ‘Relay On Level’). 11 RELAY 3 SELECTED AS (monitor) Displays the function selected for terminal 43. This relay is selected in the...
- Page 119 Manual 26641 2301E Digital Control 22 RAMP @ MIN,CB DELAY(SEC) (monitor) The time delay the load/unload ramp is at minimum value and the generator KW has not reached the unload KW trip level. 23 INHIBIT MIN. CB DELAY *FALSE (TRUE, FALSE) Set this value to TRUE to will allow **22 RAMP @ MIN.
- Page 120 Displays the status of the actuator output. T**KW INPUT CALIBRATION** This section calibrates the 2301E internal load sensor to correspond its output to measured kilowatts. This calibration allows the control to calculate the 100% load gain voltage, droop %, and load sharing ratio. For proper calibration the generator load should be as close as possible to required generator voltage and unity power factor.
- Page 121 Manual 26641 2301E Digital Control 02 ENTER DERATED LOAD (KW) dflt = 400.000 (10.00–3000.0) Adjust this value for the derated load of the generator. 03 KW INPUT CALIBRATN ZERO dflt = 0.000 (-20.00–20.00) Adjust until the KW reading below is zero when the generator output is zero.
- Page 122 2301E Digital Control Manual 26641 05 AnIN 2, Gain dflt = 1.000 (0.00–10.00) Sets the gain for analog input 2. 06 AnIN 2, mA / Volt (monitor) Shows the actual input value for input 2. 07 Actuator, Offset dflt = 0.000 (–100.00–100.00) Sets the offset for the actuator output.
- Page 123 Manual 26641 2301E Digital Control 06 LOAD PULSE DERIV %/S dflt = -100.00 (-1000.00–5000.00) This value represents the level of change in generator load at which the Load Pulse logic is activated for large load acceptances. When this level is reached, the load step value used with the value “07 LS PULSE MULT ACT %/S”...
- Page 124 2301E Digital Control Manual 26641 03 APPLICATION NAME (monitor) The name of the application. Z**COMM PORT (MODBUS)** This menu is used to setup the RS-422 serial port for use with Modbus. 01 ENABLE MODBUS CONTROL dflt = FALSE (TRUE, FALSE) Set this value to TRUE to enable the Modbus Control command.
- Page 125 Manual 26641 2301E Digital Control 10 PORT 1 PARITY IS SET FOR: (monitor) Shows the parity setting. 11 PORT 2 SELECT (MODBUS OR DATALOG) dflt = 1 (1–2) Sets weather Port 2 is selected for Modbus output or Datalog output.
-
Page 126: Saving The Tunable Values
2301E Digital Control Manual 26641 24 REMOTE SPEED DIVIDE dflt = FALSE (TRUE, FALSE) Sets a switch so that the Modbus Address Analog Write 4:0002 can be multiplied on the HMI end for better resolution. If this value is TRUE, send a 9000 for an engine speed of 900. -
Page 127: Chapter 5. Initial Control Settings
Manual 26641 2301E Digital Control Chapter 5. Initial Control Settings Initial Prestart Settings Read this entire procedure before starting the prime mover. 1. The Toolkit Service Tool contains a First Time Configuration Wizard which will step a user through all of the initial settings. This is explained in Appendix “F”. -
Page 128: Adjust For Stable Operation
2301E Digital Control Manual 26641 3. Apply input power to the control. 4. Preset rated speed (optional). When using a signal generator to verify the proper configuration setting: set the signal generator for the frequency of the speed sensor at rated speed, and connect it to terminals 25 and 26. -
Page 129: Dynamic Adjustment
Manual 26641 2301E Digital Control Dynamic Adjustment The object of the PROPORTIONAL GAIN, RESET, and ACTUATOR COMPENSATION adjustment is to obtain the optimum, or desired, stable prime mover speed response. Connect a dc analog voltmeter to terminals 13(+) and 14(–) to monitor the actuator voltage. -
Page 130: Start Fuel Limit Adjustment
2301E Digital Control Manual 26641 Start Fuel Limit Adjustment With the prime mover operating at rated speed and no load, note the Fuel Demand % displayed on the HMI. Set the Start Fuel Level 10% higher than the fuel demand noted above. Shut down the prime mover. Start the prime mover and observe the start time, overshoot of speed setting, and smoke emissions obtained. -
Page 131: Phase Correction Procedure
Manual 26641 2301E Digital Control 4. If the “Load Signal Out” Reading is within 10% of the above calculation, the PT/CT phasing is correct. If the phasing is incorrect, proceed to the Phase Correction Procedure. If the phasing appears correct, skip the Phase Correction Procedure and go to the Load Calibration Adjustment procedure. -
Page 132: Figure 5-1. Temporary Wiring For Transformer Phase Correction
(READ KW) Load Sensor calibration and monitoring. Since the kW calibration cannot be completed until the phasing is correct, the value shown is for reference only. The Load Sensor of the 2301E will only read a small negative value. 1. Shut down the prime mover. - Page 133 Manual 26641 2301E Digital Control 5. Connect the two wires from the phase A phase CT to the phase A input terminals 4 and 5. 6. Start the prime mover, apply full load, and monitor the load sensor output. Start a list and record this value.
-
Page 134: Load Calibration Adjustment
Load Calibration Adjustment For this procedure, the generator must be running isochronously and not paralleled. Start the prime mover and apply full load. With the Control Assistant or 2301E Toolkit Service Tool at T**KW INPUT CALIBRATION**, observe 05 GENOUTPUT (KW). If this reading does not match external instrumentation, adjust calibration gain and offset until Control Assistant Software or the 2301E Service Tool value matches metering. -
Page 135: Chapter 6. Alternate Dynamic Adjustments
Manual 26641 2301E Digital Control Chapter 6. Alternate Dynamic Adjustments Introduction This procedure, based on the Zeigler-Nichols Method, is an empirical method to find first-pass settings for gain, reset, and actuator compensation in a PID controller. First, the controller is set up to act as a proportional-only controller by removing the effect of the reset and actuator compensation terms. -
Page 136: Figure 6-1. Trend Tool Trace Example 1
2301E Digital Control Manual 26641 6. Disable the Reset (integral) and Compensation (derivative) dynamic actions by setting both to 0.01. 7. Disable Window Width by setting the Gain Ratio at 1.0 and the Window Width at 60 rpm. 8. Disable Gain Slope by setting it at 0.0. -
Page 137: Figure 6-2. Trend Tool Trace Example 2
Manual 26641 2301E Digital Control 14. Enter the calculated Reset, Compensation, and Gain setting into the control. Save these settings in the control. The assumption is these settings will produce good performance as shown in Figure 5-2. If this is not the case, recheck all readings and calculations or repeat this entire procedure. -
Page 138: Figure 6-4. Trend Tool Trace Example 4
2301E Digital Control Manual 26641 Gain, Window Width, and Gain Ratio Adjustments 19. When extra load transient response improvement is needed, adjust the Gain and/or Gain Ratio and Window Width. The following traces show examples of the process used to obtain optimum transient response settings. The step that increases Gain may be skipped in favor of Window Width and Gain Ratio adjustments only. - Page 139 Manual 26641 2301E Digital Control 22. Figure 5-6 shows results of ultimately increasing Gain Ratio from 1.0 to 3.0 and decreasing Window Width from 60 rpm to 5 rpm. Overall peak rpm has been reduced approximately 30 rpm. The fuel demand is steeper with little overshoot and roll-off.
-
Page 140: Chapter 7. Troubleshooting
2301E Digital Control Manual 26641 Chapter 7. Troubleshooting Introduction The following troubleshooting guide is an aid in isolating trouble to the control box, actuator, plant wiring, or elsewhere. Troubleshooting beyond this level is recommended ONLY when a complete facility for control testing is available. -
Page 141: Control Test And Calibration
2301E Digital Control Control Test and Calibration General Do the following checks on the 2301E control. Then verify the functioning of set points and adjustments. 1. Connect a computer to the communication port. Start the Control Assistant Software or the 2301E Toolkit Service Tool in accordance with the instructions in Chapter 4. -
Page 142: Troubleshooting Charts
(respond). Make resistance checks at the actuator. Coil resistance on Woodward actuators is approximately 35 ohms. (Read with leads at terminals 13 and 14 disconnected.) Start fuel limit set too low. - Page 143 Check operation of overspeed protection device(s). Prime mover overspeeds Start Fuel Limit is inactive. Power up 2301E before cranking engine. or causes excessive 2301E control. If the control does not cut back the actuator smoke only on starts.
- Page 144 1.0 Vrms. If magnetic pickup should fail and the override failed speed signal circuit is disabled, the 2301E control will call for maximum fuel. 2301E control. Control the prime mover manually at rated speed. If the Engine Speed reading in the...
- Page 145 If the problem cannot be resolved by these checks, it will be necessary to remove the 2301E control from the switchgear. Temporarily mount it next to the prime mover and connect only a battery, magnetic pickup, and actuator to the control (use a separate battery placed next to the prime mover).
- Page 146 2301E Digital Control Manual 26641 Symptom Cause Solution Prime mover will not Prime mover may not be receiving Check actuator linkage to fuel controlling stabilize at rated no load fuel as called for by the actuator mechanism for any lost motion, binding, or speed.
-
Page 147: Chapter 8. Communications
By simply connecting a monitoring device, configured to communicate through Modbus, and to the 2301E’s defaulted protocol settings (parity, stop bits, etc.), this device can be used to monitor all the 2301E’s controlling parameters, modes, etc., without affecting control. To use the 2301E port, it must be configured properly. -
Page 148: Modbus Communication Mode
The protocol and Modbus device number are set in the Program Mode and can be adjusted in Service Mode. The 2301E control is programmed to function as a slave unit only. As a slave unit, the 2301E will only respond to a transaction request by a master device. -
Page 149: Modbus Function Codes
This time-out is defaulted to 5 seconds and only applies to units using both monitor and control (adjustable in Service Mode). Port Adjustments Before the 2301E will communicate with the master device, the communication parameters must be verified. These values are set in Service Mode. Parameter... -
Page 150: 2301E Control Modbus Addresses
All read/write registers are interpreted by the 2301E as signed 16 bit integer values. Since Modbus can only handle integers, values that require a decimal point in the Modbus Master Device are multiplied by a scaling constant before being sent by the 2301E. -
Page 151: Modbus Scale Factors
Input registers are analog values that are readable from, but not writable to, the 2301E. Turbine speed is an example of an analog read value. The values of the input registers are stored internally to the control as floating point numbers representing engineering units (kPa or rpm). -
Page 152: Start Command Through Modbus
2301E Digital Control Manual 26641 actuator current to zero and activates the shutdown relay. The Controlled Shutdown function is used to stop the engine in a controlled manner, as opposed to an Emergency Trip. When a STOP command (controlled shutdown) is issued the shutdown relay is not activated. -
Page 153: Chapter 9. Product Support And Service Options
A current list of Woodward Business Partners is available at www.woodward.com/directory. Product Service Options Depending on the type of product, the following options for servicing Woodward products may be available through your local Full-Service Distributor or the OEM or Packager of the equipment system. -
Page 154: Returning Equipment For Repair
To prevent damage to electronic components caused by improper handling, read and observe the precautions in Woodward manual 82715, Guide for Handling and Protection of Electronic Controls, Printed Circuit Boards, and Modules. -
Page 155: Engineering Services
Field Service engineering on-site support is available, depending on the product and location, from one of our Full-Service Distributors. The field engineers are experienced both on Woodward products as well as on much of the non- Woodward equipment with which our products interface. -
Page 156: Technical Assistance
Manual 26641 Technical Assistance If you need to contact technical assistance, you will need to provide the following information. Please write it down here before contacting the Engine OEM, the Packager, a Woodward Business Partner, or the Woodward factory: General... -
Page 157: Appendix A. Service/Configuration Chart
Manual 26641 2301E Digital Control Appendix A. Service/Configuration Chart Configure Menus PROGRAMMED DEFAULT TUNABLE RANGE CONFIGURE MENU VALUE VALUE MIN. MAX. A**SPEED CONTROL FUNCTIONS** 01 ENTER RATED SPEED (60 HZ) (RPM) 4000 02 ENTER RATED SPEED (50 HZ) (RPM) 4000... -
Page 158: Service Menus
2301E Digital Control Manual 26641 TUNABLE RANGE PROGRAMMED DEFAULT CONFIGURE MENU VALUE VALUE MIN. MAX. E**ANALOG INPUT OPTIONS** 01 CONFIGURATION ERROR ? Monitor 02 SEL AI #1 FUNCTION (1-6) 03 DISPLAY AI #1 FUNCTION Monitor 04 SEL AI #1 TYPE (1-3) - Page 159 Manual 26641 2301E Digital Control TUNABLE RANGE PROGRAMMED DEFAULT SERVICE MENU VALUE VALUE MIN. MAX. 03 LOAD SHARING BIAS (RPM)= Monitor 04 LOAD SIGNAL OUT (Vdc)= Monitor 05 SYSTEM LOAD 0-3 (Vdc) = Monitor 06 LOAD SHARING BIAS (%) =...
- Page 160 2301E Digital Control Manual 26641 TUNABLE RANGE PROGRAMMED DEFAULT SERVICE MENU VALUE VALUE MIN. MAX. G**SPEED SETTINGS** 01 START SPEED (RPM) 400.000 1.00 2100.00 02 RAISE SPEED LIMIT (RPM) 1000.000 0.00 4000.00 03 LOWER SPEED LIMIT (RPM) 800.000 0.00 4000.00 04 IDLE SPEED (60 HZ) (RPM) 600.000...
- Page 161 Manual 26641 2301E Digital Control TUNABLE RANGE PROGRAMMED DEFAULT SERVICE MENU VALUE VALUE MIN. MAX. K**DYNAMICS #2, 5 PT GAIN** 01 ENABLE DYNAMICS 2 w/CB FALSE TRUE FALSE 02 DELAY DYN 2 ENABLE (SEC) 0.000 0.00 20.00 03 DELAY DYN 1 ENABLE (SEC) 0.000...
- Page 162 2301E Digital Control Manual 26641 TUNABLE RANGE PROGRAMMED DEFAULT SERVICE MENU VALUE VALUE MIN. MAX. N**LOAD SETTINGS** 01 LOAD DROOP PERCENT 5.000 0.00 12.00 02 LOAD LEVEL VOLTAGE 6.000 0.10 9.00 03 LOAD SHARE GAIN 1.000 0.01 10.00 04 ENABLE ACT POS DROOP...
- Page 163 Manual 26641 2301E Digital Control TUNABLE RANGE PROGRAMMED DEFAULT SERVICE MENU VALUE VALUE MIN. MAX. 13 RELAY 3 LEVEL SELECT FOR Monitor 14 RELAY 3 ON LEVEL = 0.000 -32000.00 32000.00 15 RELAY 3 OFF LEVEL = 0.000 -32000.00 32000.00...
- Page 164 2301E Digital Control Manual 26641 TUNABLE RANGE PROGRAMMED DEFAULT SERVICE MENU VALUE VALUE MIN. MAX. 09 Actuator output Monitor 10 Anout 4–20 mA, Offset 0.000 -100.00 100.00 11 Anout 4–20 mA, Gain 1.000 -100.00 100.00 12 Anout 4–20 mA, output Monitor W**LOAD PULSE / REJ –...
-
Page 165: Pid Examples
Manual 26641 2301E Digital Control Appendix B. PID Examples This is a list of some engines that this control was installed on, and the associated PID (Gain, Reset, and Actuator Compensation) values that were tuned in the control. These values are given for reference only for initial start-up. An improperly calibrated control could cause an overspeed or other damage to the prime mover. -
Page 166: Pid Conversion Charts
2301E Digital Control Manual 26641 PID Conversion Charts Listed below are conversion charts that approximate the Gain, Reset and Actuator Compensation potentiometer settings on a 2301A and convert them to the equivalent Prop. Gain, Reset, and Actuator Compensation values in the 2301E. -
Page 167: Figure B-3. Actuator Compensation Potentiometer Conversion Chart
Manual 26641 2301E Digital Control 2301A to 2301D Act. Comp. Conversion 2301A Act. Comp. Potentiometer Position (0=CCW, 10 = CW) Figure B-3. Actuator Compensation Potentiometer Conversion Chart Woodward... -
Page 168: Appendix C. Modbus Communication List
2301E Digital Control Manual 26641 Appendix C. Modbus Communication List This Modbus Communication List is applicable for software number 5418-6350. Boolean Writes Addr Description 0:0001 Reset Control 0:0002 0:0003 Stop 0:0004 Failed Speed Override ON 0:0005 Failed Speed Override OFF... - Page 169 Manual 26641 2301E Digital Control Boolean Reads Addr Description 1:0001 Shutdown Status 1:0002 Alarm Status 1:0003 Overspeed 1:0004 MPU Failure 1:0005 Analog input #1 failure (if configured) 1:0006 Analog input #2 failure (if configured) 1:0007 Test mode active 1:0008 External Shutdown...
- Page 170 2301E Digital Control Manual 26641 Analog Reads Addr Description 3:0001 Shutdown first out Indication 3:0002 Alarm first out Indication 3:0003 Engine Speed (RPM) 3:0004 Speed Reference (RPM) 3:0005 Engine load (kW) 3:0006 Actuator Output (%) 3:0007 Speed PID Output (%)
-
Page 171: Appendix D. Software Revision
The software revision of your control can be checked by connecting to the control, starting the Control Assistant or 2301E Toolkit software and opening Service Menu “Y”. - Page 172 2301E Digital Control Manual 26641 Application Software - 5418-6350 D—Released Nov, 2014 Software Modifications: 1. Changed Gain Breakpoint #2 to the same variable as #1. 2. Modified the 50 Hz./ 60 Hz function so that a Discrete Input does not have to be used when used with 50 Hz.
- Page 173 Manual 26641 2301E Digital Control ToolKit Modifications: On the Main Screen and Generator Screen, deleted the 50/60 hertz readout. This information is already displayed on the “Display Menu” on every page. On the “Display Menu, the analog input now reads either Vdc or mA, depending on the input selection.
-
Page 174: Appendix E. Printing Out A Datalog
Appendix E. Printing Out a Datalog The Control Assistant software can be used to collect a datalog from the 2301E. The datalog starts collecting information as soon as a shutdown occurs and will collect 8.0 seconds of information. The information gathered is: ... -
Page 175: Appendix F. Quick Engine Start Guide
2301E Digital Control Appendix F. Quick Engine Start Guide This quick start guide will allow the user to quickly configure the 2301E with minimal settings for simple speed control. It uses the 2301E Toolkit Service Tool to configure the control. -
Page 176: Appendix G. Loading The Settings File From A 2301D To A 2301E
This appendix will step you through the process of loading a settings file from a 2301D and load it into a 2301E. NOTE: This works only for part number 8273-501. All other 2301D part numbers must be entered directly into the 2301E! A saved .cfg from a 2301D cannot be loaded directly into a 2301E. - Page 177 Manual 26641 2301E Digital Control If you do not go into Control Assistant and manually enter the following items, your engine will not run at the right speed! 13. To manually enter the above values, with the Control Assistant software running, select the icon, Generate Quick Service / Configure Sheets.
-
Page 178: Appendix H. Connecting A 2301E To Control Acat Adem Control In The Direct Rack Mode
Connecting a 2301E to Control a CAT ADEM Control in the Direct Rack Mode This appendix will step you through the process of using the 2301E to control a CAT ADEM control in the Direct Rack Mode. This allows the 2301E to take... -
Page 179: 2301E Control Specifications
Manual 26641 2301E Digital Control Appendix I. 2301E Control Specifications Woodward Part Numbers: 8273-1011 2301E Load Sharing and Speed Control, 24 Vdc input, Ordinary Locations 8273-1012 2301E Load Sharing and Speed Control, 24 Vdc input, Hazardous Locations 8928-5014 Control Assistant... -
Page 180: Revision History
Updated Regulatory Compliance section Revised Declaration of Conformity Changes in Revision J— Added Appendix H. Connecting a 2301E to Control a CAT ADEM Control in the Direct Rack Mode Other updates/corrections as marked. Changes in Revision F—... -
Page 181: Declarations
Manual 26641 2301E Digital Control Declarations Woodward... - Page 182 Email and Website—www.woodward.com Woodward has company-owned plants, subsidiaries, and branches, as well as authorized distributors and other authorized service and sales facilities throughout the world. Complete address / phone / fax / email information for all locations is available on our website.
Need help?
Do you have a question about the 2301E and is the answer not in the manual?
Questions and answers