
Related Manuals for MasterCraft 055-6751-6


Summary of Contents for MasterCraft 055-6751-6
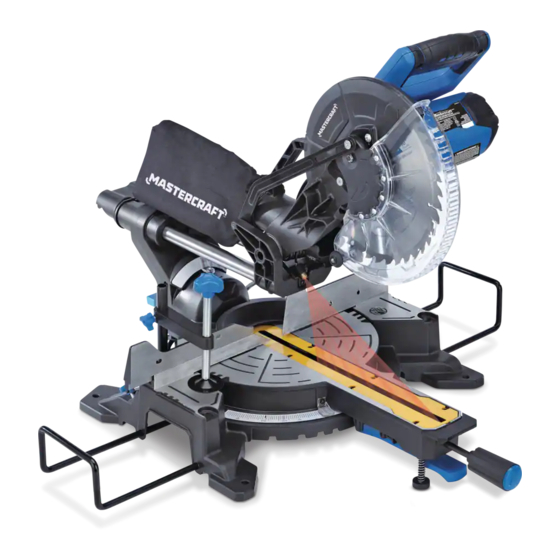
- Page 1 055-6751-6 SLIDING COMPOUND MITRE SAW WITH LASER LINE INSTRUCTION IMPORTANT: MANUAL Please read this manual carefully before using this mitre saw and save it for reference...
- Page 2 TABLE OF CONTENTS SPECIFICATIONS SAFETY GUIDELINES KEY PARTS DIAGRAM ASSEMbLY AND ADJUSTMENTS OPERATING INSTRUCTIONS MAINTENANCE TROUbLE ShOOTING ExPLODED VIEW PARTS LIST WARRANTY NOTE: If any parts are missing or damaged, or if you have any questions, please call our toll-free helpline at 1-800-689-9928.
- Page 3 055-6751-6 | contact us 1-800-689-9928 SPECIFICATIONS SAFETY GUIDELINES Motor 120V AC, 60 hz, 15A • Keep guards in place and in working order. Speed 5000 RPM (no load) • Remove adjusting keys and wrenches. Form habit of checking to see that keys and adjusting blade 10”...
- Page 4 055-6751-6 | contact us 1-800-689-9928 • Never stand on tool. Serious injury could occur if something unintentionally comes into contact with • Before plugging in the tool, BE SURE that the outlet voltage supplied is within the voltage marked on the tool’s data plate.
- Page 5 055-6751-6 | contact us 1-800-689-9928 SAFETY PRECAUTIONS FOR LASERS • Be sure that the power is disconnected before changing the blade or servicing the saw. Do not expose to rain or use in a damp location. • The mitre saw has a built-in laser light. The laser is class IIIa. These lasers do not normally present an optical hazard.
- Page 6 055-6751-6 | contact us 1-800-689-9928 • Only use the correct blades. Use the correct blade size, style and cutting speed for the material and • Inspect the tool cords periodically and, if damaged, have them repaired by a qualified person.
- Page 7 055-6751-6 | contact us 1-800-689-9928 • Set: The distance that the saw blade tooth is bent (or set) outward from the face of the blade. Description Description Switch handle Mitre handle Throat plate: A plate inserted in the mitre saw table that allows for blade clearance.
- Page 8 055-6751-6 | contact us 1-800-689-9928 REMOVING AND INSTALLING THE BLADE Description Description Dust bag Bevel lock knob Removing blade (Fig. 1 to 4) Blade Bevel scale • Unplug the tool from the power source. Motor Table Spindle lock Mitre scale •...
- Page 9 055-6751-6 | contact us 1-800-689-9928 INSTALLING THE DUST BAG • Place the out flange against the blade and on the (Fig. 5) arbor. Thread the blade bolt onto the arbor in a • Squeeze the metal collar wings on the dust bag.
- Page 10 055-6751-6 | contact us 1-800-689-9928 the bevel lock knob, put a 4 mm hex wrench into the hole (3) located in the left side end of the arm Mitre Angle Pointer Adjustment (Fig. 6) holder, turn the hex screw clockwise or counterclockwise to make the blade square to the table.
- Page 11 055-6751-6 | contact us 1-800-689-9928 MAXIMUM CUTTING DEPTH UNLOCKING AND LOCKING THE CUTTING (FIG. 11) HEAD (Fig. 12) The maximum depth travel of the cutting head was set at the factory. Check to see that the blade does not extend more To unlock: Press and lightly hold down the cutting head.
- Page 12 055-6751-6 | contact us 1-800-689-9928 BENCH MOUNTING (Fig. 14) Follow all of the cutting instructions for the type of cut to be performed. This tool should be bolted with four bolts to a level and DRY RUN stable surface using the bolt holes (1) provided in the tool’s base.
- Page 13 055-6751-6 | contact us 1-800-689-9928 • Loosen the bevel lock knob (1) and position the cut- • Engage the trigger to turn the saw on. ting head at the desired bevel position. Lock the bevel • When the saw reaches full speed, slowly push the switch handle down, cutting through the leading lock knob.
- Page 14 055-6751-6 | contact us 1-800-689-9928 • Cut two parallel grooves as shown. • Reduce splintering by taping the cut area prior to making cut. Mark cut line directly on the tape. • Use a wood chisel or make multiple passes with a router to remove the material between the two out- •...
- Page 15 055-6751-6 | contact us 1-800-689-9928 CROWN MOULDING CHART 52/38° CROWN MOULDING 45/45° CROWN MOULDING To aid in the correct setting, the compound angle setting chart below has been Angle Between Mitre Setting Bevel Setting Mitre Setting Bevel Setting provided.
- Page 16 055-6751-6 | contact us 1-800-689-9928 SAWDUST 52/38° CROWN MOULDING 45/45° CROWN MOULDING Periodically, sawdust will accumulate under the table and base. This could cause difficulty in the movement Angle Between of the table when setting up a mitre cut. Frequently blow out or vacuum up the sawdust.
- Page 17 055-6751-6 | contact us 1-800-689-9928 LUBRICATION (Fig. 31) SUGGESTED COrrECTIVE PrOBLEM PrOBABLE CAUSE ACTION All the motor bearings in this tool are lubricated with a sufficient amount of high-grade lubricant for the life of the Motor brushes not sealed or Inspect/clean/replace brushes unit under normal operating conditions;...
- Page 18 ® When servicing the Mastercraft ® Sliding Compound Mitre Saw with Laser Line, use only Mastercraft ® replacement parts. The use of any other parts may cause damage to the product. All servicing of the mitre saw should be performed by a qualified service technician. For more information, call the Toll-Free Helpline at 1-800-689-9928.
- Page 19 055-6751-6 | contact us 1-800-689-9928 Description Description Description Description Screw Spring Rotary shaft Spring washer Bearing Sliding lock knob Torsional spring sleeve Mitre locking handle cover Gear box cover Bearing cover Torsional spring Extension bar Flat key Screw...
- Page 20 3-Year Limited Warranty Additional Limitations This Mastercraft product is guaranteed for a period of 3 years from the date of original retail purchase This warranty applies only to the original purchaser and may not be transferred. Neither the retailer nor...
Need help?
Do you have a question about the 055-6751-6 and is the answer not in the manual?
Questions and answers
Need mastercraft maximum miter saw stop locking lever serial # PA66+30%GF
The locking lever for the MasterCraft miter saw model number 055-6751-6 can be found in the parts list section of the manual. If the part is missing or damaged, you can call the toll-free helpline at 1-800-689-9928 to inquire about obtaining a replacement.
This answer is automatically generated
i changed blade now light doesn't work
@Wayne King
i have a 10 inch miter saw when i try to turn the table it is binding up i have cleaned the saw and even loosened the center nut but it is still hard to turn
The table of your MasterCraft 10-inch miter saw may be binding up due to excessive sawdust build-up under the table. Even after cleaning and loosening the center nut, sawdust accumulation can prevent smooth movement. Use a vacuum or blow out the dust while wearing eye protection to ensure all debris is removed. If the issue persists, inspect for any misalignment or parts failure and contact a service center if necessary.
This answer is automatically generated
Where do I get replacement parts for my mastercraft 55-6751-6 miter saw. I need a lower blade guard and a laser