Table of Contents
Advertisement
Quick Links
ALTAIR Single Board Computer
COM Express Form Factor Intel Atom E-Series SBC with EMX Stackable I/O Expansion
Revision
Date
A.00
12/6/2012
A.01
9/3/2015
A.02
5/01/2017
FOR TECHNICAL SUPPORT
PLEASE CONTACT:
support@diamondsystems.com
Comments
Initial Release
Minor updates
Minor updates
Copyright 2015
Diamond Systems Corporation
555 Ellis Street
Mountain View, CA 94043 USA
Tel 1-650-810-2500
Fax 1-650-810-2525
www.diamondsystems.com
Advertisement
Table of Contents

Related Manuals for Diamond Systems ALT1600-2G-XT


Summary of Contents for Diamond Systems ALT1600-2G-XT
- Page 1 COM Express Form Factor Intel Atom E-Series SBC with EMX Stackable I/O Expansion Revision Date Comments A.00 12/6/2012 Initial Release A.01 9/3/2015 Minor updates A.02 5/01/2017 Minor updates Copyright 2015 FOR TECHNICAL SUPPORT Diamond Systems Corporation PLEASE CONTACT: 555 Ellis Street Mountain View, CA 94043 USA support@diamondsystems.com Tel 1-650-810-2500 Fax 1-650-810-2525 www.diamondsystems.com...
-
Page 2: Table Of Contents
CONTENTS Important Safe-Handling Information ........................4 Introduction ...............................5 Altair SBC Features ............................6 Thermal Considerations ..........................7 Functional Overview ............................8 Block Diagram ...............................8 Altair Dimensions ............................9 Connector Locations ........................... 10 2.3.1 Connector Summary .......................... 11 Configuration Jumpers ..........................12 2.4.1 Configuration Jumper Summary ......................13 Getting Started ............................... - Page 3 DIO Read ..............................36 DIO Output ..............................36 EEPROM Read............................37 EEPROM WRITE............................37 MTBF POWER CYCLE ..........................38 Watchdog Timeout Set ..........................39 Watchdog Trigger ............................40 7.10 Watchdog Read ............................40 7.11 MTBF Power Data: ............................. 41 7.12 RTC Read ..............................42 7.13 RTC Write ..............................
-
Page 4: Important Safe-Handling Information
The list here describes common causes of failure found on boards returned to Diamond Systems for repair. This information is provided as a source of advice to help you prevent damaging your Diamond (or any vendor’s) embedded computer boards. -
Page 5: Introduction
INTRODUCTION Altair is a high performance, highly integrated small form factor single board computer in the COM Express form factor. Altair incorporates a wealth of standard PC-style I/O plus on-board digital I/O and accepts EMX add-on I/O modules. An integrated, bottom-mounted heatspreader dissipates heat efficiently to the system enclosure. This configuration leaves the SBC’s top side free for easy access to memory, on-board I/O, and expansion sockets. -
Page 6: Altair Sbc Features
Altair Models Processor Type Processor Clock SO-DIMM RAM ALT1600-2G-XT Intel Atom E680T CPU 1.6GHz 2GB DDR2 DRAM ALT1600-1G-XT Intel Atom E680T CPU 1.6GHz 1GB DDR2 DRAM ALT1300-2G-XT * Intel Atom E660T CPU 1GHz 2GB DDR2 DRAM ALT1300-1G-XT * Intel Atom E660T CPU... -
Page 7: Thermal Considerations
C operating range, the temperature being measured at the outside surface of the heatspreader. Diamond Systems provides a heatspreader attached to the Altair single board computer as a conductive cooled thermal layer. However, this heatspreader by itself does not constitute the complete thermal solution necessary for any specific implementation, but provides a common interface between the single board computer and the customer’s implementation-specific thermal solution. -
Page 8: Functional Overview
FUNCTIONAL OVERVIEW 2.1 Block Diagram Figure 2 shows Altair’s functional blocks. Figure 2: Altair SBC Functional Block Diagram www.diamondsystems.com Page Altair User Manual Rev A.02... -
Page 9: Altair Dimensions
2.2 Altair Dimensions Figure 3 shows the overall dimensions of the Altair SBC measured in thousandths of inches. Figure 3: Altair Dimensions, thousandths of inches www.diamondsystems.com Page Altair User Manual Rev A.02... -
Page 10: Connector Locations
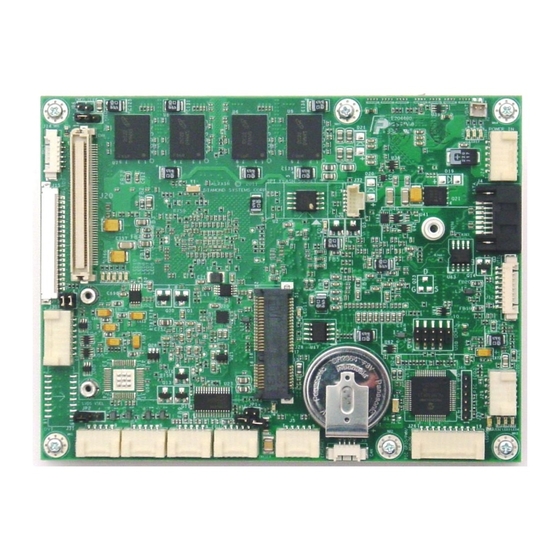
2.3 Connector Locations Figure 4 illustrates the position of interface and bus connectors jumpers located on the top side of the Altair SBC, which features EMX stackable I/O and an EMX connector. The connector for the EMX expansion bus is located on the top side of the board. -
Page 11: Connector Summary
2.3.1 Connector Summary The following table summarizes the functions of Altair’s interface, utility, and power connectors. Signal functions relating to all of Altair’s interface connectors are discussed in greater detail in Section 4 of this document. Diamond offers an optional Altair Cable Kit (number C-ALT-KIT), which provides mating cable assemblies for most of Altair’s I/O interface connectors. -
Page 12: Configuration Jumpers
2.4 Configuration Jumpers Figure 5 shows the configuration jumper groups that are located on the topside of the Altair SBC. Refer to Section 5 for details on the functions and configuration options associated with each jumper group. LCD Backlight Scan / Serial Ports Power Figure 5: Altair SBC Configuration Jumper Groups... -
Page 13: Configuration Jumper Summary
2.4.1 Configuration Jumper Summary The Altair SBC contains jumper blocks for configuring the following features. The board also contains locations for installation of 0-ohm resistors in place of all valid jumper positions for a rugged configuration. The 0-ohm resistors are oriented and labeled in a way that provides easy understanding of their use and easy interpretation of their settings. -
Page 14: Getting Started
GETTING STARTED First-time Altair users normally receive the product as part of Diamond’s Altair Development Kit, which provides everything needed to ensure rapid application development. This section of the Altair User Manual covers basic hardware setup, power connection, system boot-up, and initial software configuration. After Altair is up and running, refer to the later sections of this manual for the detailed hardware and software reference information needed to adapt the product to specific applications. -
Page 15: Altair Cable Kit
Altair Quick Start Guide (not shown) 671061x DVD with backup image and software files DOC-PKG Diamond Systems Document Package (not shown) 3.1.1 Altair Cable Kit The Altair Cable Kit (number C-ALT-KIT) provides convenient access to most of Altair’s I/O features. The kit’s cable assemblies are shown in the photo below, and identified in the table that follows. - Page 16 Note: On each interface cable, the end of the cable connector that has a red wire going to it should be oriented toward the end of the board connector that is labeled “pin 1” (typically the pin with a square pad on the PCB). www.diamondsystems.com Page Altair User Manual Rev A.02...
-
Page 17: System Setup
3.2 System Setup This section outlines a simple process for preparing Altair for first-time operation using the Altair Development Kit. Additional details regarding Altair’s interface functions and connections may be found in Section 4 of this document (Interface Connector Details). 3.2.1 Keyboard and Mouse Altair supports operation using a USB-based keyboard and mouse devices. -
Page 18: Booting The System
3.3 Booting the System Power-up the VGA video monitor. Then plug the PS-5V-04 AC power adapter to an AC outlet. Altair should begin its boot-up sequence immediately, as evidenced by BIOS messages on the connected VGA display. You can run the BIOS Setup utility and proceed to install an operating system on the boot drive just as you would on a normal desktop PC. -
Page 19: Interface Connector Details
INTERFACE CONNECTOR DETAILS This section describes the functions associated with the Altair EMX SBC, EMX bus expansion, utility, I/O interfaces, and power connectors in greater detail. Section 3.1.1 contains a list of ready-to-use interface cables included in Diamond’s Altair Cable Kit. 4.1 External Battery (J2) Altair has provision for an external battery connection via J2, a two-pin connector. -
Page 20: Sata (J4)
4.3 SATA (J4) The SATA connector is an industry-standard right-angle connector. It is mounted flush with the edge of the board so as to plug the SATA cable to an external hard drive. Ground Transmit+ Transmit- Ground Receive- Receive+ Ground Connector type: SAMTEC 4.4 Ethernet (J5) This connector provides access to the board's Gigabit Ethernet port. -
Page 21: Serial Ports (J7, J8)
4.5 Serial Ports (J7, J8) Altair provides four serial ports of which Port 1 supports RS-232/422/485 multiprotocol with the TX, RX, RTS and CTS signals. Ports 2, 3 and 4 support RS-232 only with the TX/RX only as shown in the pinouts below. Protocol RS-422 RS-485... -
Page 22: Usb 0-1 (J10)
4.7 USB 0-1 (J10) This connector provides access to two of the board's four USB 2.0 ports, USB0 and USB1. The shield pin is tied to system ground. Shield USB1 GND USB0 GND USB1 Data+ USB0 Data+ USB1 Data- USB0 Data- USB1 Pwr+ USB0 Pwr+ Connector type: JST, SM10B-ZPDSS-TF... -
Page 23: Utility Signals (J12)
4.9 Utility Signals (J12) This connector provides utility signals for Altair as follows. USB_DEV_PWR USB_DEV_D_N USB_DEV_D_P SPKR /PWRBTN /RESET Connector type: MOLEX, 532610971 4.10 LCD Backlight (J14) This connector provides the backlight power and control for the optional LCD panel. Note: If needed, +12V must be provided on the input power connector. -
Page 24: Lcd Panel (Lvds Interface) (J15)
4.11 LCD Panel (LVDS Interface) (J15) This connector is mounted on the top side of Altair. It provides connection to an LVDS LCD display. The LCD panel power is jumper selectable for 3.3V (default) or 5V. Ground / D3+, depending on video chip Ground / D3-, depending on video chip Scan Direction (High = Reverse Scan, Low/open = Normal Scan) LVDS Mapping (High = Map-B, Low = Map-A) -
Page 25: Emx Expansion Bus (J20)
4.12 EMX Expansion Bus (J20) This connector is implemented to facilitate I/O expansion modules to be plugged onto the Altair SBC. SATA-R+ USB2+ PE1T+ SATA-R- PE4T+ USB2- PE1T- +3.3V PE4T- +3.3V Reserved Reserved PE2T+ Reserved PE3T+ Reserved PE2T- PE3T- Reserved Reserved PE1R+ Reserved... -
Page 26: Gpio (J26)
4.14 GPIO (J26) This connector provides the digital IO, PWM and analog signals from the PIC microcontroller. GPIO1 - Digital GPIO0 - Digital GPIO3 – Digital GPIO2 - Digital GPIO5 – Digital GPIO4 - Digital GPIO7 – Digital GPIO6 - Digital GPIO9 - Digital GPIO8 - Digital PWM –... -
Page 27: Audio (J29)
4.17 Audio (J29) The Audio connector has the Stereo Line-In, Stereo Line-Out and Mono Microphone signals from the ALC262 HD-Audio Codec. External speakers, headphones and a microphone can be interfaced to this connector. LineOut – L LineOut – R GND_AUDIO GND_AUDIO LineIn –... -
Page 28: Configuration Jumper Details
CONFIGURATION JUMPER DETAILS This section explains the use of several jumper options on the Altair Baseboard. The board contains jumper blocks for configuring the following features. The board also contains locations for installation of 0-ohm resistors in place of all valid jumper positions for a rugged configuration. The 0-ohm resistors are oriented and labeled in a way that provides easy understanding of their use and easy interpretation of their settings. -
Page 29: Lcd Backlight Power Select - Inv Vsel (Jp4)
5.3 LCD Backlight Power Select – INV VSEL (JP4) This jumper group selects the LCD backlight inverter DC power voltage. Setting LCD Backlight Power 1 – 2 +5V (default) 2 – 3 +12V 5.4 LCD Scan Direction & LVDS Map Select (JP5) This jumper group controls the LCD panel scan direction and frame rate control. -
Page 30: Bios
BIOS Altair’s BIOS provides access to many valuable features. These instructions show how to enter the BIOS, set up features, and restore the BIOS to its default settings. 6.1 Entering the BIOS The BIOS may be entered during startup by pressing the DEL/F2 key on an attached keyboard. Press the key repeatedly right after power-on or reset until the BIOS screen appears. -
Page 31: Bios Screen Descriptions
This section describes the screen displays for each BIOS setup area. The data in the fields are examples only and may be different depending on future product releases from Diamond Systems or the user’s configuration. Sub-menus are prefixed with a . - Page 32 Advanced Legacy OpROM Support Launch PXE OpROM [Disabled] Launch Storage OpROM [Enabled] PCI Subsystem Settings ACPI Settings Windows CE CPU Configuration Wake On Lan Configuration Thermal Configuration USB Configuration SIO Configuration Hardware Health Monitor ...
- Page 33 Security Administrator Password User Password Save & Exit Boot to Windows CE Save Changes and Exit Discard Changes and Exit Save Changes and Reset Discard Changes and Reset Save Options Save Changes Discard Changes Restore Defaults Save as User Defaults Restore as User Defaults Boot Override Built-in EFI Shell...
-
Page 34: Pic Microcontroller
PIC MICROCONTROLLER The Altair SBC contains a PIC microcontroller that is used to provide various functions including serial port configuration, general purpose I/O lines, A/D lines, pulse width modulators, generate wake events, and others. This section describes the command sets that can be used to communicate with the PIC controller. The list below describes the constants that have been used in this section. -
Page 35: Are You There
Are you there Command Description: Byte Length Value and Description MESSAGE_SIG: Message signature COMMAND_AREYOU: Command id for the “are you there command” 0: No extra data sent Response: Byte Length Value and Description MESSAGE_SIG: Message signature COMMAND_RECEIVER_AREYOUTHERE Specifies the length of the buffer as 1 byte long Version Number of the firmware Comments: This command is used to retrieve the firmware version running on the target system. -
Page 36: Dio Read
DIO Read Command: Byte Length Value and Description MESSAGE_SIG: Message signature COMMAND_DIO_READ: Command id for the message Response: Byte Length Value and Description MESSAGE_SIG: Message signature COMMAND_RECEIVER_DIODATA: Command id for the message 2: Indicating 2 bytes data The state of all the DIO pins from 0 to 9 Comments: This command reads the data from all the pins starting from 0 and ending with 9. -
Page 37: Eeprom Read
EEPROM Read Command: Byte Length Value and Description MESSAGE_SIG: Message signature COMMAND_READ_EPROM: Command id of the message 2: Indicating the 2 byte address to be read from the EEPROM Contains the address to be read Response: Byte Length Value and Description MESSAGE_SIG: Message signature COMMAND_RECEIVER_EPROMDATA: Indicating the following data is from reading EEPROM data 1: Indicating one byte of data to be read... -
Page 38: Mtbf Power Cycle
Comments: This command is used to write data to the EEPROM. The first four bytes will contain the data, just like other commands, only the command id and length will be different. The firmware has to know the address of the memory location where data will be written and the data itself. -
Page 39: Watchdog Timeout Set
Watchdog Timeout Set Command: Byte Length Value and Description MESSAGE_SIG: Message signature COMMAND_WATCHDOG_SET: Sets the watchdog timeout to predefined values 1: Indicating 1 byte of data follows The time value set depending on the following set of values: Value Time interval 1 sec 2 sec 4 sec... -
Page 40: Watchdog Trigger
Watchdog Trigger Command: Byte Length Value and Description MESSAGE_SIG: Message signature COMMAND_WATCHDOG_TRIGGER 0: Indicating no data is sent Response: Byte Length Value and Description MESSAGE_SIG: Message signature COMMAND_RECEIVER_ACK: Command id for the message Return status for the command 0: Operation completed successfully 1: Some problem in the operation Comments: The first three bytes contains data just like the previous commands. -
Page 41: Mtbf Power Data
Response: Byte Length Value and Description MESSAGE_SIG: Message signature COMMAND_RECEIVER_WATCHDOG_SETTINGS: Response ID 0: Indicating no data is sent The time value set depending on the following set of values: Value Time interval 1 sec 2 sec 4 sec 8 sec 16 sec 32 sec 1 min. -
Page 42: Rtc Read
7.12 RTC Read Command: Byte Length Value and Description MESSAGE_SIG: Message signature COMMAND_RTC_READ 0: Indicating no data is sent Response: Byte Length Value and Description MESSAGE_SIG: Message signature COMMAND_RECEIVER_RTC_DATA: Indicating the command to process 7: Specifying 7 bytes following 0 – 99 specifying the year’s last two digits 1 –... -
Page 43: Rtc Write
7.13 RTC Write Command: Byte Length Value and Description MESSAGE_SIG: Message signature COMMAND_RTC_WRITE 7: Specifying 7 bytes following this 0 – 99 specifying the year’s last two digits 1 – 12 specifying Month: 1 for January, 3 for March, 11 for November, and so on 1 –... -
Page 44: Set Com Mode
7.14 Set COM Mode Command: Byte Length Value and Description MESSAGE_SIG: Message signature COMMAND_SET_COM_MODE 1: Indicating 1 more byte to be read 1: Indicates RS-232 protocol to be used 2: Indicates RS-485 protocol to be used 3: SPI (Serial Peripheral Interface) protocol to be used Response: Byte Length... -
Page 45: Read Analog Data
7.16 READ ANALOG DATA Command: Byte Length Value and Description MESSAGE_SIG: Message signature COMMAND_ANALOG_READ: Command ID 0: Indicating no data Response: Byte Length Value and Description MESSAGE_SIG: Message signature COMMAND_RECEIVER_ANALOG_DATA: Response ID 8: Indicating 8 bytes of data 8 bytes of data buffer containing the analog values for channels 0 to 3 Comments: This command retrieves the analog voltage values of channels 0 to 3. -
Page 46: Board Voltages
7.17 BOARD VOLTAGES Command: Byte Length Value and Description MESSAGE_SIG: Message signature COMMAND_BOARD_VOLTAGE: Command ID 0: Indicating no data Response: Byte Length Value and Description MESSAGE_SIG: Message signature COMMAND_RECEIVER_BOARD_VOLTAGE: Command ID 10: Indicating 10 bytes of data Comments: This command retrieves the analog voltage values of channels 6 to 10. The response consists of eight bytes of data which contain the analog voltage for channels 6 to 10 in hex. -
Page 47: Pwm Control
7.18 PWM CONTROL Command: Byte Length Value and Description MESSAGE_SIG: Message signature COMMAND_CONFIG_PWM: Command ID 4: Indicating 4 bytes of data 4 bytes of data: channel number, 2 bytes of frequency, duty cycle percentage between 0 to 100 Response: Byte Length Value and Description MESSAGE_SIG: Message signature... -
Page 48: Read Dio Config
7.19 READ DIO CONFIG Command: Byte Length Value and Description MESSAGE_SIG: Message signature COMMAND_CONFIG_READ_DIOPORT : Command ID 0: Indicating no data Response: Byte Length Value and Description MESSAGE_SIG: Message signature COMMAND_RECEIVER_CONFIG_READ_DIOPORT : Command ID 2: Indicating 2 bytes of data Comments: This command reads the configuration direction for all the pins starting from pin 0 and going to pin 9. -
Page 49: Flashdisk Modules
FLASHDISK MODULES 8.1 Overview Altair is designed to accommodate an optional wide-temperature solid-state USB flashdisk module for rugged mass storage in place of a notebook hard drive or commercial flashdisk. This module contains 1GB to 8GB of solid-state non-volatile memory that operates like any USB hard disk drive without requiring additional driver software support. -
Page 50: Flashdisk Installation
8.4 Flashdisk Installation Installing a USB flashdisk module on Altair is straightforward using the following steps. 1. Ensure power is disconnected from Altair. 2. Remove the screw from the standoff located between the flashdisk connector, USB3, and the PC/104 connector. 3. -
Page 51: Thermal Pad
THERMAL PAD A thermal pad is included with every Altair. It is the same size as the heatspreader and attaches to the bottom of the heatspreader, but is shipped loose with the product. Customers can choose to affix the thermal pad or not depending on their needs. -
Page 52: Specifications
SPECIFICATIONS Intel Atom “Tunnel Creek” processors (Queensbay platform), clocked at 1.6GHz standard, 1.0GHz and 600MHz optional Cooling : Heatspreader, fanless 1GB or 2GB DDR2 memory soldered on board Display options: LVDS flat panel interface DVI optional LVDS backlight power: +5V or +12V jumper selectable Keyboard/Mouse USB USB: 4 USB 2.0 ports on headers (Additionally an USB Hub is implemented to facilitate three ports for the EMX Expansion Connector and one port for the MiniPCIe socket)
Need help?
Do you have a question about the ALT1600-2G-XT and is the answer not in the manual?
Questions and answers