Table of Contents
Advertisement
Quick Links
Advertisement
Table of Contents

Related Manuals for Vicon CRUISER S660V


Summary of Contents for Vicon CRUISER S660V
-
Page 2: Explanation Of Graphical Symbols
WARNING TO REDUCE THE RISK OF FIRE OR ELECTRIC SHOCK, DO NOT EXPOSE THIS PRODUCT TO RAIN OR MOISTURE. DO NOT INSERT ANY METALLIC OBJECTS THROUGH THE VENTILATION GRILLS OR OTHER OPENINGS ON THE EQUIPMENT. CAUTION EXPLANATION OF GRAPHICAL SYMBOLS The lightning flash with arrowhead symbol, within an equilateral triangle, is intended to alert the user to the presence of uninsulated “dangerous voltage”... -
Page 3: Fcc Compliance Statement
FCC COMPLIANCE STATEMENT FCC INFORMATION: This equipment has been tested and found to comply with the limits for a Class A digital device, pursuant to Part 15 of the FCC Rules. These limits are designed to provide reasonable protection against harmful interference when the equipment is operated in a commercial environment. -
Page 4: Important Safety Instructions
IMPORTANT SAFETY INSTRUCTIONS 1. Read these instructions. 2. Keep these instructions. 3. Heed all warnings. 4. Follow all instructions. 5. Do not use this apparatus near water. 6. Clean only with dry cloth. 7. Do not block any ventilation openings. Install in accordance with the manufacturer’s instructions. -
Page 5: Table Of Contents
3.10 Privacy Zone ..........................23 3.11 Camera Menu..........................24 3.12 Dome Setup ..........................27 3.13 Function Run ..........................33 Appendix A — Specifications ....................35 Appendix B — Troubleshooting .................... 37 Appendix C — Glossary ......................38 Shipping Instructions ....................... 40 Vicon Standard Equipment Warranty................... 41... -
Page 6: Chapter 1 - Introduction
Chapter 1 — Introduction 1.1 Features The dome camera and the keyboard controller make up the building blocks for any surveillance/security system. Using multiple keyboard controllers and multiple dome cameras, no site is too large for monitoring. Extensible and flexible architecture facilitates remote control functions for a variety of external switching devices such as multiplexers and DVRs. -
Page 7: Chapter 2 - Installation And Configuration
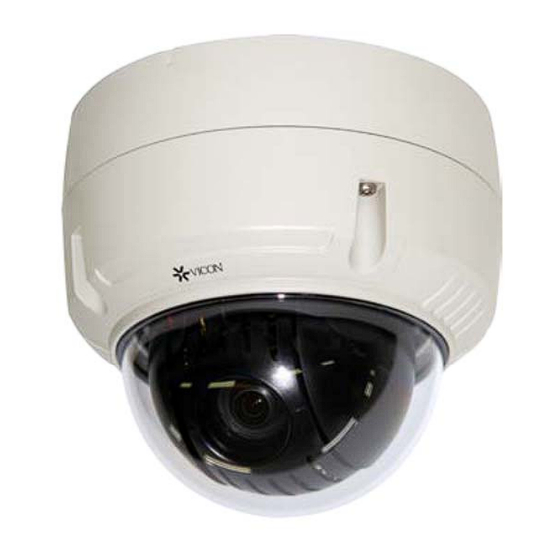
Chapter 2 — Installation and Configuration 2.1 Package Contents The dome camera is designed with a compact, small size, hard dome camera housing. The housing is constructed of aluminum, steel and plastic. The housing is designed to be mounted on a wall or a ceiling. The housing meets the Protection Classification IP66 standards for dust and moisture resistance. -
Page 8: Installation
2.2 Installation The dome camera is for use in surface or pendant mounting applications, and the mounting surface must be capable of supporting loads of up to 3.3 lb (1.5 kg). (Pendant mounting must use pendant mount accessory.) The dome camera’s mounting bracket should be attached to a structural object, such as hard wood, wall stud or ceiling rafter, that supports the weight of the dome camera. - Page 9 CAUTION 1: Before installing mounting bracket to surface, pre-adjust the four mounting screws "A" on the base of the dome camera to best match the mounting bracket locked position. Unscrew the locking screw on the side of the dome's base and fit the tab of the mounting bracket into the locking slot. Screws "A" should not be too tight or too loose when the dome is in the locked position.
-
Page 10: Basic Configuration Of Dome Camera System
2.3 Basic Configuration of Dome Camera System Figure 1 – Basic Installation Diagram The dome camera must be installed by qualified service personnel in accordance with all local and federal electrical and building codes. -
Page 11: Setting Dome Camera Termination
Figure 2 – Layout of DIP Switches NOTE: Open the switch cover (position “a”) and change the setting of DIP switches. The cover should be closed after setting DIP switches. 2.4 Setting Dome Camera Termination The device that is connected at end of line, whether it is a dome camera or keyboard controller, must have the cable for communication terminated by setting the appropriate DIP switch. - Page 12 Example: Port 1 = Dome 1, Port 2 = Dome 2 … Port 16 = Dome 16. If more than 16 dome cameras are installed, using two or more multiplexers, ID of the dome camera should be ID of MUX x No. of camera IN. (e.g., multiplexer ID= n, Camera IN= m then ID of Dome =16x(n-1)+m ) DOME ID (16) (32)
- Page 13 DOME ID (16) (32) (64) (128) Figure 4.2 – Setting Dome Camera Address (ID)
- Page 14 DOME ID (16) (32) (64) (128) Figure 4.3 – Setting Dome Camera Address (ID)
- Page 15 DOME ID (16) (32) (64) (128) Figure 4.4 – Setting Dome Camera Address (ID)
- Page 16 DOME ID (16) (32) (64) (128) Figure 4.5 – Setting Dome Camera Address (ID)
- Page 17 DOME ID (16) (32) (64) (128) Figure 4.6 – Setting Dome Camera Address (ID)
-
Page 18: Setting Dome Camera Protocol And Video
NTSC Select video type with D1 in S2. You can set Protocol with DIP switch D2, D3 and D4 in S2. ROTOCOL Vicon, F2, F2E, Pelco-P, Pelco-D : default F2, F2E Pelco-P, Pelco-D Vicon You can set Baud Rate with DIP switch D5 and D6 in S2. -
Page 19: Getting Started
• Connecting Alarms AI (Alarm Input) You can use external devices to signal the dome camera to react on events. Mechanical or electrical switches can be wired to the AI (Alarm Input) and G (Ground) connectors. Refer to Chapter 3 — Program and Operation for configuring alarm input. G (Ground) NOTE: All the connectors marked G or GND are common. -
Page 20: Chapter 3 - Program And Operation
The OSD position can be moved in the OSD position setup. (AREA TITLE) (AF AE) (FUNC TITLE (CTRL KEY TO MOVE) SAVE AND EXIT(ESC TO CANCEL) (ALARM MESSAGE) (DOME ID…) (ANGLE…) OSD Position Setup Chapter 3 — Program and Operation Note: The use of certain keypads may limit the functionality of the unit, for example the number of available presets or patterns. -
Page 21: How To Control The On-Screen Menu Utility
3.3 How to control the On-Screen Menu Utility Function Button Call the On-screen menu utility. P95P Navigate through the menu items. Joystick up or down Go into the sub-menu items. Joystick left or right or Open IRIS Joystick left or right or Change value. - Page 22 4. ZOOM In or ZOOM Out to change the alphanumeric characters and move Joystick left or right to the next position. Or move down to the character table and press the Open IRIS key at the desired character; the cursor position then moves to the next position automatically. Push the Joystick to the left or right at the “ALL DELETE”...
-
Page 23: Preset (Shortcut: P93P)
Press the P60P key on the angle field to display with the small OSD. Then the screen will display as below. AUTO SCAN AREA SETUP (CTRL KEY) NUMBER01 START : ----- ----- : ----- ----- EXIT(ESC TO EXIT) The setting procedure is the same as above. NOTE: 09:AUTO-PAN mode (endless panning/continuous rotation) 3.5 Preset (Shortcut: P93P) - Page 24 4. After aiming the camera (view direction and lens control), press the Close IRIS key. The cursor will be on the “TITLE”; after saving data, twist the Joystick or press the ZOOM in or ZOOM Out key to edit the Preset title. Follow the procedure in Auto Scan, above, to edit titles. 5.
-
Page 25: Tour (Shortcut: P70P)
The position, which is marked with the *, already has the preset view assigned. To review the stored preset, press the P93P key on the *. The camera will show the stored Preset scene. PRESET AREA SETUP (CTRL KEY) NUMBER 001 TILT 000.0 000.0 EXIT(ESC TO EXIT) -
Page 26: Pattern (Shortcut: P80P)
5. To place functions other than preset, use the Joystick to move the cursor to a stored preset position. Pressing the Open IRIS key will change the preset number to another function (Auto Scan, Pattern, Tour, Preset) with the first programmed number. To change the number, twist the Joystick or press the ZOOM in or ZOOM Out key. -
Page 27: Alarm
4. To edit the “TITLE”, follow the procedure of the Auto Scan, above, to edit titles. 5. Select “SAVE AND EXIT” and push the Joystick to the right or press the Open IRIS key. Press the Close IRIS key to exit the program without saving. NOTE: If pattern recording time reaches 200 seconds, it will automatically stop for a moment. -
Page 28: Area Title
3.9 Area Title Enter a specific name on programmed angle between START and END. For the screen below, when the camera points at an angle between 124.3 (PAN), 30.7 (TILT) to 359.5 (PAN), 45.4 (TILT), ABC will be displayed on the screen. AREA TITLE SETUP NUMBER : 01... -
Page 29: Camera Menu
2. Press the Open IRIS key; the privacy area menu displays. Move to the desired position. Press the Close IRIS key; the “CTRL” disappears and returns to the previous menu. PRIVACY AREA MENU (CTRL KEY) CONTROL NUMBER 001 354.8 344.8 3. - Page 30 • FOCUS CONTROL FOCUS SETUP MODE : AUTO FOCUS LIMIT : 1.0M SAVE AND EXIT(ESC TO CANCEL) MODE: AUTO/MANUAL/ONE PUSH/CONSTANT MANUAL Use manual mode for normal use. FOCUS LIMIT: This distance is approximate value; the focus operates from this setting value.
- Page 31 MODE: AE1/AE2/SHUTTER PRIO/MANUAL Auto exposure mode1 (Use in normal surroundings: indoor) Auto exposure mode2 (use in high brightness surroundings: outdoor) SHUTTER PRIO Variable Shutter speed, Auto Gain MANUAL Variable Shutter speed, Gain SLOW SHUTTER: OFF/ON GAIN: MIN/LOW/MID/HIGH BRIGHT: 1 ~ 15 SHUTTER: 1/60(50), 1/120(100), 1/250, 1/500, 1/1000, 1/2000, 1/10000, 1/100000 FLICKERLESS:...
-
Page 32: Dome Setup
3.12 Dome Setup CONFIGURATION MENU LANGUAGE : ENGLISH HOME FUNCTION SETUP OSD DISPLAY VIEW ANGLE SETUP INITIALIZE DATA ORIGIN OFFSET DOME RESET SYSTEM MENU SYSTEM INFORMATION SAVE AND EXIT(ESC TO CANCEL) • LANGUAGE SETUP LANGUAGE: Select the desired language. • HOME FUNCTION SETUP HOME FUNCTION SETUP HOME FUNCTION : NONE... - Page 33 • OSD DISPLAY OSD DISPLAY SETUP CAMERA TITLE : DOMEID VIEW DIRECTION : OFF DOME OSD : ON AREA TITLE : OFF PRESET TITLE : CONSTANT FOCUS EXPOSURE : ON OSD POSITION SETUP SAVE AND EXIT(ESC TO CANCEL) CAMERA TITLE: Up to 6 characters.
- Page 34 • VIEW ANGLE SETUP VIEW ANGLE SETUP PANNING RANGE FLIP : 90 TILT LIMIT : OFF SAVE AND EXIT(ESC TO CANCEL) FLIP: OFF, AUTO, 90, 100, 110, 120, OFF: The dome camera moves until 90 vertically. AUTO: When the camera reaches the floor directly above the moving object, it will stop. At that time, release the Joystick instantly and pull it down again to run the auto-flip function.
- Page 35 • INITIALIZE DATA INITIALIZE DATA FACTORY DEFAULT ERASE PROGRAMMED DATA PRESET FOCUS DEFAULT EXIT(ESC TO EXIT) FACTORY DEFAULT Select “FACTORY DEFAULT” to initialize the data. FACTORY DEFAULT ARE YOU SURE ? CANCEL ERASE PROGRAMMED DATA Erase all stored data from the Flash-ROM of the selected dome camera. You will be asked to enter ON or OFF.
- Page 36 • ORIGIN OFFSET OFFSET SETUP (CTRL KEY) PAN OFFSET : 000.0 TILT OFFSET : 000.0 ENABLE : OFF SAVE AND EXIT(ESC TO CANCEL) This feature is useful to align a new dome camera exactly as the previously installed dome camera. Dome camera’s origin set and all data initialize option do not override offset values.
- Page 37 MOTOR SETUP PROPORTIONAL P/T : ON P/T MODE : NORMAL SAVE AND EXIT(ESC TO CANCEL) PROPORTIONAL P/T: ON/OFF P/T MODE: SLOW/NORMAL/TURBO SLOW MAXIMUM SPEED: 40/second NORMAL MAXIMUM SPEED: 90/second TURBO MAXIMUM SPEED: 380/second PASSWORD EDIT PASSWORD EDIT SETUP (CTRL KEY) INPUT PASSWORD PASSWORD : A B C D E F G H I J...
-
Page 38: Function Run
• SYSTEM INFORMATION SYSTEM INFORMATION CAMERA TYPE : xxxxx-Vx.xxxx H/W VERSION : Vx.xx-xxxx ROM VERSION : Vx.xxxxx PROTOCOL : xxxx BAUDRATE : 9600 EXIT(ESC TO EXIT) The system information provides essential information about the dome camera if service is required. This screen displays the camera type and ROM version. The information on this screen cannot be modified. - Page 39 ALARM OUT SETUP : 1 MIN EXIT(ESC TO EXIT) Press the r Open IRIS key; then that alarm out operates during the set time only.
-
Page 40: Appendix A - Specifications
Appendix A — Specifications S660V 22X PTZ Camera MODEL MODULE CCD Type 1/4" Type EXview HAD CCD Optical / Digital Zoom 22X/16X Max Resolution 580 TVL Focal length f = 3.9mm ~ 85.8mm 3.9mm – 49.5° (H) Angle of view 85.8mm –... - Page 41 Figure 6 – Dimension...
-
Page 42: Appendix B - Troubleshooting
Appendix B — Troubleshooting If problems occur, verify the installation of the dome camera with the instructions in this manual and with other operating equipment. Isolate the problem to the specific piece of equipment in the system and refer to the equipment manual for further information. Problem Possible Solution Verify that power is connected to all pieces of... -
Page 43: Appendix C - Glossary
Appendix C — Glossary Alarm Action The assigned responses for the dome camera when input changes from normal to abnormal states. The dome may run a Preset, Pattern, or have no assigned action for 1 dome input. The dome may also send alarm state to the host controller for processing. See also Input Alarm and Normal Input State. -
Page 44: Line Lock
Line Lock Allows you to phase lock the video with the AC power line. When line lock is enabled, it prevents vertical video rolling when switching multiple cameras to a single monitor. If text appears slightly tinted on color monitors, disabling the line lock may prevent this problem. Name Information Relates to the display of the dome name, the area where the dome is pointing, the name of the Preset or Pattern that is running, and alarm name. -
Page 45: Shipping Instructions
Shipping Instructions Use the following procedure when returning a unit to the factory: 1. Call or write Vicon for a Return Authorization (R.A.) at one of the locations listed below. Record the name of the Vicon employee who issued the R.A. -
Page 46: Vicon Standard Equipment Warranty
“autopan” or “tour” modes of operation. Such continuous operation is outside the scope of this warranty. Any product sold as “special” or not listed in Vicon’s commercial price list: One year from date of original retail purchase. - Page 48 Vicon Industries Inc. Corporate Headquarters 89 Arkay Drive Hauppauge, New York 11788 631-952-2288 800-645-9116 Fax: 631-951-2288 Vicon Europe Headquarters Brunel Way Fareham, PO15 5TX United Kingdom +44 (0) 1489 566300 Fax: +44 (0) 1489 566322 Vicon Germany Kornstieg 3 D-24537 Neumuenster...
Need help?
Do you have a question about the CRUISER S660V and is the answer not in the manual?
Questions and answers