
Subscribe to Our Youtube Channel
Related Manuals for Delphi DEA600


Summary of Contents for Delphi DEA600
- Page 1 Owner´s Manual DEA600 Radio Owner´s Manual DEA600 Radio MY 2016 Delphi P a g e 6/20/2016...
-
Page 2: Table Of Contents
Owner´s Manual DEA600 Radio Contents DEA600 Radio System ....... 4 Radio source......25 OTA (Over the Air) ...... 41 Introduction ........4 Phone..........26 Voice Recognition ......42 System Features and Functions ..4 Contacts......... 27 Vocabulary ........ 42 Radio ..........5 Contact Information .... - Page 3 Owner´s Manual DEA600 Radio Auto Equalization ..... 57 My radio doesn't recognize my Damage Disc ......... 61 Bluetooth enabled device ..60 Speed Dependent Volume ..57 Bluetooth ........62 The device and my radio can't Speakers Configuration ..... 58 Bluetooth Distraction ....
-
Page 4: Dea600 Radio System
The DEA600 System consists of a 7" Smart Display connected to a Radio. The Smart Display functions as a main display managing the entire user interface. The Smart Display with resistive touch-screen has a rear USB for playback or USB modem connection, and manages the Applications, Phone interface, Audio, Internet and Bluetooth / Wi-Fi connections. -
Page 5: Radio
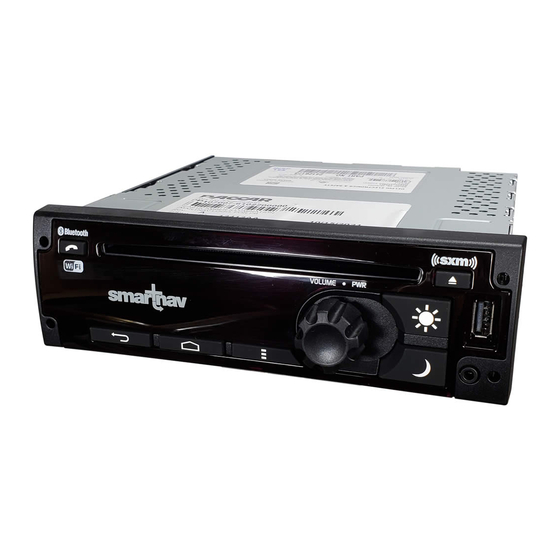
Owner´s Manual DEA600 Radio Radio Radio Button Operation Dim Day / Dim Night Volume Knob/Power The Dimming Day button is used to increment the brightness level of the Rotate to Increase/decrease Volume. Press Knob to turn ON/OFF the Radio. Smart Display and the backlight level of the Radio bezel. -
Page 6: Smart Display
Owner´s Manual DEA600 Radio Smart Display The next right screen is presented once the system senses a Swipe Left action; please see Figure 2, as reference. Getting Started Using the touch screen A “Touch” over a soft key activates or selects the corresponding function, or it opens the selected item;... - Page 7 Owner´s Manual DEA600 Radio Home screen & Navigation buttons The next top screen is presented once the System senses a Swipe Down action; please see Figure 4, as reference. The installed application icons are presented at the home screen. The home screen is distributed in a home main screen and subsequent home screens.
- Page 8 Owner´s Manual DEA600 Radio Figure 7: Drag and Drop Function At the top bar of each screen are the Notification and Status bars. The Notification bar presents the following information, if available: Icon Meaning Figure 6: The Main home screen Downloading Data Each application icon works as the application activation soft key.
- Page 9 Owner´s Manual DEA600 Radio Mute Bluetooth ON, not connected Bluetooth ON/Connected to a Bluetooth Device Connected to a Wi-Fi network USB Source available DDA active Alarm Indicator 78°F Temperature Table 1: Notification & Status Icons meaning. Figure 8: Settings menu related to SiriusXM audio source...
- Page 10 Owner´s Manual DEA600 Radio When the Driver Distraction Avoidance (DDA) mode is active, some application icons from the home screen are grayed out and cannot be selected by the user, see Figure 12 as reference. Figure 10: The settings screen – Page II...
-
Page 11: Audio Application
Owner´s Manual DEA600 Radio Mute Volume This feature is used to mute the radio due to an external event in the vehicle. Volume level is indicated each time the volume knob is turned (Figure 14). The radio remains MUTE while event is active. -
Page 12: Media Sources
Owner´s Manual DEA600 Radio The Audio sources are presented to the user in a tab-bar at the top of the application screen, with each Audio source working as a soft key selector; the selected Audio source icon is highlighted. The System does not allow the selection of more than one Audio Source option at a time. - Page 13 Owner´s Manual DEA600 Radio Fast forward function is activated by long pressing the next soft key for 2 seconds. Fast reverse function is activates by long pressing the previous soft key for 2 seconds. Views The System presents the view soft key, when it is selected (Figure 19), the following options are displayed: ...
- Page 14 Owner´s Manual DEA600 Radio Once an artist is selected the System displays the list of the contained albums, as shown in the Figure 22. Figure 23: The Albums view The System displays the albums contained in the media source selected.
- Page 15 Owner´s Manual DEA600 Radio Figure 24: Standard Album Artwork icon For Apple devices the album view screen follows the distribution and styling illustrated on previous Figure 22. Once an album is selected the System displays the list of the contained songs.
- Page 16 Owner´s Manual DEA600 Radio Figure 26: The Search screen Figure 27: The Rear Aux Media source screen In the case the Aux media source is selected, the user interface shall follow The Views soft key button is not available for the next Media sources: the distribution and styling of the Figure 28.
-
Page 17: Usb
Owner´s Manual DEA600 Radio Error Messages If an “UNSUPPORTED” message is displayed, it could be for one of the Playing from a USB following reasons: The USB port is in the front of the Radio. Five volts DC power is limited to ... -
Page 18: Cd Player
Owner´s Manual DEA600 Radio Radio will start playing the USB and shows the track number, Song, To avoid damage to the CD player: Artist, elapsed time, and album information when available. If the iPod is an unsupported model, it can still be listened to in the Do not use scratched or damaged discs. -
Page 19: Front Auxiliary
After the connector is inserted, the mode is changed to Front Aux mode, unless any mode with a higher priority is active (I.E. phone call, video, The DEA600 is not safety product. reverse mute….). The cameras and the rear auxiliary inputs are provided for driver This operation is not available while the System is in standby power mode. -
Page 20: Radio Sources
Owner´s Manual DEA600 Radio navigation system and the Rear Aux is set automatically, if no other source can be viewed by swiping the preset bar. Each preset works as soft key with higher priority is active (I.E. phone call, video, reverse mute…). -
Page 21: Sirius Xm
Owner´s Manual DEA600 Radio Channel Browsing Next Presets (Smart Favorites) Previous SCAN The SiriusXM user interface screen is illustrated in Figure 31. The System presents 7 presets for this application. To save stations in to preset follow the AM-FM instructions. - Page 22 Owner´s Manual DEA600 Radio Audio Settings SiriusXM Settings Figure 33: The Sirius XM Settings screen – Part I Figure 32: The pop-up sub menu screen Each of the options in the pop-up submenu works as a soft key. The System opens the Audio Settings in a separate screen in the case this option is selected.
-
Page 23: Audio Widget
Owner´s Manual DEA600 Radio In the case the “Direct tuning” soft key is selected, a numeric keypad is displayed as Figure 37 illustrates. It can be used to select a specific channel. Figure 35: The Category list screen The listed elements work as a soft key. In the case the channel list option is selected, a separate screen listing all the available channels is presented. - Page 24 Owner´s Manual DEA600 Radio Previous Play/Pause Next For USB, the Audio Widget is presented as Figure 38 illustrates. Figure 39: The Audio Widget for Bluetooth The Audio Widget presents the song name and the artist for CD source (see Figure 40 as reference).
-
Page 25: Radio Source
Owner´s Manual DEA600 Radio Radio source The Audio Widget does not present audio controls for the AUX, & Rear AUX; see Figure 41 & Figure 42as reference. The Audio Widget shall display the next audio controls for the Radio source configuration: ... -
Page 26: Phone
Owner´s Manual DEA600 Radio Figure 44: The Audio widget for the radio band AM screen Figure 46: The Audio widget for the SiriusXM configuration screen Phone Once your device is properly paired (see Settings / Bluetooth section), System supports Hands Free Phone features if the connected device has that capability. -
Page 27: Contacts
Owner´s Manual DEA600 Radio The Phone screen interface presents these elements (as is illustrated on A loading image is displayed during the contact list synchronization. See Figure 48): Figure 49 as reference. Numeric Keyboard Call Button Search Bar ... -
Page 28: Contact Information
Owner´s Manual DEA600 Radio The System activates the search function in case white box is selected. In the case the search function is activated, the System displays a keyboard, see Figure 51 as reference. Figure 52: The Contact information screen... -
Page 29: Making A Call
Owner´s Manual DEA600 Radio In order to save a contact as favorite select the desired contact and press The Received call indicator is represented with a Blue and hold the desired phone number until the pop-up message “Are you sure arrow. - Page 30 Owner´s Manual DEA600 Radio Figure 56: The incoming call screen Figure 57: The current call screen In the case the System detects the selection of the Reject soft key the In the case the System detects the selection of the Hang Up soft key the call system cancels the incoming call.
-
Page 31: Messaging
Owner´s Manual DEA600 Radio Figure 58: The pop-up numeric keyboard screen Figure 60: The received text messages screen The following information and options are available: Messaging Contact name If the Messaging App is selected, see Figure 59 as reference, the System ... - Page 32 Owner´s Manual DEA600 Radio Figure 61: New message received Figure 62: Predefined message list The System sends the selected message or opens the message editor or The SMS message information is displayed and provides a predefined application for the user to write the desired text, see Figure 63.
-
Page 33: Messaging With Apple Devices
For Apple devices, “show notifications” must be enabled on the Apple device main menu Route Truck Routing Profile. Ensure that this profile is set for the DEA600 device after pairing via Bluetooth for the System to display correctly as the route calculated and warnings displayed are based on these notifications of new text messages. - Page 34 Owner´s Manual DEA600 Radio Figure 66: Clock screen Figure 67: Alarm list In the case the alarm icon is selected (left lower corner), the System Each item of the alarm list works as a soft key and can be activated or presents the following screen, Figure 67;...
-
Page 35: Camera Views
Figure 70: Snooze / Dismiss Alarm screen Camera Views The DEA600 is not a safety product. The cameras and the rear auxiliary inputs are provided for driver conveniences only. Open the Camera Views App located on the home screen as illustrated on Figure 71. -
Page 36: Application Interface
Owner´s Manual DEA600 Radio Application Interface The application indicates the current activated view. The forward camera image is mirrored (left to right) to provide a correct image. The Camera Views App presents the view of the 4 cameras installed on the vehicle one at a time, each of the camera views option work as a soft key. -
Page 37: Gauges
Owner´s Manual DEA600 Radio The default page (page 1) is displayed in the Virtual Gauges app in the following cases: The first time the Virtual Gauges app is opened after an ignition or batter power cycle. When the last selected page is not available. -
Page 38: Virtual Gauges Pop-Up
Owner´s Manual DEA600 Radio return to a normal state allowing the second Virtual Gauge in a warning to state to toggle to full screen. All the Virtual Gauges minimized after being in full screen due to a warning state remain in the warning state in their original size while the warning condition of the gauge persists. - Page 39 Owner´s Manual DEA600 Radio to save changes or CANCEL soft key to discard changes. See Figure 78 as The General Settings screen shows the page numbers in their 3 states reference. (Selected, Active and Disabled) as defined for the app.
- Page 40 Owner´s Manual DEA600 Radio Automatic Population Gauge Priority Idle Time The Virtual Gauges are populated by adding gauges if the related vehicle Idle Fuel information is available. The Virtual Gauges app adds available gauges Fuel Usage Rate following the priority established.
-
Page 41: Ota (Over The Air)
Owner´s Manual DEA600 Radio The re-positioning of the non-selected gauges from the General Settings screen of the Virtual Gauges app shall be according the following rules: Gauges in the preceding slots will shift back one position until the position where the selected gauge was originally is reached. -
Page 42: Voice Recognition
Owner´s Manual DEA600 Radio Once the Voice Recognition function is activated the Voice Recognition indicator is displayed. The Voice Recognition indicator has two states: Active Inactive While the System is capturing voice commands, it displays the Voice Recognition indicator in Active state as Figure 82 illustrates. -
Page 43: Direct Action Commands
Owner´s Manual DEA600 Radio Centesimal: Launch “Hundred, Thousand”. Switch command Special Characters: -“Switch to ****** or Switch to ****** app” “Number (Hash tag, Hash, Pound, Square), Star (Asterisk), Plus”. The System opens the application specified by the user. Open command Basic disagree command: “no, incorrect, wrong, negative, none are correct, none of these, not really,... -
Page 44: Phone Commands
Owner´s Manual DEA600 Radio Phone Commands - “Redial“ If a Bluetooth Phone is paired, the System opens the Phone App and attempt a call to the last number called. -“Call Back“ If a Bluetooth Phone is paired, the System opens the Phone App and attempt a call to the last received call number. -
Page 45: Settings
Owner´s Manual DEA600 Radio Settings The System presents the following settings options. See Figure 86 & Figure 87 as reference: Wireless & Networks Language & Inputs Date & Time System Audio System Information Cameras Settings ... -
Page 46: Display Settings
Owner´s Manual DEA600 Radio 25% per step Units of measure English Metric Figure 88: The Cameras settings screen The activation soft key is displayed as a slider control. The slider control has two states. On: slide action to the right Figure 89: The Display Settings screen ... -
Page 47: Wi-Fi
Owner´s Manual DEA600 Radio Figure 90: The Wireless & Networks settings screen Figure 91: The Wi-Fi password request The Bluetooth & Wi-Fi activation options are presented to the user as slider The System captures the introduced password and uses it for the network controls. -
Page 48: Bluetooth
Owner´s Manual DEA600 Radio In the case the System detects the activation of the Menu soft key or hard key the System displays a pop sub menu with the following options, see Figure 93 as reference: Scan WPS Pin Entry ... - Page 49 Owner´s Manual DEA600 Radio List of the Bluetooth devices available to connect List of the Bluetooth devices available to pair Figure 96: Available devices searching In the case one item is selected, a pop-up screen is displayed presenting the following information and soft keys, see Figure 97 as reference.
- Page 50 Owner´s Manual DEA600 Radio The System will automatically connect to the first available paired device, starting from the most recent paired/connected device. Figure 97: Bluetooth Pairing request If the System detects the selection of the white box a keyboard is displayed, if available.
-
Page 51: Keyboard Sound
Owner´s Manual DEA600 Radio In the case the Cancel button is selected, the System cancels the connection process closing the pop-up screen. If the connection process is cancelled a pop-up message is displayed stating "Pairing failed. Unable to connect to remote device". See Figure 101 as reference. -
Page 52: Applications
Owner´s Manual DEA600 Radio Automatic date & time Automatic time zone Set date Set time Select time zone Use 24-hour format Choose date format The System shall present the following date format options only. Each of these operates as a soft key selection item to change the applicable setting: ... -
Page 53: System Information
Owner´s Manual DEA600 Radio Each item in the list works as a soft key. Each item in the list presents the next information: Application icon Application name Application memory space The System displays up to 5 items per screen. In the case there are more than 5 items the remaining items are displayed in subsequent screens. -
Page 54: Language & Inputs
Owner´s Manual DEA600 Radio Figure 107: The System Information screen Figure 108: The Language & Inputs options Language & Inputs Language In the case the Language option is selected, the System displays the In the case the Language & Inputs menu is selected, the System displays... -
Page 55: Text To Speech Output
Owner´s Manual DEA600 Radio Figure 109: Languages menu screen Figure 110: Text-To-Speech menu screen System Audio Each language option works as a soft key. The System allows the selection of one option at a time. If the language is changed to other than English... -
Page 56: Manual Equalization
Owner´s Manual DEA600 Radio Figure 111: The System audio screen – Part I Figure 113: The System audio screen – Part III The Manual Equalization and the Auto Equalization options work as soft keys. The Fade and Balance configuration options are presented in a bar selector manner. -
Page 57: Auto Equalization
Owner´s Manual DEA600 Radio Figure 114: The Manual equalizer screen Figure 115: The Auto equalizer screen Part I The System adjusts the Bass value accordingly with the selected value in the Bass bar control. Each Audio setting section has a checkbox as a selector control. The System adjusts the audio output configuration based on the option selected. -
Page 58: Speakers Configuration
Owner´s Manual DEA600 Radio Figure 116: The System audio screen Part II Figure 117: Seek sensitivity screen The System allows the selection of one option at a time. The scale of the seek sensitivity Bar is from -6 dB to +6 dB. The System detects 12 steps on the bar. - Page 59 Owner´s Manual DEA600 Radio Select “Save”. The System will ask to confirm that the system will Scroll down to page 2 using the down arrow in the bottom left-hand reboot. Select “OK”. corner. Using the slider buttons, turn the appropriate camera inputs.
-
Page 60: Tips And Troubleshooting
Owner´s Manual DEA600 Radio Tips and Troubleshooting Remove the device, after that pair and connect the device. Refer to DELETE ONE OR DELETE ALL DEVICES and to Pairing a Bluetooth Radio Device and Connecting a Device sections. Make sure the device is turned on. -
Page 61: Precautions
System memory If the battery is disconnected before or at the same time as the ignition line, The DEA600 is not a safety product. The cameras and the rear auxiliary the system does not guarantee the memory retention. inputs are provided for driver conveniences only. -
Page 62: Bluetooth
Bluetooth SIG, Inc. and any use of such marks by Delphi is under license. Other trademarks and trade names are those of their respective owners.”... -
Page 63: Interference Statement
Owner´s Manual DEA600 Radio and on, the user is encouraged to try to correct the interference by one or Delphi Electronics&Safety n’approuve aucune modification apportée à more of the following measures: l’appareil par l’utilisateur, quelle qu’en soit la nature. Tout changement ou modification peuvent annuler le droit d’utilisation de l’appareil par l’utilisateur.
Need help?
Do you have a question about the DEA600 and is the answer not in the manual?
Questions and answers