
Subscribe to Our Youtube Channel
Related Manuals for Delphi DEA600


Summary of Contents for Delphi DEA600
- Page 1 Owner´s Manual DEA600 Radio Owner´s Manual DEA600 Radio MY 2015 P a g e Delphi 7/20/2015...
-
Page 2: Table Of Contents
Owner´s Manual DEA600 Radio Media source ......23 Direct Action Commands ..42 Contents Radio source......25 Launch........42 DEA600 Radio System ....... 4 Phone..........27 Phone Commands ..... 43 Introduction ........4 Contacts......... 27 Settings ..........44 System Features and Functions ..4 Contact Information .... - Page 3 Owner´s Manual DEA600 Radio Seek Sensitivity -6dB to +6dB .. 58 System memory ......60 Tips and Troubleshooting ....59 Apple devices ........ 60 Radio ..........59 Sirius XM ........60 Unable to tune stations ....59 Warranty Replacement....60 CD ..........
-
Page 4: Dea600 Radio System
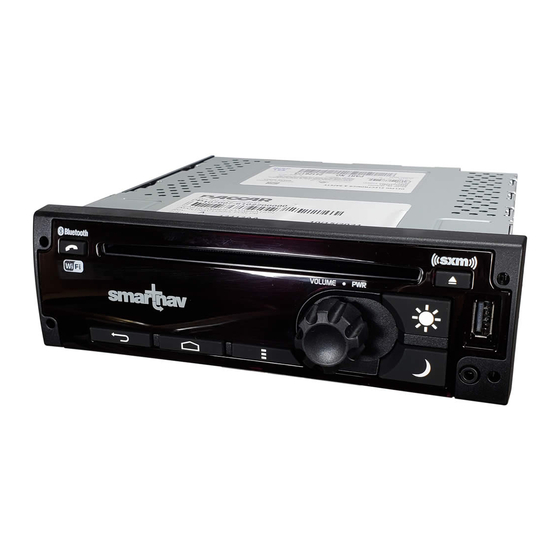
The DEA600 System consists of a 7" Smart Display connected to a Radio. The Smart Displaly functions as a main display managing the entire user interface. The Smart Display with resistive touch-screen has a rear USB for playback or USB modem connection, and manages the Applications, Phone interface, Audio, Internet and Bluetooth / W-Fi conections. -
Page 5: Radio
Owner´s Manual DEA600 Radio Radio Radio Button Operation Dim Day / Night The Dimming “day” is used to increment the brightness level of the Smart Volume Knob/Power Display and the backlight level of the Radio bezel. Press Knob to turn ON the Radio. Rotate to Increase/decrease Volume. -
Page 6: Smart Display
Owner´s Manual DEA600 Radio Smart Display Getting Started Using the touch screen A Touch over a soft key activates or selects the corresponding function. Figure 2: Swipe to the Left action presents right screen. The next left screen is presented once the system senses a Swipe Right action. - Page 7 Owner´s Manual DEA600 Radio The next top screen is presented once the system senses a Swipe Down Home screen & Navigation buttons action. The installed application icons are presented at the home screen. The home screen is distributed in a main screen and subsequent home screens.
- Page 8 Owner´s Manual DEA600 Radio When the system senses the selection of the Back button the previous screen is presented even if it was in a different app. The Back soft key button doesn’t have any effect at the home screen When the system senses the selection of the Home soft key button the main home screen is presented.
- Page 9 Owner´s Manual DEA600 Radio Figure 8: Settings menu related to the current screen. Figure 10: The settings screen Part II If the Menu button is activated at the home screen, the system settings When the system senses the selection of the Voice Recognition soft key the screen is presented.
- Page 10 Owner´s Manual DEA600 Radio Volume mute is also reported with a pop up indicator and on Top bar Dim Day / Night indicator screen. The Dimming level is indicated each time the Dim Day or Dim Night buttons are pushed.
-
Page 11: Audio Application
Owner´s Manual DEA600 Radio If this event occurs, the Media sources are paused. Once it ends, the system The system does not allow the selection of more than one Audio Source continues playing the media. option at a time. If the system senses the selection of the current Audio source option no change will take place. -
Page 12: Media Audio Control Soft Keys
Owner´s Manual DEA600 Radio In the case the USB media source is active the system indicates the type of Media Audio Control Soft keys audio file displayed. The system presents the next control soft keys as part of the Media sources... - Page 13 Owner´s Manual DEA600 Radio Artists • Albums • All Songs • Playlists • Figure 20: The Artist view All the artists in this mode work as a soft key. Once an artist option is selected the system presents the media files related to the artists selected as illustrated on Figure 21.
- Page 14 Owner´s Manual DEA600 Radio songs are distributed in bottom subsequent screens. All items in the list work as a soft key button selector. Albums The albums view screen follows the distribution and styling as the Figure 24 illustrates. Figure 22: Apple Artist View.
- Page 15 Owner´s Manual DEA600 Radio All Songs The all songs view screen follows the distribution and styling Figure 27 illustrates. Figure 25: The Songs contained in the selected album screen In the case the album artwork is not available the system displays a standard album icon as Figure 26 illustrates.
-
Page 16: Usb
Owner´s Manual DEA600 Radio In the case the Wi-Fi media source is selected, the user interface shall follow In the case the Rear Aux media source is selected, the user interface shall the distribution and styling of Figure 30. follow the distribution and styling Figure 28 illustrates. - Page 17 Owner´s Manual DEA600 Radio MS-Dos partition only. • ® iPod classic (6th generation) • Class specification (USB MSC) and supports formats of FAT32, • ® iPod nano ( 6G) FAT16, NTFS, and HFS+. • ® iPod touch (4G) Hard disk drives may be played, but they are not supported.
-
Page 18: Cd Player
Owner´s Manual DEA600 Radio Insert a disc into the slot, label side up. The player pulls it in the Error Messages rest of the way. If the disc is damaged or improperly loaded, there If an “UNSUPPORTED” message is displayed, it could be for one of the is an error on the screen and the disc ejects. -
Page 19: Front Auxiliary
Rear Auxiliary After the connector is inserted, the mode is changed to Front Aux mode, The DEA600 is not safety product. unless any mode with a higher priority is active (I.E. phone call, video, reverse mute….). The cameras and the rear auxiliary inputs are provided for driver conveniences only. -
Page 20: Wi-Fi Media Playback
The DEA600 Smart Display behaves as a Digital Media Render with an interface to allow the display of metadata content. Tune to the desired station. • The DEA600 Smart Display support Wi-Fi Client / Wi-Fi AP / Wi-Fi Direct Press and hold one of the 6 presets • features. -
Page 21: Sirius Xm
Owner´s Manual DEA600 Radio Previous Presets (Smart Favorites) • SCAN • The SiriusXM user interface screen is illustrated in Figure 33. The system presents 7 presets for this application. To save stations in to preset follow the AM-FM instructions. The WX radio source screen is illustrated in Figure 32. - Page 22 Owner´s Manual DEA600 Radio The system displays a pop-up sub menu in the case the Menu button is Tune start • selected while in this screen. Reset Default • The pop-up sub menu presents the next options as Figure 34 illustrates: Audio Settings •...
-
Page 23: Audio Widget
Owner´s Manual DEA600 Radio In the case the Category List option is selected, a separate screen opens The listed elements work as a soft key. listing all the available categories. See Figure 37 as reference. Each of the options in the separate screen works as a soft key. - Page 24 Owner´s Manual DEA600 Radio Bluetooth • • Rear Aux • Wi-Fi • • The Audio widget presents the next audio controls for the USB & Bluetooth configurations. See Figure 40 as reference: Previous • Play/Pause • Next • Figure 41: The Audio widget with no available art work screen for USB &...
-
Page 25: Radio Source
Owner´s Manual DEA600 Radio The Audio widget does not present audio controls for the AUX, Rear AUX & Wi-Fi configuration. See Figure 43, Figure 44 & Figure 45 as reference. The note "Now Playing" shall be displayed only in case an audio file is playing. - Page 26 Owner´s Manual DEA600 Radio Figure 46: The Audio widget for the radio band AM screen. Figure 48: The Audio widget for the Weather channel screen. The Audio widget shall present the next audio controls for the SXM configurations. Illustrated in Figure 49: Previous •...
-
Page 27: Phone
Owner´s Manual DEA600 Radio Phone Once your device is properly paired (see Settings / Bluetooth section), DEA600 System supports Hands Free features if the connected device has that capability. Open the Phone App located on the home screen of the Smart Display as illustrated on Figure 50. -
Page 28: Contact Information
Owner´s Manual DEA600 Radio In the case the search function is activated, the system displays a keyboard. See Figure 54 as reference. Figure 52: The contact list synchronization screen. If failure is present during the contact synchronization, a pop-up message is Figure 54: The search contact screen. -
Page 29: Favorites
Owner´s Manual DEA600 Radio Making a Call The contact information displays the next information if available. See as reference: You can call a contact directly from the previously stored contact information Contact photo • if the item Phone 1 or Phone 2 is selected; the system uses the information Contact Name •... -
Page 30: Incoming Call
Owner´s Manual DEA600 Radio Figure 58: The history of calls screen. Figure 59: The incoming call screen. The Receive call indicator is represented with a Blue arrow. • In the case the system detects the selection of the Reject soft key the The Made call indicator is represented with a Green arrow. -
Page 31: Sms
Owner´s Manual DEA600 Radio If the system detects the selection of the second call soft key the current call is placed on hold allowing the user to dial another number. When the second call is activated, a numeric keyboard shall be displayed. -
Page 32: Apps
Owner´s Manual DEA600 Radio The system provides the following options upon message notification shown on the screen: Read / Ignore The SMS message information is displayed and provides a predefined message list to replay with, as follows. See Figure 63: Can´t talk now. - Page 33 Owner´s Manual DEA600 Radio Each item of the alarm list works as a soft key. Each item in the list can be activated or deactivated with the ON/OFF select soft key. If the alarm hour is selected a numeric pop-up pad is presented. The time set on the numeric pop-up pad is used to set the alarm once the OK soft key is selected.
-
Page 34: Camera Views
Owner´s Manual DEA600 Radio Camera Views The DEA600 is not a safety product. The cameras and the rear auxiliary inputs are provided for driver conveniences only. Open the Camera Views App located on the home screen of the Smart Display as illustrated on Figure 70. The system displays the Camera Views screen interface. -
Page 35: Automatic Cameras View
Owner´s Manual DEA600 Radio The system activates the Reverse View in case the vehicle is put in reverse Reverse View • (if the automatic view function is activated). Forward View • Right View • The system activates the Right View in case the right turn signal is activated Left View •... -
Page 36: Gauges
Owner´s Manual DEA600 Radio The Gauges app can handle up to 30 gauges distributed in 5 screens as This state includes Metric and English rates Figure 73 represents. Figure 74: Regular KW Oil Temp Gauge state Art Work (°F) Warning States... -
Page 37: Virtual Gauges Pop-Up
Owner´s Manual DEA600 Radio If the gauge is over scaled, the gauge will pointer Presets automatically be positioned in + 5° from the Null position Presets are used to define personalized views of the gauges. Two presets and stay in that position until the data is rescaled. - Page 38 Owner´s Manual DEA600 Radio The default page selected when accessing the General Settings in the Virtual Gauges app is the page 1. The General Settings screen from the Virtual Gauges app show the active virtual gauges. The Default Virtual Gauges priorities and the User defined Virtual Gauges...
- Page 39 Owner´s Manual DEA600 Radio During the saving of a preset or a restoration of the default presets the key cycle. Some virtual gauges show a specific icon in the case of a not Virtual Gauges app shows a pop-up with the label "Processing..." while the available gauge.
- Page 40 Owner´s Manual DEA600 Radio Ammeter Once the user stops pressing the screen, all the gauges will be moved and Air Suspension Pressure 1 Tractor Brake Application N/A – In Cluster the gauge selected keep their new positions. Pusher Axle #1 Pressure...
-
Page 41: Voice Recognition
Place Bluetooth phone calls • Vocabulary Changing audio sources • The DEA600 system is able to recognize the following vocabulary as a Tuning radio stations • Language Model for the Voice Recognition System in the DEA600. Control media playback •... -
Page 42: Direct Action Commands
Eighteen, Nineteen” -“What day is it” Decimals: The DEA600 show the Date in full format (It is [Day of the week], [Month] “Twenty, Thirty, Forty, Fifty, Sixty, Seventy, Eighty, Ninety” [Day], [Year]) in the Voice Recognition Pop-Up for 5 seconds. -
Page 43: Phone Commands
The system performs the function related to the option selected. Phone Commands - “Redial “ If a Bluetooth Phone is paired, the DEA600 open the Phone App and attempt a call to the last number called. -“Call Back “ If a Bluetooth Phone is paired, the DEA600 open the Phone App and attempt a call to the last received call number. -
Page 44: Settings
Owner´s Manual DEA600 Radio Settings The system presents the next settings options. See Figure 85 & Figure 86 as reference: Wireless & Networks • Language & Inputs • Date & Time • System Audio • System Information • Cameras settings •... -
Page 45: Display Settings
Owner´s Manual DEA600 Radio In the case the system detects an Off state the corresponding automatic camera view is deactivated. This menu may not be available in all vehicles Display Settings The system opens the Display Settings section in the case this option is selected at system settings. -
Page 46: Wi-Fi
Owner´s Manual DEA600 Radio The “Wireless & Networks” menu is accessed while the System is ON. Wi-Fi In the case the Wi-Fi option is activated a separate sub screen displays the Once the “Wireless & Networks” settings menu is open the next connectivity list of available networks. - Page 47 Owner´s Manual DEA600 Radio Wi-Fi Password: CONNECT ****** Figure 91: Error - Invalid Password process terminated The system presents the Wi-Fi menu screens following the distribution and styling of the Figure 92, Figure 93, Figure 94 & Figure 95. CANCEL Wi-Fi Figure 93: The Wi-Fi menu screen Part III.
- Page 48 Owner´s Manual DEA600 Radio W i-Fi Wi-Fi Erro r A TTW IFI ATTWIFI Error In Range In Range In valid Passw o rd p rocess Guest G uest term in ated In valid Passw o rd p ro cess Secure with WPA/WPA2...
-
Page 49: Bluetooth
Other devices may be connected and played but functionality cannot be guaranteed. You can pair up to 10 devices to the system; the DEA600 will connect to the first available paired device, starting from the last paired/connected device. 49 |... - Page 50 Owner´s Manual DEA600 Radio Figure 101: The Bluetooth menu screen III. Figure 100: The Bluetooth menu screen II. If the system detects the selection of the white box a keyboard is displayed. In the case one item of the "List of the Bluetooth devices available to connect"...
-
Page 51: Ota (Over The Air)
Owner´s Manual DEA600 Radio Figure 105: Error - Invalid Password process terminated The mentioned message is displayed for 3 seconds. OTA (Over the Air) The system is capable of receiving Over the Air updates when the unit is connected to the internet. The following items can be updated: OS version. -
Page 52: Date & Time
Owner´s Manual DEA600 Radio The system shall present the following date format options only. Each of these operates as a soft key selection item to change the applicable setting: 12/31/2014 • 31/12/2014 • 2014/12/31 • Applications The system supports the standard application manager settings. -
Page 53: System Information
Owner´s Manual DEA600 Radio In the case a listed item is selected, the system presents the following controls and information. See Figure 108 & Figure 109 as reference. Controls: Force stop button • Clear data button • Clear cache button •... -
Page 54: Language & Inputs
Owner´s Manual DEA600 Radio Figure 110: The System Information screen. Figure 111: The Language & Inputs options screen Part I. Language & Inputs In the case the Language & Inputs menu is selected, the system displays the next options: Language •... -
Page 55: Text To Speech Output
Owner´s Manual DEA600 Radio English Very Fast • • Spanish Rapid • • Canadian French Very Rapid • • Fastest • Each language option has a checkbox as selector control. The system Cancel • allows the selection of one option at a time. -
Page 56: Manual Equalization
Owner´s Manual DEA600 Radio Speed Dependent Volume • 4/2 Speakers Configuration • Seek Sensitivity • Figure 117: The System audio screen Part III. The Manual Equalization and the Auto Equalization options work as soft keys. The Fade and Balance configuration options are presented in a bar selector Figure 115: The System audio screen Part I. -
Page 57: Auto Equalization
Owner´s Manual DEA600 Radio JAZZ • CLASSICAL • Figure 118: The Manual equalizer screen. The system adjusts the Bass value accordingly with the selected value in the Bass bar control. Figure 119: The Auto equalizer screen Part I. The system adjusts the Middle value accordingly with the selected value in the Middle bar control. -
Page 58: Speed Dependent Volume
Owner´s Manual DEA600 Radio Each Audio setting section has a checkbox as a selector control. The system Speakers Configuration adjusts the Audio output configuration based on the option selected. The In the case the Speakers configuration option is selected, the system system does not allow selecting more than one Auto Equalization option. -
Page 59: Tips And Troubleshooting
Owner´s Manual DEA600 Radio Remove the device, after that pair and connect the device. Refer to Tips and Troubleshooting DELETE ONE OR DELETE ALL DEVICES and to Pairing a Bluetooth Device and Connecting a Device sections. Radio Make sure the device is turned on. -
Page 60: Driver Distraction Avoidance
5 km/h. If not certified accessories are used to connect an Apple device to the DEA600 system, it will not be able to provide Power as required for the Limited Applications/Functionalities Apple device. -
Page 61: Moisture Condensation
Focus your attention on driving. ® “The Bluetooth word mark and logos are registered trademarks owned by Bluetooth SIG, Inc. and any use of such marks by Delphi is under license. Disclaimers, Trademarks License Other trademarks and trade names are those of their respective owners.”... -
Page 62: Fcc Information
Modification statement installation. If this equipment does cause harmful interference to radio or Delphi Electronics & Safety has not approved any changes or modifications television reception, which can be determined by turning the equipment off to this device by the user. Any changes or modifications could void the and on, the user is encouraged to try to correct the interference by one or user’s authority to operate the equipment.
Need help?
Do you have a question about the DEA600 and is the answer not in the manual?
Questions and answers