Table of Contents
Advertisement
Quick Links
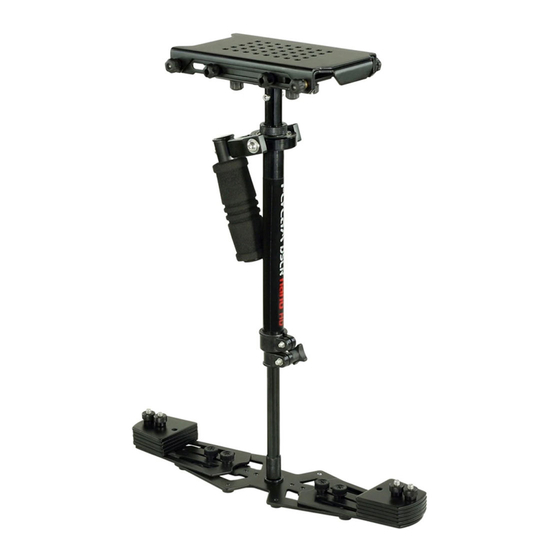
DSLR Nano HD Camera Stabilizer
(FLCM-DN-HD-QT)
I N S T R U C T I O N M A N U A L
For Demonstration Only
All rights reserved
No part of this document may be reproduced, stored in a retrieval system, or transmitted by any form or by any
means, electronic, mechanical, photocopying, recording, or otherwise, except as may be expressly permitted
by the applicable copyright statutes or in writing by the publisher.
Advertisement
Table of Contents

Summary of Contents for Flycam FLCM-DN-HD-QT
- Page 1 DSLR Nano HD Camera Stabilizer (FLCM-DN-HD-QT) I N S T R U C T I O N M A N U A L For Demonstration Only All rights reserved No part of this document may be reproduced, stored in a retrieval system, or transmitted by any form or by any means, electronic, mechanical, photocopying, recording, or otherwise, except as may be expressly permitted by the applicable copyright statutes or in writing by the publisher.
-
Page 2: What's In The Box
Please inspect the contents of your shipped package to ensure you have received all that is pic- tured and listed below. The gray foam shipping/storage container has been especially designed to protect your purchase while in transit and is a good place to keep your Flycam when not in use. -
Page 3: Head Assembly
BASE PLATFORM Provided threaded stud located in the center of the base. ASSEMBLING OF FLYCAM DSLR NANO HD HANDHELD STABILIZER. ATTACHING THE CENTRAL POST TO THE BASE PLATFORM The bottom of the interior central post has a threaded slot that matches the pin located mid base on the platform. - Page 4 Retighten the bolt for securing the adapter to the plate. Attach the Head Plate to the FLYCAM DSLR NANO-HD with appropriate fore & aft position- ing and tighten the side knobs as shown. Further ‘fine tuning’ will probably be required.
- Page 5 FLYCAM DSLR Nano - HD Open the lever and remove Quick Release Plate from quick release adapter. Attach it with your camera with the help of screw driver. Insert your camera setup with Quick Release Plate into quick release adapter and tightened with provided lever.
- Page 6 Attach clamp onto the table, tighten the provided knob to secure. Then attach handle onto the clamp, it helps achieving balance in just seconds and saves your professional time. YOUR FLYCAM DSLR NANO-HD HANDHELD STABILIZER ALL DRESSED UP AND READY TO GO...
- Page 7 Exclusive of Camera ADDING WEIGHTS AND POSITIONING FOR PROPER BALANCE Continuing the assembly and balance requirements to make your FLYCAM DSLR Nano-HD fully functional you will note that the base platform has a provision to mount the balance weights on weight plate via knobs on both sides of the post.
-
Page 8: Balancing The Horizontal Axis
When testing for horizontal balance start from a flat and level surface like a table. This will allow the FLYCAM DSLR Nano HD to hang freely as you hold it. If your FLYCAM DSLR Nano HD is cor- rectly balanced on its horizontal axis, then it will be both level & upright, with the Central Post in... -
Page 9: Balancing The Vertical Axis
Head Plate. If the FLYCAM DSLR Nano HD leans to the right, then loosen the screws on the bottom of the Bottom Plate and then gently slide the Mid Plate to the left. If it leans to the left from the opera- tor’s point of view, then adjust the Mid Plate to the right. - Page 10 Remove the top plate of the Flycam and line up your camera so that its center of gravity is as close to the center of the plate as possible (basically hold the camera in your hand until it...
- Page 11 Insert the center post as far as it will go and tighten so it won't slide out. Hold the handle normally and turn the FLYCAM DSLR Nano HD so that it is horizontal to the ground. Let go of the stalk while keeping a firm grip on the handle and count how long it takes to return to vertical again.
-
Page 12: Maintenance
& clean up any over spill. Cleaning Do not use solvents or harsh cleaners of any kind on your FLYCAM DSLR Nano HD. If unit be- comes dirty, use a damp soft cloth or sponge & a mild detergent to gently clean external parts. -
Page 13: Warranty
FLYCAM DSLR Nano - HD WARRANTY We offer a limited time warranty for our products. For Mechanical products we provide a 6 month warranty & for electronic products we provide a 3 month warranty from the date of pur- chase.


Need help?
Do you have a question about the FLCM-DN-HD-QT and is the answer not in the manual?
Questions and answers