Table of Contents
Advertisement
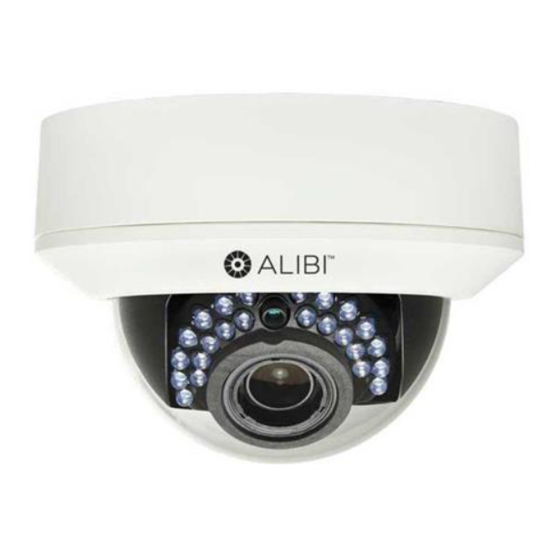
ALI-NS1044VR 4.0 Megapixel
IP Dome Camera Quick
Installation Guide
This document guides you through the basic steps to install and configure the ALI-NS1044VR camera. The
ALI-NS1044VR camera features:
4.0 MP high resolution sensor
•
2.8 - 12 mm motorized vari-focal lens
•
HD real-time video up to 2688 x 1520 with H.264 compression
•
IR LEDs with illumination up to 100 feet
•
3D-DNR noise reduction, Wide Dynamic Range (WDR), Backlight compensation
•
Dual power capable - Power over Ethernet (PoE) or 12 Vdc
•
Weatherproof - IP66 rated and Vandalproof - IK10 rated
•
Internal microSD card storage up to 128GB (card not provided)
•
Audio I/O, Alarm I/O
•
Includes a junction box adapter plate
•
For more information about the software features of this camera, please refer to the ALI-IP Camera V2
Software User Manual.
Lower
dome
assembly
Dome
assembly
IR array
Lens
Drop cable for
power and LAN
Conduit
port
Lower
dome
assembly
Drop cables
IR LED
array
Lens
Reset
button
MicroSD
card slot
Camera gimbal
tilt pivot point
CVBS jack
Camera with dome cover removed
www.observint.com
1
What's in the box
Your camera includes this document and the items shown below.
Video test
Weatherproof
LAN coupling
mount drill
template
Step 1.
The camera includes hardware to install it directly to a mounting surface, or onto a single- or double-gang
electrical box using the gang box adapter plate shown above. Camera drop cables can be routed through
the conduit port on the side of the lower dome, through the mounting surface or into an electrical box, if
used. To install the camera:
1.
Remove the dome assembly by loosening the three captive dome screws using the security
L-wrench provided.
2.
Install a microSD card in the SD card slot, if needed.
3.
To mount the camera, do one of the following:
To mount the camera directly onto a mounting surface
1.
Determine the best fasteners
for securing the camera
Drop cable for
peripherals
to mounting surface. The
mounting hardware provided is
Holes for
suitable for most surfaces.
mounting
screws (3)
2.
Using the Drill Template
Product label
provided, mark the location of
the mounting screw holes. If
the drop cable will be routed
through the mounting surface,
mark the location of the hole for
the camera drop cables.
3.
Drill holes for the mounting
fasteners, and for the drop cable
where needed.
4.
Continue the installation with
Connect camera drop cables
to peripherals, LAN and
power below.
To mount the camera onto an electrical box
1.
Install a single- or double-gang electrical box at the location where the camera will be installed.
2.
Secure the flat side of the gang box adapter plate to the open side of the box using appropriate
screws.
Anchor for
dome tether
Continue the installation with Connect camera drop cables to peripherals, LAN and power
3.
Mounting screw
below.
holes (3)
cable
Surface
Install the camera
Security
L-wrench
CD-ROM
manuals and
software
Mounting
hardware
packet
Junction box
adapter plate
(camera side
shown
Mounting
screw hole
Wall insert
Drop
cables
Lower
dome
assembly
Mounting
screws
ALI-NS1044VR_CQ
10/12/15
Advertisement
Table of Contents

Subscribe to Our Youtube Channel
Summary of Contents for ALIBI ALI-NS1044VR
-
Page 1: Installation Guide
Security Installation Guide Video test L-wrench cable CD-ROM manuals and This document guides you through the basic steps to install and configure the ALI-NS1044VR camera. The software ALI-NS1044VR camera features: Weatherproof Mounting 4.0 MP high resolution sensor LAN coupling •... - Page 2 Step 2. Install the Alibi Discovery Tool Alibi Discovery Tool is a software utility used to “discover” Alibi cameras and NVRs/DVRs installed on the physical Ethernet network (LAN) and change their network settings. Discovery Tool is provided on the CD with your camera and is contained in Alibi Power Tools.
- Page 3 Step 3. Login to the camera If this login is the first login to an Alibi camera from your computer and browser, continue with the following sub-steps to install WebComponents: To access the camera from a computer on the LAN:...
- Page 4 Log into the camera again to see the Live View - Main stream window. Live View options Screen select tabs Live View image Logout button Some computer security software may attempt to block you from running WebComponents.exe. If necessary, open the Internet Explorer downloads list, right click on the WebComponents.exe file name, Capture, Record, Zoom then click Run Anyway.
- Page 5 Step 6. Change default password Observint Technologies strongly recommends that you change the default admin user password in your camera from “1111” to a different code to help protect against unauthorized access. You must login to the camera with the admin user name to change the admin password. To change the admin password: Click the Setup tab, and then click Security in the left frame.
- Page 6 Video Video Compression Format H.264 (Main Profile), H.264 OVC (Optimized Video Codec), MJPEG Codec Streaming Capability Dual Streaming Maximum Frame Rate 20 fps @ 2688 x 1520, 30 fps @ 1080p Bit Rate 32 kbps ~ 16 Mbps Bit Rate Mode CBR, VBR Audio Audio Streaming...


Need help?
Do you have a question about the ALI-NS1044VR and is the answer not in the manual?
Questions and answers