Table of Contents
Advertisement
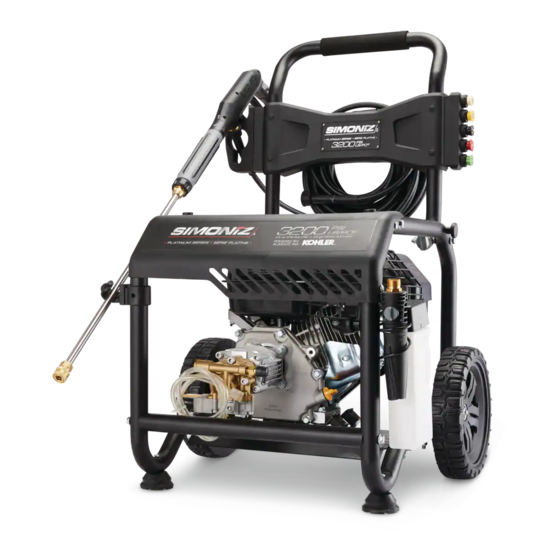
3200 PSI Gas Pressure Washer
039-8056-0
Congratulations on the purchase of your new pressure washer. In order
to ensure you have the best possible experience please read through the
following instructions. If you require any help, please contact the customer
service department at:
Model no. XG01
1-866-4SIMONIZ
(1-866-474-6664)
Version no. 02
Contact us for assistance; we're here to help.
Advertisement
Table of Contents
Troubleshooting

Subscribe to Our Youtube Channel
Related Manuals for Simoniz 039-8056-0


Summary of Contents for Simoniz 039-8056-0
- Page 1 3200 PSI Gas Pressure Washer 039-8056-0 Congratulations on the purchase of your new pressure washer. In order to ensure you have the best possible experience please read through the following instructions. If you require any help, please contact the customer service department at: Model no.
-
Page 2: Table Of Contents
Table of Contents 1. S ............................3 afety dvice 1.1 d ................................. efinitionS 1.2 S ..............................3 afety arningS 1.3 i ............................7 ntended pplication 2. e ............................8 xploded 3. p .............................. 8 artS 4. a ..........................9 SSembly nStructionS 4.1 S ............................. -
Page 3: S Afety A Dvice
Safety Advice 1. S afety dvice IMPORTANT, RETAIN FOR FUTURE TOXIC GASES REFERENCE AND READ CAREFULLY! Alerts against possible toxic gases which can be harmful to your health or deadly if you are exposed to Do not attempt to install or operate this device until you have read them. - Page 4 Safety Advice 1. S (cont.) afety dvice 1.2 Safety Warnings (cont.) CAUTION — HOT ENGINE AND MUFFLER THE ENGINE AND MUFFLER DANGER — WORK AREA SAFETY AND BECOME VERY HOT DURING AND EXHAUST FUMES AFTER USE. AVOID TOUCHING THE ENGINE OR THE MUFFLER •...
- Page 5 Safety Advice 1. S (cont.) afety dvice CAUTION–ENGINE SAFETY 1.2 Safety Warnings (cont.) • Certain components in this product and its related FLAMMABLE AND POISONOUS MATERIALS accessories contain chemicals which are known to cause cancer, birth defects, or other reproductive harm. Wash •...
- Page 6 Safety Advice 1. S (cont.) afety dvice 1.2 Safety Warnings (cont.) CAUTION — SPECIFIC SAFETY ADVICE This product is capable of producing high pressure as rated in CAUTION — SPECIFIC SAFETY ADVICE the Technical Specifications. To avoid rupture and injury, do not operate this product with components rated less than the •...
-
Page 7: Intended Application
Please refer to the icons below for suggested applications. For questions regarding other uses, please refer to our website at www.simoniz.ca or call us at 1-866-4SIMONIZ (1-866-474-6664). IMPORTANT — SAFETY FEATURES IMPORTANT —... -
Page 8: E Xploded V Iew
Exploded View / Parts List 2. e xploded 3. p artS Item # Part Name Qty. Part # Part Name Qty. Diagram Gun Holder XG01-040-0001 Engine Oil 1 set Gun Support XG01-030-0001 Funnel Wheel XG01-030-2000 Hose Hook XG01-040-0002 Spark Plug 1 set Tip Holder 1 set... -
Page 9: Ssembly I Nstructions
Assembly Instructions 4. a SSembly nStructionS 4.1 Surface Preparation 4.3 Assembly Steps Before beginning any cleaning task, it is important to inspect the area for objects that could create a hazard. Remove any objects from the work area that could be tripped over, such as toys or outdoor furniture. - Page 10 Assembly Instructions 4. a (cont.) SSembly nStructionS 4.3 Assembly Steps (cont.) Connect the pressure hose to the pump outlet and the gun connector respectively. Attach the gun holder, tip holder, gun support and hose hook on the main frame and handle respectively. Connect the garden hose to the inlet adapter.
- Page 11 Assembly Instructions 4. a (cont.) SSembly nStructionS 4.3 Assembly Steps (cont.) Adjust the pressure by turning the gun collar to the desired setting for the following purposes: DETERGENT For applying detergent with the on-board detergent injection system. NOTE: Machine performs siphon function from the on-board detergent injection system only if gun set to detergent setting and using the detergent (black) tip.
-
Page 12: Engine Operation
Engine Operation 5. e ngine peration 5.1 Adding/Checking Oil TIP: When adding oil use provided oil funnel. IMPORTANT Oil has been drained for shipping. Failure to fill engine with oil before starting engine will result in permanent damage and will void engine warranty. Add oil according to the instructions. -
Page 13: Dding Uel
Engine Operation 5. e ngine peration cont 5.2 Adding Fuel WARNING • Make sure there is enough fuel in the fuel tank before operating the pressure washer. • Use only clean, fresh, unleaded fuel. Use a minimum of 87 octane/87 AKI (91 RON). •... -
Page 14: Hecking Ir Ilter
Engine Operation 5. e (cont.) ngine peration 5.3 Checking Air Filter 5.4 Purging Release the safety trigger if it is locked. Unscrew the butterfly nut by hand and take off the air filter PURGING cover, then repeat with the second nut, and pull out the air filter element carefully. -
Page 15: Starting Engine
Engine Operation 5. e (cont.) ngine peration 5.5 Starting Engine a. Set the engine I/O switch to ON (I) position. b. Move the throttle control to HIGH position. c. Move the fuel valve to ON position d. Move the choke lever to CLOSED position. e. -
Page 16: Stopping Engine
Engine Operation 5. e (cont.) ngine peration 5.6 Stopping Engine a. To stop the engine move the choke lever to the CLOSED b. Set the engine I/O switch to OFF (O) position. position. IMPORTANT Restarting the engine after running it for over 5 minutes, place the choke lever to OPEN position to restart the engine. -
Page 17: Cleaning With Detergent Instructions
This pressure washer is intended for use with special pressure washer detergents only. Do not use powdered soaps, which would clog the injection system. Follow the detergent manufacturer’s directions or call the Simoniz toll-free number at 1-866-4SIMONIZ (1-866-474-6664) if you have any questions or concerns. -
Page 18: W Orking With The F Oam B Laster
Cleaning with Detergent Instructions 6. c (cont.) leaning with etergent nStructionS 6.2 Working with the Detergent Injection Tube 6.3 Working with the Foam Blaster (cont.) Engage the safety lock on the spray gun. 1. Insert the detergent injection tube into any pressure washer detergent container of your choice. - Page 19 Cleaning with Detergent Instructions 6. c (cont.) leaning with etergent nStructionS 6.3 Working with the Foam Blaster (cont.) Detergent Detergent 1. Set detergent ON/OFF knob to ON position to work with detergent. 2. Set detergent ON/OFF knob to OFF position for cleaning surface without detergent.
-
Page 20: Operating Instructions
Operating Instructions 7. o peration nStructionS 7.1 Using Pressure Washer 7.3 Using Spray Nozzle This pressure washer comes with 5 different nozzles that 1. Start the engine. can be installed on the stainless steel wand. The spray 2. Install appropriate spray nozzle. pattern is adjusted by installing the appropriate spray 3. -
Page 21: C Leaning And M Aintenance
Cleaning and Maintenance 8. c leaning and aintenance 8.1 Cleaning the Spray Tips 8.3 Engine Maintenance Draining Engine Oil WARNING The engine oil should be replaced after the first 20 hours of operation, or after the first month of use. After that, it should be Clogging of the spray tip increases the water pressure and replaced every 100 hours or every 6 months. -
Page 22: Erm S Toring
Cleaning and Maintenance 8. c (cont.) leaning and aintenance 8.4 Short Term Storing 8.3 Engine Maintenance (cont.) Store idle product out of the reach of children and do not allow 2. Using provided spark plug wrench, remove the spark plug by persons unfamiliar with the product or these instructions to turning it counter-clock wise. -
Page 23: Winterizing Procedures
Cleaning and Maintenance 8. c (cont.) leaning and aintenance 8.6 Winterizing Procedures 8.5 Long Term Storing (cont.) 3. Drain Oil Winterizing you pressure washer will help protect and prolong a. Drain the oil Follow the “To Drain the Engine Oil” instructions its life. -
Page 24: Technical Specifications
Technical Specifications 9. t echnical pecificationS Maximum Pressure: 3200 PSI Rated Water Pressure: 2500 PSI Rated Water Flow: 9.8 litres per minute LPM (2.6 gallons per minute GPM) Minimum Inlet Pressure: 30 PSI Maximum Inlet Pressure: 100 PSI Pump Type: Heavy-duty maintenance free axial cam Thermal Relief Valve: Included... -
Page 25: Troubleshooting
NOTE: If your unit still is not functioning properly once you have Problem Cause Solution used this guide please call the SIMONIZ toll-free service number Engine stops Low oil or no fuel. Check oil and fuel at 1-866-4SIMONIZ (1-866-474-6664). Please do NOT bring the after starting. -
Page 26: Troubleshooting Pump
Troubleshooting 10. t (cont.) roubleShooting 10.3 Troubleshooting Accessories & Connections 10.2 Troubleshooting Pump Problem Cause Solution Problem Cause Solution No pressure, low Nozzle tip not Attach required No intake of The detergent Connect detergent pressure. attached. nozzle tip. detergent. siphon tube is not siphon tube (For use of connected. - Page 27 The o-ring are not Put lubricating oil Hose can’t be lubricated. or water on the connected to o-ring. pump or gun. IF YOU ENCOUNTER ANY ADDITIONAL DIFFICULTIES NOT LISTED, VISIT OUR WEBSITE AT WWW.SIMONIZ.CA OR CALL CUSTOMER SERVICE FOR HELP AT 1-866-4SIMONIZ (1-866-474-6664).
-
Page 28: L Imited W Arranty
The warranty is void if the equipment is used for commercial, rental or industrial purposes. If you have further questions, please visit our website (www.simoniz.ca) or call 1-866-4SIMONIZ (1-866-474-6664). Imported for... - Page 29 SH265 Owner's Manual IMPORTANT: Read all safety precautions and instructions carefully before operating equipment. Refer to operating instruction of equipment that this engine powers. Ensure engine is stopped and level before performing any maintenance or service. Warranty coverage as outlined in the warranty card and on KohlerEngines.com.
- Page 30 Safety Precautions WARNING: A hazard that could result in death, serious injury, or substantial property damage. CAUTION: A hazard that could result in minor personal injury or property damage. NOTE: is used to notify people of important installation, operation, or maintenance information. WARNING WARNING WARNING...
- Page 31 Air Cleaner Air Cleaner Paper Element Wing Nut Base Cover Dual-Element Low-Profi le Air Precleaner Foam Element Air Cleaner Cleaner Screw Muffl er Shield Spark Plug Oil Drain Plug On/Off Switch Retractable Oil Fill Plug Dipstick (if equipped) Starter Debris Screen Starter Handle Fuel Shut-Off Choke Control...
- Page 32 4. Retractable Start: Slowly pull starter handle Starting until just past compression-STOP! Return starter handle; fi rmly pull straight out to avoid excessive rope wear from starter rope guide. WARNING Electric Start: Activate starter switch. Carbon Monoxide can cause Release switch as soon as engine starts. If severe nausea, fainting or death.
- Page 33 Maintenance Instructions WARNING Before working on engine or equipment, disable Accidental Starts can cause engine as follows: 1) Disconnect spark plug severe injury or death. lead(s). 2) Disconnect negative (–) battery cable from battery. Disconnect and ground spark plug lead(s) before servicing. Normal maintenance, replacement or repair of emission control devices and systems may be performed by any repair establishment or individual;...
- Page 34 3. If oil is low, add oil up to point of overfl owing Fuel must meet these requirements: fi ller neck. ● Clean, fresh, unleaded gasoline. 4. Reinstall dipstick or oil fi ll plug and tighten ● Octane rating of 87 (R+M)/2 or higher. securely.
- Page 35 Fuel Line Breather Tube Low permeation fuel line must be installed on Ensure both ends of breather tube are properly carbureted Kohler Co. engines to maintain EPA connected. and CARB regulatory compliance. Air Cooling Spark Plugs WARNING CAUTION Hot Parts can cause severe Electrical Shock can cause injury.
- Page 36 Troubleshooting Do not attempt to service or replace major engine components, or any items that require special timing or adjustment procedures. This work should be performed by a Kohler authorized dealer. Possible Cause Dirt In Dirty Faulty Improper Fuel Debris Incorrect Engine Dirty Air...
Need help?
Do you have a question about the 039-8056-0 and is the answer not in the manual?
Questions and answers