Table of Contents
Advertisement
Quick Links
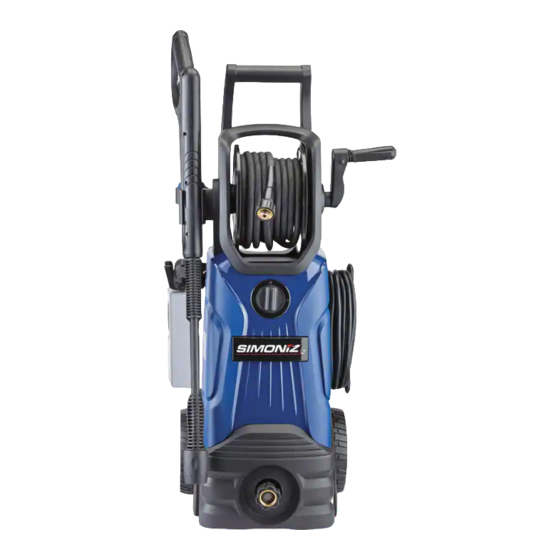
2000 PSI Electric Pressure Washer
039-8702-2
Congratulations on the purchase of your new pressure washer. In order
to ensure you have the best possible experience, please read through the
following instructions. If you require any help, please contact the customer
service department at:
Model no. XE27
1-866-4SIMONIZ
(1-866-474-6664)
Version no. 02
Contact us for assistance; we're here to help.
Advertisement
Table of Contents

Related Manuals for Simoniz 039-8702-2


Summary of Contents for Simoniz 039-8702-2
- Page 1 2000 PSI Electric Pressure Washer 039-8702-2 Congratulations on the purchase of your new pressure washer. In order to ensure you have the best possible experience, please read through the following instructions. If you require any help, please contact the customer service department at: Model no.
-
Page 2: Table Of Contents
Table of Contents 1. I ..........................3 mportant recautIons 1.1 D ................................3 efInItIons 1.2 s ..............................3 afety arnIngs 1.3 I ..............................5 ntenDeD pplIcatIon 2. s ....................5 afety eatures anD lectrIcal nformatIon 2.1 e ..............................5 xtensIon orDs 3. e ............................6 xploDeD 4. p ..............................6 arts 5. -
Page 3: I Mportant P Recautions
Important Precautions 1. I mportant recautIons 1.2 Safety Warnings IMPORTANT, RETAIN FOR FUTURE REFERENCE AND READ CAREFULLY! DANGER Do not attempt to install or operate this device until you have read To reduce the risk of fire, electric shock, explosion or injury to the safety instructions in this manual. - Page 4 Important Precautions 1. I mportant recautIons cont 1.2 Safety Warnings (cont.) CAUTION—USE WARNING—INJECTION HAZARD • Learn how to stop the device and release the pressure quickly. Familiarize yourself with the controls. • Equipment can cause serious injury if the spray penetrates •...
-
Page 5: Intended Application
Please refer to the icons below for suggested WARNING applications. For questions regarding other uses, please refer to our website at www.simoniz.ca or call us at 1-866-4SIMONIZ • Extension cords are not recommended unless they are (1-866-474-6664). -
Page 6: E Xploded V Iew
Exploded View / Parts List 3. e xploded 4. p arts Item # Part Name Qty. Part # Item # Part Name Qty. Part # Foldable 3-in-1 wand XE27-021-0090 XE20-000-0001 handle Foam blaster XE20-060-0000 Gun holder XE20-000-0002 Cleaning Hand crank XE01-020-0007 XE18-052-0001 needle... -
Page 7: A Ssembly I Nstructions
Assembly Instructions 5. a ssembly nstructIons 5.1 Water Supply (Cold Water Only) 5.3 Accessories Storage Locations Only draw water through the unit. The device must be used Gun and with cold water supply only. The water hose must be at least wand 1/2”... -
Page 8: Assembly Steps
Assembly Instructions 5. a ssembly nstructIons cont 5.4 Assembly Steps Assemble the gun holder and the bottle holder. 0º 15º 40º The spray nozzles on 3-in-1 wand are selected with the desired spray pattern for the following purposes: • 0º: For tough spots and grimes (e.g., concrete surfaces);... - Page 9 Assembly Instructions 5. a (cont.) ssembly nstructIons 5.4 Assembly Steps (cont.) OFF (0) Make sure the ON/OFF switch is in the OFF position. Connect the garden hose to the inlet adaptor. Attach garden hose to water supply and turn water on. Plug the unit into an outlet.
- Page 10 Assembly Instructions 5. a (cont.) ssembly nstructIons 5.4 Assembly Steps (cont.) PURGING Release the safety trigger if it is locked. Purge air by squeezing the trigger on the gun until there is a steady stream of water. CAUTION Drain unit after each use (for storage): remove water connection, turn ON the machine for a few seconds and press gun trigger to bleed remaining water in the pump.
- Page 11 Assembly Instructions 5. a (cont.) ssembly nstructIons 5.4 Assembly Steps (cont.) Ö ON (1) Turn the main switch to ON position and the pressure washer is ready to operate.
-
Page 12: O Perating I Nstructions
Operating Instructions 6. o peratIng nstructIons 6.1 Working with the Foam Blaster Working with a detergent ensures quick soaking of the dirt, and allows the high-pressure water to penetrate and remove the dirt more effectively. Always spray detergent on a dry surface, do not pre-soak the area. -
Page 13: Taking Breaks
Operating Instructions 6. o (cont.) peratIng nstructIons 6.2 Shutting Down and Cleaning Up 6.4 Warnings Turn off water supply and disconnect the garden hose CAUTION from the water inlet on the pressure washer. Failure to clean foam blaster properly will cause the detegent Pull the trigger to release any remaining water pressure. -
Page 14: Interizing And
Winterizing and Long-Term Storage 7. w InterIzIng and torage 7.1 Optimum Winterizing Procedure CAUTION Winterizing your pressure washer will help protect and prolong Drain any remaining water from the gun assembly. Aim the its life. We strongly recommend you follow the below steps using gun downwards and pull the trigger. -
Page 15: C Leaning And M Aintenance
Cleaning and Maintenance / Technical Specifications 8. c leanIng and aIntenance 8.1 Connections 8.3 Water Filter Screen The connections on the pressure washer’s hoses, gun, and spray wand should be cleaned and lubricated with non-water-soluble grease regularly. 8.2 Cleaning the Nozzles The pressure washer is equipped with a water inlet screen to protect the pump. -
Page 16: Roubleshooting
Troubleshooting 10. t roubleshootIng Problem Cause Solution Output pressure Not enough inlet Turn faucet on fully. Disconnect the device from the power source before making any fluctuates high water supply. Check garden hose repairs. and low. for kinks, leaks or blockage. - Page 17 Voltage loss due to Unplug any the extension cord. extension cords attached and plug the unit directly into the outlet. IF YOU ENCOUNTER ANY ADDITIONAL DIFFICULTIES NOT LISTED, VISIT OUR WEBSITE AT WWW.SIMONIZ.CA OR CALL CUSTOMER SERVICE FOR HELP AT 1-866-4SIMONIZ (1-866-474-6664).
-
Page 18: Imited W Arranty
The warranty is void if the equipment is used for commercial, rental or industrial purposes. If you have further questions, please visit our website (www.simoniz.ca) or call 1-866-4SIMONIZ (1-866-474-6664). Made in China...
Need help?
Do you have a question about the 039-8702-2 and is the answer not in the manual?
Questions and answers