Table of Contents
Advertisement
Quick Links
Download this manual
See also:
Owner's Manual
51-200
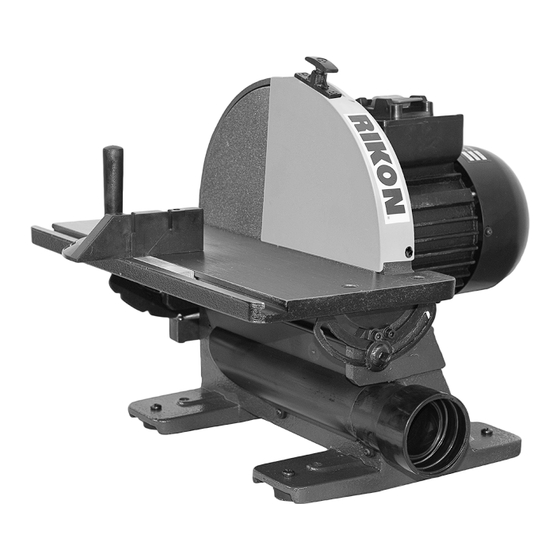
12" Benchtop Disc Sander
4001824
Operator's Manual
Record the serial number and date of purchase in your manual for future reference.
Serial Number: _________________________
Date of purchase: _________________________
For technical support or parts questions, email techsupport@rikontools.com or call toll free at (877)884-5167
www.rikontools.com
51-200M3
Advertisement
Table of Contents

Summary of Contents for Rikon Power Tools 51200
- Page 1 51-200 12” Benchtop Disc Sander 4001824 Operator’s Manual Record the serial number and date of purchase in your manual for future reference. Serial Number: _________________________ Date of purchase: _________________________ For technical support or parts questions, email techsupport@rikontools.com or call toll free at (877)884-5167 www.rikontools.com 51-200M3...
-
Page 2: Table Of Contents
Changes and improvements may be made at any time, with no obligation on the part of Rikon Power Tools, Inc. to modify previously delivered units. Reasonable care has been taken to ensure that the information in this manual is correct, to provide you with the guidelines for the proper safety,... -
Page 3: Safety Warnings
SAFETY INSTRUCTIONS IMPORTANT! Safety is the single most important consideration in the operation of this equipment. The following instructions must be followed at all times. Failure to follow all instructions listed below may result in electric shock, fire, and/or serious personal injury. There are certain applications for which this tool was designed. - Page 4 SAFETY INSTRUCTIONS 12. KEEP PROTECTIVE GUARDS IN PLACE AND IN 25. ALWAYS WEAR A DUST MASK TO PREVENT WORKING ORDER. INHALING DANGEROUS DUST OR AIRBORNE PARTICLES, including wood dust, crystalline silica dust 13. AVOID ACCIDENTAL STARTING. Make sure that and asbestos dust. Direct particles away from face and the power switch is in the “OFF”...
-
Page 5: Electrical Requirements
SAFETY INSTRUCTIONS EXTENSION CORDS ELECTRICAL SAFETY THE USE OF AN EXTENSION CORD THIS TOOL MUST BE GROUNDED WITH THIS MACHINE IS NOT RECOMMENDED. For WHILE IN USE TO PROTECT THE OPERATOR FROM best power and safety, plug the machine directly into a ELECTRIC SHOCK. -
Page 6: Sander Safety Rules
SAFETY INSTRUCTIONS SPECIFIC SAFETY INSTRUCTIONS FOR SANDERS This machine is intended for the surfacing of natural, solid woods and composite materials. Any other use not as specified, including modification of the machine or use of parts not tested and approved by the equipment manufacturer can cause unforeseen damage, and invalidate the warranty. -
Page 7: Contents Of Package
CONTENTS OF PACKAGE Dust Port Sander Disc Guard & Mounting Screws Miter Gauge Manual & Warranty Card (not shown) Disc Brake & Mounting Screws NOTE: Pending packaging changes at the factory, some parts may already be pre-assembled on the machine. The assembly steps listed should none-the-less be reviewed for information on the machine parts and their adjustments. -
Page 8: Assembly/Adjustments
ASSEMBLY SECURING SANDER TO A WORKBENCH The sander base must be secured before using. Attach a large C-Clamp to each side of the sander and the workbench. Or, permanently mount following the instructions below: 1. Place the sander on the workbench in its final operating location. -
Page 9: Operation
Warning: To avoid jamming the workpiece or fingers between the table and sanding surface, the table edge should be a maximum of 1/16 inch from sanding surface. 3. Always maintain a gap of approximately 1/16” between the table edge, and disc. If adjustment is necessary loosen the four bolts (Fig. -
Page 10: Operation
OPERATION Warning: Applying the workpiece to the right side of Before turning on the machine, review the disc could cause workpiece to fly up (kickback) the safety precautions listed on pages 3 to 6. Make sure and result in an injury. that you fully understand the features, adjustments and capabilities of the machine that are outlined throughout this Please take note of the disc rotation (counter clock-... -
Page 11: Troubleshooting
MAINTENANCE Turn the power switch “OFF” and disconnect the plug from the outlet prior to adjusting or maintaining the sander. DO NOT attempt to repair or maintain the electrical components of the motor. Take the sander to a qualified service technician for this type of maintenance. MAINTENANCE REQUIRED FREQUENCY Check the power cord and plug for any damage. -
Page 12: Parts Diagram
PARTS DIAGRAM... -
Page 13: Parts List
PARTS LIST... -
Page 14: Wiring Diagram
WIRING DIAGRAM This machine must be grounded. Replacement of the power supply cable should only be done by a qualified electrician. See page 5 for additional electrical information. This tool is intended for use on a circuit that has a 120 volt electrical receptacle. The illustration on page 5 shows the type of the 120v, 3-wire electrical plug and electrical receptacle that has a grounding... -
Page 15: Warranty
WARRANTY... -
Page 16: Width
51-200 For more information: 16 Progress Road Billerica, MA 01821 877-884-5167 / 978-528-5380 techsupport@rikontools.com www.rikontools.com 51-200M3...


Need help?
Do you have a question about the 51200 and is the answer not in the manual?
Questions and answers