
Related Manuals for SATO WS4 Series


Summary of Contents for SATO WS4 Series
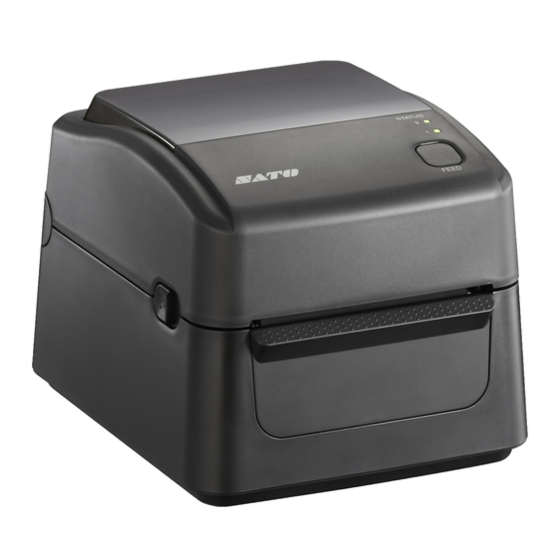
- Page 1 WS4 Series Printer Operator Manual WS408DT / WS412DT WS408TT / WS412TT WS4-r04-16-02-24OM © 2017 SATO Corporation. All rights reserved.
- Page 2 FCC ID In a domestic environment this product may cause radio interference in which case the user may be required to take adequate measures. FCC Warning This equipment has been tested and found to comply with the limits for a Class A digital device, pursuant to Part 15 of the FCC Rules.
- Page 3 Disassemble or modify this product. ∙ Remove the certificate label (serial number seal) affixed to this product. ∙ Use of this product near microwave and/or other Wireless LAN equipment, or where static electricity or radio interference is present, may shorten the communication distance, or even disable communication.
-
Page 4: Liability Disclaimer
SATO has been advised of the possibility of such damages. -
Page 5: Safety Precautions
Safety Precautions This section describes how to use the printer safely. Be sure to read the following information carefully before using the printer. Pictographic Symbols This operator manual and the printer labels use a variety of pictographic symbols. These symbols emphasize the safe and correct use of the printer and to prevent injury to others and property damage. - Page 6 If they are spilled and get inside the printer, immediately turn off the power switch, unplug the power cord from the outlet and contact your SATO reseller or technical support center. Using the printer in this condition could cause a fire or electric shock.
- Page 7 Do not disassemble the printer Do not disassemble or modify the printer. Doing so could result in fire or electric shock. Ask your SATO reseller or technical support center to conduct internal inspections, adjustments, and repairs.
- Page 8 The print head is hot after printing. Be careful not to get burned when replacing media or cleaning immediately after printing. Touching the edge of the print head with bare hands could result in injury. Be careful not to become injured when replacing media or cleaning.
- Page 9 break the core wires and cause a fire or electric shock. The power cord set that comes with the printer is especially made for this printer. Do not use it with any other electrical devices. Top cover Be careful not to get your fingers pinched when opening or closing the top cover.
-
Page 10: Table Of Contents
Contents Introduction ......................2 Features ....................... 2 Unpacking ....................2 Understand Your Printer ................3 1.3.1 WS4 Direct Thermal (DT) Model ............3 1.3.2 WS4 Thermal Transfer (TT) Model ............. 6 Printer Lights ..................... 10 1.4.1 Status Lights ..................10 1.4.2 System Mode ................... - Page 11 Media Issues ....................45 Ribbon Issues for TT Model ............... 46 Other Issues ....................47 Set Up Interface Connection by SATO WS4 Printer Utility ........48 Install SATO WS4 Printer Utility ..............48 Using the SATO WS4 Printer Utility ............51 6.2.1 Menu Bar..................
-
Page 12: Features
1 Introduction Features 1 Introduction Thank you for purchasing a SATO WS printer. This manual provides information about how to set up and operate your printer, load the media and solve common problems. 1.1 Features Various Connectivity Options USB, Ethernet, RS232 ■... -
Page 13: Introduction
When you receive the printer, open the package immediately and inspect for shipping damage. If you discover any damage, contact the shipping company and file a claim. SATO is not responsible for any damage incurred during shipping. Save all package materials for the shipping company to inspect. -
Page 14: Understand Your Printer
1 Introduction Understand Your Printer 1.3 Understand Your Printer 1.3.1 WS4 Direct Thermal (DT) Model 1.3.1.1 Perspective View LED 2 LED 1 Feed Button Cover Open Latch... - Page 15 1 Introduction Understand Your Printer 1.3.1.2 Back View Paper Slot Power Switch RS232 USB A USB B Power Jack Caution: The areas indicated by the ellipse have sharp edges. To avoid injury, be careful not to touch them when handling the printer. Caution: To avoid injury, be careful not to trap your fingers in the Paper Slot while opening or closing the Top Cover.
-
Page 16: Interior View
1 Introduction Understand Your Printer 1.3.1.3 Interior View Thermal Printhead Transmissive Sensor Core Holders Media Roll Holders Media Guides Thumbscrew Reflective Sensor Platen Roller Warning: The printhead becomes very hot during printing. Do not touch the printhead or touch around it directly after printing. By doing so you may get burnt. -
Page 17: Ws4 Thermal Transfer (Tt) Model
1 Introduction Understand Your Printer 1.3.2 WS4 Thermal Transfer (TT) Model 1.3.2.1 Perspective View LED2 LED1 Feed Button... - Page 18 1 Introduction Understand Your Printer 1.3.2.2 Back View Power Switch RS232 Power Jack USB A USB B Caution: The areas indicated by the ellipse have sharp edges. To avoid injury, be careful not to touch them when handling the printer. Caution: To avoid injury, be careful not to trap your fingers in the Paper Slot while opening or closing the Top Cover.
-
Page 19: Interior View I
1 Introduction Understand Your Printer 1.3.2.3 Interior View I Ribbon Supply Wheel Take-Up Wheel Media Roll Holders Module Release Latch... -
Page 20: Interior View Ii
1 Introduction Understand Your Printer 1.3.2.4 Interior View II Printhead Media Shaft Lock Button Transmissive Sensor Reflective Sensor Media Guides Platen Roller Warning: The printhead becomes very hot during printing. Do not touch the printhead or touch around it directly after printing. By doing so you may get burnt. -
Page 21: Printer Lights
1 Introduction Printer Lights 1.4 Printer Lights There are two LED lights that show the status of your printer. 1.4.1 Status Lights Status lights help you check printer’s condition. The following tables show the blinking speed of status lights and the conditions they indicate. Symbol Blinking Speed Blinking Interval... - Page 22 1 Introduction Printer Lights Word data has been accessed from a place other than the boundary of the word data. Long word data has been accessed from a place other than the boundary of the long word data. ** Red Command error.
-
Page 23: System Mode
1 Introduction Printer Lights 1.4.2 System Mode The system mode consists of status light color combinations. It contains a list of commands for you to select and run. To enter the system mode and run the command, do the following: 1. -
Page 24: Get Started
2 Get Started Attach the Power Cord 2 Get Started This chapter describes how to set up your printer. Caution: Do not use your printer in areas exposed to splashing water or any other liquid. Caution: Do not drop your printer, or place it in an area subject to humidity, vibration or shock. -
Page 25: Turn On/Off Your Printer
2 Get Started Turn On/Off Your Printer 2.2 Turn On/Off Your Printer When your printer is connected to a host (a computer), it is best practice to turn on the printer before turning on the host, and turn off the host before turning off the printer. -
Page 26: Turn Off Your Printer
2 Get Started Turn On/Off Your Printer 2.2.2 Turn Off Your Printer 1. Make sure LED 2 is off and LED 1 is solid green before turning off the printer. 2. To turn off your printer, turn off the Power Switch as below. The “O” is the OFF position. -
Page 27: Load Media
2 Get started Load Media 2.3 Load Media There are various types and sizes for the media roll. Load the applicable media to satisfy your need. 2.3.1 Prepare Media The inside wound and outside wound media roll can be loaded into the printer the same way. -
Page 28: Place A Media Roll And Test Media Feed
2 Get started Load Media 2.3.2 Place a Media Roll and Test Media Feed 2.3.2.1 Place a Media Roll for DT Model 1. Open the top cover of the printer. 2. Press the holder lock on the Media Roll Holders to slide them outward and place the media roll between the holders. - Page 29 2 Get started Load Media 1 inch 1.5 inch Core Holder Thumbscrew Holder Lock 3. Pull the media until it reaches out of the printer. Thread the media under the media guides. Caution: Do not ship or carry the printer while the label roll is installed. Do not turn off your printer during data transmission.
- Page 30 2 Get started Load Media 4. Close the top cover. Warning: The printhead becomes very hot during printing. Do not touch the printhead or touch around it directly after printing. By doing so you may get burnt.
- Page 31 2 Get started Load Media 2.3.2.2 Test Media Feed for DT Model 1. Turn on the printer and press the FEED button to feed a label. 2. Flip the media and tear it along the edge of the top cover.
- Page 32 2 Get started Load Media 2.3.2.3 Place a Media Roll for TT Model 1. Open the top cover of the printer. 2. Press the switch lock on the Media Roll Holders to slide them outward and place the media roll between the holders. Adjust the media roll so its print side is facing up and make sure it is clamped tightly by the holders.
- Page 33 2 Get started Load Media 3. Push the Module Release Latch to open the printer module. 4. Press the Lock button on the Media Guides to slide them outward.
- Page 34 2 Get started Load Media 5. Pull the media until it reaches out of the printer. 6. Put the media under the Media Shaft and center it between the Media Guides.
- Page 35 2 Get started Load Media 7. Close the printer module and press down firmly at its both sides, until you hear a click. Warning: The printhead becomes very hot during printing. Do not touch the printhead or touch around it directly after printing. By doing so you may get burnt.
- Page 36 2 Get started Load Media 2.3.2.4 Test Media Feed for TT Model 1. Turn on the printer, and press the FEED button to feed a label. 2. Flip the media and tear it along the edge of front cover.
-
Page 37: Placing Ribbon For Tt Model
2 Get Started Load Media 2.4 Placing Ribbon for TT Model 1. Open the top cover of the printer. 2. Push the Module Release Latch to open the printer module. - Page 38 2 Get Started Load Media 3. Lift the printer module to reveal the Supply Wheel. Supply Wheel 4. Do the following to install both rolls: To load the supply roll, set the ribbon roll on the core adapter shaft. Then, ...
- Page 39 2 Get Started Load Media shaft. Then, align the notches on the left side of the roll to the hole on the take-up wheel. Then place the other end of the roll into the hole on the right. 5. Pull the ribbon from the supply roll and tape it on the empty ribbon core. 6.
- Page 40 2 Get Started Load Media 7. Rotate the Take-Up Wheel to straighten the ribbon and reduce its wrinkles. Note: For the supply hub, the ribbon wind direction can be coated side in (CSI) or coated side out (CSO); for the take-up hub, the wind direction must be CSO.
-
Page 41: Media Types
Your printer supports various media types, including non-continuous media, continuous media, and fanfold media. The following table provides details about them. For optimal print performance and durability, please use SATO- certified label and ribbon supplies on this printer. Media Type... - Page 42 3 Printer Operation Media Types Media Type Looks Like Description Fanfold Media Fanfold media is in continuous form, but it can be used as non-continuous media, because its labels are separated by folds. Some fanfold media also has black marks or liners. For fanfold media installation, take the following steps.
-
Page 43: Printer Operation
3 Printer Operation Media Sensor Calibration 3 Printer Operation This chapter provides information about printer operation. 3.1 Media Sensor Calibration You need to calibrate the media sensor to print properly. WS printers provide transmissive and reflective sensor calibration. Take the following steps to use them. -
Page 44: Self-Test
3 Printer Operation Self-Test 3.2 Self-Test The printer can run a self-test to print a configuration label, which helps you understand current settings of the printer. Perform the following steps to run the self-test: 1. Turn off the printer. 2. Press and hold the FEED button and turn on the printer. 3. -
Page 45: Dt Model Test Print
3 Printer Operation Self-Test 3.2.1 DT Model Test Print... -
Page 46: Tt Model Test Print
3 Printer Operation Self-Test 3.2.2 TT Model Test Print... -
Page 47: Reset Your Printer
3 Printer Operation Reset Your Printer 3.3 Reset Your Printer By resetting your printer, you can return your printer to factory defaults. This can help you solve some problems caused by settings changed when printing from driver or sending commands. Perform the following steps to reset your printer: 1. -
Page 48: Media Sensing
3 Printer Operation Media Sensing 3.4 Media Sensing WS printers offer two types of media sensor: transmissive and reflective. They are used for detecting specific media types. 3.4.1 Transmissive Sensor The transmissive sensor is fixed and placed near the center of the printhead. It is used for detecting gaps across the entire width of the label. -
Page 49: Reflective Sensor
3 Printer Operation Media Sensing 3.4.2 Reflective Sensor The reflective sensor is movable within the entire width of the media. It detects gaps, notches and black marks not located at the center of the media. Multi Columns Notch Black Mark Flip the media so the black-mark side is facing down to align with the sensor. -
Page 50: Maintenance
Daily maintenance should be done for high volume printing, and weekly for low volume printing. Use a cleaning kit to clean the printer regularly. You can purchase a cleaning kit from a SATO reseller or technical service center. - Page 51 4 Maintenance Cleaning DT Model Print Head Cleaning TT Model Print Head Cleaning Important: Printhead warranty becomes void if printhead’s serial number is removed, altered, defected, or made illegible, under any circumstance.
-
Page 52: Media Housing
4 Maintenance Cleaning 4.1.2 Media Housing Use a soft cloth to clean the dust, dirt or debris built up on the Media Roll Holders, Media Guides and media path. 1. Moisten a soft cloth with Isopropyl alcohol (≥99%). 2. Wipe the Media Roll Holders to clean dust. 3. -
Page 53: Platen Roller
4 Maintenance Cleaning 4.1.4 Platen Roller The platen roller is also important for print quality. Dirty platen roller may damage the printhead. Clean the platen roller right away if the adhesive, dirt or dust accumulates on it. For excessive dirt / stuck labels, the platen roller should be removed. - Page 54 4 Maintenance Cleaning DT Platen Roller Cleaning TT Platen Roller Cleaning...
-
Page 55: Troubleshooting
5 Troubleshooting Printer Issues 5 Troubleshooting This chapter provides information about printer operational related problems and recommended suggestions to resolve the issue. 5.1 Printer Issues The printer won’t power on ■ Did you attach the AC power cord? ■ Make sure the power supply’s connector is inserted into the printer power jack. -
Page 56: Media Issues
The printhead is dirty. Clean the printhead. ■ The platen roller is dirty. Clean the platen roller. Adjust the print darkness or lower the print speed. ■ The media is incompatible for the printer. Use SATO-approved media ■ roll instead. -
Page 57: Ribbon Issues For Tt Model
5 Troubleshooting Media Issues 5.3 Ribbon Issues for TT Model The ribbon is out Load a new ribbon roll. See Section 2.4, “Placing Ribbon” to reload the ribbon. The ribbon is broken Check the print darkness and adjust it if it is too high, and take the ... -
Page 58: Other Issues
6 SATO WS4 Printer Utility Install SATO WS4 Printer Utility 5.4 Other Issues There are broken lines in the printed label The printhead is dirty. Clean the printhead (see Section 4.1.1 “Printhead”). ■ An error occurred when writing data to the USB memory ■... -
Page 59: Set Up Interface Connection By Sato Ws4 Printer Utility
You can define properties, update firmware and send commands in SATO WS4 Printer Utility. 6.1 Install SATO WS4 Printer Utility 1. Download the SATO WS4 Printer Utility from your local SATO Resources website and start the installation process. 2. Locate the installation file on the CD and click it. - Page 60 6 SATO WS4 Printer Utility Install SATO WS4 Printer Utility 4. In this dialog box, follow the instructions to choose the installation path and then click Next. 5. In this dialog box, click Next.
- Page 61 6 SATO WS4 Printer Utility Install SATO WS4 Printer Utility 6. After the installation of SATO WS4 Printer Utility is complete, click Close.
-
Page 62: Using The Sato Ws4 Printer Utility
6 SATO WS4 Printer Utility Work with SATO WS4 Printer Utility 6.2 Using the SATO WS4 Printer Utility Start SATO WS4 Printer Utility. Its interface looks like this: Menu bar It includes SATO WS4 Printer Utility menus. ■ Toolbar It provides ports, port settings, emulation languages, printer dpi and ■... - Page 63 Setting Auto Detect USB When you connect your printer ■ to a computer with a USB cable, SATO WS4 Printer Utility automatically detects it and shows the USB information in the Port Name and Port Information. By default, it is enabled.
-
Page 64: Toolbar
6 SATO WS4 Printer Utility Work with SATO WS4 Printer Utility Language ■ It is the language of SATO WS4 Printer Utility interface. You can select Windows’s System Default, English or Simplified Chinese. By default, it uses your system default. Help Contents The help content of SATO WS4 Printer Utility. - Page 65 6 SATO WS4 Printer Utility Work with SATO WS4 Printer Utility ■ It shows the USB information in the Port Name and Port Information as soon as the computer detects your printer. By default, the computer automatically detects the USB port.
-
Page 66: Printer Status
6 SATO WS4 Printer Utility Work with SATO WS4 Printer Utility Set up WLAN connection. The second row of the toolbar includes six items. Printer Model Printer models. ■ Printer Emulation The emulation language of your printer. The emulation ■... -
Page 67: Navigation Pane
6 SATO WS4 Printer Utility Work with SATO WS4 Printer Utility Status Description CUTTER ERROR The cutter is experiencing issues. NO PAPER The label has run out. HEAD OPEN Attempt to feed or issue the label with the top cover (head) ERROR open. -
Page 68: Parameter Setting
6 SATO WS4 Printer Utility Work with SATO WS4 Printer Utility object; Delete is to delete file from the list object. You can also right-click in the Properties pane and select Send, Get, Add or Delete in the shortcut menu. Each time you click Send, your printer restarts to apply the change. - Page 69 6 SATO WS4 Printer Utility Work with SATO WS4 Printer Utility Property Name Description It is the media sensor you are using. It includes I-MARK, Sensor Type GAP and None. When you perform media calibration, the sensor is set to the one you select.
- Page 70 6 SATO WS4 Printer Utility Work with SATO WS4 Printer Utility Property Name Description ON (Power on and Head close) Your printer automatically calibrates media using a media sensor after power on and every time you close the print module when the printer is turned on.
- Page 71 6 SATO WS4 Printer Utility Work with SATO WS4 Printer Utility Property Name Description Inch Change the unit of Position Adjustment to inch. dots Change the unit of Position Adjustment to dots. Horizontal Offset Move the print position horizontally. The positive number is left, and the negative number is right.
- Page 72 6 SATO WS4 Printer Utility Work with SATO WS4 Printer Utility SDPL, SEPL, SIPL, SZPL and AUTO ■ SDPL, SEPL, SIPL, SZPL and AUTO provides settings grouped in the Supply, Control, Action, Label and Position Adjustment area. Property Name Description It is the media sensor you are using.
- Page 73 6 SATO WS4 Printer Utility Work with SATO WS4 Printer Utility Property Name Description media using a media sensor every time you close the print module when the printer is turned on. ON (Power on and Head close) Your printer...
-
Page 74: Com
6 SATO WS4 Printer Utility Work with SATO WS4 Printer Utility 6.2.4 COM The COM tab provides the settings of the RS-232C port. When you use COM as your port, make sure the settings in the COM tab are the same as the port settings, or your printer won’t work properly. - Page 75 6 SATO WS4 Printer Utility Work with SATO WS4 Printer Utility Set Up LAN Connection If you want to use the LAN port to transfer data, you need to set up the network connection in the LAN tab. 1. Connect your printer and computer to a network device (hub, switch or router) with Ethernet cables.
- Page 76 6 SATO WS4 Printer Utility Work with SATO WS4 Printer Utility If you don’t have a static IP address, make sure DHCP is enabled and click ∙ Send. 5. After your printer restarts, click Get to get the TCP/IP information of your printer.
-
Page 77: Ipv6
6 SATO WS4 Printer Utility Work with SATO WS4 Printer Utility If you are using a dynamic IP ∙ address provided by DHCP, in the IP Address box, enter the IP address under Current TCP/IP in the LAN tab, and then click OK. - Page 78 6 SATO WS4 Printer Utility Work with SATO WS4 Printer Utility If you don’t have a static IPv6 address, in the Mode list, click DHCPv6; in the • Address Type list, click Normal, and click Send. 2. After your printer restarts, click Get to get its IPv6 information. If you are using a static IPv6 address, you’ll get the same settings as it is in the previous step;...
- Page 79 6 SATO WS4 Printer Utility Work with SATO WS4 Printer Utility 3. In the Input/Output Port list, click LAN, and click Setting. 4. In the Setting LAN dialog box, do one of the following to configure your IP address: If you are using a static IP address, in ∙...
-
Page 80: Wlan
6 SATO WS4 Printer Utility Work with SATO WS4 Printer Utility 6.2.7 WLAN The WLAN tab provides wireless network settings, including IPv4, Current IPv4, Authentication, Information, WEP, WPA, Initialization, Protocol, Current Protocol, Server and EAP. Set Up WLAN Connection Before you set up a wireless LAN connection, make sure your computer has connected to a wireless network. - Page 81 6 SATO WS4 Printer Utility Work with SATO WS4 Printer Utility 3. In the SSID box, enter the network name you’ve connected and do one of the following to enter your password: If you’re using Open and WEP is on, choose your WEP password type in the ∙...
- Page 82 6 SATO WS4 Printer Utility Work with SATO WS4 Printer Utility If you’re using WPA-Personal or WPA2 Personal, enter your password in the ∙ WPA Pre-Shared Key box. If you’re using 802.1X, WPA-Enterprise or WPA2 Enterprise, choose your EAP ∙...
- Page 83 6 SATO WS4 Printer Utility Work with SATO WS4 Printer Utility If you don’t have a static IP address, make sure DHCP is enabled and click ∙ Send. 5. After your printer restarts, click Get to get the IPv4 information of your printer.
- Page 84 6 SATO WS4 Printer Utility Work with SATO WS4 Printer Utility address: If you are using a static IP address, in ∙ the IP Address box, enter the IP address under IPv4 in the WLAN tab and click OK. If you are using a dynamic IP address ∙...
-
Page 85: Bluetooth
6 SATO WS4 Printer Utility Work with SATO WS4 Printer Utility 6.2.8 Bluetooth The Bluetooth tab provides Bluetooth settings. Property Name Description Pin Code The Bluetooth PIN code of your printer. The new PIN code takes effect when you reconnect your printer to your computer. - Page 86 6 SATO WS4 Printer Utility Work with SATO WS4 Printer Utility Do the following to set up a Bluetooth connection for your printer: 1. Click the Bluetooth icon in the notification area (system tray). 2. In the Bluetooth Devices dialog box, click Add.
- Page 87 6 SATO WS4 Printer Utility Work with SATO WS4 Printer Utility 4. Click SATO WS4, and click Next. 5. Click Let me choose my own passkey. The default key is 0000. After entering...
- Page 88 6 SATO WS4 Printer Utility Work with SATO WS4 Printer Utility the key, click Next. 6. The computer will try to connect the printer. If it succeeds, you’ll see the successful message. Take a note of the outgoing COM port and click Finish.
-
Page 89: Specifications
7 Specifications Printer 7 Specifications This chapter provides specifications for the printer. Specifications are subject to change without notice. 7.1 Printer Model WS408DT WS412DT WS408TT WS412TT Print Method Direct Thermal Direct Thermal or Thermal Transfer 203 dpi 300 dpi 203 dpi 300 dpi Resolution (8 dots/mm) - Page 90 7 Specifications Printer Model WS408DT WS412DT WS408TT WS412TT Pitch Direction (excluding liner) - Top: 1.5 mm (0.06"), Bottom: 1.5 mm (0.06") Printable Width Direction (excluding liner) - Left: 1.5 mm (0.06"), Right: 1.5 mm Area (0.06") STD Model: USB (Type A and Type B), Ethernet, RS232C Interface LAN Model: USB (Type A and Type B), Ethernet Optional...
-
Page 91: Media
7 Specifications Media 7.2 Media Model WS408DT WS412DT WS408TT WS412TT Media Size Continuous 10 ~ 996 mm (0.39" ~ 39.21") 10 ~ 996 mm (0.39" ~ 39.21") Pitch Pitch including 13 ~ 999 mm (0.51" ~ 39.33") 13 ~ 999 mm (0.51" ~ 39.33") liner 25.4 ~ 115 mm (1"... - Page 92 7 Specifications Media Model WS408DT WS412DT WS408TT WS412TT Media Thickness 0.06 ~ 0.19 mm (0.0024” ~ 0.0074”) Max Roll Diameter Max Roll Diameter Size: 127 mm (5 inches) Max Roll Diameter for 203.2 mm (8 inches) Unwinder Direct Thermal Label, Direct Thermal Tag, Roll Paper (Inside Wound or Media Type Outside Wound), Fanfold Paper Ribbon Size Length...
-
Page 93: Barcodes
7 Specifications Barcodes 7.3 Barcodes Barcodes One Dimensional UPC-A Barcodes UPC-E JAN/EAN CODE39 CODE93 CODE128 GS1-128 (UCC/EAN128) CODABAR (NW-7) Industrial 2of5 UPC add-on code POSTNET GS1 DataBar Omnidirectional GS1 DataBar Truncated GS1 DataBar Stacked GS1 DataBar Stacked Omnidirectional GS1 DataBar Limited GS1 DataBar Expanded GS1 DataBar Expanded Stacked Two Dimensional... - Page 94 7 Specifications Barcodes Barcodes (CC-A/CC-B) GS1 DataBar Expanded Composite (CC-A/CC- GS1 DataBar Stacked Omnidirectional Composite (CC-A/CC-B) GS1 DataBar Limited Composite (CC-A/CC-B) GS1-128 Composite (CC-A/CC-B/CC-C)
-
Page 95: Ethernet
Technology HP Auto-MDIX, Auto-Negotiation 7.5 Wireless LAN Properties Wireless LAN I/F Hardware Protocol IEEE802.11b/g/n Enabled Device WS4 Series Operating -4 degF (-20 degC) ~ 185 degF (+85 degC) Temperature Destination Europe Frequency 2412 ~ 2462 MHz 2412 ~ 2472 MHz... - Page 96 7 Specifications Ethernet Properties Wireless LAN I/F 9/6 Mbps: BPSK IEEE Transmission Conforming to 802.11n Method IEEE802.11n OFDM method Channel US)1-11ch (JP/DE)1-13ch Data Transmission 20MHz : 6.5M / 7.2M / Speed/Modulation 13M / 14.4M / 19.5M / 21.7M / 26M /28.9M / 39M / 43.3M / 52M / 57.8M / 58.5M / 65M / 72.2M(Auto-sensing)
-
Page 97: Bluetooth
7 Specifications Bluetooth 7.6 Bluetooth Properties Bluetooth I/F Standard Bluetooth 2.1 + EDR or later Enable Device WS Series Operating Temperature 41°F (5°C) ~ 104°F (40°C) Storage Temperature -4°F (-20°C) ~ 140°F (60°C) Operating Humidity 25 ~ 85 % Non-condensing R.H Storage Humidity 10 ~ 90 % Non-condensing R.H Connection Form... -
Page 98: Electrical And Operating Environment
7 Specifications Electrical and Operating Environment 7.7 Electrical and Operating Environment Properties Range Power Supply Voltage: AC 100 V ~ 240 V ± 10 % (full range) Frequency: 50 Hz - 60 Hz ± 5 % Power Consumption DT Model: 60W TT Model: 90W Temperature Operating: 5 °C ~ 40 °C Storage: -20 °C ~ 60 °C... -
Page 99: Interfaces
7 Specifications Interfaces 7.9 Interfaces This section provides information about IO port specifications for the printer. 7.9.1 USB There are two common USB connectors. Typically, type A is found on hosts and hubs; type B is found on devices and hubs. The figure below shows their pinouts. -
Page 100: Ethernet
7 Specifications Interfaces 7.9.2 Ethernet The Ethernet uses RJ-45 cable, which is 8P8C (8-Position 8-Contact). The figure below shows its pinout. 1 2 3 4 5 6 7 8 Signal Transmit+ Transmit- Receive+ Reserved Reserved Receive- Reserved Reserved... -
Page 101: Rs-232C
7 Specifications Interfaces 7.9.3 RS-232C The RS-232C on the printer is DB9 female. It transmits data bit by bit in asynchronous start-stop mode. The figure below shows its pinout. Signal Description Provide 5V Power Receive Transmit No Connection Ground Pull High RTS NC Request to Send Clear to Send... - Page 102 7 Specifications Interfaces Host (DB9) Printer (DB9) Signal Description Description Signal Carrier Detect Provide 5V Power Receive Receive Transmit Transmit Data Terminal Ready No Connection Ground Ground Data Set Ready Pull High Request to Send Request to Send Clear to Send Clear to Send Pull High...
Need help?
Do you have a question about the WS4 Series and is the answer not in the manual?
Questions and answers