
Related Manuals for Santec SCVR-2411K


Summary of Contents for Santec SCVR-2411K
- Page 1 USER MANUAL HD-CVI digital video recorder Models: SCVR-2411K SCVR-2411TK SCVR-2812TK SCVR-2411K SCVR-2411TK SCVR-2812TK Version 1.1sfi/1015/dt/A5...
- Page 2 Please follow all instructions and observe the warnings contained in this manual. Please contact your local dealer or SANTEC directly if you have any questions or if you wish to claim for a service or warranty. You will find further information on our website: www.santec-video.com...
-
Page 3: Table Of Contents
User manual SCVR-2411K, SCVR-2411TK, SCVR-2812TK Table of contents 1. General 1.1 Security notes and safety precautions 1.2 CE compliance 1.3 Important general notes 1.4 Items included in the delivery 1.5 „Burg Cam“ App for P2P applications 1.6 General notes 2. Controls, indicators and connectors 2.1 SCVR-2411K... - Page 4 User manual SCVR-2411K, SCVR-2411TK, SCVR-2812TK 7.5 Main menu Setting 7.5.1 Main menu Setting Camera 7.5.1.1 Main menu Setting Camera Image 7.5.1.2 Main menu Setting Camera Encode 7.5.1.3 Main menu Setting Camera Channel name 7.5.1.4 Main menu ...
-
Page 5: General
User manual SCVR-2411K, SCVR-2411TK, SCVR-2812TK 1. General Please read this user manual carefully before starting to operate this device. Please retain this user manual for future reference. 1.1 Safety instructions and precautions Overcharge Never expose the power socket or the power cord to electrical overcharge. This may lead to fire and life-threatening shocks. -
Page 6: Important General Notes
User manual SCVR-2411K, SCVR-2411TK, SCVR-2812TK 1.3 Important general note Please read the following instructions carefully. 1.3.1 Assembly and installation On-site installation should only be performed by qualified maintenance personnel and must meet local specifications and regulations. Never operate the equipment without the respective protective cover near water, in dusty rooms or extremely humid rooms. -
Page 7: Items Included In The Delivery
Non-approved spare parts may cause harm to people (electric shock) and may damage the device (fire). 1.4 Items included in the delivery 1x Recorder SCVR-2411K, SCVR-2411TK or SCVR-2812TK 1x Mouse 1x CD (configurations tool, quick installation guide) 1x Power adapter... -
Page 8: Burg Cam" App For P2P Applications
They are not connected in any way with SANTEC BW AG. Proprietary rights are with the respective manufacturers or brand owners. Illustrations and pictures in this user manual are for better understanding only and may differ from the actual product design. -
Page 9: Controls, Indicators And Connectors
User manual SCVR-2411K, SCVR-2411TK, SCVR-2812TK 2. Control elements, indicators and connections 2.1 SCVR-2411K Connections on recorder rear: VGA monitor output 5V DC power Netwokr connection 4x BNC video input 2x USB port Audio out, Audio in HDMI monitor output 2.2 SCVR-2411TK... -
Page 10: Scvr-2812Tk
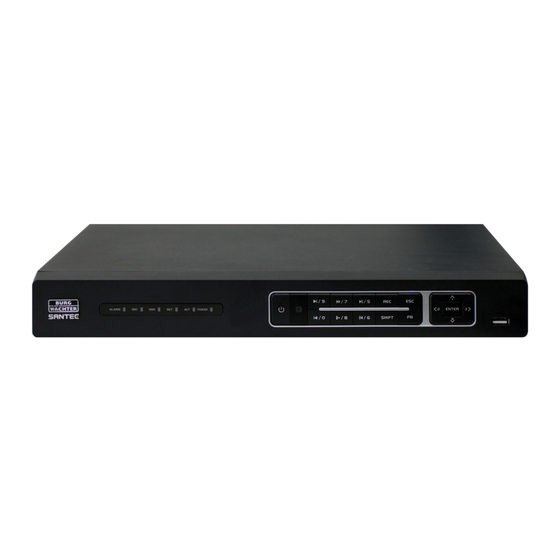
User manual SCVR-2411K, SCVR-2411TK, SCVR-2812TK 2.3 SCVR-2812TK Control indicators on recorder front: Indicator Description ALARM Alarm Recording Hard disk drive Network Remote control POWER Power Connections on recorder rear: Power on/off Alarm out, Audio out, 8x BNC video input 1x USB port... -
Page 11: Quick Start
Connect the monitor and the camera to power by using the power adapters supplied with these devices Finally, connect the recorder to power by using the supplied power adapter. For models SCVR-2411K and SCVR-2411TK: The recorder switches on automatically as soon as it is connect to power. During this phase a beep sounds. -
Page 12: Login
User manual SCVR-2411K, SCVR-2411TK, SCVR-2812TK 3.2 Login Enter your user name and password. By default, the following user name and password are: User name: admin Password: 9999 Important note: It is recommended to change the user name and password here: (see chapter 3.3 and... -
Page 13: Notes On Connected Cameras
User manual SCVR-2411K, SCVR-2411TK, SCVR-2812TK 4. Notes on connected cameras You can connect analogue or HD-CVI cameras (via coax or twisted pair) to this recorder. For models SCVR-2411TK and SCVR-2812TK, IP cameras (ONVIF) can be connected, too. Recommended SANTEC HD-CVI cameras:... -
Page 14: Controlling The Recorder Using The Mouse
User manual SCVR-2411K, SCVR-2411TK, SCVR-2812TK 5. Controlling the recorder using the mouse You can control the recorder using the supplied mouse. Connect the mouse to the USB port on the recorder. Double left-click: In live mode, double left-click in the respective camera image to display it as full screen. -
Page 15: Live View
User manual SCVR-2411K, SCVR-2411TK, SCVR-2812TK 6. Live view 6.1 Event display In the live view, small icons are displayed if one of the following events have been triggered: Symbol Description This channel is currently recording. Motion has been detected on this channel. -
Page 16: Calling-Up The Menu Bar
User manual SCVR-2411K, SCVR-2411TK, SCVR-2812TK 6.2 Calling-up the menu bar If you touch the upper edge of the respective channel with the mouse cursor, the following small menu bar is displayed: Note: This only works if the navigation bar is hidden. Right-click to do so. -
Page 17: Calling-Up The Quick Menu Using The Right Mouse Button
User manual SCVR-2411K, SCVR-2411TK, SCVR-2812TK 6.3 Access the quick menu by right-click In live mode (no matter if in split mode or full screen mode), single right-click into the live image to open the quick menu. Here you will find the following items:... - Page 18 User manual SCVR-2411K, SCVR-2411TK, SCVR-2812TK PTZ directions: You may use the 8 direction buttons (arrows) for PTZ control by clicking on them. In the center of the direction buttons, there is another button. If you click here, the camera image is displayed in full screen. Press and hold the left mouse key to draw a frame into the image.
-
Page 19: Aux Configuration
User manual SCVR-2411K, SCVR-2411TK, SCVR-2812TK 6.3.2.2 Aux configuration Click on the Aux configuration symbol. The following menu appears: Preset: For preset settings, the direction buttons can be used to move the camera into the desired position. Enter the preset number. - Page 20 User manual SCVR-2411K, SCVR-2411TK, SCVR-2812TK Pattern: For pattern settings, the direction buttons can be used to move the camera into the desired position. Enter the pattern number. Click on „Start“ and „End“. Border: For border settings, the direction buttons can be used. Use the left/right buttons to set the borders.
-
Page 21: Aux
User manual SCVR-2411K, SCVR-2411TK, SCVR-2812TK 6.3.2.3 Aux Click on the Aux symbol. The following menu appears: The here defined options depend on the selected protocol. “Aux Num” relates to the Aux on/off button of the decoder. _________________________________________________________________________________ - 21 -... -
Page 22: Colour Setting
User manual SCVR-2411K, SCVR-2411TK, SCVR-2812TK 6.3.3 Color setting Here you can make the following colour settings: Time period/Effective time: You can define 2 independent time periods for which apply additional settings usch as sharpness, brightness, etc. Hue: Values 0-15. Sharpness: Values 0-100. -
Page 23: Search
User manual SCVR-2411K, SCVR-2411TK, SCVR-2812TK 6.3.4 Search Please see chapter 7.1 6.3.5 Manual Please see chapter 7.5.4.3 6.3.6 Main menu Please see chapter 7 _________________________________________________________________________________ - 23 -... -
Page 24: Calling-Up The Navigation Bar
User manual SCVR-2411K, SCVR-2411TK, SCVR-2812TK 6.4 Calling-up the navigation bar You have to first enable the navigation bar to display it in the live image. You can enable the navigation bar here: Main menu Setting System General Navigation bar Once you have enabled the navigation bar, it is displayed in the live image if you left-click. -
Page 25: Usb Auto Pop-Up
User manual SCVR-2411K, SCVR-2411TK, SCVR-2812TK 6.5 USB Auto pop-up If you connect a USB device (e.g. a USB stick) to the recorder, it will be detected and the following message appears: You can choose to start a backup or an upgrade process using the USB device. Also see chapter 7.5.5.7 (Import/Export) and chapter 7.5.5.9 (Upgrade). -
Page 26: Main Menu Settings
User manual SCVR-2411K, SCVR-2411TK, SCVR-2812TK 7. Main menu settings You have 2 options to call-up the main menu: To open the main menu, right-click into the live image and select „Main Menu“ from the displayed quick menu. See chapter 6.3 Alternatively, you can open the main menu through the navigation bar which is displayed in the live image. -
Page 27: Main Menu Operate Search
User manual SCVR-2411K, SCVR-2411TK, SCVR-2812TK 7.1 Main menu Operate Search Symbol Function Display The searched image or file is displayed here. window At playback mode, full screen or split screen is supported. Here you can select between: From read/write HDD... - Page 28 User manual SCVR-2411K, SCVR-2411TK, SCVR-2812TK You can search for SD card recordings: Card record Here you can call-up the bookmark search for the respective Bookmark channel. Also see chapter 7.1. A list of all recordings (snapshots, videos) for the specified day is displayed.
- Page 29 User manual SCVR-2411K, SCVR-2411TK, SCVR-2812TK Smart search Volume setting for playback In full screen mode of the desired channel, click on this symbol to make a snapshot. The snapshot can be saved to a connected USB device (e.g. stick). Bookmark: See chapter 7.1.3...
-
Page 30: Intelligent Search
User manual SCVR-2411K, SCVR-2411TK, SCVR-2812TK 7.1.1 Smart search If you click on the „smart search“ symbol the following window is displayed: Left-click to define a search area. Click again on the search symbol to start the smart search. Click again to stop the search. -
Page 31: Search By Mark
User manual SCVR-2411K, SCVR-2411TK, SCVR-2812TK 7.1.3 Search by bookmark (marks manager) In playback mode, you can assign a name to the selected item. Start the playback. Click on the mark symbol The following window is displayed: Enter the mark time and the mark name. -
Page 32: Main Menu Operate Backup
User manual SCVR-2411K, SCVR-2411TK, SCVR-2812TK 7.2 Main menu Operate Backup There are various possibilities to backup data, e.g. via a USB device (e.g. USB stick) or HDD. Open the main menu and select. The following window is displayed: Here you can select the backup device, the start and end time of the recording, the camera name and the file format. -
Page 33: Main Menu Operate Shutdown
User manual SCVR-2411K, SCVR-2411TK, SCVR-2812TK The recorder automatically calculates the required storage capacity for this backup. Tick each recording which you wish to backup. Click on „Start“ to start the backup. The remaining backup time is displayed. Once the backup has successfully been completed, a message is displayed. -
Page 34: Main Menu Info
User manual SCVR-2411K, SCVR-2411TK, SCVR-2812TK 7.4 Main menu Info Here you can receive information on the recorder and the video data. System: o HDD: Double-click on a HDD to receive further information. o Recordings o BPS (video stream) o Version (e.g. system version, serial number, MAC address, etc.) Event: Here you will receive status information on the recorder and the camera channels. -
Page 35: Main Menu Setting Camera Image
User manual SCVR-2411K, SCVR-2411TK, SCVR-2812TK 7.5.1.1 Main menu Setting Camera Image Channel: Select the channel number. Saturation: Set the saturation (0-100). The higher the value, the brighter the colour. Optimum value: 40-60. Brightness: Set the brightness (0-100). The higher the value, the brighter the image. Optimum value: 40-60. -
Page 36: Main Menu Setting Camera Channel Name
User manual SCVR-2411K, SCVR-2411TK, SCVR-2812TK 7.5.1.3 Main menu Setting Camera Channel name Click into the name field to call up the virtual keyboard and assign a name to the individual cameras/channels. 7.5.1.4 Main menu Setting Camera Channel type Per channel define either „coax“... -
Page 37: Main Menu Setting Network Connection
User manual SCVR-2411K, SCVR-2411TK, SCVR-2812TK 7.5.2.2 Main menu Setting Network Connection Here you can adjust settings for: Max. number of connection, i.e. users (max. 128) TCP Port UDP Port HTTP Port HTTPS Port RTSP Port Note: If you change one of the above mentioned ports and don’t keep the default port value, you have to restart the recorder. -
Page 38: Main Menu Setting Network Ip-Filter
User manual SCVR-2411K, SCVR-2411TK, SCVR-2812TK Each device has a default domain name generated by MAC address for your option. You can also use customized valid domain name. Before you use Quick DDNS, you need to enable the following: Server address: www.quickddns.com... -
Page 39: Main Menu Setting Network Ftp
User manual SCVR-2411K, SCVR-2411TK, SCVR-2812TK Interval: Enter the seconds. 0 = no interval Enable health e-mail: Enable this box if you wish to send a test e-mail. Interval for health e-mail: Enter the interval in minutes to regularly send e-mail. -
Page 40: Main Menu Setting Network Upnp
User manual SCVR-2411K, SCVR-2411TK, SCVR-2812TK 7.5.2.8 Main menu Setting Network UPnP The UPnP protocol establishes a connection between LAN and WAN. Please enter the router‘s LAN and WAN addresses. Double-click on the respective service name in the list to enter additional port information: External port: Please only enter ports from 1024 to 5000 to avoid port conflicts. -
Page 41: Main Menu Setting Network Multicast
User manual SCVR-2411K, SCVR-2411TK, SCVR-2812TK 7.5.2.10 Main menu Setting Network Multicast Multicast describes the transmission of information from one point to a group (one-to-many distribution). Information (data) is transmitted to several recipients or a group simultaneously. The information packet is sent only once even if it need to be delivered to a large number of recipients. -
Page 42: Main Menu Setting Event
User manual SCVR-2411K, SCVR-2411TK, SCVR-2812TK 7.5.3 Main menu Setting Event 7.5.3.1 Main menu Setting Event Detect Here you can adjust settings for: Motion detection Video loss Video masking Motion detection: Select the channel by ticking “Enable“ to activate the motion detection function. -
Page 43: Main Menu Setting Event Abnormality
User manual SCVR-2411K, SCVR-2411TK, SCVR-2812TK 7.5.3.2 Main menu Setting Event Abnormality HDD: Define the event type: No HDD HDD error Disk no space For each event type define the action: Show message Alarm upload Send e-mail Buzzer... -
Page 44: Main Menu Setting Storage Schedule
User manual SCVR-2411K, SCVR-2411TK, SCVR-2812TK 7.5.4.1 Main menu Setting Storage Schedule Here you can adjust settings for: Record: Select the desired channel and define the pre-recording time (1-30 seconds). Redundancy: To be able to use this function, at least one HDD has to be defined as redundant. -
Page 45: Main Menu Setting Storage Hdd Manage
User manual SCVR-2411K, SCVR-2411TK, SCVR-2812TK 7.5.4.2 Main menu Setting Storage HDD Here you can manage the HDDs. HDD information such as status or or available storage capacity are displayed. 7.5.4.3 Main menu Setting Storage Record For manual recording the following functions are available per channel: “Schedule“, “Manual“... - Page 46 User manual SCVR-2411K, SCVR-2411TK, SCVR-2812TK HDD full: Define whether the data is to be overwritten or the recording to be stopped if the DD is full. Pack duration: Define the pack duration (1-120 minutes). Realtime playback: Define the realtime playback duration (5-60 minutes).
-
Page 47: Main Menu Setting System Display
User manual SCVR-2411K, SCVR-2411TK, SCVR-2812TK 7.5.5.2 Main menu Setting System Display Here you can adjust settings for: Display TV adjust Tour setup Zero channel Display: GUI (Graphical User Interface): You can define what is to be displayed in the video image: Resolution: If you change the resolution, you have to reboot the recorder. -
Page 48: Main Menu Setting System Text Overlay
User manual SCVR-2411K, SCVR-2411TK, SCVR-2812TK 7.5.5.4 Main menu Setting System Text overlay This function is mainly used for finance and cashier applications, e.g. to capture POS information in a supermarket. Enter the IP information and port. 7.5.5.5 Main menu Setting System Account Here you can manage user and setup user groups. -
Page 49: Main Menu Setting System Import/Export
User manual SCVR-2411K, SCVR-2411TK, SCVR-2812TK 7.5.5.7 Main menu Setting System Import/Export Here you can export or import data. This function is helpful if you wish to save the recorder configurations to a stick and then use the stick to copy these configurations to another recorder. -
Page 50: Technical Specifications
User manual SCVR-2411K, SCVR-2411TK, SCVR-2812TK 8. Technical specifications Model SCVR-2411K Type 4-channel HD-CVI hybrid digital video recorder Video inputs 4x BNC (CVI) Supported video standards CVI (max. 4), IP (max. 2) Audio inputs/outputs 1 / 1 (3.5 mm) Alarm inputs/outputs... - Page 51 User manual SCVR-2411K, SCVR-2411TK, SCVR-2812TK Model SCVR-2411TK Type 4-channel HD-CVI tribrid digital video recorder Video inputs 4x BNC Supported standards CVI 1080p, CVI 720p, Analog 960H, IP 1080p ONVIF camera Audio inputs/outputs 1 / 1 (Cinch) Alarm inputs/outputs 0 / 0 1x SATA 3.5“...
- Page 52 User manual SCVR-2411K, SCVR-2411TK, SCVR-2812TK Model SCVR-2812TK Type 8-channel HD-CVI tribrid digital video recorder Video inputs 8x BNC / 1x RJ45 Supported standards CVI 1080p, CVI 720p, Analog 960H, IP 1080p ONVIF camera Audio inputs/outputs 4 / 1 (Cinch) Alarm inputs/outputs 16 / 3 2x SATA 3.5“...
-
Page 53: Remote Access: Access The Recorder Via The Web
User manual SCVR-2411K, SCVR-2411TK, SCVR-2812TK 9. Remote access: Access the recorder via the web 9.1 Establish a network connection You can access the recorder remotely by using the web. In order to do so, please make the following preparations: 1. Start the recorder as usual. - Page 54 User manual SCVR-2411K, SCVR-2411TK, SCVR-2812TK The following web login window is displayed As connection type, you can choose between „LAN“ and „WAN“. Default login for web access: User name: admin Password: 9999 Note: It is highly recommended to change the default user name and password. You can view, edit and delete the login details here: Main menu ...
-
Page 55: Lan Connection
User manual SCVR-2411K, SCVR-2411TK, SCVR-2812TK 9.3 LAN connection If you have selected the „LAN option on the login page, the following live view page of the connected camera(s) is displayed: Double-click on a camera channel to display it as full screen. -
Page 56: Displayed Information In Video Image
User manual SCVR-2411K, SCVR-2411TK, SCVR-2812TK 9.3.1 Displayed information in video image In the upper left corner of each channel’s live view image, the following information is displayed: 1. IP address of recorder 2. Channel number 3. Monitor bit stream 4. M = Main stream; S = Sub stream In the upper right corner of each channel’s live view image, the following functions are... -
Page 57: Ptz Control
User manual SCVR-2411K, SCVR-2411TK, SCVR-2812TK 9.3.2 PTZ control When using the PTZ control function, please ensure that a suitable PTZ camera is connected to the recorder and that the corresponding configurations have been made (see chapter 6.3.2). In the live view image on the right hand side, you will find a panel for PTZ control:... - Page 58 User manual SCVR-2411K, SCVR-2411TK, SCVR-2812TK Preset: Use the direction buttons to adjust the camera position and enter a preset number. Click on „Add“. Tour: Enter a preset number. Click on “Add” to add this preset to the tour. Proceed in the same way to add further presets to the tour.
-
Page 59: Wan Connection
User manual SCVR-2411K, SCVR-2411TK, SCVR-2812TK 9.4 WAN connection On the login page, select „WAN“ connection. The WAN setting options are basically the same as the LAN setting (see chapter 9.3), except for the following difference: By default, the first channel is displayed as main stream in full screen. -
Page 60: Additional Web Connections
User manual SCVR-2411K, SCVR-2411TK, SCVR-2812TK 9.5 Additional web setting options The setting options for the recorder using the web (thus remotely) are basically the same as the settings which you do directly at the recorder. Please read the respective chapters for direct recorder settings. - Page 61 User manual SCVR-2411K, SCVR-2411TK, SCVR-2812TK GNU GPL Licensenote Certain Open Source Components are licensed pursuant to GNU General Public License. This establishes that the Customers have the right to acquire, modify and redistribute the source code of said software in accordance with the terms of the GNU General Public License or Lesser General Public License.
- Page 62 User manual SCVR-2411K, SCVR-2411TK, SCVR-2812TK Notes: _________________________________________________________________________________ - 62 -...
- Page 63 User manual SCVR-2411K, SCVR-2411TK, SCVR-2812TK Notes: _________________________________________________________________________________ - 63 -...
- Page 64 Your local distributor: __________________________________________________________________________ www.santec-video.com...